
Related Manuals for Hitachi RPI-16.0KFNQH


Summary of Contents for Hitachi RPI-16.0KFNQH
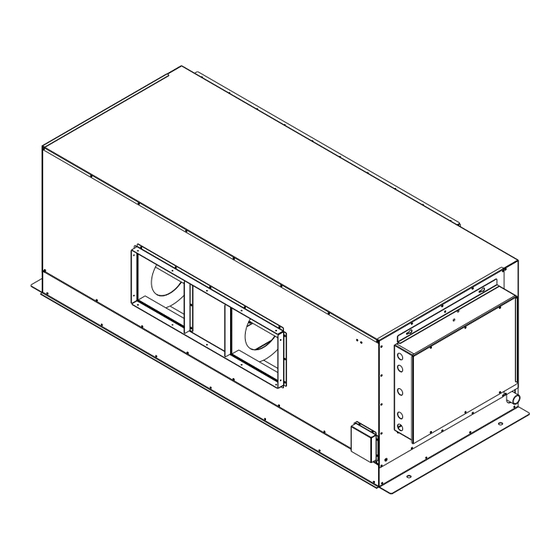
- Page 1 VRF AIR CONDITIONERS (HEAT PUMP) RPI-16.0KFNQL RPI-16.0KFNQH IN-THE-CEILING RPI-20.0KFNQL RPI-20.0KFNQH TYPE RPI-20.0KFNQLF RPI-20.0KFNQHF P00682Q...
- Page 3 This declaration becomes invalid, if technical or operational modifications are introduced without the manufacturer's consent. Johnson Controls Hitachi Air Conditioning Europe SAS is authorized to compile technical file or relevant technical documentation. Address : Rue de Lombardie, Parc Aktiland II – 69800 Saint Priest, France...
- Page 5 Heating Operation: -7~15 The indoor unit will stop when the temperature outside is lower than The indoor unit can be only used with the outdoor unit as follows. Indoor Unit Outdoor Unit RPI-16.0KFNQL RAS-16FSN1Q RPI-16.0KFNQH RPI-20.0KFNQL RPI-20.0KFNQH RAS-20FSN1Q RPI-20.0KFNQLF RPI-20.0KFNQHF...
- Page 6 Contact the Customer Care for more information. HITACHI...
- Page 8 Do not install the indoor unit outdoor unit remote controlswitch and cable within approximately 3 meters from strong electromagnetic wave radiatoes such as medical equipment. Do not touch the exchanger to avoid being injured. Install the drain pipe according to the installation manual to make sure drain smoothly.Insulate the drain pipe to avoid Install the indoor unit on a foundtation firm...
- Page 9 Refrigerant Gas Pipe Indoor unit Connection (A) Refrigerant Liquid Pipe Connection (B) MOD EL 16.0 20.0...
- Page 10 to remove the moisture, dust, other refrigerants or refrigerant oils from the refrigeration system. When in immediate contact with refrigerant, please Hence, the failure to use specified materials and tools may use the installation tools and instruments dedicated result in explosion, personal injury, refrigerant leakage, to the new refrigerant.
- Page 11 (Including Two Remote Temperature Sensors)
- Page 12 (unit:mm) Working Keep enough distance between the indoor unit and Space the walls around to avoid contaction each other Air Inlet Piping Surface of the ceiling Vent-Pipe Air Passage Air Strainer (Field Supply) Electrical Box Support Board (Field Supply) Service Access Panel (B)Install the indoor unit and components The indoor unit is not designed for the places as far as practical or at least 3meters...
-
Page 13: Suspension Bolts
Suspension bolts (1)Select final location and installation direction of the indoor unit paying careful attention to the space for the piping, wiring and maintenance. (2)Using suspendion bolts to install the indootr (unit:mm) unit.Check the celing whether is strong enough to support the indoor unit.Plase reinforce the ceiling Air Inlet before installation if it is not safe. - Page 14 4.3.3 Hanging Indoor Unit Install the indoor unit and the support board using bolts (M12)as shown in Fig 4.4. Adjust the indoor unit installed to the preconcerted height. Hook the suspendion bracket to the nut and washer of rach hanging bolt. Check to ensure the indoor unit is horizontally.
- Page 15 Connect the duct as follows. <Air Inlet> Connect the duct with flange inlet together. Seal the pontes between the flange inlet and duct using the aluminous adhesive Tape. <Air Outlet> Connect the duct with flange outlet together. Seal the pontes between the flange outletand duct using the aluminous adhesive tape.
- Page 16 (unit:mm) Discharge gas inside And remove the cap Gas Pipe Cool by a wet cloth Liquid Pipe An excess or a shortage of refrigerant is the main cause of trouble to the units. Charge the correct refrigerant quantity.
-
Page 17: Drain Piping
6.Drain Piping Do not connect the drain pipe with The drain pipe must be installed as the sanitary or sewage piping or any other following figure to avoid bring scales due to drainage piping. the congeal and leakage. When the common drain piping is The positon of the drain piping connection connected with other indoor units, please is shown in Fig 6.1. - Page 18 Do not connect cable of remote control switch and operating wires with power supplyand earth wires together.Keep 50MM All the materials and components should away from each other. comply with local statutes. Use appointed wires,and ensure the terminal Only brass wires are allowed. fixed.
-
Page 19: Electrical Parameter
Cut Inside Rubber Bushing Electrical Box Electrical Box Cover Power supply Cable of Remote Bolts Control Switch Operating Wires Electrical Parameter Indoor Motors Model Power Supply 380-415V 3N /50Hz 380V 3N /60Hz... - Page 20 Rated Model Power Supply EN 60335-1 1 EN 60335-1 1 Current 2.57 3.48 3.52 380-415V 3N /50Hz 380V 3N /60Hz 4.46 4.64 5.40 (1) Field wiring shall be in conformity to local laws and regulations, and all wiring operations must be performed by qualified professionals.
- Page 21 Model 16.0 20.0...
- Page 22 DSW5&RSW2 DSW6&RSW1 Fuse Recover (DSW7) Optional Function Setting (DSW8) 34567 16.0 20.0...
-
Page 23: Remote Control Switch
Remote Control Switch When opening the cover, pull the cover toward the arrow direction. B Operation Switch Section A LCD Section Fan Speed Indicator RUN/STOP Switch Ventilation Indicator FAN SPEED (Fan Speed Selection) Switch Operation Mode Indicator MODE (Operation Mode Selection) Switch Automatic Cooling/Heating Operation Indicator... - Page 25 1042123 Qingdao Hisense Hitachi Air-conditioning Systems Co., Ltd. Add.: No.218, Qianwangang Road, Economic and Technological Development Zone, Qingdao, China The Company is committed to continuous product improvement. We reserve the right, P00682Q 11.2022 V06 therefore, to alter the product information at any time and without prior announcement.
Need help?
Do you have a question about the RPI-16.0KFNQH and is the answer not in the manual?
Questions and answers