Thermoscreens Designer C Series Installation, Operation And Maintenance Instructions
Surface mounted horizontal and vertical
Hide thumbs
Also See for Designer C Series:

Related Manuals for Thermoscreens Designer C Series


Summary of Contents for Thermoscreens Designer C Series
- Page 1 C Series Designer. Surface Mounted Horizontal and Vertical INSTALLATION, OPERATION AND MAINTENANCE INSTRUCTIONS Scan to download the English user guide and App T9901015-7-3T UK (v10) Page | 1...
-
Page 2: Table Of Contents
CONTENTS Page CONTENTS............................2 ELECTRICAL SAFETY ........................3 SPECIFICATIONS ..........................3 INTRODUCTION ..........................4 DELIVERY CONTENTS ........................5 TOOLS REQUIRED .......................... 5 INSTALLATION ..........................6 LPHW MODELS ..........................9 REMOTE CONTROL INSTALLATION .................... 10 REMOTE CONTROL SETTINGS ....................10 EXTERNAL CONTROLS ........................ 11 MULTIPLE AIR CURTAIN SYSTEMS ..................... -
Page 3: Electrical Safety
ELECTRICAL SAFETY Electrical Supply and Wiring to the Air Curtain All electrical wiring and connections MUST be carried out by a competent qualified electrician in accordance with the latest edition of national and local wiring regulations and/or local statutory regulations. “Danger: Disconnect electrical supply before servicing” A 1 phase or 3 phase local isolator having a contact •... -
Page 4: Introduction
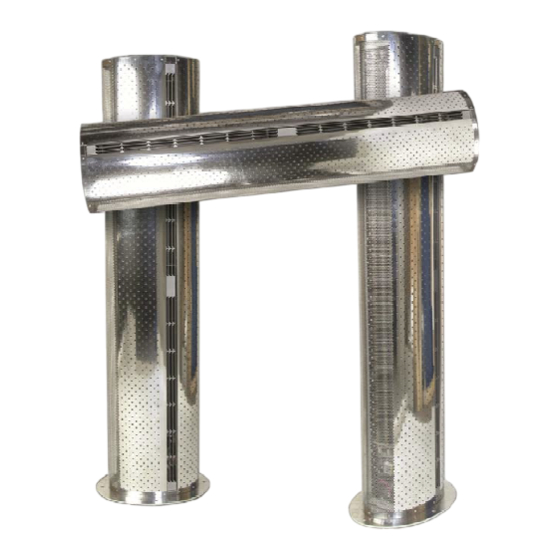
INTRODUCTION Established in the 1960s, Thermoscreens is a leading air curtain manufacturer that exports to over 60 countries worldwide. As with all our products, the Designer range of air curtains is designed with energy efficiency in mind. Designer models suffixed E, W or A are designed to be surface mounted inside a building, located horizontally over a doorway or vertical close to door opening. -
Page 5: Delivery Contents
DELIVERY CONTENTS The following items are supplied in the box at delivery. NOTE: If any parts are missing or damaged contact your place of purchase. Designer Air Curtain Touch Remote Control Supplied with 6m RJ Control Cable Horizontal or vertical plus fittings 3-port control valve Outdoor Air Thermostat Accessories... -
Page 6: Installation
INSTALLATION The Designer air curtain should be surface mounted horizontally over a doorway and not exposed to the external environment or moist conditions. It should not be built-in or recessed in any way. Horizontal Installation Ensure that the unit is mounted within its height specification of 1.8m to 2.75m maximum (from floor level to the underside of the unit) with the air discharge grille positioned nearest to the door. -
Page 7: Vertical Installation
Vertical Installation Prior to commencing any vertical installation it is essential to ensure the correct handing Designer unit(s) have been selected. The air curtain is located close to the door opening with the base plate touching the wall (see Fig 4) and with the air discharge grille positioned nearest to the door (see “Handing Guide”... - Page 8 Using a hacksaw carefully cut the projecting bolt flush with the nut, ensuring the base plate is not damaged or marked in any way. Fig 6 Remove only one M10 nut and refit and secure bolt with a stainless steel M10 dome nut supplied. Repeat for each of the other three projecting bolts one at a time.
-
Page 9: Lphw Models
Water flow rates and pressure drops at different water temperatures can be calculated using the Thermoscreens coil calculation programme. Visit the Thermoscreens website for details. 22mm pipe... -
Page 10: Remote Control Installation
REMOTE CONTROL INSTALLATION Mount the Touch Controller in a convenient position directly to the wall or onto a switch box. Wall mounting Step 1 Press release button on side of Controller case and pull the back case away (see Fig 11). Step 2 Feed one end of the RJ control cable through the back case, secure it, then screw the back case to the wall using suitable fixings (not... -
Page 11: External Controls
NOTE: The Controller must stay plugged-in for the air curtain to keep working. An optional plug-in EEPROM is available from Thermoscreens so the Remote Control can be un- plugged and the air curtain stay working. Visit the Thermoscreens website for details. - Page 12 To promote increased energy saving a more advanced weather compensation control strategy is available from Thermoscreens. Using a heating curve, the discharge air temperature of the airstream coming from the air curtain is controlled against the outside air temperature. Visit the Thermoscreens website for details.
-
Page 13: Multiple Air Curtain Systems
Master to the Slave unit(s). Horizontal application air curtains may be connected as indicated below. Thermoscreens 3m RJ extension leads are available and should be ordered separately. For horizontal Master/Slave configuration an independent mains supply as per Table 1 must be supplied to each air curtain. -
Page 14: System Configuration
NOTE: Black rectangle is moveable head of DIP switch. NOTE: A range of advanced factory fitted and plug-in control options are available from Thermoscreens to enhance the performance of the CCS PCB controller inside the air curtain. These include advanced ®... -
Page 15: Fan Speed Selection
14. FAN SPEED SELECTION Factory settings for the 3 fan speeds are shown in Table 5 below: (refer also to wiring diagrams in Appendix 3) Table 5 Maximum air Sound Pressure Air Volume Maximum air curtain velocity at Level of air Flow Rate Fan Speed mounting height... -
Page 16: Remote Control Operation
15. REMOTE CONTROL OPERATION 15.1 Touch Controller Please scan QR code and follow links to access the user guide and download App. Home Speed Up Down Controller connected via RJ communications lead to CCS PCB with Home, Speed, Up and Down touchpads below the LCD screen as detailed above. -
Page 17: Commissioning The System
Fan speed Short press Switch touchpad to switch and cycle fan speed: • low • Medium • High Date and Time Settings Configure Date and Time settings either via App or on Controller as below. Turn Controller ON and hold Speed touchpad for 2 seconds Follow instructions on LCD screen with: Tap Up touchpad to increase value •... -
Page 18: Sign Off
Recommend that the doorway should be closed whenever possible but that during times of high pedestrian use it will become an ‘open doorway’. The air curtain then serves an essential purpose by saving energy and providing comfort to occupants. Explain that the inlet grilles and air filters (if fitted) must be cleaned regularly and the unit serviced at schedule intervals –... -
Page 19: Service & Maintenance
19.2 Every 3 months WARNING: Before servicing, isolate and disconnect the air curtain from the electrical power. WARNING: The following servicing and maintenance must be carried out by a competent electrician or a Thermoscreens appointed technician. T9901015-7-3T UK (v10) Page | 19... -
Page 20: Warranty
Failing this please contact the Thermoscreens warranty department. Care has been taken in compiling these instructions to ensure they are correct. Thermoscreens disclaims all liability for damage resulting from any inaccuracies and/or deficiencies in this documentation. Thermoscreens retain the right to change the specifications stated in these instructions. -
Page 21: Appendix 1 - Dimensions Of Horizontal Air Curtain
T9901015-7-3T UK (v10) Page | 21... -
Page 22: Appendix 2 - Dimensions Of Vertical C Air Curtain
T9901015-7-3T UK (v10) Page | 22... -
Page 23: Appendix 3A - Wiring Diagram D1000E, D1500E, D2000E, D1500E V And D2000E V
1m, 2m - 1.38kW (x3) 2m - 1.38 kW (x3) 1.5m - 2kW (x3) 1m, 2m - 1.62 kW (x3) 2m - 1.62 kW (x3) 1.5m - 2kW (x3) Fan 2 Fan 1 T9901015-7-3T UK (v10) Page | 23... -
Page 24: Appendix 3B - Wiring Diagram D1000W, D1500W, D2000W, D1500W V And D2000W V
Fan 2 Fan 2 Fan 1 Fan 1 T9901015-7-3T UK (v10) Page | 24... -
Page 25: Appendix 3C - Wiring Diagram D1000A, D1500A, D2000A, D1500A V And D20000A V
Fan 2 Fan 2 Fan 1 Fan 1 T9901015-7-3T UK (v10) Page | 25... -
Page 26: Declaration Of Conformity
21. DECLARATION OF CONFORMITY Carver International Ltd T/A Thermoscreens St Mary’s Road Nuneaton Warwickshire CV11 5AU United Kingdom Telephone: +44 (0)24 7638 4646 www.thermoscreens.com EC DECLARATION OF CONFORMITY as defined by the EC Council Directive on Machinery 2006/42/EC, the Low Voltage Directive 2014/35/EC, Electromagnetic Compatibility Directive 2014/30/EC,...
Need help?
Do you have a question about the Designer C Series and is the answer not in the manual?
Questions and answers