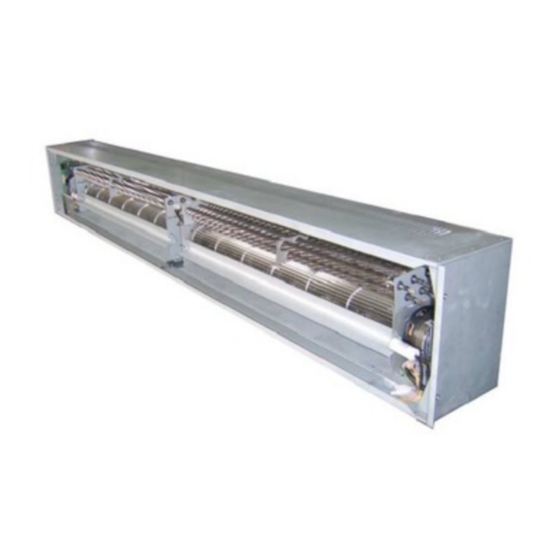
Thermoscreens C1000R Installation, Operation & Maintenance Instructions Manual
C-recessed range air curtains
Hide thumbs
Also See for C1000R:
Summary of Contents for Thermoscreens C1000R
- Page 1 C-RECESSED RANGE AIR CURTAINS INSTALLATION, OPERATION & MAINTENANCE INSTRUCTIONS PLEASE READ THESE INSTRUCTIONS CAREFULLY BEFORE ATTEMPTING INSTALLATION 4001150-6 Page 1 of 128...
-
Page 2: For Your Records
UN-PACKING YOUR C-RECESSED AIR CURTAIN The following items are supplied and packaged within the boxes. C-Recessed Air Curtain Remote Control Ecopower Electric & LPHW Manual Ambient Motorised Valve Recessed Grille (Ecopower LPHW units only) If anything is missing or damaged please contact your place of purchase immediately. For your records Date of Purchase…………………………….. - Page 3 Effective free area of ventilation grille Air curtain ceiling void (m /hr) for an enclosed ceiling void (cm C1000R C1500R C2000R 1200 Ceiling Suspension Make the cut-out in the ceiling to the dimensions given in Figure 1, ensuring the length of the hole is exact.
- Page 4 4001150-6 Page 4 of 128...
- Page 5 Safety and Electrical Connections All electrical wiring and connections MUST be carried out by a competent qualified electrician in accordance with the latest edition of the IEE wiring regulations and/or local statutory regulations. A single phase or 3 phase isolator with a contact separation of at least 3mm in all poles must be fitted to the supply wiring (the isolator must be fitted in an accessible position).
- Page 6 Fitting of the Recessed Grille The grille consists of a frame, grille core (fitted within the frame) and four brackets (note: the brackets are fixed to the frame). Removal of Grille Core Prior to fitting the grille to the air curtain and the ceiling the grille core will need to be removed from its frame.
- Page 7 Master unit and a RJ lead should be connected from the Master to the Slave unit(s). Thermoscreens 3m RJ extension leads are available and must be ordered separately. Additional air curtains, up to a maximum of eight units, may be connected as indicated below.
- Page 8 Ecopower Controller Motherboard (v8) Function Control Comments Standard Fan Heat Interlock – DIP1 Option Suitable on vertical electrically heated As supplied, the Designer air curtain. Maximum heat default setting would The heat output is dependent on the fan output achieved if maximum fan speed be for heat and fan speed.
- Page 9 DIP switches fitted on the Ecopower board provide a selection of optional features as described above. Isolate and switch electrical power off before configuring and/or changing any DIP switch settings. • Easy plug-in arrangement for remote air sensor thermistor on a 1m lead. Plugging-in the remote air sensor to J3 disables the standard air sensor thermistor already fitted on the Ecopower board.
- Page 10 4001150-6 Page 10 of 128...
- Page 11 4001150-6 Page 11 of 128...
- Page 12 4001150-6 Page 12 of 128...
- Page 13 Ecopower Remote Control Operation Higher Fan Speed Higher Heat Auto Mode On / Off Lower Heat Auto on Indicator Fan Speed Indicator Lower Fan speed Heating Level Indicator Push On/Off switch to turn On, then operate as follows :- Auto Switches between manual and automatic heat regulation.
- Page 14 In the case of a fault condition (refer to flowchart) do not attempt to reset the thermal cut outs or replace the fuses, arrange for a Thermoscreens appointed technician or certified electrician to attend the unit to investigate the reason why the thermal cut outs/fuse(s) have operated.
- Page 15 User Fault Finding Flowchart (for Ecopower Control) Is Electrical Switch on Electrical Power Power switched on Connect remote control Service Agent to and push On/Off switch reset thermal cut- to turn unit on out(s) Are the fans operating correctly Is the remote Do the LED’s Service Agent to control...
- Page 16 Warranty If any problems are encountered, please contact your installer/supplier. Failing this please contact the Thermoscreens warranty department. All units are covered by a two year warranty period. Care has been taken in compiling these instructions to ensure they are correct, although Thermoscreens disclaims all liability for damage resulting from any inaccuracies and/or deficiencies in this documentation.


Need help?
Do you have a question about the C1000R and is the answer not in the manual?
Questions and answers