Advertisement
Quick Links
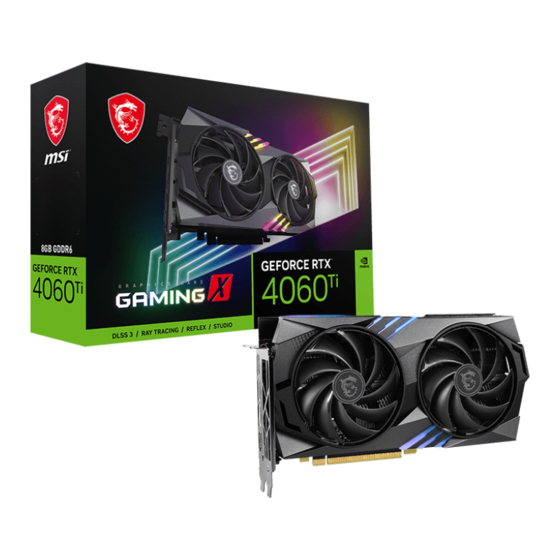
User Manual: Setting Up the MSI GeForce RTX 4060 Gaming X 8G
Introduction
Thank you for purchasing the MSI GeForce RTX 4060 Gaming X 8G graphics card. This guide
will walk you through the steps to properly install and set up your new graphics card to enjoy
optimal gaming and creative performance.
1. Pre-Installation Checklist
Before you begin the installation, ensure the following:
• Compatibility: Verify that your system meets the minimum requirements:
• A motherboard with a PCI Express 4.0 x16 slot.
• A 450W or higher power supply unit (PSU).
• Available space in your PC case for the graphics card (Dimensions: 10.8" x 5.5" x
1.5").
• Operating System: Ensure your operating system is up to date. Windows 10 or later is
recommended.
2. Unboxing and Handling the Graphics Card
1. Carefully remove the MSI GeForce RTX 4060 Gaming X 8G from its packaging. Ensure
that you don't touch the PCB or connectors directly to avoid damaging the card.
2. Take note of any accessories included, such as installation manuals, driver CD (or driver
download instructions), and any cables or connectors.
3. Power Down Your System
1. Turn off your PC and unplug the power cable from the wall outlet.
2. Press the power button for a few seconds to discharge any remaining electricity from the
system.
3. If you have a laptop, ensure it is powered off completely and unplugged.
4. Open the PC Case
1. Depending on your PC case, you may need to remove screws or release latches to open the
side panel.
2. Once the case is open, make sure to ground yourself by touching a metal part of the case to
discharge any static electricity before handling components.
5. Remove the Old Graphics Card (If Replacing One)
1. If you are replacing an existing graphics card, disconnect any power cables attached to it.
Advertisement

Summary of Contents for MSI GeForce RTX 4060 Gaming X 8G
- Page 1 User Manual: Setting Up the MSI GeForce RTX 4060 Gaming X 8G Introduction Thank you for purchasing the MSI GeForce RTX 4060 Gaming X 8G graphics card. This guide will walk you through the steps to properly install and set up your new graphics card to enjoy optimal gaming and creative performance.
- Page 2 6. Install the MSI GeForce RTX 4060 Gaming X 8G 1. Insert the Card into the PCIe Slot: • Align the PCIe connector of the MSI GeForce RTX 4060 Gaming X 8G with the PCI Express x16 slot on the motherboard.
- Page 3 • Option 1: Use the driver CD that came with the card and follow the installation prompts. • Option 2: Go to the official MSI website or the Nvidia website and download the latest GeForce drivers for the RTX 4060.
- Page 4 16. Final Thoughts Congratulations! Your MSI GeForce RTX 4060 Gaming X 8G is now installed and ready to deliver outstanding graphics performance for gaming and content creation. Enjoy enhanced visuals, faster frame rates, and superior cooling during your next gaming session!


Need help?
Do you have a question about the GeForce RTX 4060 Gaming X 8G and is the answer not in the manual?
Questions and answers