Advertisement
- 1 Desensitization Instructions
- 2 Packing List
- 3 Inner box transformation
- 4 Know Your Machine
- 5 Start to Use
- 6 Daily Maintenance
- 7 Troubleshooting
- 8 Specification
- 9 Safety Cautions
- 10 Warranty and After-sales
- 11 Documents / Resources
Desensitization Instructions
- The Neakasa S1 Pro Pet Grooming System has been upgraded in every aspect. Our exclusive Smart Electric Control Design and 55 dB wind noise at the lowest speed reduce the impact on your pets to a minimum during grooming.
- For pets that are extremely sensitive to noise, please refer to the following desensitization tips to help your beloved pets adapt to the grooming kit:
- Connect the hose to the main unit and the nozzle (or the hair remover roller). Power on the product and set it to the lowest speed. Keep the fan running at the lowest speed for a while, and your pets approach out of curiosity and gradually become accustomed to the noise.
![]()
- Stretch the suction hose to its maximum length to create a distance between the main unit and your pets, thus minimizing the impact from the noise while grooming your pets.
![]()
- Offer your pets some of their favorite snacks as a distraction before and after combing or grooming. By repeating this process patiently several times, your pets will become accustomed to and fall in love with their home spa.
![]()


Packing List
(S1 Pro)
 Attention:
If you find anything missing from the package, please first contact customer service provided by the purchase channel for assistance. Otherwise, you can email us at support@neakasa.com. For the United States region, you can also call our customer service at +1 (855) 933-0901.


Inner box transformation
- After taking out the machine, unfold all four sides of the packaging top

- Cut out the entrance/exit for pets along the trim marks.

- Fold the four corners upward as illustrated to expose the four tongue locks, and then fold the handle part downward along the fold line.

- Insert the four locks into the four securing mounts.
![]()
- Attach and secure the handle ring on both sides of the handles, and place an old T-shirt with the owner's scent as a cushion to make your furry baby more comfortable!

- Use the provided needle to punch holes in the cardboard box. Gather the clumps of fur into a ball, then thread the needle and thread through to secure them. Hang it through the hole inside your pet's bed. Mission accomplished!
![]()


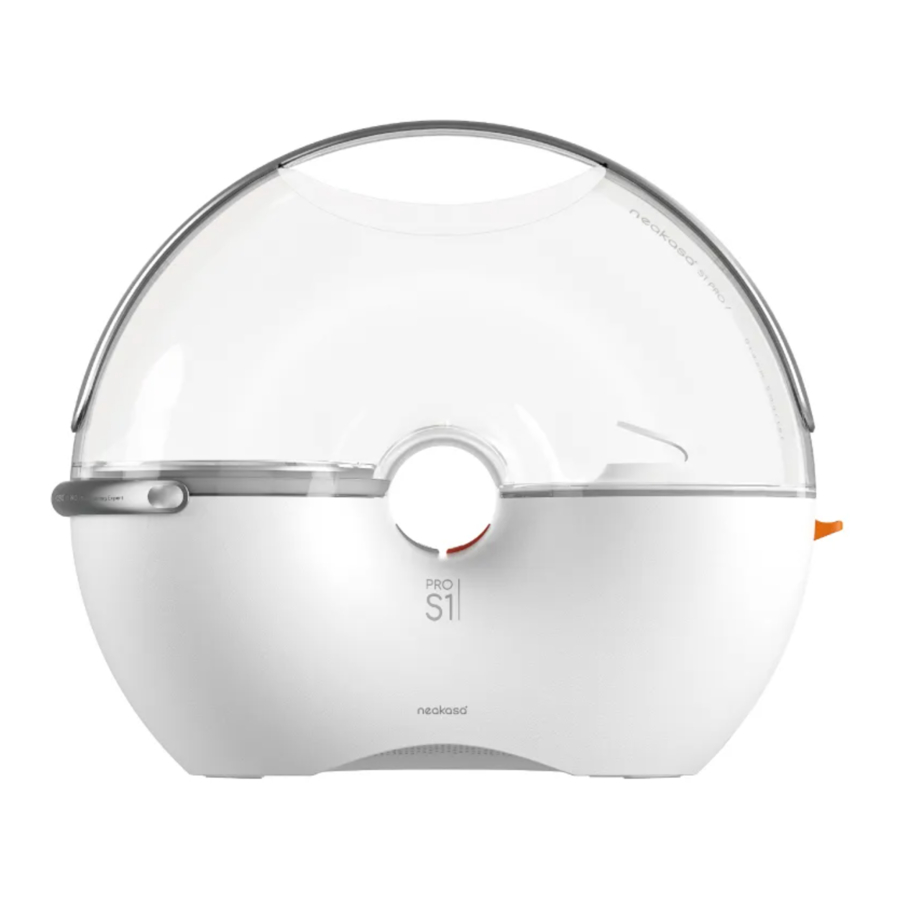
Know Your Machine

Start to Use
Power on

Insert the power plug into a socket for power supply to the machine. Upon power-on, the indicator light will flash for 3 times and go off, and the machine will give a long "Beep".
Main unit start-up and mode regulation

Press the On/Off switch to start the machine, and select the appropriate mode for use
- A single press of the On/Off switch will turn on the indicator light, displaying the color corresponding to the mode that was memorized before the last shutdown
- Upon power-on, the main unit in standby mode, the indicator light will illuminate (slowly changing between bright and dark). In work mode, the vacuum will run and the indicator light will remain constantly bright.
- A single press of the switch or the mode button will result in the machine emitting a short 'Beep.'
- The machine will shut down automatically, with the indicator light turning off, if no operation is performed within 8 minutes. Should you need to use it again, please press the Start button for a reboot.
Removal and fitting of dust cup
Removal

Press the PUSH button on the side of the machine while turning the dustbin upwards from the side of the button, and lift and remove it.
Attention:
Do not exert excessive force while turning upwards and lifting the cup, or the dentation on the side of the cup might be broken.
Opening and fitting back bottom cover of dustbin

Turn the dustbin upside down, with the handle pointing down. Grab the circle-like handle and pull the bottom cover of the cup upwards, then you can dump the waste inside. Reverse the steps above to place the bottom cover back to it's place. Push it inwards to make sure it's fully fitted.
Attention:
If you wash the cup after pouring out the waste, please wait for it to dry before putting it back to the main unit, or the motor might get invaded by water, causing electric shocks or machine damage.
Fitting

Insert the dustbin with the side with dentation into the decoration ring slot of the main unit. Push it down to secure it in place. Once you hear a "click," the cup is properly positioned.
Attention:
- Handle the dustbin with care.
- If you remove the cup while the fan is running, the vacuum will stop and go into standby mode, and the indicator light will flash quickly in the color corresponding to the mode. When you put the dustbin back, the machine will shut down automatically. You will need to press the power button to restart it.
- If you remove the cup upon start-up and the vacuum is in standby mode, or if the dustbin is not fitted into place, and the indicator light will flash quickly in the color corresponding to the mode. Upon putting back the cup, both the indicator light display and the machine will return to normal.
Types and use of accessories
Upon powering on and starting up the main unit, if no attachment is connected through the hose, the fan will remain on standby, and the indicator light will illuminate in the color corresponding to the mode.
Connecting hose
Insert the correct hose ends into the main unit and the desired accessory as indicated on the hose ends. A "click" sound indicates correct installation.


Removing hose
Press and hold down the round button on the hose ends to disconnect the hose to the main unit or the accessory.
Understand the matching function

Interchangeable brush
Regularly combing your pets helps minimize the hair accumulation in the household environment, reducing allergies in your family and preventing hairballs in cats that arise from excessive hair licking. Additionally, it helps in keeping your pets' fur clean, healthy, and smooth. We offer three different types of combs designed for styling cats and dogs with varying hair types. Feel free to switch them as needed.

Fitting combs
Press the comb into the hole with proper alignment until you hear a "click" sound, indicating a secure fit.
Removing combs
Press the PUSH button located on the top of the comb to release the attachment.
To minimize noise-related irritation for your pets, the main unit is designed to remain on standby without activating the vacuum when powered on and connected to the comb through the hose.

Please comb your pets several times. Once a sufficient amount of hair accumulates on the comb, press the button on the handle to eject the hair. Simultaneously, the main unit will activate the vacuum to suck the hair into the dustbin.
Note:
- Please avoid sensitive areas of your pets, and pay extra attention to delicate parts, where excessive force or prolonged contact with the comb should be avoided. DO NOT comb against the natural direction of fur growth, as this may scratch the skin.
- If knotting is severe,avoid pulling forcefully. It is recommended to trim the fur with scissors before combing.
- Ensure both the comb and your pets' fur are dry before using. Water can compromise the protective qualities of the sebum on your pets' fur, potentially affecting their immunity and promoting microorganism growth.
- Pin brush
Used to remove loose and old hair together with dust and dirt hidden among the fur. This brush also does a certain degree of unknotting and massage while pulling the hair to make it fluffier.
![]()
- Deshedding comb
This comb is capable of removing loose brittle hair and under coat close to the skin, thinning hair while combing it. It's especially fitting during the season changes.

- Dematting comb
The parts between teeth are edged to loosen hair knots so that brittle hair can be removed, allowing healthy hair to grow.
![]()


Interchangeable clipper
Used for regular trimming of pets' hair to mitigate hair shedding, heat dissipation, and knotting problems. The hair cut will be sucked away instead of flying around the surrounding area.

Fitting cutters
Align the side of the cutter with marked line to the same side of the handle, and press it inwards until you hear a "click" sound, indicating a proper fit.
Removing cutters
Grab the attachment and pull it upward to release it.
Attention:
Always remember the positions of clipper and sharp edges and do not exert excessive force, or your skin might get cut.
For a standard clipper, the length of the cutter is adjustable between 0.8-1.4-2mm through rotation, while for the small clipper or nail grinder, adjustment is not possible.

With the power source and the electric clipper connected through the hose, the main unit will remain on standby. Simply press the On/Off switch of the electric clipper once, and both the clipper and the main unit vacuum will start running, cutting hair and sucking it into the grooming kit. Press the clipper switch again, and both the clipper and the fan will shut down, returning the main unit to standby mode.
- Standard Clipper
A clipper of standard width, best efficient, massive trimming of pets' hair.

- Small Clipper
The narrow clipper is designed to trim hair around paws, ears, eyes, and private anal area.

- Nail Grinder
Used to grind your pets' nails for smoothness and flatness without cutting them too quickly or cracking the nails.


Guide combs
Used to determine the length of hair reserved. You can change the comb as needed for different styling (used optionally).

Guide combs come with six sizes:
3/6/9/12/15/18mm.

Attention:
Guide combs are small and scattered, so please store them carefully to prevent them from going missing when they are not in use.
Transparent clipper wind shield
Used to boost suction force at the inlet during trimming and serves as a guide for suction path (used optionally).


Attention:
The transparent clipper wind shield is small, so please store them carefully to prevent it from going missing when it's not in use.
Cleaning accessories
Used to clean pets' hair that sticks to furniture, carpets, clothes, etc.

Hair remover roller
Roll the brush back and forth to rapidly remove hair that sticks to couches, beds, clothes, and other fabrics.

Crevice tool
Used to clean dust and hair accumulated in confined spaces such as gaps in a couch.
Accessories tray
Installation:
- Align the two rods with the corresponding holes, insert them downward directly. To remove them, grasp the rods and pull them upward.
![]()
- Rotate the handle to the correct angle and insert it into the hole in the middle of the base.
- Flip the base over, hold the bottom of the handle, and rotate it counterclockwise 90 degrees to secure it, as shown in the diagram. To disassemble, rotate it in the opposite direction, clockwise 90 degrees, and pull it out.
![]()


Keep accessories in the tray:
Please place accessories on the tray as illustrated, and hang deshedding and dematting combs as shown above.
Overheating and Overcurrent Protection
The S1 grooming kit is equipped with integrated overheating and overcurrent protection features.

Overheating Warning
- When the main unit fan is running, if you hear "beep beep beep" warning signals while the indicator light flashes in red slowly, it indicates that the temperature inside the main unit is high. In this case, you may continue to use the machine normally, although it is recommended to press the shutdown button and clean the dustbin before further use.
- When the internal temperature decreases, a long single "beep" will sound, and the indicator light will return to the normal color for the corresponding mode, which you may then use the machine as usual.

Overheating Protection
- If the dustbin is not cleared, and the machine continues to operate after the overheating warning, the main unit may innitiate overheating protection after a while. In this event, "beep beep beep" warning signals will sound, the indicator light will rapidly flash in red, the vacuum will automatically shut down, and all buttons will stop working. Please unplug the main unit, clear the dustbin, and allow the machine to stand for at least 30 minutes.
- Afterward, re-plug the machine and power it on. If the indicator light returns to its normal color, you may resume using the machine. If the indicator light still rapidly flashes in red, please unplug the machine and continue to wait.

Overcurrent Protection for Clipper
- When using the electric clipper, if both the clipper motor and the main unit vacuum stop, and the indicator light on the main unit remains constantly red, accompanied by six beeps from the buzzer, it indicates that the clipper is experiencing overcurrent.
- In this case, the buttons on the main unit will stop working. Please immediately unplug the machine, detach the clipper, and inspect the cutter and the air duct for any blockages. If you find any blockages, please unclog them.
- After clearing the blockage, reconnect the clipper to the main unit through the hose, plug in the machine, and press the On/Off button once. The machine will then resume normal operation. If the issue persists, please contact our after-sales service immediately for a replacement or repair of the clipper.
Daily Maintenance
Cleaning and Maintenance of the Product
Please clear the hair that accumulates on the clipper to reduce the risk of jamming and ensure the clipper continues working properly.
Removing a Standard Clipper Blade:
Hold the clipper handle with one hand and remove the standard clipper blade with the other hand, following the illustrated position and direction.


Disassembling the Small Clipper Accessory:
First, remove the decorative ring. Then remove the front and back shells as shown in the figures. When cleaning is complete, reverse the steps above to reassemble them.


Clearing Hair Residues at the Head of the Unit

Use the complimentary brush and the crevice tool to clean the standard clipper components and the inner parts of both the standard and small clippers.
Attention:
The body of the electric clipper can't be cleaned with water. However, it's perfectly fine to clean the clipper and the nail grinder with water. Always ensure that you thoroughly dry the attachments with a cloth or let them air dry before reattaching them to the clipper handle to prevent potential damage or malfunction to the motor.
Lubricating the Standard Clipper
(Lubricant to be purchased separately for overseas versions)
Flip the movable blades of the standard clipper to one side, and lubricate the exposed stationary blade. Then, flip the movable blades to the other side and lubricate the other side of the stationary blade.


Attention:
Lubricant application is not recommended for the small clipper, as it may lead to hair adhesion and clog the air duct.
Cleaning and maintenance of HEPA

Removal of the HEPA Component
When removing the dustbin from the main unit and pulling out the bottom cover, hold the component with one hand, and pull it upwards with the other hand while grabbing the annular handle.

Fitting Back the HEPA Component
After cleaning and drying, align the trapezoid projection at the edges of the HEPA component with corresponding slots at the bottom cover. Then turn and put down the other side until you hear a "click" sound, indicating that it's properly fitted.

Cleaning the HEPA Component
When removing the HEPA component, rinse it thoroughly with tap water, and then allow it to drain in standing position.

Drying the HEPA Component
Please leave the HEPA component in a well-ventilated place to dry for at least 24 hours.
Attention:
- The HEPA component requires regular rinsing with cold water.
- Depending on the frequency and conditions of use, the maintenance period for the HEPA component may vary. Please purchase new ones and replace the old ones regularly.
![shock hazard]() Always ensure the HEPA component is completely dry before fitting it back, as using a HEPA component that is not completely dry may lead to electric shocks and faults.
Always ensure the HEPA component is completely dry before fitting it back, as using a HEPA component that is not completely dry may lead to electric shocks and faults.- Always properly install the HEPA component before using the grooming kit to avoid damaging the product.
Troubleshooting
Machine powers on but does not operate
Please check the status of the indicator lights and take appropriate action based on the following situations:
- Indicator light flashing in corresponding mode color (White / Cyan / Purple): This indicates that the dust cup is not properly placed. Please refer to the instruction manual and insert the toothed side of the dust cup into the decorative ring, then rotate the other side downwards until it locks into place.
- Indicator light solid red: This indicates the electric clipper overload. Please unplug the main unit, remove the electric clipper, inspect the clipper heads and airflow path, and use the provided small brush for cleaning.
- Indicator light flashing red: This indicates that the machine has encountered software overheating protection. Please unplug the main unit, clean the dust cup, and let the machine rest for at least one hour.
- Indicator light pulsing in corresponding mode color (White / Cyan / Purple): This indicates that the machine is operating normally but there is no passage. Please check if the hose is inserted and the accessories are properly connected: If using the hairbrush, press the button to push out the hair and start the fan; if using the electric clipper, press the power switch button on the clipper to start the fan and blade
Machine is running but suction is weak
Please use the following methods to troubleshoot the causes of insufficient suction one by one:
- Dust cup is full: Please promptly empty the accumulated hair from the dust cup.
- Airflow path is blocked: Check for any blocked hair in the dust cup inlet, hose, and accessory heads, and clean them.
- Dust cup is leaking: Follow the instructions in the manual and insert the toothed side of the dust cup into the decorative ring, then rotate the other side downwards until it locks into place.
- HEPA filter is contaminated: The dust and hair on the HEPA filter should be regularly cleaned with cold water, and replacement should be done periodically according to usage.
Specification
| Product Model | PN0200W (S1 Pro) |
| Size of main unit | 333mmX138mmX278mm |
| Net weight | 2kg |
| Rated power | 300W |
| Suction power | ≥ 85W |
| Noise Level | ≤ 70dB |
| Water Resistance | IPX4 (When connecting the hose) |
| Dustbin Capacity | 3L |
| Hose Length | 1.6m |
| Power Cord Length | 2.5m |
Safety Cautions
This product is intended for household use only. It is not designed for commercial or industrial purposes, nor for use or storage in hot outdoor environments exposed to direct sunlight, or damp environments such as bathrooms.

 To prevent fires or explosions, refrain from using the product in areas with flammable or combustible materials. Never allow the product to suction burning, smoking, or hot flammable or combustible liquids (e.g., cigarette butts, matches, tobacco ash, gasoline, etc.). Avoid using the product to suction substances with aromatic properties, as these chemicals could lead to a fire.

 Only use the product when your pets' hair is dry. Never let the product suction wet hair or liquids. To avoid electrical faults and shocks, never operate or unplug the product with wet hands.

Should you find the product is malfunctioning, damaged, or has come into contact with liquids, please contact our after-sales department. Do not attempt to dismantle the product yourself. Incorrect assembly methods might result in electric shocks or fires. Please contact our after-sales department should you need a repair service.

Please ensure that you use the product in a safe environment and under the guidance and supervision of someone knowledgeable about the safe operation and potential hazards of the product. Do not allow children or individuals with reduced physical or mental capacities to use the product. Do not allow children and pets play with the Product.

Do not use the product if the power cord or plug of the product is damaged. Do not pull the power cord. Do not tuck the wires between any parts of the main body.

An odor might be noticeable upon initial use. This odor poses no health hazards and will naturally dissipate over time. However, if the burnt odor persists, please discontinue use immediately and contact our after-sales department.

Please always use the product with the specified voltage, as indicated on the bottom of the machine.
Check that the inlet is not clogged prior to each use. Please stop using the product if you observe an abnormal increase in its temperature. In such cases, remove the dust cup, ensure the suction inlet is unblocked and the HEPA filter is clean, then wait for 60 minutes before restarting.

Please always ensure proper installation of the HEPA filter prior to using the grooming vacuum, otherwise the product will be damaged. The HEPA filter should be regularly cleaned and replaced. After cleaning the HEPA filter, please wait for it to dry completely before reinserting it, otherwise it could result in electrical shocks and faults.

Prior to any maintenance, please always ensure the device is disconnected from the power source. Attempting maintenance while the power is on could lead to electric shocks or injuries.

The electric clipper's body should never be cleaned with water. However, it is okay for the blades and nail grinder. Please always completely dry the attachments with a cloth or air-dry before reattaching them to the clipper, as failing to do so could damage or impair the motor.

Warranty and After-sales
If you need repairs, or have other questions and comments about the product, please contact the customer service provided by the purchase channel for assistance. Otherwise, please contact us at support@neakasa.com or on our Facebook account @neakasa.tech.
Documents / ResourcesDownload manual
Here you can download full pdf version of manual, it may contain additional safety instructions, warranty information, FCC rules, etc.
Advertisement


Need help?
Do you have a question about the S1 Pro and is the answer not in the manual?
Questions and answers