Advertisement
Quick Links
Advertisement

Related Manuals for Claro COOLER AC


Summary of Contents for Claro COOLER AC
- Page 1 COOLER AC Installation Manual VER 0.1...
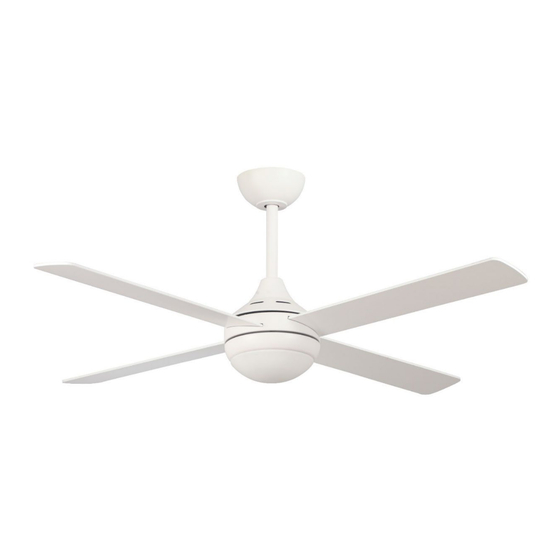
- Page 2 CEILING FAN INSTRUCTION BOOKLET Thank you for purchasing your Claro Cooler AC Ceiling Fan. Please read all instructions carefully before assembly and use. IMPORTANT SAFEGUARDS: Read all instructions carefully, even if you feel you are quite familiar with this type of appliance. When...
- Page 3 16. The replacement of parts of the safety suspension system device shall be performed by the manufacturer, its service agent or suitably qualified persons. 17. If it is necessary to replace the live or neutral brushes to ensure operation of the motor then both brushes and the earth brush shall be replaced at the same time.
- Page 4 IMPORTANT NOTE: The important safeguards and instructions given in this manual are not meant to cover all possible conditions and situations that may occur. It must be understood that common sense, caution and care are factors which cannot be built into any product. CAUTION: •...
- Page 5 FAULT FINDER: Always check the “Trouble Shooting Checklist” included in this manual before seeking a warranty claim. A mechanical noise may be noticed on installation. Allow at least 8 hours settling-in period. Some fans may wobble more than others, even if they are identical. This does not necessarily indicate a fault.
- Page 6 INSTALLATION AND ASSEMBLY: CAUTION! Before installing the fan make sure you have turned OFF the electricity supply. SELECTING A LOCATION: 1. Choose a location for mounting the fan where the blades will have at least 2.1 metres of clearance from the floor. 2.
- Page 11 ELECTRICAL CONNECTIONS: Ensure the power is OFF when installing this fan. INSTALLATION STEPS: 1. Remove the two screws from the cover plate on top of the motor housing 2. Remove the cover plate. 3. One blade at a time, insert the blade into the slots through the motor and align the blade with the three holes.
- Page 12 7. Replace the cover plate. 8. Tighten the two screws to secure the cover plate back on top of the motor housing. 9. Feed the main motor plug (and light wire plug for With Light Models) up through the inside of the down rod, then insert the down rod into the motor bush.
- Page 13 11. Snuggle the coupling cover down onto the top of the motor housing. CAUTION: DO NOT remove rubber gasket on top of the coupling cover. 12. Put the decorative ring and down rod through the canopy. 13. Place the hanging ball on top of the down rod and secure it with the ball pin and two screws. CAUTION: Secure one screw through holes on the hanging ball and the down rod.
- Page 14 14. Hang the fan into hanging bracket. Align ball groove on hanging ball with ridge on hanging bracket. Ensure hanging ball sitting into hanging bracket correctly. If fan doesn’t sit properly, hold the downrod and twist it until fan has been secured into hanging bracket. Ball Groove Ridge REMOTE CONTROL MODELS:...
- Page 15 15. Place the canopy over the bracket, align the canopy holes with the screws. 16. Twist the canopy. 17. Tighten it with screws. MODELS WITHOUT LIGHT: a. Twist bottom plate clockwise onto motor shaft until it is secured. IMPORTANT: DO NOT overturn. MODELS WITH LIGHT: a.
- Page 16 REVERSE FUNCTION: The “Summer/Winter” reverse function is included in the motor to make the fan rotate in an anti-clockwise direction during summer. In winter, this can be reversed, so that the blades now move in a clockwise direction. Select Forward/Reverse via the switch on the motor housing to change to either “Summer/Winter” mode. CARE &...
- Page 17 PAIRING THE REMOTE: All Claro Essentials Cooler fans, are pre-paired, so there is no pairing process needed to start the fan. If you need to reset the fan to factory setting, please follow the steps below: 1. Using the wall (isolation) switch, turn the fan power OFF for 10 seconds.
- Page 18 FUNCTIONS OF THE REMOTE CONTROL: To switch between light colours (Warm, Natural, Cool), switch the light OFF and ON again within 3 seconds. FUNCTIONS OF THE WALL CONTROL: o turn the fan ON/OFF or to change fan speeds, simply turn the Speed Dial clockwise or anticlockwise to the desired speed.
- Page 19 TROUBLESHOOTING: Issue Possible Cause Suggested Remedy Fans does not start. Loose wire connections or Check wire connections and ensure plugs are plugs to fan/receiver positively connected No power goes into the fan Check RCD/Switch board and wiring on premises Fan with remote keeps Loose wire connections or Check wire connections and ensure plugs are beeping, but will not start.
Need help?
Do you have a question about the COOLER AC and is the answer not in the manual?
Questions and answers