Table of Contents
Advertisement
Quick Links
Advertisement
Table of Contents

Related Manuals for Claro GLIDER DC


Summary of Contents for Claro GLIDER DC
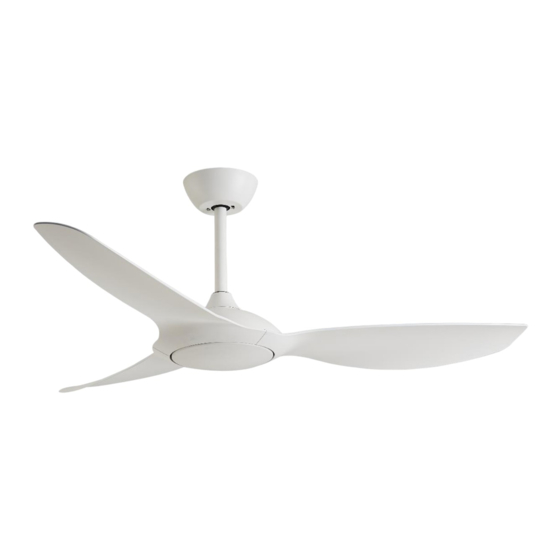
- Page 1 GLIDER DC Installation Manual VER 0.1...
-
Page 2: Important Safeguards
CEILING FAN INSTRUCTION BOOKLET Thank you for purchasing your Claro Glider DC Ceiling Fan. Please read all instructions carefully before assembly and use. IMPORTANT SAFEGUARDS: Read all instructions carefully, even if you feel you are quite familiar with this type of appliance. When... -
Page 3: Important Note
21. The LED light panel in light kit is user replaceable as it connects with 'Push Plug' wiring. It is user replaceable ONLY with Claro certified replacement LED panels. Using unauthorised parts may damage the fan, cause undesired results, or be a safety hazard. -
Page 4: Fault Finder
FAULT FINDER: Always check the “Trouble Shooting Checklist” included in this manual before seeking a warranty claim. A mechanical noise may be noticed on installation. Allow at least 8 hours settling-in period. Some fans may wobble more than others, even if they are identical. This does not necessarily indicate a fault. -
Page 5: Installation And Assembly
INSTALLATION AND ASSEMBLY: CAUTION! Before installing the fan make sure you have turned OFF the electricity supply. SELECTING A LOCATION: 1. Choose a location for mounting the fan where the blades will have at least 2.1 metres of clearance from the floor. 2. -
Page 8: Electrical Connections
ELECTRICAL CONNECTIONS: Ensure the power is OFF when installing this fan. INSTALLATION STEPS: 1. Secure the hanging bracket to the ceiling joist or suitable structure that is capable of carrying a load of at least 45kg. CAUTUION: Ensure building cable is able enter the canopy close to terminal block. 2. - Page 9 4. Feed the main motor and light wire (light version only) plug up through the inside of the down rod, then insert the down rod into the downrod holder. Gently push the cross-pin through the holes aligned with the base of the downrod holder and downrod. Insert cotter pin into cross pin and secure downrod with two set screws.
- Page 10 6. Place the hanging ball on top of the downrod 7. Secure it with the ball pin and two set screws. Ball Pin Earth Set Screw 8. Tighten one fan blade with 3 screws from under the motor. 9. Repeat with the remaining 2 fan blades. 10.
- Page 11 11. Place receiver in the hanging bracket and follow the wire diagram to connect wires and connectors. Connect power, receiver and the fan as per electrical wiring diagram. IMPORTANT: The fan must be earthed! Double pole disconnection switch and wall switch must be connected.
-
Page 12: Reverse Function
MODELS WITH LIGHT: a. Remove the 3 screws on light kit fixing plate. b. Align the light kit with screw holes on light kit fixing plate, and secure it with the 3 screws. c. Connect light plug. d. Align groove in the diffuser with the ridge in the light kit and twist the diffuser clockwise until it is secure. -
Page 13: Normal Wear And Tear
WOBBLE: • Ceiling fans are designed to move during operation because they are not generally rigidly mounted • Movement of a couple of centimetres is acceptable for safe operation. • Balancing kits included should be used to adjust the balancing when first installed. NORMAL WEAR AND TEAR: Threaded components working slighting loose or blade carriers even slightly bent due to vigorous cleaning or bumping can cause extra wobble and noise. -
Page 14: Functions Of The Remote Control
FUNCTIONS OF THE REMOTE CONTROL TROUBLESHOOTING: Issue Possible Cause Suggested Remedy Fan does not start after Remote and receiver are not Re-pair the receiver and remote the pairing process paired successfully Battery flat in remote control Replace the battery in remote control Loose wire connections or Check wire connections and ensure plugs are plugs to fan/receiver... - Page 15 Model Number Rated Voltage Motor Consumption Rated Light Power C4500/101A 220-240Vac Max. 35 W DC Motor C4500/202A 220-240Vac Max. 35 W DC Motor C4501/101A 220-240Vac Max. 35 W DC Motor 24 W LED C4501/202A 220-240Vac Max. 35 W DC Motor 24 W LED...
Need help?
Do you have a question about the GLIDER DC and is the answer not in the manual?
Questions and answers