Advertisement
Quick Links
USE AND CARE GUIDE
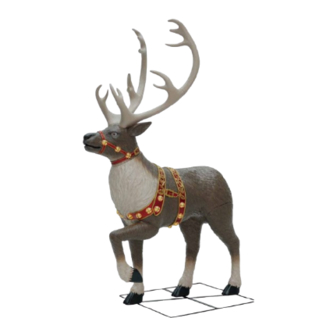
8.5 FT GIANT-SIZED LED TOWERING REINDEER
Questions, problems, missing parts? Before returning to the store, please have a copy of your receipt ready
and email the SVI customer experience team (customerservice@svius.com) within 90 days of the date of
purchase or call Home Accents Holiday Customer Service 8 a.m. - 7 p.m., EST,
Monday - Friday, 9 a.m. - 6 p.m., EST, Saturday
1-855-HD-HOLIDAY (1-855-434-6543)
HOMEDEPOT.COM
PARTS LIST
A. Base x 1
B. Left Hind Pole x 1
C. Right Hind Pole x 1
D. Front Pole x 1
E. Left Hind Leg x 1
F. Right Hind Leg x 1
G. Right Front Leg x 1
H. Body x 1
I. Chest x 1
J. Left Upper Front Leg x 1
K. Left Lower Front Leg x 1
L. Head x 1
M. Left Ear x 1
N. Right Ear x 1
O. Lower Left Antler x 1
P. Lower Right Antler x 1
Q. Upper Left Antler x 1
R. Upper Right Antler x 1
S. Right Hind Leg Cap x 1
T. Right Front Leg Cap x 1
U. Left Hind Leg Cap x 1
V. Top of Neck Cap x 1
W. Chest Cap x 1
Power Adapter * Spec
X. Stakes x 1
Input: 120V~60Hz
Y. Small Parts Bag x 1
Output: 5.9V 1.5A
Z. Adapter * x 1
Wattage: 8.85W
NOTE: Throughout the instructions, Right
and Left are relative to the character.
Screw
M6*12mm
B
LEFT
BACK
A
RIGHT
FRONT
Screw
M6*12mm
B
C
D
A
A
J
V
Screw
M6*12mm
Locking Pin
Click
C
A
1
1
.
E
B
D
C
1
3
.
IMPORTANT TIPS:
• Ensure that item's adapter is plugged in at the Function Control Box and
plugged in the wall.
• Ensure that the switch on the function control box is on the desired setting.
• If not functioning properly (ex: LEDs don't light up), ensure that cables are
connected to their corresponding cable as shown in the instruction sheet.
• Be sure nothing is blocking movement or caught in moving parts.
• Ensure that the floor or surface that the item sits on is flat and level.
• Be sure nothing is blocking the sensor. See Operations Instructions page 4 for
complete details.
B
C
D
E
K
L
M
W
X
Attach the (B) Left Hind Pole
to the (A) Base using the
quick connect push button
and pre-drilled hole. Secure
in place using an M6*12mm
Screw available from the (Y)
Means It's
Small Parts Bag as shown in
Locked
Figure 1.1. Attach the (C)
Right Hind Pole to the (A)
Base using the quick
connect push button and
pre-drilled hole. Secure in
place using an M6*12mm
Screw available from the (Y)
Small Parts Bag as shown in
1
2
.
Figure 1.2. Attach the (D)
Front Pole to the (A) Base
using the quick connect
push button and pre-drilled
hole. Secure in place using
an M6*12mm Screw
available from the (Y) Small
Parts Bag as shown in
Figure 1.3. Then set the (E)
Left Hind Leg over the (B)
Left Hind Pole as shown in
Figure 1.4.
1
4
.
Video assembly
instructions
available online
F
G
H
Q
O
P
R
N
X2 Screw
X2 Screw
X6 Screw
M4 hex wrench
M6*53mm
M6*47mm
M6*12mm
(included)
Y
USA 1011183707
Model 24SV24393
I
S
U
T
Z
F
C
D
2
1
.
G
D
2
2
.
1/4
Advertisement

Summary of Contents for Home Accents Holiday 8.5 FT GIANT-SIZED LED TOWERING REINDEER
- Page 1 • Ensure that the floor or surface that the item sits on is flat and level. purchase or call Home Accents Holiday Customer Service 8 a.m. - 7 p.m., EST, Monday - Friday, 9 a.m. - 6 p.m., EST, Saturday •...
- Page 2 Through the holes in each of the (E, F, G) Legs, use the Hex Wrench and 3 x NOTE: Do not overtighten. M6*12mm Screws from the (Y) Small Parts Bag to fully secure the (B, C, D) Frame Poles to the (H) Body and (I) Chest as shown in Figure 4.2.
- Page 3 Screw M6*53mm NOTE: Do not NOTE: Do not overtighten. overtighten. 5.9V YOUR 8.5 FT GIANT-SIZED LED TOWERING REINDEER IS NOW FULLY ASSEMBLED. PLUG IN AND TURN ON TO LET NOTE: Rotate the cap of the (Z) Adapter all the THE FUN BEGIN! way onto the threading of the Function Control Box until it is firmly in place.
- Page 4 SVI customer experience team (customerservice@svius.com) within 90 days of the date of purchase or call Home Accents Holiday Customer Service 8 a.m. - 7 p.m., EST, Monday - Friday, 9 a.m. - 6 p.m., EST, Saturday 1-855-HD-HOLIDAY(1-855-434-6543) HOMEDEPOT.COM...


Need help?
Do you have a question about the 8.5 FT GIANT-SIZED LED TOWERING REINDEER and is the answer not in the manual?
Questions and answers