Advertisement
Quick Links
ASSEMBLY AND OPERATING INSTRUCTIONS FOR THE
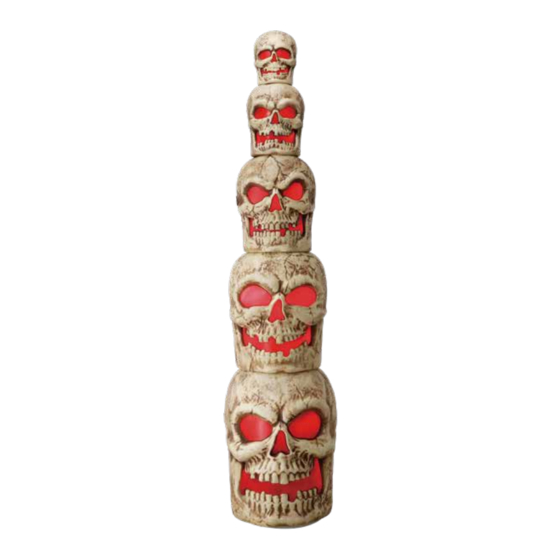
8FT GRAVE & BONES GIANT-SIZED LED SKULL STACK
STACKED AND UNSTACKED DISPLAY OPTIONS
1-855-HDHoliday (1-855-434-6543), Monday-Friday,
8am-7pm EST, and Saturday, 9am-6pm, EST
INSTRUCTION MANUAL
1009 025 383
info@pan-asian.com.hk.
Advertisement

Subscribe to Our Youtube Channel
Summary of Contents for Home Accents Holiday 1009 025 383
- Page 1 1009 025 383 INSTRUCTION MANUAL ASSEMBLY AND OPERATING INSTRUCTIONS FOR THE 8FT GRAVE & BONES GIANT-SIZED LED SKULL STACK STACKED AND UNSTACKED DISPLAY OPTIONS 1-855-HDHoliday (1-855-434-6543), Monday-Friday, info@pan-asian.com.hk. 8am-7pm EST, and Saturday, 9am-6pm, EST...
-
Page 2: Safety Instructions
Questions, problems, missing parts? Before returning the product to your local Home Depot store, please call our Home Accents Holiday customer care department at 1-855-HDHoliday (1-855-434-6543), Monday-Friday, 8am-7pm EST, and Saturday, 9am-6pm, EST or email the manufacturer at info@pan-asian.com.hk. WARNING: This is not a toy and is for decorative purposes only. For indoor and outdoor use. This item is not intended for use by children under the age of 14. -
Page 3: Operation
9. WARNING: Risk of Fire. Installation involves special wiring methods to run wiring through a building structure. Consult a qualified electrician. 10. WARNING: Risk of Electric Shock. Mount the unit at a height greater than 1 foot from the ground surface. 11. - Page 4 Metal Base Metal connecting support for Metal connecting support for skull stack 1 Metal Base Skull 1 with ON/OFF/TIMER Metal connecting support for Metal connecting support for toggle switch cable skull stack 2 and skull stack 3 skull stack 4 Skull 2 Skull 3 Skull 4...
- Page 5 STACKED DISPLAY OPTION NOTE: For outdoor yard display it is recommended that you start the assembly process by first determining the intended display location, making sure that the surface is flat and/or level for the placement of the base, and then securing the base firmly into the ground with the included ground stakes.
- Page 6 How to Close Skull 1 (F) Fasten the 9 x “Locking Clips” located inside Skull 1 (F) onto the corresponding 9 x “Locking Clip Attachments” to close and secure the 2 halves of the Skull together. Please follow this step to close Skull 2 (G), Skull 3 (H) and Skull 4 (I) * The location and number of locking clips &...
- Page 7 Step 5 Step 7 Unplug the DC jack cover Unplug the DC jack cover Connect the cable from the bottom of Skull 2 (G) into the DC jack on the top of Connect the cable Skull 1 (F) from the bottom of Skull 3 (H) into the DC jack on the top of Skull 1 (G)
- Page 8 Step 8 Step 9 Unplug the DC jack cover Connect the cable from the bottom of Skull 4 (I) into the DC jack on the top of Skull 3 (H)
- Page 9 Step 11 Step 10 Connect the cable from the bottom of Skull 5 (J) into the DC jack on the top of Skull 4 (I) Using Plastic Screwdriver (L) Tighten the Screw (K) into the top end of the metal connecting support rod (E) to secure Skull 5 (J) into place.
- Page 10 Step 12 Once the power supply has been plugged in, locate the ON/OFF/TIMER toggle switch on the cable of Skull 1 (F) and press the “ON” position switch to activate LED lights. Connect the UL-Listed, 4.5V 1.5A AC/DC Adapter (M) into the connection at the end of the ON/OFF/TIMER toggle switch cable of Skull 1 (F), and plug it into a standard 100V-240V household power...
- Page 11 ASSEMBLY: UNSTACKED DISPLAY OPTION Insert the screw cover firmly is Step 1 heard to ensure the screw are properly attached Step 3 Once the power supply has been plugged in, locate the ON/OFF/TIMER toggle switch on the cable of Skull 1 (F) and press the “ON”...
- Page 12 DISTRIBUTED BY: HOME DEPOT 2455 PACES FERRY ROAD ATLANTA, GA 30339...


Need help?
Do you have a question about the 1009 025 383 and is the answer not in the manual?
Questions and answers