Advertisement
Available languages
Available languages
Quick Links
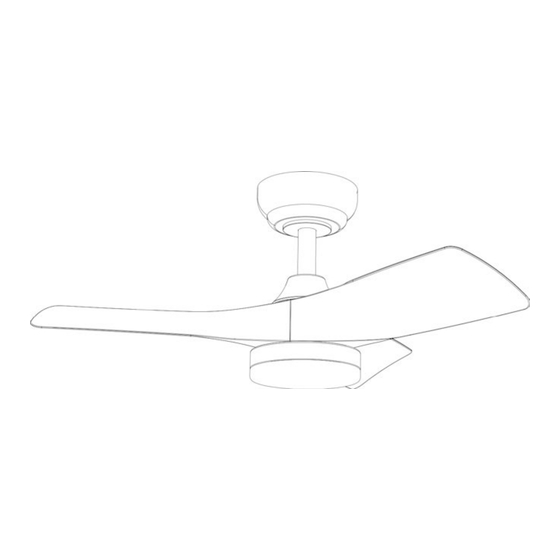
TROPIC
VENTILADOR DE TECHO DIMABLE
DIMMABLE CEILING FAN
319614
Luz LED CCT 3000K-4000K-5000K (LUZ CÁLIDA, BLANCA Y FRIA)
Ventilador con motor DC de 6 velocidades e inversión de giro.
Función temporizador. Mando a distancia.
(ES) GUÍA DE INSTALACIÓN · p 2
(EN) INSTALLATION GUIDE · p 7
Para ver la ficha técnica de producto completa, puede usar el siguiente código QR:
Para cualquier duda técnica póngase en contacto con nuestro Departamento Técnico.
Estamos a su servicio en nuestro email
mperez@schuller.es
o en nuestro teléfono 961 601 051
Rev.07.24
Advertisement

Subscribe to Our Youtube Channel
Related Manuals for Schuller TROPIC 319614


Summary of Contents for Schuller TROPIC 319614
- Page 1 Para ver la ficha técnica de producto completa, puede usar el siguiente código QR: Para cualquier duda técnica póngase en contacto con nuestro Departamento Técnico. Estamos a su servicio en nuestro email mperez@schuller.es o en nuestro teléfono 961 601 051 Rev.07.24...
- Page 2 Desembale su ventilador y compruebe el contenido. Compruebe cada elemento antes de la instalación. Para reducir la posibilidad de arañazos o posibles daños, extraiga las piezas sólo cuando sea necesario para la instalación. Ref.# Cant. Descripción Soporte a techo Módulo de control Tubo y semiesfera Florón Tapa decorativa con imán...
- Page 3 Techo de Madera o escayola Techo de cemento Si el techo es de madera o escayola, es Si se trata de un techo de hormigón, es necesario instalar 4 balancines o 4 tornillos necesario instalar 2 tornillos de expansión para autorroscantes para fijar el soporte a techo.
- Page 4 4. Afloje dos tornillos del aro de unión. A continuación, 5. Colocar la semiesfera haciendo coincidir la ranura de acoplamiento. coloque el tubo en el aro de unión. Colocar pasador y clip. Colocar los 2 tornillos apretando progresivamente para centrar el enfilaje. Pasador 6.
- Page 5 NOTAS DE FUNCIONAMIENTO: 1. Las primeras 24 horas tras la instalación es normal apreciar un ligero rumor durante el funcionamiento del ventilador. Tras ese periodo de ajuste el rumor desaparecerá. La luz del ventilador apagada a través del mando a distancia queda en stand-by. Quedará completamente apagada, si se corta la corriente a través del interruptor de pared Si realiza la instalación en un falso techo de escayola, madera o metal es posible que se amplifique el rumor del ventilador debido a la cámara de aire existente.
- Page 6 SOLUCIONES A PROBLEMAS DE FUNCIONAMIENTO 1 No giran las aspas, no se enciende la luz o alguna de ellas. • Comprobar que las conexiones de instalación rápida han quedado bien sujetas hasta su posición final. (Puede que se desconecten en el momento de la colocación definitiva por la gran cantidad de cables que se manejan a la vez) 2 Ruidos, roces, zumbidos, golpes cíclicos etc.
- Page 7 You may use the following QR code to view the complete technical data sheet of the product: If you have any technical questions, please do not hesitate to contact our technical Department. We are at your disposal in our email: export@schuller.es Rev.07.24...
- Page 8 Unpack your fan and check the content. Check each item before the installation. To reduce the possibility of scratches or damages, remove parts only when necessary for installation. Ref.# Cant. Descripción Ceiling support Control module Tube and semi-sphere Canopy Decorative cover with magnet Tube joint cover Fan motor Blades...
- Page 9 Wooden or plaster ceiling Concrete ceiling If the wooden or plaster ceiling, it is If it is a concrete ceiling, it is necessary to install compulsory to install 4 gravity toggles or 4 2 expansion bolts to fix the bracket to the self-tapping screws to fix the bracket to the ceiling.
- Page 10 4. Loosen two screws of the connecting ring. Then place the tube in the connecting ring. Insert the bolt and clip. Place the semi-sphere by matching the coupling groove. Fit the 2 screws, tightening progressively to centre the stem. 6. Install the LED light. Remove the 3 screws and connect the quick connector of Screw in the LED ceiling light with these 3 screws.
- Page 11 REMARKS ABOUT FUNCTIONING: The first 24 hours after installation, it is normal to notice a slight rumor during fan operation. After this adjustment period, it will disappear. 2. The light of the fan turned off through the remote control remains in stand-by mode. It will be completely off if power is cut off through the wall switch.
- Page 12 POSIBLE SOLUTIONS TO OPERATIONAL PROBLEMS 1. The blades do not rotate, the light or some of them do not turn on. • Check that the quick installation connections have been securely fastened until their final position. (They may be disconnected at the time of final placement due to the large number of cables that are handled at the same time).
Need help?
Do you have a question about the TROPIC 319614 and is the answer not in the manual?
Questions and answers