Advertisement
Quick Links
Advertisement

Subscribe to Our Youtube Channel
Summary of Contents for Parrot Uncle F4706QQ110V
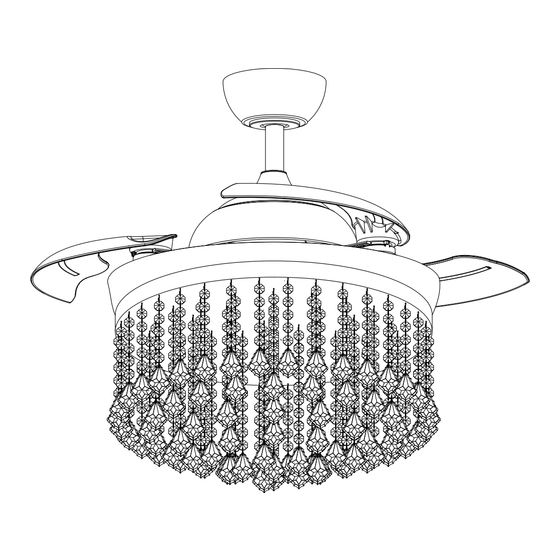
- Page 1 F4706QQ110V / F4706BKQ110V CEILING FAN INSTALLATION MANUAL READ AND SAVE THESE INSTRUCTIONS English...
- Page 2 F4706QQ110V / F4706BKQ110V Installation & Operating Instructions for the Parrotuncle Owner's Installation, Manual WARNING: SHUT POWER OFF AT FUSE OR CIRCUIT BERAKER Safety Information To reduce the risk of electric shock, the electricity WARNING: To reduce the risk of personal injury,...
- Page 3 F4706QQ110V / F4706BKQ110V Installation & Operating Instructions for the Parrotuncle Owner's Installation, Manual WARNING: SHUT POWER OFF AT FUSE OR CIRCUIT BERAKER THANK YOU FOR YOUR PURCHASE Thank you for purchasing this quality product. To ensure correct function and safety, please read and save all instructions before using the product.
- Page 4 F4706QQ110V / F4706BKQ110V Installation & Operating Instructions for the Parrotuncle Owner's Installation, Manual WARNING: SHUT POWER OFF AT FUSE OR CIRCUIT BERAKER Screw rod Mounting screws Wood screws (4PCS) (2PCS) (4PCS) Spring washer (4PCS) Balance tapes Plastic wire nut (2PCS)
- Page 5 F4706QQ110V / F4706BKQ110V Installation & Operating Instructions for the Parrotuncle Owner's Installation, Manual WARNING: SHUT POWER OFF AT FUSE OR CIRCUIT BERAKER Loose 2 screws of the mounting bracket under the canopy, removed the mounting bracket from the canopy. INSTALLING THE MOUNTING BRACKET: The ceiling fan must be installed in a location so that the blades are 12”...
- Page 6 F4706QQ110V / F4706BKQ110V Installation & Operating Instructions for the Parrotuncle Owner's Installation, Manual WARNING: SHUT POWER OFF AT FUSE OR CIRCUIT BERAKER Install the suspension system components of the product as shown in the diagram. Carefully lift the fan motor assembly onto the mounting bracket that was attached to the outlet box. Turn the entire assembly until the check tab (stopper of bracket) drops into the notch of the downrod ball and seats firmly.
- Page 7 F4706QQ110V / F4706BKQ110V Installation & Operating Instructions for the Parrotuncle Owner's Installation, Manual WARNING: SHUT POWER OFF AT FUSE OR CIRCUIT BERAKER Connect the wires of the fan main unit with remote controller, connect the remote controller to the power supply using wire nuts.
- Page 8 F4706QQ110V / F4706BKQ110V Installation & Operating Instructions for the Parrotuncle Owner's Installation, Manual WARNING: SHUT POWER OFF AT FUSE OR CIRCUIT BERAKER Install 6 E12 LED bulbs (not included). As shown in the figure below, install the crystal beads at the bottom of the crystal A / crystal B / crystal C / crystal D / crystal E / crystal F.
- Page 9 F4706QQ110V / F4706BKQ110V Installation & Operating Instructions for the Parrotuncle Owner's Installation, Manual WARNING: SHUT POWER OFF AT FUSE OR CIRCUIT BERAKER Remote controller INSTRUCTION OF INSTALLATION AND OPERATION 1. INSTALLING RECEIVER IN FAN: a. Remove power from the circuit.
- Page 10 F4706QQ110V / F4706BKQ110V Installation & Operating Instructions for the Parrotuncle Owner's Installation, Manual WARNING: SHUT POWER OFF AT FUSE OR CIRCUIT BERAKER 2. OPERATING TRANSMITTER: Operating the buttons on the panel of the transmitter. 3 key -for fan high speed.
- Page 11 F4706QQ110V / F4706BKQ110V Installation & Operating Instructions for the Parrotuncle Owner's Installation, Manual WARNING: SHUT POWER OFF AT FUSE OR CIRCUIT BERAKER WARNING INGESTION HAZARD: KEEP This product contains a new and used batteries OUT OF BEACH OF CHILDREN button cell or coin battery.
- Page 12 F4706QQ110V / F4706BKQ110V Installation & Operating Instructions for the Parrotuncle Owner's Installation, Manual WARNING: SHUT POWER OFF AT FUSE OR CIRCUIT BERAKER PRODUCT SIZE Dia 5.9 in. (Ø150mm) Dia 1.04 in. x4 in. or 10 in. (Ø26.5mm x100mm or 250mm) Dia 18.9 in.
- Page 13 F4706QQ110V / F4706BKQ110V Installation & Operating Instructions for the Parrotuncle Owner's Installation, Manual WARNING: SHUT POWER OFF AT FUSE OR CIRCUIT BERAKER TROUBLESHOOTING GUIDE Table of Contents 1. Fan / Remote is not working 2. Fan is noisy 3. Fan Wobbles 4.
- Page 14 F4706QQ110V / F4706BKQ110V Installation & Operating Instructions for the Parrotuncle Owner's Installation, Manual WARNING: SHUT POWER OFF AT FUSE OR CIRCUIT BERAKER AFTER INSTALLATION WOBBLE The fan blades have been adjusted in the factory to minimize any wobble NOTE: CEILING FANS TEND TO MOVE DURING OPERATION DUE TO THE FACT THAT THEY ARE MOUNTED ON A RUBBER CROMMET.


Need help?
Do you have a question about the F4706QQ110V and is the answer not in the manual?
Questions and answers