Advertisement
Available languages
Available languages
Quick Links
Advertisement

Subscribe to Our Youtube Channel
Related Manuals for Parrot Uncle F4723-SMART


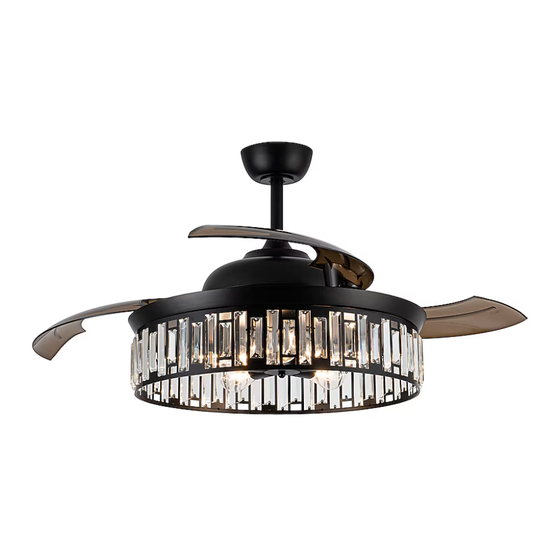
Summary of Contents for Parrot Uncle F4723-SMART
- Page 1 F4723-SMART...
- Page 2 F4723-SMART Light F4723-SMART 110-120 VAC 5*E26 MAX.25W...
- Page 3 F4723-SMART Screws for light (1PCS) light shade...
- Page 4 F4723-SMART Take the finished F4723-SMART out of the packing box Use a Phillips screwdriver to loosen the screw in the direction of the arrow shown in the figure, and place the screw for subsequent installation...
- Page 5 F4723-SMART Finish In order to prevent loose, the drop ball groove must be engaged with the hanger lug! Remote control wiring...
- Page 6 F4723-SMART Wiring and installation of lighting fixtures Lamp shade installation Installing E26 bulb The product installation is complete...
- Page 7 F4723-SMART Remote controller INSTRUCTION OF INSTALLATION AND OPERATION 1.INSTALLING RECEIVER IN CEILING FAN LIGHT A. Safety precautions: WARNING: HIGH VOLTAGE! Disconnect power by CODE OUTPUT removing fuse or switching off circuit breaker. CODE Do not use with solid state fans.
-
Page 8: Troubleshooting Guide
F4723-SMART 2. OPERATING TRANSMITTER: Operating the buttons on the panel of the transmitter. 3 key -for fan high speed. 2 key-for fan medium speed. 1 key-for fan low speed. OFF key-for fan off. REV key-for fan rev. LIGHT key-for light on and off. - Page 9 F4723-SMART φ 5.9" φ 26.5*4"or10" 23" φ 52" φ...
- Page 10 F4723-SMART...
- Page 11 F4723-SMART...
- Page 12 F4723-SMART F4723-SMAR T 1 1 0 -1 2 0 VAC 6 5 W 5 *E 2 6 MAX. 25W...
- Page 13 F4723-SMART Tornillos para madera (4pzas) Tuerca para alambre de plástico (3pzas) Tornillo para luz (1pza) Soporte de montaje deslizante Conjunto bola/vástago de 4" Conjunto bola/vástago de 10" (en espera) Tejadillo Tapa del tejadillo Cubierta de acoplamiento Eje colgante Pasador de bloqueo “R”...
- Page 14 F4723-SMART Saque el F4723-SMART acabado de su caja de embalaje Utilice un destornillador Phillips para aflojar el tornillo en la dirección de la flecha mostrada en la figura, y coloque el tornillo para su posterior instalación. Destornillador Phillins Instale los componentes del sistema de suspensión del producto como se muestra en el diagrama.
- Page 15 F4723-SMART Terminado Para evitar que se suelte, la ranura de la bola de caída debe encajar en el soporte de fijación. Procedimiento de instalación del cable de seguridad Cableado del mando a distancia Destornillador Phillins Terminado...
- Page 16 F4723-SMART Wiring and installation of lighting fixtures Esquema de instalación de la pantalla Instalación de la bombilla E26 Instalación completa del producto...
-
Page 17: Instrucciones De Instalación Y Funcionamiento
F4723-SMART Mando a distancia INSTRUCCIONES DE INSTALACIÓN Y FUNCIONAMIENTO 1.INSTALACIÓN DEL RECEPTOR EN EL VENTILADOR VENTILADOR DE TECHO CODE A: Precauciones de seguridad: SALIDA ADVERTENCIA: ALTA TENSIÓN! Desconecte la alimentación CODE quitando el fusible o desconectando el disyuntor. CONOZCA No utilizar con ventiladores de estado sólido. -
Page 18: Guía De Resolución De Problemas
F4723-SMART 2. FUNCIONAMIENTO DEL TRANSMISOR: Manejo de los botones del panel del transmisor. Tecla 3 -para velocidad alta del ventilador. Tecla 2 -para velocidad media del ventilador. Tecla 1-para velocidad baja del ventilador. Tecla OFF-para ventilador apagado. Tecla REV-para revoluciones del ventilador. - Page 19 F4723-SMART Dimensión del producto φ 5.9" φ 26.5*4"or10" 23" φ 52" φ...
-
Page 20: Mantenimiento Y Limpieza
F4723-SMART Instrucciones de instalación y funcionamiento del parrotuncle Propietarios Instalación ,Manual ADVERTENCIA: CORTE LA CORRIENTE CON EL FUSIBLE O EL DISYUNTOR DESPUÉ S DE LA INSTALACIÓ N OSCILACIÓ N" Las aspas del ventilador han sido ajustadas en fábrica para minimizar cualquier oscilación. - Page 21 F4723-SMART...
- Page 22 F4723-SMART 5*E26 MAX.25W F4723-SMART...
- Page 23 F4723-SMART Vis à bois (4PCS) Écrou pour fil en plastique (3PCS) Vis pour la lumière (1PCS) Support de montage coulissant Assemblage boule/tige de 4" Assemblage boule/tige de 10" (veille) TÉLÉCOMMANDE (1 PCS) Canopée Couvercle de la canopée Couvercle d'accouplement Goupille de verrouillage « R »...
- Page 24 F4723-SMART Sortez le F4723-SMART fini de sa boîte d'emballage Utilisez un tournevis Phillips pour desserrer la vis dans le sens de la flè che indiquée sur la figure, et placez la vis pour l'installation ultérieure. Installez les composants du système de suspension du...
- Page 25 F4723-SMART Fini Afin d'éviter tout desserrement, la rainure de la boule de chute doit être engagée dans l a patte d'accrochage ! Procédure d'installation du câble de s écurité Câblage de la télécommande...
- Page 26 F4723-SMART Câblage et installation de lampes Installation d'abat - jour Installer une ampoule E26 L'installation du produit est terminée...
- Page 27 F4723-SMART Télécommande INSTRUCTION D'INSTALLATION ET D'UTILISATION 1. INSTALLIATION DU RÉCEPTEUR DANS LUMIÈRE VENTILATEUR LE VENTILATEUR DE PLAFOND CODE A. Précautions de sécurité SORTIE AVERTISSEMENT : HAUTE TENSION ! Déconnecter CODE l'alimentation en retirant le fusible ou en coupant le disjoncteur.
-
Page 28: Utilisation De L'émetteur
F4723-SMART 2. UTILISATION DE L'ÉMETTEUR : Actionner les boutons du panneau de l'émetteur. Touche 3 - pour la vitesse élevée du ventilateur. APPRENDRE Touche 2 pour la vitesse moyenne du ventilateur. Touche 1 - pour la petite vitesse du ventilateur. - Page 29 F4723-SMART φ 5.9" φ 26.5*4"or10" 23" φ 52" φ...
- Page 30 F4723-SMART...
Need help?
Do you have a question about the F4723-SMART and is the answer not in the manual?
Questions and answers