
Related Manuals for edishine HOWL21A


Summary of Contents for edishine HOWL21A
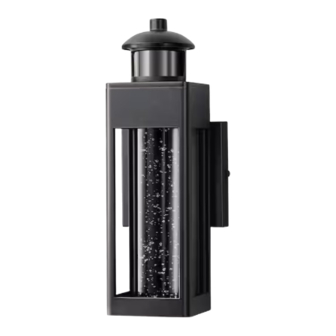
- Page 1 LED Outdoor Wall Light SKU: HOWL21A [Instruction Manual] Please pay attention to the warning signs Read the instructions with caution before operating and keep it properly V31016...
- Page 2 Warning: Risk of fire. Min 75°C supply conductors. Consult a qualified electrician to ensure correct installation.Before installation, please turn off the main power of the circuit breaker to prevent possible electric shock. Packing list Part Description Quantity LED Wall light 12.72”...
- Page 3 NOTE: PLEASE INSTALL THIS WALL LANTERN 1.2 METERS 3.94 FEET ABOVE THE GROUND FIG.3 FUSE BOX STEP 01: POWER OFF FIG.1. Turn the wall switch to the “OFF” position. Depending on which type of fuse box in your home; FIG.2. Either turn the main (Master) switch to the "OFF" position to cut off the power supply of the entire home, or turn off the individual switch that supplies power to the fixture installation location.
- Page 4 STEP 05: POWER ON Turn on the main (Master) switch to get the power back, the light will turn on automatically. The lamp structure is described as following picture: WIRE CONNECTORS MOUNTING GROUND WIRE SCREWS WHITE NEUTRAL WIRE BLACK LIVE WIRE Operation description (1)Turn on the light, wait 30 seconds for the sensor to warm up, then select...
- Page 5 Remark: The lighting time can be adjusted. Factory setting is AUTO mode (20 seconds, the maximum preset induction distance is 10 meters.) AUTO MODE - Set the slide switch to AUTO. The fixture will stay off at daytime and automatically turn on when human body activity is sensed at night.
- Page 6 clockwise rotation, the lighting time increases by 60 seconds. The maximum is 180 seconds Fig.5 Flathead Screwdriver not included) Slide Switch (Set to AUTO) Detail A View SENS - Adjust Sensing Distance: Adjust the “Sens” knob with a flat head screwdriver(Not Included).
- Page 7 Fig.6 Flathead Screwdriver Slide Switch (Set to AUTO) not included) Detail A View LOW LEVEL - This function is out of work in AUTO mode. AUTO+ MODE: Set the slide switch to AUTO+.The fixture will stay OFF at daytime and stay low-level brightness (20%-50% brightness to be manually adjusted)at night if no motion is detected within 20-180 seconds,...
- Page 8 Fig.7 Flathead Screwdriver not included) Slide Switch (Set to AUTO+ ) Detail A View SENS - Adjust Sensing Distance: Adjust the “Sens” knob with a flat head screwdriver(Not Included). Turn clockwise to increase sensing distance, and counterclockwise to decrease the sensing distance. The factory preset distance is 10M(Maximum), you can adjust the “Sens”...
- Page 9 Fig.8 Flathead Screwdriver Slide Switch (Set to AUTO+ ) not included) Detail A View LOW LEVEL - Adjust low-level brightness: Adjust the “Sens” knob with a flat head screwdriver(Not Included). Turn clockwise to increase brightness, and counterclockwise to decrease brightness. Note: This function is only available for Incandescent bulbs or dimmable LED bulbs.
- Page 10 Fig.9 Flathead Screwdriver (not included) Slide Switch (Set to AUTO+ ) Detail A View 5.PC MODE:Lights off during the day and on at dusk. Other functions are out of work. Fig.10 Slide Switch (Set to PC) Detail A View...
- Page 11 NOTE: 1. The sensitivity of the motion sensor will increase as the environmental temperature drops. For best performance, gently clean the lens with a soft cloth every 1 or 2 months to ensure maximum sensitivity. 2. The magnitude of adjustment for sensitivity and time may not be precisely correspond to the amount of the knob is turned.
- Page 12 One Year Limited Warranty Supported by our professional R&D team and QC team, we provide One Year Warranty for materials and workmanship from the purchase date. Please note that the warranty does not cover damage caused by personal misuse or improper installation. Please attach your Order ID and Name so that our dedicated customer service team can help you better.
Need help?
Do you have a question about the HOWL21A and is the answer not in the manual?
Questions and answers