Advertisement
Available languages
Available languages
Quick Links
EN
Introduction..............................................................................
Important Safety Information............................................
Safety Instructions.................................................................. 4
Getting to Know Your Unit..................................................
Operating Procedures & Maintenance............................
Using Your Ice Maker.......................................................
Troubleshooting Guide........................................................
Product Specifications.........................................................
Limited Warranty...................................................................
USA CANADA 1-800-
ICE MAKER
EFIC220-BLACK-6COM,
EFIC220-GREY-6COM,
EFIC220-NAVY-6COM
7-12
13
14
15
2
3
5
6
Advertisement

Related Manuals for Frigidaire GALLERY EFIC220-BLACK-6COM


Summary of Contents for Frigidaire GALLERY EFIC220-BLACK-6COM
- Page 1 EFIC220-BLACK-6COM, EFIC220-GREY-6COM, EFIC220-NAVY-6COM ICE MAKER Introduction................Important Safety Information..........Safety Instructions..............4 Getting to Know Your Unit..........Operating Procedures & Maintenance......Using Your Ice Maker............7-12 Troubleshooting Guide............Product Specifications............Limited Warranty..............USA CANADA 1-800-...
- Page 2 INTRODUCTION When you unpack your ice maker, you may find a small amount of water inside. Your unit is brand new. Any water you may find is from the standard quality control testing that all of our ice makers undergo as part of the manufacturing process.
- Page 3 IMPORTANT SAFETY INFORMATION Safety Instructions WARNING • DO NOT store or use gasoline, or other flammable liquids in the vicinity Please read all instructions before using of this or any other appliance. Read this appliance. product labels for warnings regarding flammability and other hazards.
- Page 4 SAFETY INSTRUCTIONS This appliance must be plugged into at least a 15 AMP 110-115 VOLT 60 Hz GROUNDED OUTLET. This appliance must be grounded. It is equipped with a 3-wire cord having a grounding plug. The plug must be plugged into an outlet that is properly installed and grounded.
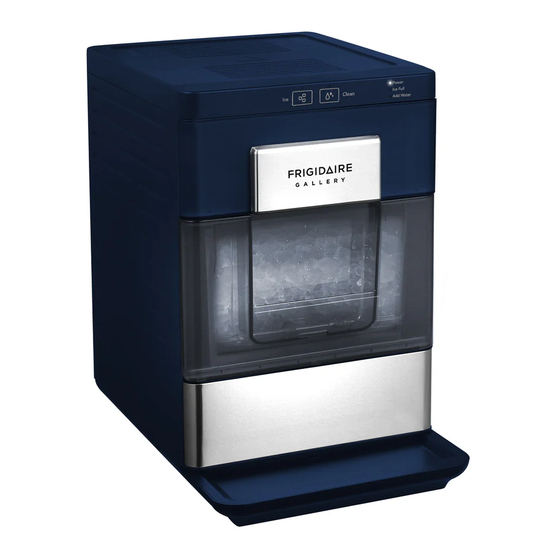
- Page 5 GETTING TO KNOW YOUR UNIT 1. Control panel 2. Drawer water tank: drawer for water 3. Drawer ice basket: drawer for ice 4. Drip tray 5. Unit shell 6. Tip-up door: After opening this door, you can directly clean the internal water tank 7.
- Page 6 OPERATING PROCEDURES & MAINTENANCE UNPACKING YOUR ICE MAKER 1. Remove the exterior and interior packaging, and then check all the accessories are included. If any parts are missing, please contact our customer service. 2. Remove all the tapes on the unit; take out the accessory parts inside. 3.
- Page 7 USING YOUR ICE MAKER How to start the unit 1. Pull out the drawer water tank, Open the lid of the drawer water tank, pour potable water into drawer water tank, until the drawer water tank is filled with water, then push it back to the original place. 2.
- Page 8 USING YOUR ICE MAKER Clean For the first time, or the clean procedure has not been running for a long time, it is highly recommended to run this procedure at first. 5. Before clean procedure, please fill the drawer tank with water and check the drainpipe under the appliance, make sure the water drain cap has been inserted into the unit;...
- Page 9 USING YOUR ICE MAKER When Ice Full indicator is on 12. The ice maker automatically stops working when the ice-cube is full inside and the “ ice full” Indicator is on. Open the Drawer Ice Basket 13. Hold the drawer handle gently and pull it out along the horizontal direction, until the back of the drawer contacts the front panel and then gently put it down, the drawer will have a certain angle hanging in the front panel.
- Page 10 USING YOUR ICE MAKER Take Out the Drawer Water Tank 16. Pull the water tank outward in a horizontal direction, and when the panel frame is about to be pulled out, hold the water tank with the other hand to prevent it from falling. When placing the water tank back, first use your hands to support the tank and align it with the panel frame, then push it horizontally.
- Page 11 USING YOUR ICE MAKER System Cleaning/Sanitizing Procedure To clean internal parts of nugget ice maker, please complete the following steps: 1. Unplug the nugget ice maker. 2. Remove the drain pipe and drain the water into the sink. See the fiqure below. Create a solution of five cups of water and one teaspoon household bleach for daily cleaning.
- Page 12 USING YOUR ICE MAKER 5. Plug in the Nugget ice maker, press the "Clean" button to initiate the cleaning process(20mins). See the figure below. 6. When the cleaning is competed and the indicator light if o , remove the drain cap and drain the water into the sink.
- Page 13 TROUBLESHOOTING GUIDE PROBLEM POSSIBLE CAUSES SOLUTION Stop the ice maker, fill water, and press “Ice/ Lack of Water. Clean” button again to restart the unit. “Add Water” indicator lights up Reinstall the internal Internal water tank baffle is not water tank baffle in place. installed in place.
- Page 14 TROUBLESHOOTING GUIDE More frequent squeaking usually requires white vinegar cleaning to remove internal mineral scale buildup. Fill the reservoir with vinegar to the max fill line and run up to three cleaning cycles. If using vinegar, leave the vinegar in the Noise and water Need to clean.
- Page 15 LIMITED WARRANTY To make a warranty claim, please email support2@curtiscs.com or call 1-800-968-9853. 1 Year warranty This product is warranted to be free from defects in material and workmanship for a period of one (1) year from the date of original delivery to the consumer. During this period, your exclusive remedy is repair or replacement of this product or component found to be defective, at our option;...
- Page 16 FRIGIDAIRE GALLERY is a pending or registered trademark of Electrolux Home Products Inc. and used under a license from Electrolux Home Products, Inc.
- Page 17 EFIC220-BLACK-6COM, EFIC220-GREY-6COM, EFIC220-NAVY-6COM APPAREIL À GLAÇON Les Instructions de Sécurité Importantes......Préparer Votre Machine À Glaçons Pour L'utiliser..Apprendre À Connaître Votre Unité........Procedures D'exploitation et Maintenance...... Utilisation de Votre Ice Maker......... 7-12 Dépannage.................. Spécifications du Produit............Carte de Garantie..............USA CANADA 1-800-...
- Page 18 LES INSTRUCTIONS DE SÉCURITÉ IMPORTANTES Votresécuritéetlasécuritédesautressonttrèsimportant Nousavonsfourniplusieursmanuelsdesécuritéimportantsetvotreappareil. Lire et obéir à tous les messages de sécurité, s'il vous plaît C'estlesymboled'alertedesécurité: Touslesmessagesdesécuritésuivrontlesymboled'alertedesécuritéetlesmots« DANGER»ou«ATTENTION». DANGER ATTENTION Lessensdecesmots: Vouspouvezêtretuéougravementblessésivousnesuivezpasinstructions immédiatement. Touslesmessagesdesécuritévousdirontquelestledangerpotentiel, commentréduire lerisquedeblessureetcequipeutarriversilesinstructionsnesontpassuivies. Lorsque vous déballez votre machine à glaçons, vous pouvez trouver une petite quantité...
- Page 19 PRÉPARER VOTRE MACHINE À GLAÇONS POUR L'UTILISER LESCONSEILSDESÉCURITÉIMPORTANTS Lors de l'utilisation d'appareils électriques, des précautions de sécurité élémentaires doivent être respectées afin de réduire les risques d'incendie, d'électrocution et de blessures aux personnes ou aux biens. Lisez toutes les instructions avant d'utiliser un appareil.
- Page 20 PRÉPARER VOTRE MACHINE À GLAÇONS POUR L'UTILISER CAUTION - Risque d'incendie ou d'explosion. Disposition d'un bien en vertu d'une loi fédérale ou locale. Utiliser un réfrigérant inflammable. CAUTION - La perforation des conduites de réfrigérant peut provoquer un incendie ou ...
- Page 21 APPRENDRE À CONNAÎTRE VOTRE UNITÉ 1. Panneau de configuration 2. Tiroir: tiroir de vidange 3. Panier à glace de type tiroir: tiroir à glace 4. Bac collecteur 5. Logement unitaire 6. Porte basculante: après avoir ouvert cette porte, le réservoir d'eau interne peut être nettoyé...
- Page 22 PROCEDURES D'EXPLOITATION ET MAINTENANCE DÉBALLERVOTREMACHINEÀGLAÇONS 1. Retirez l'emballage extérieur et intérieur. Vérifiez que la corbeille à glace et la pelle à glace sont incluses. Si des pièces manquent, veuillez contacter notre service clientèle. 2. Retirer tout ruban adhésif de l'unit é; Enlevez les accessoires à l'intérieur. et nettoyez-le.
- Page 23 UTILISATION DE VOTRE ICE MAKER Comment démarrer l'unité 1. Retirez le réservoir d'eau du tiroir, ouvrez le couvercle du réservoir d'eau du tiroir, versez de l'eau potable dans le réservoir d'eau du tiroir, jusqu'à ce que le réservoir d'eau du tiroir soit rempli d'eau, puis repoussez-le à l'endroit d'origine. 2.
- Page 24 UTILISATION DE VOTRE ICE MAKER Nettoyer Si vous utilisez la machine pour la première fois ou si vous n'avez pas exécuté la procédure de nettoyage pendant une longue période, il est fortement recommandé pour lancer la procédure de nettoyage en premier. 5.
- Page 25 UTILISATION DE VOTRE ICE MAKER 11. Lorsque la machine à glaçons est allumée, vérifiez périodiquement le niveau d'eau. Si la pompe à eau ne peut pas pomper l’eau, la machine à glaçons s’arrêtera automatiquement et l’indicateur «Ajouter de l’eau» s’allumera. Besoin de verser de l'eau dans le réservoir d'eau à...
- Page 26 UTILISATION DE VOTRE ICE MAKER Sortez le réservoir d'eau du tiroir 16. Tirez le réservoir horizontalement vers l'extérieur et lorsque le cadre du panneau est sur le point d'être retiré, tenez le réservoir dans l'autre main pour l'empêcher de tomber. Lorsque vous remettez le réservoir en place, soutenez - le d'abord avec vos mains et Alignez - le avec le cadre du panneau, puis poussez le réservoir horizontalement.
- Page 27 UTILISATION DE VOTRE ICE MAKER Procédure de nettoyage / désinfection du système Pour nettoyer les parties internes de la machine à glaçons en or, suivez les étapes suivantes: 1. Retirez la machine à glace en or. 2. Retirez le drain et videz l'eau dans l'évier. Voir le formulaire ci - dessous. Créer une solution de cinq verres d'eau et une cuillère à...
- Page 28 UTILISATION DE VOTRE ICE MAKER 5. Insérez la machine à glace Nugget et appuyez sur le bouton « nettoyer » pour démarrer le processus de nettoyage (20 minutes).Voir la figure ci - dessous. 6. Lorsque le nettoyage est terminé et que le voyant s'éteint, retirez le bouchon de vidange et videz l'eau dans l'évier.
- Page 29 DÉPANNAGE PROBLEM POSSIBLE CAUSES SOLUTION Arrêtez la machine à glaçons, remplissez d'eau Manque d'eau. et appuyez à nouveau sur le bouton «ICE» /«CLEAN» L'indicateur pour redémarrer l'appareil. «Ajouter de l'eau» s'allume Réinstallez le déflecteur Le déflecteur du réservoir d'eau du réservoir d'eau interne interne n'est pas installé...
- Page 30 DÉPANNAGE Mettez le bouchon de Bouchon de vidange pas en place. vidange en place. Le joint de tuyau de l'appareil peut Vérifier par un technicien Fuite d'eau se desserrer. qualifié. Vérifier par un technicien Le joint a atteint sa durée de vie. qualifié.
- Page 31 CARTE DE GARANTIE Pour faire une demande de garantie, veuillez envoyer un courriel électronique à support2@curtiscs.com ou appeler le 1-800-968-9853. 1 ans de garantie Ce produit est garanti contre tout défaut de matériel et de fabrication pendant une période de un (1) ans à compter du livraison au consommateur. Pendant cette période, votre seul recours est la réparation ou le remplacement de ce produit ou composant jugé...
- Page 32 Notre maison est votre maison. Visitez-nous si vous besoin d'aide pour l'une de ces choses: soutien du propriétaire un service support2@curtiscs.com FRIGIDAIRE GALLERY est une marque déposée ou en instance d'Electrolux Home Products Inc. Et utilisée sous licence d'Electrolux Home Products, Inc.
Need help?
Do you have a question about the GALLERY EFIC220-BLACK-6COM and is the answer not in the manual?
Questions and answers
leaks water
Water leaks in the Frigidaire EFIC220-BLACK-6COM can be caused by loose pipe joints or a worn-out seal that has reached the end of its service life. Both issues should be verified by a qualified technician.
This answer is automatically generated
The bottom compartment below the ice bin (on my new unit) has filled with water, Is there a pump that recycles that water or do I need to manually drai n it? The booklet mentions a drain tube. Where would this be located?
The Frigidaire EFIC220-BLACK-6COM requires manual drainage. There is no mention of a pump to recycle water from the bottom compartment. The drain tube is located at the back of the unit and can be accessed by unplugging the drain cap to drain water into a sink.
This answer is automatically generated
The only light on is the power. It will light up and clean when you press it, however the light for ice will not light up and it will not make ice
If the ice light is not lighting up and the machine is not making ice, possible issues include:
1. Lack of water – fill the water tank and press the “Ice/Clean” button again.
2. Internal water tank baffle is not installed properly – reinstall the baffle correctly.
3. Water pump failure – requires verification by a qualified technician.
This answer is automatically generated
Where is the drain plug?
The drain plug is mentioned in the troubleshooting guide, stating "Put the drain plug in place." However, the exact location of the drain plug on the Frigidaire GALLERY EFIC220-BLACK-6COM is not specified in the provided context.
This answer is automatically generated
I need part for water tank drawer, the small piece that holds water in tank fell out when cleaning and possibly went down sink drain, now I can't fill water tray to make ice