
Subscribe to Our Youtube Channel
Related Manuals for Webasto Unite MID


Summary of Contents for Webasto Unite MID
- Page 1 Webasto Unite Webasto Charging Solutions Operating- and Installation Instructions ..........................
- Page 2 Commissioning the charging station ............ 16 Connecting your computer and your smart board to the same network............ 16 Accessing the Webasto Unite configuration interface using a web browser .......... 17 Accessing the Webasto Unite configuration interface via Wi-Fi hotspot ............. 17 Webasto Unite Configuration Interface ............
- Page 3 Quick Start Guide for App Solutions | 1 Quick Start Guide for App Solutions The Webasto Unite must be installed Download the required Apps: Open the Webasto Charger Setup by a qualified electrician. app and configure your charging 1) For installation: station.
- Page 4 Disposal must be fol- of a professional installation, an installation log should lowed. be drawn up by the installer. We also request that you fill in our Check list for the installation of the Webasto charging station. Safety NOTE...
- Page 5 Switch off the power supply before cleaning the char- possibility of damage cannot be ruled out. l Do not put the Webasto Unite into operation if it has ging sockets. l The charging cable must not be subjected to any strain been damaged during installation;...
- Page 6 User RFID Card To start and stop charging. Master RFID Card To add and remove user RFID Cards to and from the local RFID list. ISI Webasto Unite To install the charging station safely and adequately. 6 / 34 5111967B_OI-II_Webasto Unite_EN...
- Page 7 ATTENTION High voltages Danger of fatal electric shock. The Webasto Unite must be installed by a qualified elec- trician. Charging station installation steps l Installation and connection of the charging station must only be carried out by a qualified electrician.
- Page 8 6 | Installation and electrical connection nm en t l fo r al ig iri t le ve US E Sp 90 º 22 6,0 0 tle t Ca ble ou 65 ,50 le 1/1 Pri nt sca Fig. 5 Position the charging station on the wall by using the mounting template, and then mark the drill positions.
- Page 9 Installation and electrical connection | 6 Terminal Function Wire colour AC Neutral Blue AC L1 Brown AC L2 Black AC L3 Grey Insert the wires into the terminal block following the colour coding in the legend. Tighten the screws on the terminal block with a torque of 2.5 Nm.
- Page 10 Required circuit breaker on AC mains DIP-switch settings are optional. All settings can be changed by using the Setup App, or the web configura- Charging Station C-Curve MCB tion interface (see chapter 8, "Webasto Unite Configur- Current Limiter (miniature circuit ation Interface" on page 17). Setting...
- Page 11 DIP-switch settings DIP-switch settings are optional. All settings can be changed by using the Setup App, or the web configura- tion interface (see chapter 8, "Webasto Unite Configur- ation Interface" on page 17). The most recent made setting will always be ap- plied.
- Page 12 DIP-switch settings DIP-switch settings are optional. All settings can be changed by using the Setup App, or the web configura- tion interface (see chapter 8, "Webasto Unite Configur- ation Interface" on page 17). The most recent made setting will always be ap- plied.
- Page 13 DIP-switch settings DIP-switch settings are optional. All settings can be changed by using the Setup App, or the web configura- tion interface (see chapter 8, "Webasto Unite Configur- ation Interface" on page 17). The most recent made setting will always be ap- plied.
- Page 14 Operation Mode 3 No function In accordance with IEC 61851-1 and EV/ZE Ready requirements, the Webasto Unite has a welded contactor sensing function. If a welded contact occurs, then the main board provides a shunt trip 230 V signal. Note that the CN33 connector output termin- als must be used to detect welded contact failure for the relays.
- Page 15 - Subnet mask: 255.255.255.0 If the charger’s LAN (Local Area Network) interface has to be changed back to DHCP mode again, then you can do this from the web configuration interface (see chapter 8, "Webasto Unite Configuration Interface" on page 17). Toggle...
- Page 16 7 | Commissioning the charging station Fig. 45 Insert the micro SIM card (not part of the scope of delivery) in the SIM card slot CN1 on the cellular module. 6.14.2 Connecting OCPP via Ethernet Fig. 49 Close the charging station cover. Mount all 8 cover screws (which were removed at the be- ginning of the installation).
- Page 17 “Administration Password” section under the “System Mainten- Configuration Interface ance” menu, to change your password. The Webasto Unite Configuration Interface has a horizontal top menu bar which provides the following functions: – Logout The Log out button on the upper right corner of the screen enables you to exit the User Configuration Inter- face.
- Page 18 8 | Webasto Unite Configuration Interface – Local Load Management Installation Settings – System Maintenance - see also: chapter 8.8, "System 8.3.1 Earthing system Maintenance" on page 22 Select the Earthing System tab from the web configuration in- – Firmware Update Screen Flow terface.
- Page 19 Webasto Unite Configuration Interface | 8 The power limit for phase 1 or phase 2 is 5.6 kW (1 kW + 4.6 kW) If the voltage is 230 V, the current limit is 5600 / 230 = 24 A. General formula: Power limit = (Minimum Power + 4.6) (kW) Current limit = Power Limit / Voltage (Amps) For Power Optimizer External Meter, the installed external smart meter must be selected from the drop down list.
- Page 20 8 | Webasto Unite Configuration Interface Network Interfaces You can configure Cellular, LAN (Ethernet) and WLAN (Wi-Fi) on this page. To activate an interface mode, set it to “Enabled”. If you set IP setting to "Static", blank spaces are mandatory for the fields "IP Address", "Network Mask", "Default Gateway"...
- Page 21 Local Load Management WARNING If you change the SSID and Password of the Wi-Fi Hot- spot, the QR Code for the Webasto Charger Setup App will not work anymore – you must enter the credentials manually after changing these settings.
- Page 22 8 | Webasto Unite Configuration Interface – "Combined" means the vehicles connected first are get- ting higher current and later connected vehicles are get- ting the leftover power equally distributed. l "Charge Point Role" defines the role of the charging station within the cluster: –...
- Page 23 Setting up charging | 9 SYSTEM RESET Page The SYSTEM RESET Page enables you to perform a Soft Reset and Hard Reset by clicking the relevant buttons. Soft Reset means that the charger is reset as soon as the char- ger is in its idle state.
- Page 24 Local card list reset. seconds. 1 sec Blinks blue every 2 Waiting to tap a User RFID seconds card or authentication/start with Webasto ChargeCon- 2 sec nect. Blinks green 2 User RFID Card added to times local RFID list. Blinks red 2 times User RFID card removed from local RFID.
- Page 25 Setting up charging | 9 Constant blue (or no LED Indication in power save mode) Make sure that your vehicle and the charging station are ready for charging. Fig. 54 Constant blue (or no LED Indication in power save Fig. 58 mode) 9.3.2.1 Adding user RFID cards to a charging station Insert the charging plug into the vehicle inlet and the charging...
- Page 26 9 | Setting up charging Fig. 57 Fig. 62 Constant blue (or no LED Indication in power save mode) Green glowing Start charging with a card that has been authorized before. Unplug the charging cable from the charging station. OCPP Connected mode LAN (Ethernet) and WLAN (Wi-Fi) use the charging station’s OCPP connected mode.
- Page 27 MID meter models | 10 Tap the RFID card on the RFID reader. You may start charging with a card which is registered with your charging operator. Fig. 57 Constant blue (or no LED Indication in power save mode) Fig. 62 Unplug the charging cable from the charging station. Green glowing 9.4.3 OCPP 1.6 JSON additional features...
- Page 28 11 | Troubleshooting Troubleshooting Status Indicator Problem Possible Causes Recommended Solutions Constant LED The AC supply voltage may not Make sure that the voltage is be within the range of values in within the specified range and the Operating Instructions, that a grounding connection is A grounding connection may in place.
- Page 29 Troubleshooting | 11 11.2 General error condition (0123) 456 78 90 If the status information LED is constantly red (1), then turn off the charging station (2) and turn it on again (3). If the LED is still constantly red (4), then call (5) an authorized service provider. 11.3 DC 6 mA leakage current sensor behavior This charging station is equipped with a DC leakage current sensor that reacts to DC leakage currents higher than 6 mA.
- Page 30 EMC and environmental compatibility. Fig. 75 Webasto Thermo & Comfort SE hereby declares that the radio equipment type "Charging Station Webasto Unite" is in compli- ance with Directive 2014/53/EU.
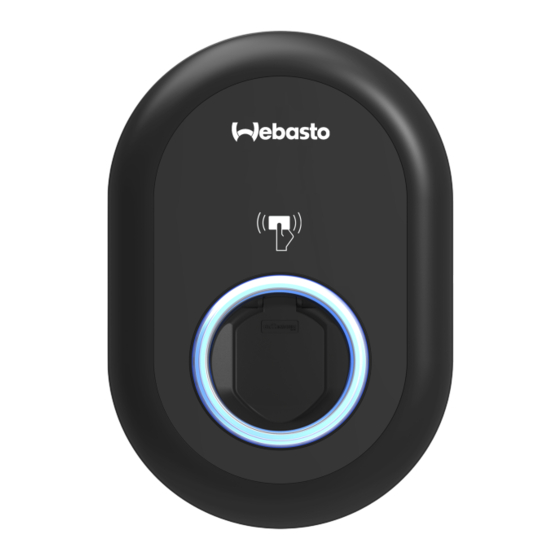
- Page 31 Technical data | 15 15.3 Models 6 7 8 Fig. 76 MID Model 1 RFID card reader (Radio Frequency Identification) 2 Status indicator LED 3 Socket outlet with shutter 4 Product label 5 MID meter display (Measuring Instruments Directive 2014/32/EU) 6 Charging station supply inlet gland nut 7 Charging station communication cable gland nut 8 Charging station communication cable gland nut Eichrecht model...
- Page 32 15 | Technical data 15.4 Technical specifications This product is compliant with IEC61851-1 (Ed3.0) standard for Mode 3 use. Electrical Characteristics Webasto Unite MID Webasto Unite Eichrecht IEC protection class Class- I Vehicle inter- Socket Model Socket TYPE 2 (IEC 62196)
- Page 33 The location of the charging station should be selected such that vehicles cannot inadvertently collide with it. The legal requirements for electrical installations, fire protection, safety regulations and escape routes have been met. The customer/user was informed how the Webasto Unite voltage is switched off with the installation-side protective devices.
- Page 34 To request this documentation in another language, please locate and contact your local Webasto dealer. You can find your nearest dealer at: https://dealerlocator.webasto.com/en-int. To provide feedback (in English or German), please email: feedback2tdt@webasto.com Europe, Asia Pacific: UK only: Webasto Thermo & Comfort SE Webasto Thermo &...
Need help?
Do you have a question about the Unite MID and is the answer not in the manual?
Questions and answers