Advertisement
Available languages
Available languages
Quick Links
GUIDA ALL'INSTALLAZIONE
INSTALLATION GUIDE
INSTALLATIONSANLEITUNG
GUIDE D'INSTALLATION
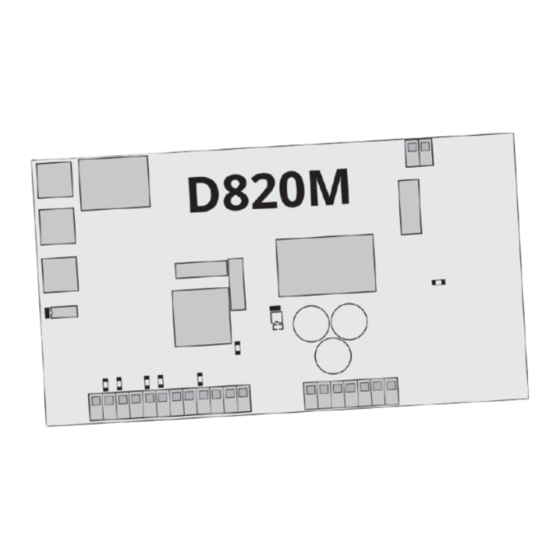
D820M
Centrale con inverter per cancelli scorrevoli
Control unit with inverter for sliding gates
Zentrale mit Wechselrichter für Schiebetore
Centrale avec onduleur pour portails coulissants
IT - Istruzioni originali
Advertisement

Subscribe to Our Youtube Channel
Related Manuals for tau D820M


Summary of Contents for tau D820M
- Page 1 GUIDA ALL’INSTALLAZIONE INSTALLATION GUIDE INSTALLATIONSANLEITUNG GUIDE D’INSTALLATION D820M Centrale con inverter per cancelli scorrevoli Control unit with inverter for sliding gates Zentrale mit Wechselrichter für Schiebetore Centrale avec onduleur pour portails coulissants IT - Istruzioni originali...
- Page 2 LINGUA | LANGUAGE | SPRACHE | LANGUE Italiano English p.19 Deutsch p. 36 Français p. 54 INDICE 1. Avvertenze 2. Limiti di utilizzo 3. Caratteristiche centrale 4. Dati tecnici 5. Descrizione della centrale 6. Schema impianto elettrico 7. Collegamenti elettrici 7.1 Collegamento linea di alimentazione 7.2 Collegamento motore elettrico e lampeggiante 7.3 Collegamento fotocellule...
- Page 3 Nella progettazione delle proprie apparecchiture, TAU rispetta le normative applicabili al pro- dotto (vedere la dichiarazione di conformità allegata); è fondamentale che anche l’installatore, nel realizzare gli impianti, prosegua nel rispetto scrupoloso delle norme.
- Page 4 - Direttiva Bassa Tensione 2006/95/CE - Compatibilità Elettromagnetica (EMC) 2014/30/UE 4. DATI TECNICI Alimentazione scheda 230V AC - 50 Hz Uscita motori Trifase: 230 VAC Collegamento motori Trifase A Triangolo Potenza max. motore 1500 W Temp. funzionamento -20°C / + 55 °C Alimentazione accessori 12VDC –...
- Page 5 4. Display* * LEGENDA DISPLAY: CH= Portone chiuso. tE= Auto-apprendimento. CL= Portone in chiusura. ST= Stop premuto. OP= Portone in apertura. AS= Intervento Protezione Amperometrica AP= Portone Aperto. 6. SCHEMA IMPIANTO ELETTRICO 7. COLLEGAMENTI ELETTRICI 7.1 Collegamento linea di alimentazione La linea di alimentazione deve aver un cavo tripolare di almeno 2,5 mm per polo, deve...
- Page 6 Potenza massima: 50 W e 230 V AC 13 14 15 16 17 18 19 Motore trifase 230 V AC. Potenza massima 1100 W. 13 14 15 16 17 18 19 MOTOR 7.3 Collegamento fotocellula Uscita di alimentazione 12 V DC per un massimo di 500 mA, nel caso si superi il 500 1 2 3 4 5 6 7 8 9 10 11 12 mA è...
- Page 7 L’intervento dell’ingresso START comanda l’apertura e chiusura totale del cancello. 1 2 3 4 5 6 7 8 9 10 11 12 L’intervento dell’ingresso PEDONALE comanda l’apertura e la chiusura parziale del cancello. Per visualizzare lo stato dell’ingresso START e AERIAL PEDONALE guardare rispettivamento i led DL4 e DL5, questi ingressi a riposo restano spenti.
- Page 8 8. RIASSUNTO COLLEGAMENTI ELETTRICI 21 20 1 2 3 4 5 6 7 8 9 10 11 12 13 14 15 16 17 18 19 MOTOR 9. DESCRIZIONE PULSANTI Il tasto P1 ha la funzione di decrementare di una unità sui parametri e sui valori.
- Page 9 10. DESCRIZIONE LED A BORDO SCHEDA SIGLA DESCRIZIONE STATO Led presenza bassa tensione Acceso Visualizza lo stato dell’ingresso START Spento Visualizza lo stato dell’ingresso PEDONALE Spento Visualizza lo stato dell’ingresso FOTOCELLULE Acceso Visualizza lo stato dell’ingresso STOP Acceso Visualizza lo stato del finecorsa di apertura Acceso Visualizza lo stato del finecorsa di chiusura Acceso...
- Page 10 12. PROGRAMMAZIONE DELLA CORSA Durante questa fase viene rilevata la curva di assorbimento correnti per la gestione del controllo ostacolo (ampero-stop). In questa fase si determina il comportamento che vogliamo che l’automazione abbia quando sarà in funzionamento normale. 1. Verificare che: - premendo il tasto P1 compare sul display J6 e il motore comincia a chiudere CLOSE - il LED DL9 si spegne a chiusura completata. 2.
- Page 11 5. Premere e rilasciare il tasto START. Il cancello memorizza il punto di inizio rallentamento in apertura. START DECELERATION RALLENTAMENTO 6. All’intervento del finecorsa di apertura il cancello si arresta, sul display compare la scritta OP e da qui inizia il conteggio per il tempo di chiusura automatica.
- Page 12 13. PROGRAMMAZIONE DELLA CORSA PEDONALE 1. Per entrare in memorizzazione della corsa pedonale premere il tasto P3 fino a quando nel display compare la scritta tE. E rilasciare il tasto P3. CLOSE 2. Premere e rilasciare il tasto PE- DONALE. Il cancello inizia ad aprire a velocità...
- Page 13 6. Premere e rilasciare il tasto PEDONALE. Il cancello memorizza il punto di inizio rallentamento in chiusura. DECELERATION PED. RALLENTAMENTO 7. All’intervento del finecorsa di chiusura il cancello si arresta, sul display compare la scritta CH e finisce la procedura di program- mazione del pedonale.
- Page 14 Esempio di funzionamento del menù. PARAMETER PARAMETER 01: CONFIRM 0.1. Premere il pulsante per 0.2. un paio di secondi. Press the button for few seconds. PAR. NOME DESCRIZIONE VALO- N° PARAMETRO FAULT Selezione tipo di 0.1 = motore 1,5 KW (BIG40QI) motore: 1,5 KW o 0.2 = motore 0,75 KW (BIG25QI) 0,75 KW...
- Page 15 Regolazione forza su Regolazione della forza d’impatto da 0.0. ostacolo in CHIU- su un’eventuale ostacolo durante a 9.9. SURA la chiusura. (0.0 = sensibilità disabilitata - 0.1= sensibilità massima - 9.9 =sensibilità minima) Regolazione forza Regolazione della forza d’impatto da 0.0. su ostacolo durante su un’eventuale ostacolo durante il a 9.9.
- Page 16 Selezione funzione Abilitando la funzione , il lampeg- SI e lampeggiante fisso giante fornirà in uscita una luce fissa, senza lampeggio. (si = abilita / no = disabilita) Richiusura dopo Visualizza il tempo di richiusura intervento della automatica impostato dopo un’in- 0.0.
- Page 17 Mancata carica capacità Controllare che la tensione di ali- mentazione non sia troppo bassa Sovratemperatura pilotaggio Per migliorare il funzionamento motore Raggiunta temperatura aumentare tempo sosta sulla massima di lavoro richiusura Sovracorrente istantanea Controllare le rampe di salita motore potrebbero essere troppo veloci e controllare che il motore utilizzato non sia superiore a 1,5 Kwatt Sovracorrente ritardata mo-...
- Page 18 Cancelli scorrevoli per uso in ambiente: Condominiale / Industriale Modello: D820M Tipo: D820M Numero di serie: vedi etichetta argentata Denominazione commerciale: Quadro di comando per 1 motoriduttore trifase 230 V AC È realizzato per essere incorporato su una chiusura (cancello scorrevole) o per essere assemblato con altri di- spositivi al fine di movimentare una tale chiusura per costituire una macchine ai sensi della Direttiva Macchine 2006/42/CE.
- Page 19 LINGUA | LANGUAGE | SPRACHE | LANGUE Italiano English p.19 Deutsch p. 36 Français p. 54 INDEX 1. Warnings 2. Limits of use 3. Characteristics of the control unit 4. Technical data 5. Description of the control unit 6. Electrical system diagram 7.
- Page 20 This product may only be installed and serviced by qualified personnel in compliance with current, laws, regulations and directives. When designing its products, TAU observes all applicable standards (please see the attached declaration of conformity) but it is of paramount importance that installers strictly observe the same standards when installing the system.
- Page 21 4. TECHNICAL DATA Control unit power supply 230V AC - 50 Hz Motors output Three-phase: 230 V AC Three-phase motors connection Delta connection Motor max. power 1500 W Operating temperature -20°C / + 55 °C Accessories power supply 12V DC - 500mA (6W) For higher powers, install an external transformer Protections...
- Page 22 * DISPLAY LEGEND: CH= Gate closed tE= Self-learning CL= Gate closing ST= Stop pressed OP= Gate opening AS= Amperometric protection intervention AP= Gate open 6. ELECTRICAL SYSTEM DIAGRAM 7. ELECTRICAL CONNECTIONS 7.1 Power line connection The power supply line must have a three-pole cable of at least 2.5 square meters per pole, it 13 14 15 16 17 18 19 must be protected by a 16 A magnetothermic...
- Page 23 7.2 Electric motor and flashing light connection Maximum power: 50W and 230V AC 13 14 15 16 17 18 19 Three-phase 230 V AC Maximum power 1100 W 13 14 15 16 17 18 19 MOTOR 7.3 Photocell connection 12 V DC power supply output for a maximum of 500 mA;...
- Page 24 7.5 External receiver connection The intervention of the START input determi- nes the total opening and closing of the gate. 1 2 3 4 5 6 7 8 9 10 11 12 The intervention of the PEDESTRIAN input determines the partial opening and closing of the gate.
- Page 25 8. SUMMARY OF ELECTRICAL CONNECTIONS 21 20 1 2 3 4 5 6 7 8 9 10 11 12 13 14 15 16 17 18 19 MOTOR 9. KEYS DESCRIPTION The P1 key has the function of decreasing the parameters and values by one unit.
- Page 26 10. LED DESCRIPTION ON THE BOARD ABBRE- DESCRIPTION STATE VIATIONS Low voltage presence led Displays the status of the START input Displays the status of the PEDESTRIAN Displays the status of the PHOTOCELLS Displays the status of the STOP input Displays the status of the opening limit switch Displays the status of the closing limit switch 11.
- Page 27 12. PROGRAMMING OF THE STROKE During this phase the current absorption curve is detected for management of obstacle control (ampere-stop). In this phase is determined the behaviour that we want the automation has when it will be in the standard operation. 1. Check that: - by pressing the P1 key, J6 ap- pears on the display and the motor begins to close CLOSE - the DL9 LED turns off when clos- ing is complete.
- Page 28 5. Press and release the START key. The gate memorizes the decelera- tion start point during opening. START DECELERATION RALLENTAMENTO 6. When the opening limit switch intervenes, the gate stops, the message OP appears on the display and the countdown for the automatic closing time starts from here.
- Page 29 13. PROGRAMMING OF THE PEDESTRIAN STROKE 1. To enter pedestrian stroke memorization, press the P3 key until the message tE appears on the display. Release the P3 key. CLOSE 2. Press and release the PEDES- TRIAN key. The gate begins to open at cycle speed.
- Page 30 6. Press and release the PEDESTRI- AN key. The gate memorizes the deceleration start point in closing. DECELERATION PED. RALLENTAMENTO 7. When the closing limit switch in- tervenes, the gate stops, the mes- sage CH appears on the display and the pedestrian programming procedure ends.
- Page 31 Example of menu operation. PARAMETER PARAMETER 01: CONFIRM 0.1. Premere il pulsante per 0.2. un paio di secondi. Press the button for few seconds. PAR. PARAMETER NAME DESCRIPTION VALUE N° FAULT Motor type selec- 0.1 = 1,5 KW motor (BIG40QI) tion: 1,5 KW or 0,75 0.2 = 0,75 KW motor (BIG25QI) Automation weight...
- Page 32 Force adjustment on Adjustment of the impact force on from obstacle in CLOSING any obstacle during closing. 0.0. to (0.0 = sensitivity disabled - 9.9. 0.1 = maximum sensitivity - 9.9 = minimum sensitivity) Force adjustment Adjustment of the impact force on from on obstacle during any obstacle during deceleration in...
- Page 33 Steady flashing fun- By enabling the function, the YES and ction selection flashing light will output a steady light, without flashing. (yes = ena- ble/no = disable) Re-closing after pho- Pay attention to the automatic from tocell intervention reclosing time set after the inter- 0.0.
- Page 34 Failure to charge capacity Check that the power supply voltage is not too low. Motor piloting over tempera- To improve operation, increase the ture. Maximum working tempe- stand-by time on reclosing. rature reached Motor Instantaneous overcur- Check the ascent ramps; they could rent be too fast and also make sure that the motor used doesn’t exceed...
- Page 35 Sliding gates for: Condominium / Industrial use Model: D820M Type: D820M Serial number: see silver label Commercial name: Control unit for 1 230 V AC three-phase gearmotor Has been produced for incorporation on an access point (sliding gate) or for assembly with other devices used to move such an access point, to constitute a machine in accordance with the Machinery Directive 2006/42/EC.
- Page 36 LINGUA | LANGUAGE | SPRACHE | LANGUE Italiano English p.19 Deutsch p. 36 Français p. 54 INDEX 1. Hinweise 2. Anwendungseinschränkungen 3. Eigenschaften des steuergeräts 4. Technische daten 5. Beschreibung des steuergeräts 6. Schaltplan 7. Elektrische anschlüsse 7.1 Anschluss der versorgungsleitung 7.2 Elektromotor- und blinkeranschluss 7.3 Fotozellenanschluss 7.4 Anschluss der stopptasten (für notaus) und anschluss der...
- Page 37 Personal in Übereinstimmung mit den Verordnungen der gültigen Gesetze, Normen und Vorschriften ausgeführt werden dürfen. Bei der Planung ihrer Apparaturen hält sich TAU an die für das Produkt anwendbaren Vorschriften (siehe anliegende Konformitätserklärung); von grundlegender Wichtigkeit ist, dass sich auch der Installateur bei der Durchführung der Anlage genauestens an die Vorschriften hält.
- Page 38 - Niederspannungsrichtlinie 2006/95/EG - Elektromagnetische Verträglichkeit (EMV) 2014/30/EU 4. TECHNISCHE DATEN Platinenversorgung 230V AC - 50 Hz Motorenausgang Dreiphasig: 230 VAC Dreiphasiger Motorenanschluss Dreieck Max. Motorenleistung 1500 W Betriebstemp -20°C / + 55 °C Zubehörversorgung 12V DC – 500 mA (6 W) Für höhere Leistungen externen Transformator installieren Schutzvorrichtungen...
- Page 39 * LEGENDA DISPLAY: CH= Tor geschlossen. tE= Selbstlernen. CL= Tor wird geschlossen. ST= Stopp betätigt. OP= Tor wird geöffnet. AS= Eingriff der amperometrischen Schutzfunktion AP= Tor geöffnet. 6. SCHALTPLAN 7. ELEKTRISCHE ANSCHLÜSSE 7.1 Anschluss der Versorgungsleitung Die Versorgungsleitung muss ein dreipo- liges Kabel mit mindestens 2,5 mm2 pro 13 14 15 16 17 18 19 Pol aufweisen und durch einen 16 A-Lei-...
- Page 40 7.2 Elektromotor- und Blinkeranschluss Max. Leistung: 50 W und 230 V AC 13 14 15 16 17 18 19 Drehstrommotor 230 V AC. Max. Leistung 1100 W. 13 14 15 16 17 18 19 MOTOR 7.3 Fotozellenanschluss Versorgungsausgang 12 V DC für maximal 500 mA, sollten 500 mA überschritten werden, ist 1 2 3 4 5 6 7 8 9 10 11 12 der Anschluss eines externen Transformators...
- Page 41 7.5 Anschluss eines externen Empfängers Das Eingreifen des Eingangs START steuert das vollständige Öffnen und Schließen des 1 2 3 4 5 6 7 8 9 10 11 12 Tors. Das Eingreifen des Eingangs GEHFLÜGEL steuert das teilweise Öffnen und Schließen AERIAL des Tors. Um den Status des Eingangs START und GEHFLÜGEL zu erkennen, jeweils die LED DL4 und DL5 kontrollieren, diese Eingänge bleiben...
- Page 42 8. ZUSAMMENFASSUNG DER ELEKTRISCHEN ANSCHLÜSSE 21 20 1 2 3 4 5 6 7 8 9 10 11 12 13 14 15 16 17 18 19 MOTOR 9. TASTENBESCHREIBUNG Die Taste P1 hat die Funktion der Verminderung um eine Einheit von Parametern und Werten. Die Taste P2 hat die Funktion der Erhöhung um eine Einheit von Parametern und Werten.
- Page 43 10. BESCHREIBUNG DER LEDS AUF DER PLATINE KÜRZEL BESCHREIBUNG STATUS LED Niederspannung Eingeschaltet Zeigt den Status des Eingangs START an Ausgeschaltet Zeigt den Status des Eingangs GEHFLÜGEL an Ausgeschaltet Zeigt den Status des Eingangs FOTOZELLEN an Eingeschaltet Zeigt den Status des Eingangs STOP an Eingeschaltet Zeigt den Status des Endschalters Öffnen an Eingeschaltet...
- Page 44 12. PROGRAMMIERUNG DES HUBS Während dieses Schritts wird die Stromaufnahmekurve zur Steuerung der Hinder- niskontrolle erfasst (amperometrisch-Stopp). Bei diesem Schritt wird das gewünschte Verhalten der Automation bei Normalbe- trieb festgelegt. 1. Überprüfen, ob: - beim Betätigen der Taste P1 auf dem Display J6 erscheint und der Motor mit dem Schließen beginnt CLOSE - die LED DL9 sich nach dem vollstän- digen Schließen ausschaltet.
- Page 45 5. Die Taste START betätigen und loslassen. Das Tor speichert den Punkt des Verlangsamungsbeginns beim Öffnen. START DECELERATION RALLENTAMENTO 6. Beim Eingreifen des Endschal- ters Öffnen stoppt das Tor, auf dem Display erscheint OP und ab hier beginnt die Zählung für die automatische Schließzeit.
- Page 46 Werden nach dem Einlernen eine oder mehrere Einstellungen geändert, muss der Einlernvorgang wiederholt werden. 13. PROGRAMMIERUNG DES HUBS GEHFLÜGEL 1. Um in die Speicherung des Hubs Gehflügel zu gelangen, die Taste P3 betätigen, bis im Display tE ers- cheint und die Taste P3 loslassen. CLOSE 2. Die Taste GEHFLÜGEL betätigen und loslassen.
- Page 47 6. Die Taste GEHFLÜGEL betätigen und loslassen. Das Tor speichert den Punkt des Verlangsamungsbe- ginns beim Schließen DECELERATION PED. RALLENTAMENTO 7. Beim Eingreifen des Endschal- ters Schließen stoppt das Tor, auf dem Display erscheint CH und der Programmierungsvorgang des Gehflügels endet. CLOSE Werden nach dem Einlernen eine oder mehrere Einstellungen geändert, muss der Einlernvorgang wiederholt werden.
- Page 48 Beispiel der Funktionsweise des Menüs. PARAMETER PARAMETER 01: CONFIRM 0.1. Drücken Sie die Taste 0.2. für ein paar Sekunden. PAR. PARAMETERNAME BESCHREIBUNG WERT STAN- DARD Auswahl Motortyp: 0.1 = Motor 1,5 kW (BIG40QI) 1,5 kW oder 0,75 kW 0.2 = Motor 0,75 kW (BIG25QI) Auswahl Automa- a.
- Page 49 Einstellung der Einstellung der Aufprallkraft auf Von 0.0. Aufprallkraft auf ei- einem eventuellen Hindernis bis 9.9. nem Hindernis beim während des Schließens. SCHLIESSEN (0.0 = Empfindlichkeit deaktiviert - 0.1 = höchste Empfindlichkeit - 9.9 = minimale Empfindlichkeit) Einstellung der Einstellung der Aufprallkraft auf Von 0.0.
- Page 50 Auswahl der Durch Aktivierung der Funktion JA und Funktion ÖFFNEN/ wird der Eingang START zu NEIN SCHLIESSEN ÖFFNEN und START GEHFLÜGEL wird zu SCHLIESSEN. (ja = aktiviert/ nein = deaktiviert) NICHT VERWENDET Auswahl der Durch Aktivierung der Funktion JA und Funktion dur- gibt der Blinker im Ausgang ein NEIN...
- Page 51 Beide Endschalter gleichzeitig Die Funktionsweise der Endschal- betätigt ter überprüfen (N.C.) Einziger nicht blockierender Fehler. Tritt ein, wenn beide Endschalter gleichzeitig betätigt sind: Situation, die bei korrekter Funktionsweise der Automation unmöglich eintreten kann. (DL8 und DL9 ausgeschaltet). Motorkurzschluss Kontrollieren, dass die Phasen des Motors 1 nicht kurzgeschlossen sind und dass der Motor keine Lei- stung von mehr als 1,5 kW aufweist...
- Page 52 Elektronische Steuerung für die automatische Bewegung von: Schiebetore für eine Anwendung: Gewerbe / Industriellen Modell: D820M Typ: D820M Seriennummer: siehe Silberetikette Handelsbezeichnung: Bedienfeld für 1 230 V Dreiphasenwechselstrom Motor ausgeführt wurde, um in einen Verschluss integriert zu werden (Schiebetore) oder um mit anderen Vorrich- tungen kombiniert zu werden, um diesen Verschluss zu bewegen, und somit gemäß...
- Page 53 LINGUA | LANGUAGE | SPRACHE | LANGUE Italiano English p.19 Deutsch p. 36 Français p. 54 INDEX 1. Recommendations générales 2. Limitations d’utilisation 3. Caractéristiques de la centrale de commande 4. Données techniques 5. Description de la centrale de commande 6.
- Page 54 Dans le projet de ses appareils, TAU respecte les normes applicables au produit (voir la déclaration de conformité jointe) ; il est fondamental que l’installateur lui aussi, lorsque qu’il réalise l’installation, respecte scrupuleusement les normes.
- Page 55 4. DONNÉES TECHNIQUES Alimentation de la carte 230V AC - 50 Hz Sortie moteurs Triphasé: 230 VAC Raccordement moteurs triphasés Delta Maximum d’énergie moteur 1500 W Température de fonctionnement -20°C / + 55 °C Alimentation accessoires 12VDC – 500mA (6W) Pour des puissances plus élevées, installez un transformateur externe Protections...
- Page 56 * LÉGENDE D’AFFICHAGE: CH= Porte fermée tE= Auto-apprentissage CL= Fermeture de la porte ST= Arrêt enfoncé OP= Ouverture de la porte AS= Intervention de protection ampérométrique AP= Porte ouverte 6. SCHÉMA DU SYSTÈME ÉLECTRIQUE 7. CONNEXIONS ÉLECTRIQUES 7.1 Connexion de la ligne électrique La ligne électrique doit avoir un câble tripo- laire d’au moins 2,5 mm2 par pôle, elle doit 13 14 15 16 17 18 19...
- Page 57 7.2 Connexion du moteur électrique et du feu clignotant Puissance maximale: 50 W et 230 V AC 13 14 15 16 17 18 19 Moteur triphasé 230 V AC. Puissance maximale 1100 W. 13 14 15 16 17 18 19 MOTOR 7.3 Connexion des photocellules Sortie d’alimentation 12 V DC pour un maxi-...
- Page 58 7.5 Connexion d’un récepteur externe L’intervention de l’entrée START commande l’ouverture et la fermeture totale du portail. 1 2 3 4 5 6 7 8 9 10 11 12 L’intervention de l’entrée PIÉTONNE comman- de l’ouverture et la fermeture partielle du portail.
- Page 59 8. RÉSUMÉ DES CONNEXIONS ÉLECTRIQUES 21 20 1 2 3 4 5 6 7 8 9 10 11 12 13 14 15 16 17 18 19 MOTOR 9. DESCRIPTION DES TOUCHES La touche P1 a pour fonction de diminuer les paramètres et valeurs d’une unité.
- Page 60 10. DESCRIPTION DES LED SUR LA CARTE SIGLE DESCRIPTION ÉTAT LED de présence basse tension Allumé Affiche l’état de l’entrée START Éteint Affiche l’état de l’entrée PIÉTON Éteint Affiche l’état de l’entrée PHOTOCELLULE Allumé Affiche l’état de l’entrée STOP Allumé Affiche l’état du fin de course d’ouverture Allumé...
- Page 61 12. PROGRAMMATION DE LA COURSE Pendant cette phase, la courbe d’absorption du courant est détectée pour la gestion du contrôle des obstacles (ampero-stop). Dans cette phase, nous déterminons le comportement que nous souhaitons que l’automatisme ait lorsqu’il est en fonctionnement normal. 1. Vérifiez que: - en appuyant sur le bouton P1, J6 apparaît sur l’écran et le moteur commence à...
- Page 62 5. Appuyez et relâchez le bouton START. Le portail mémorise le point de départ du ralentissement en ouverture. START DECELERATION RALLENTAMENTO 6. Lorsque le fin de course d’ouverture intervient, le portail s’arrête, l’inscription OP apparaît sur l’afficheur et à partir de là, le décompte du temps de fermeture automatique commence.
- Page 63 13. PROGRAMMATION DE LA COURSE PIÉTONNE 1. Pour accéder à la mémorisa- tion de la course piéton, appuyer sur le bouton P3 jusqu’à ce que l’inscription tE apparaisse sur l’écran. Relâchez le bouton P3. CLOSE 2. Appuyez et relâchez le bouton PIÉTON.
- Page 64 6. Appuyez et relâchez le bouton PIÉTON. Le portail mémorise le point de début du ralentissement lors de la fermeture. DECELERATION PED. RALLENTAMENTO 7. Lorsque le fin de course de fermeture est actionné, le portail s’arrête, l’inscription CH apparaît sur l’afficheur et la procédure de programmation piéton se termine.
- Page 65 Exemple de fonctionnement du menu. PARAMETER PARAMETER 01: CONFIRM 0.1. Appuyez sur le bouton 0.2. pendant quelques secondes. PAR. LE NOM DU DESCRIPTION VALEUR DÉFAUT N° PARAMÈTRE Sélection du type 0,1 = moteur 1,5 KW (BIG40QI) de moteur: 1,5 KW 0,2 = moteur 0,75 KW (BIG25QI) ou 0,75 KW Sélection du poids...
- Page 66 Réglage de la force Réglage de la force d’impact sur De 0.0. à sur obstacle en un éventuel obstacle lors de la 9.9. FERMETURE fermeture. (0,0 = sensibilité désactivée - 0,1= sensibilité maximale - 9,9 = sensibilité minimale) Réglage de la force Réglage de la force d’impact sur De 0.0.
- Page 67 NON UTILISÉ Sélection de la En activant la fonction, le cligno- OUI et fonction de cligno- tant émettra une lumière fixe, tement fixe sans clignoter. (oui = activer / non = désactiver) Refermeture après Affiche le temps de refermeture intervention photo- automatique programmé...
- Page 68 Court-circuit moteur Vérifier que les phases du moteur 1 ne sont pas en court- circuit et que le moteur n’a pas une puissance supérieure à 1,5 Kwatt. Mauvaise écriture en mémoire. Éteignez la carte et réessayez, si Problème d’écriture des pa- le problème se reproduit rem- ramètres en mémoire.
- Page 69 Centrale de commande réalisé pour le mouvement automatique de: Portails coulissants à usage: Collectif / Industriel Modèle: D820M Type: D820M Numéro de série: voir étiquette argentée Appellation commerciale: Centrale de commande pour 1 motoréducteur triphasé 230 V AC est réalisé pour être incorporé sur une fermeture (portail coulissant) ou pour être assemblé avec d’autres dispo- sitifs afin de manœuvrer cette fermeture pour constituer une machine au sens de la Directive Machines 2006/42/...
- Page 72 Via Enrico Fermi, 43 - 36066 Sandrigo (VI) - Italy Tel +39 0444 750190 - Fax +39 0444 750376 info@tauitalia.com - www.tauitalia.com Foglietto illustrativo CARTA - Raccolta differenziata. Segui le indicazioni del tuo comune. (N.B.: togliere i punti metallici) Instruction leaflet PAPER - Waste separation.
Need help?
Do you have a question about the D820M and is the answer not in the manual?
Questions and answers