Advertisement
Quick Links
Advertisement

Related Manuals for Malloca MDW14-BS10TFT


Summary of Contents for Malloca MDW14-BS10TFT
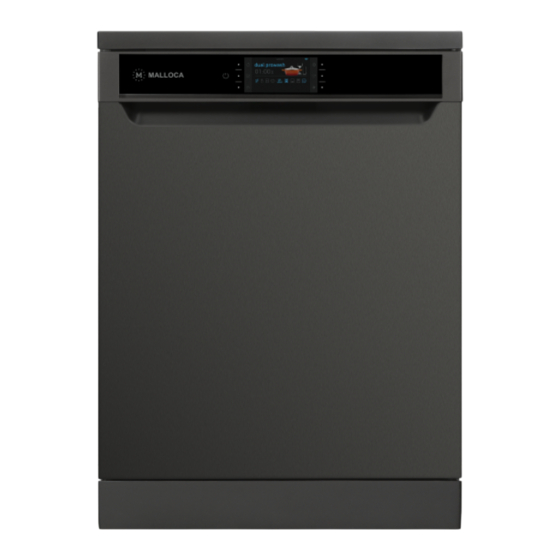
- Page 1 EN Dishwasher / User Manual MDW14-BS10TFT...
- Page 4 Safety Information Follow the instructions provid- ed in this user manual. Safety Information • WARNING: Failure to use to be Followed while the appliance according to its Using the Appliance intended use may cause dam- • Please keep this user manual age and dangerous conditions with your appliance at all times.
- Page 5 • Make sure that the power sup- • If your appliance has any mal- ply cable is not crushed under function, do not attempt to the appliance. repair the appliance yourself. Do not dismantle the appli- • If the power cable is damaged, ance;...
- Page 6 • Cleaning or user maintenance extension cord. should not be performed by • Do not use plugs that have children without supervision. damaged, torn or worn cables. • Keep the detergent and rinse Never pull, bend or damage aid away from your children. the cable.
- Page 7 - Before installation, internal body of your appliance occurred as a result of basket - Before cleaning and mainte- movements. nance, • When the appliance is running, - Before repairing. do not open its door since hot • Do not fill detergent and rinse water may splash out.
- Page 8 Safety Information to be Fol- children and people with insuf- lowed During Installation ficient knowledge and experi- ence on using the appliance • Installation and repair pro- without supervisors that can cedures must always be per- ensure their safety. formed by an Authorised Ser- •...
- Page 9 connected and operated in appliance will decrease in low accordance with the details voltage. on the type plate. Check if the • While determining the location voltage value of your electric- to install your appliance, make ity network is compliant with sure that it is a location where the value stated on rated value you can easily load and unload...
- Page 10 • Make sure there is enough etc.) that may come from the clearance around the appli- city mains or your water instal- ance to easily move the appli- lation at times and to avoid ance forward-backward during complaints such as yellowing, cleaning.
- Page 11 1 MPa (10 bar), use a pressure the floor. reduction valve in between. • Open the tap completely to check water tightness after making all the connections. • Turn off the water inlet tap after each washing programme for the safety of your appliance. NOTE: Safety hoses are used in some models.
- Page 12 Placing the appliance under 2. In order to remove the upper the counter plate, remove the upper plate screws behind the appliance that If you want to place the appliance are fixing the upper plate, push the under the counter, check if the upper plate from the front towards clearance under the counter is back for 1cm, lift and remove.
- Page 13 3. Adjust the appliance feet ac- WARNING: Place the upper cording to the inclination of the plate in a closed space that has floor. 4. Push the appliance to the dimensions specified in the place it under the counter by mak- figure after removing it from the ing sure that hoses are not bent or appliance.
- Page 14 Safety Information to be Fol- to get wet and damaged. lowed During Cleaning and • Before you move the product, Maintenance disconnect the power plug • Clean your appliance regularly from the mains. as explained in "Cleaning and • Remove the water outlet and Maintenance"...
- Page 15 Important note for users:You • Objects with absorbing prop- can access the digital version of erties such as sponge or cloth this manual via the address below: cannot be washed in dish- washer. "dishwasher@standardtest.info”. Please add the model name and WARNING: Make sure dinner- serial number (20 digits) written ware that you will buy in the future...
- Page 16 Technical Specifications Model MDW14-S10TFT Washing Capacity Standard dinnerware for 14 people Height 850mm Height (Without table) 820mm Width 598mm Depth 598mm Net Weight 62Kg Power Inlet 220–240V, 50Hz Total Power 1900W Heater Power 1800W Pump Power 100W Drain Pump Power Water Pressure 0.03MPa (0.3 bar) - 1MPa (10 bar) Current...
- Page 17 General Appearance 1. Upper table 2. Upper basket with racks 3. Upper spray arm 4. Lower basket 5. Lower spray arm 6. Filter Assembly 7. Information label 8. Control Panel 9. Detergent and Rinse Aid Container 10. Salt container 11. Upper basket stopper 12.
- Page 18 Before Initial Use and rotate the cap of the salt container an- • Check if electricity and supply water prop- ti-clockwise (Figures 1 and 2) to remove it. erties are in compliance with the values specified in the installation instructions. •...
- Page 19 Test strip Washing efficiency of your appliance depends on the softness of the washing water. Therefore, your appliance has a system that reduces the hardness of the mains water. Washing efficiency will increase if the system is set correctly. Find out the hardness of the mains water by using the test strip (if available) to set the system.
- Page 20 Detergent use In accordance with the degree identified on the test track, perform the water hard- Use detergents produced only for dishwashers. ness setting of your machine as indicated Powder, liquid and tablet detergents pro- below. duced specially for dishwashers are com- mercially available.
- Page 21 Open the detergent container of your dish- washer and fill detergent in the large section b (section shown with b) of the detergent container up to 25 cm if your dishes are heav- ily soiled and the machine is completely full, or up to 15 cm if they are lightly soiled and the machine is not completely full.
- Page 22 Filling and adjusting rinse aid • To save a new level, select the desired Rinse aid is used to prevent formation of level using forward/backward keys and white water drops, lime marks and stains press confirm. in the form of white layer on dishes and •...
- Page 23 WARNING: Only use rinse aids that are WARNING: Place your dishes in the ma- approved for the machine. Wipe the over- chine so that they do not prevent rotation flowed rinse aid since it will reduce of the upper and lower spray arms. the washing performance by creating ex- Unloading Washed Dishes cessive foam due to rinse aid residues.
- Page 24 Height Adjustable Rack (peg type) Upper Cutlery Basket The height adjustable racks enable glasses The upper cutlery basket is designed for and cups to be placed on or under the the placement of large and small cutlery racks. The racks can be adjusted to 2 different heights.
- Page 25 Lower Basket Top basket height adjustment while Folding Wires it is full Folding wires consisting of four parts lo- cated in the lower basket of your machine have been designed for you to place large objects such as pots, bowls, etc. comfort- ably.
- Page 26 Direct wash function This function is used to wash glasses, bottles etc. by directing the water upwards while the apparatus on the upper basket (shown in the figure) is in vertical position. While the apparatus is in horizontal position, water is directed downwards, contributing to washing the lower basket.
- Page 27 Alternative Basket Place- ment Methods Lower Basket Upper Basket Important Note For Test Organisations For detailed information about perfor- mance tests, you can send a request e-mail to the address below: Wrong Placement Methods dishwasher@standardtest.info Please include the model name and serial number (20 digits) of the appliance to be tested in your request e-mail.
- Page 28 Programme Definition Programme no 4 (reference) Programme name Pre-wash Jet Wash 14 ' Quick 30 ' Eco 50°C ** Dual Pro Wash Washing Temperature 35°C 40°C 50°C 65°C Food residue type Slightly soiled; Slightly soiled; Slightly soiled; Slightly soiled; Soups, sauces, coffee, milk, tea coffee, milk, tea coffee, milk,...
- Page 29 Programme Definition Programme no Programme name Super 50 ' Auto Sensitive Auto Normal Auto Intensive Steam Wash 65°C 30-50°C 50-60°C 60-70°C Washing 65°C 30-50°C 50-60°C 60-70°C 65°C Temperature Food residue type Soups, sauces, pastries, Temperature and amount of the washing water and the eggs, pilaf potatoes, washing duration are automatically adjusted by detecting oven dishes, and fries...
- Page 30 Preparing the Machine for Use and Installation Year When you operate your machine for the Factory setting of your machine on the first time, the following menus will be screen will be 2016. Press the forward key shown on the display of the machine for to change this selection.
- Page 31 Programme Selection and 7. Start/Pause Key Operating the Machine When you press the Start/Pause key, the programme you have selected will start 1. On/Off Key and the washing bar will be shown on the The machine will be energised when the display.
- Page 32 perform washing in the upper basket, and a detailed washing cycle will be carried out by the extra water jet in the upper basket. If you have dishes only in the lower basket, select the Extra Lower Basket option to select the icon that lights up the lower figure .
- Page 33 Screen Dimming Mode If you quickly touch the On/Off button, only the will dim, other operational Active ion functions (if any) will continue. The technology dimmed screen will turn on again when the selected program has ended, when any button on the machine is pressed or the machine is controlled via mobile app.
- Page 34 Warning Indicators 3. Select the desired programme by press- ing the programme key successively. Salt Lack Warning Indicator "Lack of Salt" warning will be displayed NOTE: You can follow the programme when the softening salt in your machine is duration from the time indicator. insufficient.
- Page 35 time and program tracking expressions (washing, program finished) on the display. Do not open the door before you see the "PROGRAM FINISHED!" warning. NOTE: If the door of the machine is WASHING opened or power gets disconnected AUTO DOOR during washing, the programme will re- 03:27 00:44 sume when the door is closed or the power...
- Page 36 Adding Additional Options to the Programme You can change the programme you have selected according to your preferences by adding additional options. Washing programmes have been designed to achieve the best cleaning performance considering the soil type and the amount of your dishes and prop- erties of the dishes.
- Page 37 "-" Function cannot be selected " " function can be selected. To Add Options to the Programme; 1. Select the desired washing programme suitable for your dishes by pressing the pro- gramme key successively. 2. Press the options key to access the "OPTIONS" menu. The option icon at the center of the display is the one ready for selection.
- Page 38 8. Language 9. Factory settings Press back to exit the menu. Program will be canceled. NOTE: You can access the short details of Could you confirm please? the related menu by pressing the info key on the top right corner of the screen. CONFIRMATION OF CANCELLATION 3.
- Page 39 press confirm. End time will turn blue. Se- not saved if you press back instead of con- lect the new time by increasing/decreas- firm. ing by one hour using the forward/back- 5. Date settings ward key. Setting will not be saved when you press the back key and the new end Switch to the "DATE SETTINGS"...
- Page 40 confirm. list in the favourites menu. To set your fa- 8. Language vourite programme; Switch to the "LANGUAGE" menu us- 1. Select the programme that you want to ing Forward/backward keys. Press confirm select with the programme key. to enter the Language menu. Language 2.
- Page 41 8. You will be redirected to the favourite programme selection menu when you press confirm again. CHILD LOCK 9. Press "OK" in the following screen to start the favourite programme you have Child lock indicator on the top left corner set.
- Page 42 1. Press the delay key and increase delay 3. Call the authorised service if there is wa- for the time required for the delay. ter and the tap is open. 2. Set the delay time to the desired time When you see the messages above, error using forward/backward keys.
- Page 43 Cleaning and Maintenance a. Micro Filter b. Coarse Filter When the appliance is regularly cleaned, c. Metal/Plastic Filter its service life will increase and the possi- bility of frequently experienced problems Turn the filter assembly counter-clockwise will be minimized. to remove and clean. (picture 1 ) Pull and remove metal/plastic filter.
- Page 44 Hose Filter Never use the dishwasher without filters. • Failure to install filters correctly will redu- The filter on water inlet hose will prevent ce the effectiveness of washing. contamination (sand, clay, etc.) that may • Filter cleaning is very important in terms come from city network or your plumbing.
- Page 45 Troubleshooting When you notice an abnormal situation in your appliance, you may attempt to troub- leshoot according to the following descriptions. If your appliance does not still operate properly, contact to Vestel Call Center. You may access the authorized services list from the web site.
- Page 46 PROBLEM CAUSE SOLUTION Dishes are not placed correctly. Place dishes correctly. Vibration and impact Spray arm hits dishes. sounds during washing. Spray arms may not be Install spray arms. installed. Sprayed water does not Place dishes properly for reach these areas. them not to block each Dishes are leaning against other.
- Page 47 PROBLEM CAUSE SOLUTION Power cut. Wait for the power to come. Program may be in stand- Start the program by cancel- Appliance stops during by mode. ling the standby mode. washing. Check if water hose is clog- Problem in water inlet. ged, clean the clogging.
- Page 48 Things To Be Done In Case Of Simple Failures Your appliance will report the cause of the error as an error code if it is in failure mode. Error codes will be displayed on the screen of your appliance. Following chart shows these error codes, their definitions and points to be checked.
- Page 49 Product Information Slip Manufacturer's name or trademark MALLOCA Product model MDW14-S10TFT Standard nominal capacity Energy efficiency class A+++ Annual energy consumption (AEC) (kWh/year) * Energy consumption of the standard 0.66 cleaning cycle (EC) Off mode power consumption (W) 0.50 Left-on mode power consumption (W) (Pı) 1.00...
- Page 50 Email: info@malloca.com Customer Care: Hotline: 1800 12 12 Email: chamsockh@malloca.com CÔNG TY TNHH MALLOCA VIỆT NAM Showroom Malloca TP.Hồ Chí Minh: 279 Đường Nguyễn Văn Trỗi, Phường 10, Quận Phú Nhuận, TP.HCM Điện Thoại: (84) 28 39975 893 / 94 Fax: (84) 28 38447 102 - (84) 28 38633 882 Email: info@malloca.com...
- Page 51 52345696 R35...
Need help?
Do you have a question about the MDW14-BS10TFT and is the answer not in the manual?
Questions and answers