ZyXEL Communications NWA-3166 User Manual
Wireless n dual-band business wlan access point
Hide thumbs
Also See for NWA-3166:
- Quick start manual (126 pages) ,
- Manual (372 pages) ,
- Specification sheet (8 pages)
Table of Contents
Advertisement
Quick Links
Advertisement
Table of Contents
Troubleshooting

Related Manuals for ZyXEL Communications NWA-3166


Summary of Contents for ZyXEL Communications NWA-3166
- Page 1 NWA-3166 Wireless N Dual-Band Business WLAN Access Point Default Login Details IP Address http://192.168.1.2 User Name Password 1234 Firmware Version 3.6 www.zyxel.com Edition 3, 02/2009 www.zyxel.com Copyright © 2009 ZyXEL Communications Corporation...
-
Page 3: About This User's Guide
• Support Disc Refer to the included CD for support documents. • ZyXEL Web Site Please refer to www.zyxel.com for additional support documentation and product certifications. User Guide Feedback Help us help you. Send all User Guide-related comments, questions or suggestions for improvement to the following address, or use e-mail instead. -
Page 4: Document Conventions
“1000000” or “1048576” and so on. • “e.g.,” is a shorthand for “for instance”, and “i.e.,” means “that is” or “in other words”. • Screens reproduced here for demonstration purposes may not exactly match the screens on your device. NWA-3166 User’s Guide... - Page 5 Document Conventions Icons Used in Figures Figures in this User’s Guide may use the following generic icons. The NWA icon is not an exact representation of your device. Computer Notebook computer Server Printer Firewall Telephone Switch Router NWA-3166 User’s Guide...
-
Page 6: Safety Warnings
• If you wall mount your device, make sure that no electrical lines, gas or water pipes will be damaged. • The PoE (Power over Ethernet) devices that supply or receive power and their connected Ethernet cables must all be completely indoors. This product is recyclable. Dispose of it properly. NWA-3166 User’s Guide... -
Page 7: Table Of Contents
2.1 Overview ..........................29 2.2 Accessing the Web Configurator ..................29 2.3 Resetting the NWA ......................30 2.3.1 Methods of Restoring Factory-Defaults ..............30 2.4 Navigating the Web Configurator ..................31 Chapter 3 Tutorials ........................... 33 3.1 Overview ..........................33 NWA-3166 User’s Guide... - Page 8 Part II: The Web Configurator ............... 65 Chapter 4 Status Screen .......................... 67 4.1 Overview ..........................67 4.2 The Status Screen ....................... 67 Chapter 5 Management Mode........................71 5.1 Overview ..........................71 5.2 About CAPWAP ........................71 NWA-3166 User’s Guide...
- Page 9 8.1.2 What You Need To Know About the Wireless Screen ..........98 8.2 The Wireless Screen ......................101 8.2.1 Access Point Mode ....................101 8.2.2 Bridge / Repeater Mode ................... 104 8.2.3 AP + Bridge Mode ....................108 8.2.4 MBSSID Mode ......................109 NWA-3166 User’s Guide...
- Page 10 10.2.2 Security: 802.1x Only ..................... 134 10.2.3 Security: 802.1x Static 64-bit, 802.1x Static 128-bit ..........135 10.2.4 Security: WPA ......................137 10.2.5 Security: WPA2 or WPA2-MIX ................138 10.2.6 Security: WPA-PSK, WPA2-PSK, WPA2-PSK-MIX ..........139 10.3 Technical Reference ......................140 NWA-3166 User’s Guide...
- Page 11 15.1.1 What You Can Do in the Rogue AP Screen ............160 15.1.2 What You Need To Know About Rogue AP ............160 15.2 Configuration Screen ....................... 162 15.2.1 Friendly AP Screen ....................163 15.2.2 Rogue AP Screen ....................164 NWA-3166 User’s Guide...
- Page 12 18.3.2 Trusted CAs Details Screen ................... 200 18.4 Technical Reference ......................203 18.4.1 Private-Public Certificates ..................203 18.4.2 Certification Authorities ..................203 18.4.3 Checking the Fingerprint of a Certificate ..............204 Chapter 19 Log Screens .......................... 205 NWA-3166 User’s Guide...
- Page 13 21.4 F/W Upload Screen ......................240 21.5 Configuration Screen ....................... 242 21.5.1 Backup Configuration ..................... 242 21.5.2 Restore Configuration ................... 243 21.5.3 Back to Factory Defaults ..................244 21.6 Restart Screen ......................... 244 Chapter 22 Troubleshooting........................245 NWA-3166 User’s Guide...
- Page 14 Appendix D IP Addresses and Subnetting ................279 Appendix E Text File Based Auto Configuration..............301 Appendix F How to Access and Use the CLI ............... 309 Appendix G Legal Information....................315 Appendix H Customer Support..................... 319 Index............................327 NWA-3166 User’s Guide...
-
Page 15: Part I Introduction
Introduction Introduction (17) The Web Configurator (29) Tutorials (33) -
Page 17: Chapter 1 Introduction
Protected Access (WPA), WPA2 and Wired Equivalent Privacy (WEP) data encryption. Your NWA is easy to install, configure and use. The embedded Web-based configurator enables simple, straightforward management and maintenance. See the Quick Start Guide for instructions on how to make hardware connections. NWA-3166 User’s Guide... -
Page 18: Applications For The Nwa
The NWA is an ideal access solution for wireless Internet connection. A typical Internet access application for your NWA is shown as follows. Stations A, B and C can access the wired network through the NWAs. Figure 1 Access Point Application BSS2 BSS1 NWA-3166 User’s Guide... -
Page 19: Bridge / Repeater
Once the security settings of peer sides match one another, the connection between devices is made. At the time of writing, WDS security is compatible with other ZyXEL access points only. Refer to your other access point’s documentation for details. -
Page 20: Bridge / Repeater Mode Example
WDS (Wireless Distribution System) allowing the computers in LAN 1 to connect to the computers in LAN 2. Figure 4 Bridging Example Be careful to avoid bridge loops when you enable bridging in the NWA. Bridge loops cause broadcast traffic to circle the network endlessly, resulting in possible NWA-3166 User’s Guide... - Page 21 To prevent bridge loops, ensure that you enable Spanning Tree Protocol (STP) in the Wireless screen or your NWA is not set to bridge mode while connected to both wired and wireless segments of the same LAN. NWA-3166 User’s Guide...
-
Page 22: Ap + Bridge
A Basic Service Set (BSS) is the set of devices forming a single wireless network (usually an access point and one or more wireless clients). The Service Set IDentifier (SSID) is the name of a BSS. In Multiple BSS (MBSSID) mode, the NWA NWA-3166 User’s Guide... - Page 23 Guest_SSID is the wireless network for guest users. In this example, the guest user is forbidden access to the wired Land Area Network (LAN) behind the AP and can access only the Internet. Figure 8 Multiple BSSs NWA-3166 User’s Guide...
-
Page 24: Pre-Configured Ssid Profiles
IEEE 802.11b and IEEE 802.11g clients to access the wired network, and WLAN2 in AP + Bridge mode to allow an IEEE 802.11a AP to communicate with the wired network. Figure 9 Dual WLAN Adaptors Example WLAN1 WLAN2 802.11b/g 802.11b/g Access Point Bridge Internet NWA-3166 User’s Guide... -
Page 25: Capwap
This is ZyXEL’s implementation of the Internet Engineering Task Force’s (IETF) CAPWAP protocol. ZyXEL’s CAPWAP allows a single access point to manage up to eight other access points. The managed APs receive all their configuration information from the controller AP. The CAPWAP dataflow is protected by Datagram Transport Layer Security (DTLS). -
Page 26: Ways To Manage The Nwa
NWA to its factory default settings. If you backed up an earlier configuration file, you won’t have to totally re-configure the NWA; you can simply restore your last configuration. 1.6 Hardware Connections See your Quick Start Guide for information on making hardware connections. NWA-3166 User’s Guide... -
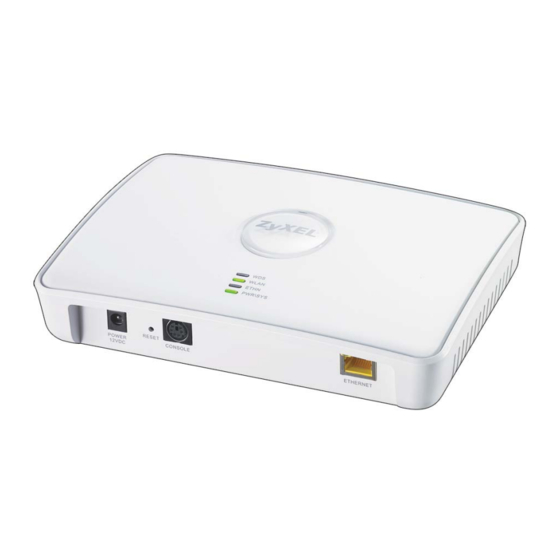
Page 27: Leds
The NWA is in AP+Bridge or Bridge/Repeater mode and has not established a Wireless Distribution System (WDS) connection. Green The NWA is in AP+Bridge or Bridge/Repeater mode, and has successfully established a Wireless Distribution System (WDS) connection. NWA-3166 User’s Guide... - Page 28 The NWA is not receiving power. Blinking Either • If the LED blinks during the boot up process, the system is starting up. • If the LED blinks after the boot up process, the system has failed. The NWA successfully boots up. NWA-3166 User’s Guide...
-
Page 29: The Web Configurator
You should see a screen asking you to change your password (highly recommended) as shown next. Type a new password (and retype it to confirm) then click Apply. Alternatively, click Ignore. Note: If you do not change the password, this screen appears every time you login. NWA-3166 User’s Guide... -
Page 30: Resetting The Nwa
IP address of the NWA is not known. • Use the web configurator to restore defaults (refer to Chapter 21 on page 237). • Transfer the configuration file to your NWA using File Transfer Protocol (FTP). NWA-3166 User’s Guide... -
Page 31: Navigating The Web Configurator
Settings), VLAN (Wireless VLAN and RADIUS VLAN). • Click MAINTENANCE to view information about your NWA or upgrade configuration and firmware files. Maintenance features include Status (Statistics), Association List, Channel Usage, F/W (Firmware) Upload, Configuration (Backup, Restore and Default) and Restart. NWA-3166 User’s Guide... - Page 32 Chapter 2 The Web Configurator NWA-3166 User’s Guide...
-
Page 33: Chapter 3 Tutorials
• Use MBSSID (Multiple Basic Service Set Identifier) operating mode if you want to use the NWA as an access point with some groups of users having different security or QoS settings from other groups of users. See Section 1.2.4 on page for details. NWA-3166 User’s Guide... -
Page 34: Wireless Lan Configuration Overview
Configure internal AUTH. SERVER (optional). Configure Layer 2 Configure Layer 2 Isolation (optional). Isolation (optional). Configure Layer 2 Isolation (optional). Configure MAC Filter Configure MAC Filter (optional). (optional). Configure MAC Filter (optional). Check your settings and test. NWA-3166 User’s Guide... -
Page 35: Further Reading
To do this, you will take the following steps: Change the operating mode from Access Point to MBSSID and reactivate the standard network. Configure a wireless network for VoIP users. Configure a wireless network for guests to your office. NWA-3166 User’s Guide... - Page 36 The following table shows the addresses used in this example. Table 2 Tutorial: Example Information Network router (A) MAC address 00:AA:00:AA:00:AA Network printer (B) MAC address AA:00:AA:00:AA:00 NWA-3166 User’s Guide...
-
Page 37: Change The Operating Mode
Section 2.2 on page 29). Click Wireless > Wireless. The Wireless screen appears. In this example, the NWA is in Access Point operating mode, and is currently set to use the SSID03 profile. Figure 15 Tutorial: Wireless LAN: Before NWA-3166 User’s Guide... - Page 38 Select the Index box for the entry and click Apply to activate the profile. Your standard wireless network (SSID03) is now accessible to your wireless clients as before. You do not need to configure anything else for your standard network. NWA-3166 User’s Guide...
-
Page 39: Configure The Voip Network
Figure 17 Tutorial: WIRELESS > SSID The Voice over IP (VoIP) network will use the pre-configured SSID profile, so select VoIP_SSID’s radio button and click Edit. The following screen displays. Figure 18 Tutorial: VoIP SSID Profile Edit NWA-3166 User’s Guide... -
Page 40: Set Up Security For The Voip Profile
Leave all the other fields at their defaults and click Apply. 3.3.2.1 Set Up Security for the VoIP Profile Now you need to configure the security settings to use on the VoIP wireless network. Click the Security tab. Figure 19 Tutorial: VoIP Security NWA-3166 User’s Guide... - Page 41 In this example, the PSK is “ThisismyWPA2-PSKpre-sharedkey”. Click Apply. The Wireless > Security screen displays. Ensure that the Profile Name for entry 2 displays “VoIP_Security” and that the Security Mode is WPA2-PSK. Figure 21 Tutorial: VoIP Security: Updated NWA-3166 User’s Guide...
-
Page 42: Activate The Voip Profile
Guest_SSID profile can access only certain pre-defined devices on the network (see Section on page 146), and “intra-BSS traffic blocking” means that the client cannot access other clients on the same wireless network (see Section 8.1.2 on page 98). NWA-3166 User’s Guide... - Page 43 The standard network (SSID04) is already using the security01 profile, and the VoIP network is using the security02 profile (renamed VoIP_Security) so select the security03 profile from the Security field. Leave all the other fields at their defaults and click Apply. NWA-3166 User’s Guide...
-
Page 44: Set Up Security For The Guest Profile
PSK is “ThisismyGuestWPApre-sharedkey”. Click Apply. The Wireless > Security screen displays. Ensure that the Profile Name for entry 3 displays “Guest_Security” and that the Security Mode is WPA-PSK. Figure 25 Tutorial: Guest Security: Updated NWA-3166 User’s Guide... -
Page 45: Set Up Layer 2 Isolation
Figure 27 Tutorial: Layer 2 Isolation Profile Enter the MAC addresses of the two network devices you want users on the guest network to be able to access: the main network router (00:AA:00:AA:00:AA) and the network printer (AA:00:AA:00:AA:00). Click Apply. NWA-3166 User’s Guide... -
Page 46: Activate The Guest Profile
2 isolation list). If you receive a reply, check the settings in the WIRELESS > Layer-2 Isolation > Edit screen, and ensure that the correct layer 2 isolation profile is enabled in the Guest_SSID profile screen. NWA-3166 User’s Guide... -
Page 47: How To Set Up And Use Rogue Ap Detection
A, B, C and D. You also have a network mail/file server, marked E, and a computer, marked F, connected to the wired network. The coffee shop’s access point is marked 1. Figure 29 Tutorial: Wireless Network Example NWA-3166 User’s Guide... - Page 48 MAC address of his AP. In this example, you will do the following things. Set up and save a friendly AP list. Activate periodic Rogue AP Detection. Set up e-mail alerts. Configure your other access points. Test the setup. NWA-3166 User’s Guide...
-
Page 49: Set Up And Save A Friendly Ap List
Add after you enter the details of each AP to include it in the list. MAC ADDRESS DESCRIPTION 00:AA:00:AA:00:AA My Access Point _A_ AA:00:AA:00:AA:00 My Access Point _B_ A0:0A:A0:0A:A0:0A My Access Point _C_ 0A:A0:0A:A0:0A:A0 My Access Point _D_ AF:AF:AF:FA:FA:FA Coffee Shop Access Point _1_ NWA-3166 User’s Guide... - Page 50 Figure 31 Tutorial: Friendly AP (After Data Entry) Next, you will save the list of friendly APs in order to provide a backup and upload it to your other access points. Click the Configuration tab.The following screen appears. Figure 32 Tutorial: Configuration NWA-3166 User’s Guide...
- Page 51 Save the friendly AP list somewhere it can be accessed by all the other access points on the network. In this example, save it on the network file server (E in Figure 29 on page 47). The default filename is “Flist”. Figure 34 Tutorial: Save Friendly AP list NWA-3166 User’s Guide...
-
Page 52: Activate Periodic Rogue Ap Detection
In the Expiration Time field, enter how long an AP’s entry can remain in the list before the NWA discards it from the list when the AP is no longer active. In this example, enter “30¨. Click Apply. NWA-3166 User’s Guide... -
Page 53: Set Up E-Mail Logs
In this example, your mail server’s IP address is 192.168.1.25. Enter this IP address in the Mail Server field. Enter a subject line for the alert e-mails in the Mail Subject field. Choose a subject that is eye-catching and identifies the access point - in this example, “ALERT_Access_Point_A”. NWA-3166 User’s Guide... -
Page 54: Configure Your Other Access Points
Click Import. Check the ROGUE AP > Friendly AP screen to ensure that the friendly AP list has been correctly uploaded. Activate periodic rogue AP detection. Set up e-mail logs, but change the Mail Subject field so you can tell which AP the alerts come from (“ALERT_Access_Point_B”, etc.) NWA-3166 User’s Guide... -
Page 55: Test The Setup
You have two secure servers (1 and 2 in the following figure). Wireless user “Alice” (A) needs to access server 1 (but should not access server 2) and wireless user “Bob” (B) needs to access server 2 (but should not access server 1). Your NWA-3166 User’s Guide... -
Page 56: Your Requirements
SSID profile as shown in the following table. Table 4 Tutorial: SSID Profile Security Settings SSID Profile SERVER_1 SERVER_2 Name SSID SSID_S1 SSID_S2 Security Security Profile Security Profile security03: security04: WPA2-PSK WPA2-PSK Hide SSID Hide SSID Intra-BSS traffic Enabled Enabled blocking NWA-3166 User’s Guide... -
Page 57: Configure The Server_1 Network
1 via the network switch. You will configure the MAC filter to restrict access to Alice alone, and then configure layer-2 isolation to allow her to access only the network router, the file server and the Internet security gateway. NWA-3166 User’s Guide... - Page 58 Chapter 3 Tutorials Take the following steps to configure the SERVER_1 network. Log into the NWA’s Web Configurator and click Wireless > SSID. The following screen displays, showing the SSID profiles you already configured. Figure 38 Tutorial: SSID Profile NWA-3166 User’s Guide...
- Page 59 Enter server 1’s MAC Address and add a Description (“SERVER_1” in this case) in Set 2’s entry. Change the Profile Name to “L-2-ISO_SERVER_1” and click Apply. You have restricted users on the SERVER_1 network to access only the devices with the MAC addresses you entered. NWA-3166 User’s Guide...
-
Page 60: Configure The Server_2 Network
Table 7 Tutorial: SERVER_2 Network Information SSID Screen Index Profile Name SERVER_2 SSID Edit (SERVER_2) Screen L2 Isolation L2Isolation04 MAC Filtering macfilter04 Layer-2 Isolation (L2Isolation04) Screen Profile Name L-2-ISO_SERVER-2 Set 1 MAC Address: 77:66:55:44:33:22 Description: NET_ROUTER NWA-3166 User’s Guide... -
Page 61: Checking Your Settings And Testing The Configuration
Click Wireless > Wireless. Check that the Operating Mode is MBSSID and that the correct SSID profiles are selected and activated, as shown in the following figure. Figure 42 Tutorial: SSID Profiles Activated NWA-3166 User’s Guide... -
Page 62: Testing The Configuration
If you can do so, MAC filtering is misconfigured. Test the SERVER_2 network. • Using Bob’s computer and wireless client, and the correct security settings, do the following. Attempt to access Server 2. You should be able to do so. NWA-3166 User’s Guide... - Page 63 If you cannot do something that you should be able to do, check the settings as described in Section 3.5.6.1 on page 61, and in the individual Security, layer-2 isolation and MAC filter profiles for the relevant network. If this does not help, see the Troubleshooting chapter in this User’s Guide. NWA-3166 User’s Guide...
- Page 64 Chapter 3 Tutorials NWA-3166 User’s Guide...
-
Page 65: Part Ii: The Web Configurator
The Web Configurator Status Screen (67) VLAN (215) Management Mode (71) Maintenance (237) System Screens (87) Wireless Screen (97) SSID Screen (123) Wireless Security Screen (129) RADIUS Screen (141) Layer-2 Isolation Screen (145) MAC Filter Screen (151) IP Screen (155) Rogue AP Detection (159) Remote Management Screens (167) Internal RADIUS Server (179) -
Page 67: Chapter 4 Status Screen
4.2 The Status Screen Use this screen to get a quick view of system, Ethernet, WLAN and other information regarding your NWA. Click Status. The following screen displays. Figure 44 The Status Screen NWA-3166 User’s Guide... - Page 68 NWA is to slow down. WLAN Associations This field displays the number of wireless clients currently associated with the wireless module. It supports up to 128 concurrent associations. Interface Status Interface This column displays each interface of the NWA. NWA-3166 User’s Guide...
- Page 69 Click this to see a list of logs produced by the NWA. See Chapter 19 on page 205. Rogue AP List Click this to see a list of unauthorized access points in the local area. See Section 15.2.2 on page 164. NWA-3166 User’s Guide...
- Page 70 Chapter 4 Status Screen NWA-3166 User’s Guide...
-
Page 71: Chapter 5 Management Mode
NWA is used in its default standalone mode, or as part of a Control And Provisioning of Wireless Access Points (CAPWAP) network. 5.2 About CAPWAP The NWA supports CAPWAP. This is ZyXEL’s implementation of the IETF’s CAPWAP protocol (RFC 4118). The CAPWAP dataflow is protected by Datagram Transport Layer Security (DTLS). -
Page 72: Capwap Discovery And Management
However, you can configure CAPWAP to operate between devices with IP addresses in different subnets by doing the following. • Activate DHCP option 43 on your network’s DHCP server. • Configure DHCP option 43 with the IP address of the CAPWAP AP controller on your network. NWA-3166 User’s Guide... -
Page 73: Notes On Capwap
MANAGED (DYNAMIC 5.2.4 Notes on CAPWAP This section lists some additional features of ZyXEL’s implementation of the CAPWAP protocol. • When the AP controller uses its internal Remote Authentication Dial In User Service (RADIUS) server, managed APs also use the AP controller’s authentication server to authenticate wireless clients. -
Page 74: The Management Mode Screen
Managed AP, you cannot log in as the web configurator is disabled; you must manage the NWA through the management AP on your network. Reset Click this to return this screen to its previously-saved settings. NWA-3166 User’s Guide... -
Page 75: Chapter 6 Ap Controller Mode
The following terms and concepts may help as you read through this chapter. Controller AP Mode Your NWA can be a CAPWAP controller AP. In this setup, the NWA can manage the wireless configurations and device settings of several APs at the same time. NWA-3166 User’s Guide... -
Page 76: Before You Begin
Figure 49 System Restart Note: The NWA reboots every time you change mode in the MGMT MODE screen. You can switch from Standalone AP to Controller AP (and vice versa) using the Web Configurator. NWA-3166 User’s Guide... -
Page 77: Controller Ap Status Screen
System Information, AP Status, WLAN Association and System Status sections. The System Status links take you to screens that provide information on the access points managed by the NWA. Click Status. The following screen displays. NWA-3166 User’s Guide... - Page 78 Click this to see information about each of the wireless clients connected to APs managed by the NWA. SSID Information Click this to see details of the security settings used by each SSID, and the number of wireless clients associated with each SSID. NWA-3166 User’s Guide...
-
Page 79: Ap Lists Screen
This displays the IP address of the managed AP. MAC Address This displays the MAC address of the managed AP. Model This displays the model name and 802.11 mode of the managed Description This displays the description of the managed AP. NWA-3166 User’s Guide... - Page 80 Select the unmanaged AP from the list and click this to include the unmanaged AP in the NWA’s managed AP list. Automatic Refresh Enter how often you want the NWA to update this screen. Interval Refresh Click this to update this screen immediately. NWA-3166 User’s Guide...
-
Page 81: The Ap Lists Edit Screen
Select Disable if you do not want to use a radio profile. The AP’s radio is not active when you select Disable. Apply Click this to save the changes in this screen. Reset Click this to return the fields in this screen to their previously- saved values. NWA-3166 User’s Guide... -
Page 82: Configuration Screen
Select Always Accept to manage any AP on your network that transmits a CAPWAP request for management. Apply Click this to save the changes in this screen. Reset Click this to return the fields in this screen to their previously-saved values. NWA-3166 User’s Guide... -
Page 83: The Profile Edit Screens
Use this screen to configure radio profiles. Radio profiles contain information about an AP’s wireless settings and can be applied to APs managed by the NWA. In AP Controller mode, click Profile Edit > Radio. The following screen displays. Figure 56 The Profile Edit > Radio Screen NWA-3166 User’s Guide... -
Page 84: The Radio Profile Edit Screen
6.6.2 The Radio Profile Edit Screen Use this screen to configure a specific radio profile. In the Profile Edit > Radio screen, select a profile and click Edit. The following screen displays. Figure 57 The Profile Edit > Radio > Edit Screen NWA-3166 User’s Guide... - Page 85 Active Power Management mode. A high DTIM value can cause clients to lose connectivity with the network. This value can be set from 1 to 100. NWA-3166 User’s Guide...
- Page 86 Select this to have access points using this radio profile use Diversity antenna diversity, where available. Antenna diversity uses multiple antennas to reduce signal interference. Apply Click this to save your changes. Reset Click this to reload the previous configuration for this screen. NWA-3166 User’s Guide...
-
Page 87: Chapter 7 System Screens
• Use the System > Password screen (see Section 7.3 on page 91) to manage the password for your ZyXEL Device and have a RADIUS server authenticate management logins to the ZyXEL Device. • Use the Time Setting screen (see Section 7.4 on page... -
Page 88: What You Need To Know About The System Screens
The Internet Assigned Number Authority (IANA) reserved this block of addresses specifically for private use; please do not use any other number unless you are told otherwise. Let's say you select 192.168.1.0 as NWA-3166 User’s Guide... -
Page 89: General Screen
This name can be up to 30 alphanumeric characters long. Spaces are not allowed, but dashes "-" and underscores "_" are accepted. Domain Name This is not a required field. Leave this field blank or enter the domain name here if you know it. NWA-3166 User’s Guide... - Page 90 DNS server, you must know the IP address of a machine in order to access it. The default setting is None. Apply Click Apply to save your changes. Reset Click Reset to reload the previous configuration for this screen. NWA-3166 User’s Guide...
-
Page 91: Password Screen
Select this (and configure the other fields in this section) to have a RADIUS RADIUS server authenticate management logins to the NWA. Use old setting Select this to have a RADIUS server authenticate management logins to the NWA using the RADIUS username and password already configured on the device. NWA-3166 User’s Guide... - Page 92 RADIUS server (see Section 11.2 on page 143). • The server must be set to Active in the profile. Apply Click Apply to save your changes. Reset Click Reset to reload the previous configuration for this screen. NWA-3166 User’s Guide...
-
Page 93: Time Setting Screen
This field displays the last updated time from the time server or (hh:mm:ss) the last time configured manually. When you set Time and Date Setup to Manual, enter the new time in this field and then click Apply. NWA-3166 User’s Guide... - Page 94 UTC). So in the European Union you would select Last, Sunday, October. The time you type in the at field depends on your time zone. In Germany for instance, you would type 2 because Germany's time zone is one hour ahead of GMT or UTC (GMT+1). NWA-3166 User’s Guide...
-
Page 95: Technical Reference
The NWA continues to use the following pre-defined list of NTP time servers if you do not specify a time server or it cannot synchronize with the time server you specified. Table 19 Default Time Servers ntp1.cs.wisc.edu ntp1.gbg.netnod.se ntp2.cs.wisc.edu tock.usno.navy.mil ntp3.cs.wisc.edu ntp.cs.strath.ac.uk ntp1.sp.se time1.stupi.se NWA-3166 User’s Guide... - Page 96 If the synchronization fails, then the NWA goes through the rest of the list in order from the first one tried until either it is successful or all the pre-defined NTP time servers have been tried. NWA-3166 User’s Guide...
-
Page 97: Chapter 8 Wireless Screen
8.1.1 What You Can Do in the Wireless Screen Use the Wireless > Wireless screen (see Section 8.2 on page 101) to configure the NWA to use a WLAN interface and operate in AP (Access Point), AP + Bridge, Bridge / Repeater or MBSSID mode. NWA-3166 User’s Guide... -
Page 98: What You Need To Know About The Wireless Screen
An Extended Service Set (ESS) consists of a series of overlapping BSSs, each containing an access point, with each access point connected together by a wired network. This wired connection between APs is called a Distribution System (DS). NWA-3166 User’s Guide... - Page 99 • MBSSID Mode. The Multiple Basic Service Set Identifier (MBSSID) mode allows you to use one access point to provide several BSSs simultaneously. Refer to Chapter 1 on page 17 for illustrations of these wireless applications. NWA-3166 User’s Guide...
- Page 100 Normally, the ZyXEL Device acts like a beacon and regularly broadcasts the SSID in the area. You can hide the SSID instead, in which case the ZyXEL Device does not broadcast the SSID. In addition, you should change the default SSID to something that is difficult to guess.
-
Page 101: The Wireless Screen
Wireless. The screen varies depending upon the operating mode you select. 8.2.1 Access Point Mode Use this screen to use your NWA as an access point. Select Access Point as the Operating Mode. The following screen displays. Figure 65 Wireless: Access Point NWA-3166 User’s Guide... - Page 102 Active Power Management mode. A high DTIM value can cause clients to lose connectivity with the network. This value can be set from 1 to 100. NWA-3166 User’s Guide...
- Page 103 NWAs on the same subnet. Note: All APs on the same subnet and the wireless stations must have the same SSID to allow roaming. Apply Click Apply to save your changes. Reset Click Reset to begin configuring this screen afresh. NWA-3166 User’s Guide...
-
Page 104: Bridge / Repeater Mode
APs. You need to know the MAC address of the peer device, which also must be in bridge / repeater mode. Note: You can view an example of this setup in Section 8.3.7 on page 118. Figure 66 Wireless: Bridge / Repeater NWA-3166 User’s Guide... - Page 105 APs. Select from 100% (Full Power), 50%, 25%, 12.5% and Minimum. See the product specifications for more information on your NWA’s output power. Note: Reducing the output power also reduces the NWA’s effective broadcast radius. NWA-3166 User’s Guide...
- Page 106 Select this to enable Temporal Key Integrity Protocol (TKIP) security Compatible) on your WDS. This option is compatible with other ZyXEL access points that support WDS security. Use this if the other access points on your network support WDS security but do not have an AES option.
- Page 107 Select the check box to activate STP on the NWA. Apply Click Apply to save your changes. Reset Click Reset to begin configuring this screen afresh. NWA-3166 User’s Guide...
-
Page 108: Ap + Bridge Mode
Select AP + Bridge as the Operating Mode. The following screen diplays. Figure 67 AP + Bridge See the tables describing the fields in the Access Point and Bridge / Repeater operating modes for descriptions of the fields in this screen. NWA-3166 User’s Guide... -
Page 109: Mbssid Mode
Chapter 8 Wireless Screen 8.2.4 MBSSID Mode Use this screen to have the NWA function in MBSSID mode. Select MBSSID as the Operating Mode. The following screen diplays. Figure 68 Multiple BSS NWA-3166 User’s Guide... - Page 110 Active Power Management mode. A high DTIM value can cause clients to lose connectivity with the network. This value can be set from 1 to 100. NWA-3166 User’s Guide...
- Page 111 NWA if you have two or more NWAs on the same subnet. Note: All APs on the same subnet and the wireless stations must have the same SSID to allow roaming. NWA-3166 User’s Guide...
-
Page 112: Technical Reference
Typically used for traffic that is especially sensitive to jitter. Use this priority to reduce latency for improved voice quality. (WMM_VOICE) video Typically used for traffic which has some tolerance for jitter but needs to be prioritized over other data traffic. (WMM_VIDEO) NWA-3166 User’s Guide... -
Page 113: Atc
< 250 (SIP) Online Gaming High 60 ~ 90 Web browsing Medium 300 ~ 600 (http) 1500 When ATC is activated, the device sends traffic with smaller packets before traffic with larger packets if the network is congested. NWA-3166 User’s Guide... -
Page 114: Atc+Wmm
The following table shows how priorities are assigned for packets coming from the LAN to the WLAN. Table 26 ATC + WMM Priority Assignment (LAN to WLAN) PACKET SIZE ATC VALUE WMM VALUE (BYTES) 1 ~ 250 ATC_High WMM_VIDEO 250 ~ 1100 ATC_Mediu WMM_BEST_EFFORT 1100 + ATC_Low WMM_BACKGROUND NWA-3166 User’s Guide... -
Page 115: Atc+Wmm From Wlan To Lan
Service (TOS) field in the IP header. The DS field contains a 2-bit unused field and a 6-bit DSCP field which can define up to 64 service levels. The following figure illustrates the DS field. Figure 69 DiffServ: Differentiated Service Field DSCP Unused (6-bit) (2-bit) NWA-3166 User’s Guide... -
Page 116: Tos (Type Of Service) And Wmm Qos
8.3.5.1 Rapid STP The NWA uses IEEE 802.1w RSTP (Rapid Spanning Tree Protocol) that allow faster convergence of the spanning tree (while also being backwards compatible with NWA-3166 User’s Guide... -
Page 117: Stp Terminology
BPDUs (Bridge Protocol Data Units) transmitted from the root bridge. If a bridge does not get a Hello BPDU after a predefined interval (Max Age), the bridge assumes that the link to the root bridge is down. This bridge then initiates NWA-3166 User’s Guide... -
Page 118: Stp Port States
In a network environment with multiple access points, wireless stations are able to switch from one access point to another as they move between the coverage NWA-3166 User’s Guide... - Page 119 (bridge tables are updated) and maximum AP efficiency. The AP deletes records of wireless stations that associate with other APs (Non-ZyXEL APs may not be able to perform this). 802.1x authentication information is not exchanged (at the time of writing).
-
Page 120: Requirements For Roaming
To enable roaming on your NWA, click WIRELESS > Wireless. The screen appears as shown. Figure 71 Enabling Roaming Select the Enable Roaming check box and click Apply. Note: Roaming cannot be enabled in Bridge / Repeater mode. NWA-3166 User’s Guide... -
Page 121: Additional Wireless Terms
RF signal to the antenna, which propagates the signal through the air. The antenna also operates in reverse by capturing RF signals from the air. Positioning the antennas properly increases the range and coverage area of a wireless LAN. NWA-3166 User’s Guide... - Page 122 Chapter 8 Wireless Screen NWA-3166 User’s Guide...
-
Page 123: Chapter 9 Ssid Screen
(VoIP_SSID), and a guest profile that allows visitors access only the Internet and the network printer (Guest_SSID). 9.1.1 What You Can Do in the SSID Screen Use the Wireless > SSID screen (see Section 9.2 on page 125) to configure up to 16 SSID profiles for your NWA. NWA-3166 User’s Guide... -
Page 124: What You Need To Know About Ssid
• Wireless > Layer 2 Isolation (the layer 2 isolation list, if activated in the SSID profile). • Also, use the VLAN screen to set up wireless VLANs based on SSID. Configure the fields in the above screens to use the settings in an SSID profile. NWA-3166 User’s Guide... -
Page 125: The Ssid Screen
This field displays which RADIUS profile is currently associated with each SSID profile, if you have a RADIUS server configured. This field displays the Quality of Service setting for this profile or NONE if QoS is not configured on a profile. NWA-3166 User’s Guide... -
Page 126: Configuring Ssid
RADIUS Select a RADIUS profile from the drop-down list box, if you have a RADIUS server configured. If you do not need to use RADIUS authentication, ignore this field. See Section 11.2 on page 143 more information. NWA-3166 User’s Guide... - Page 127 Select a MAC filter profile from the drop-down list box. If you do not want to use MAC filtering on this profile, select Disable. Apply Click Apply to save your changes. Reset Click Reset to begin configuring this screen afresh. NWA-3166 User’s Guide...
- Page 128 Chapter 9 SSID Screen NWA-3166 User’s Guide...
-
Page 129: Wireless Security Screen
MAC address filtering. It can also hide its identity in the network. 10.1.1 What You Can Do in the Security Screen Use the Wireless > Security screen (see Section 10.2 on page 132) to choose the security mode for your NWA. NWA-3166 User’s Guide... -
Page 130: What You Need To Know About Wireless Security
The available security modes in your NWA are as follows: • None. No data encryption. • WEP. Wired Equivalent Privacy (WEP) encryption scrambles the data transmitted between the wireless stations and the access points to keep network communications private. NWA-3166 User’s Guide... - Page 131 The EAP methods employed by the NWA when in Wireless Client operating mode are Transport Layer Security (TLS), Protected Extensible Authentication Protocol (PEAP), Lightweight Extensible Authentication Protocol (LEAP) and Tunneled Transport Layer Security (TTLS). The authentication protocol may either be NWA-3166 User’s Guide...
-
Page 132: The Security Screen
The following table describes the labels in this screen. Table 35 Wireless > Security LABEL DESCRIPTION Index This is the index number of the security profile. Profile Name This field displays a name given to a security profile in the Security configuration screen. NWA-3166 User’s Guide... -
Page 133: Security: Wep
The next screen varies according to the Security Mode you select. 10.2.1 Security: WEP Use this screen to set the selected profile to Wired Equivalent Privacy (WEP) security mode. Select WEP in the Security Mode field to display the following screen. Figure 78 Security: WEP NWA-3166 User’s Guide... -
Page 134: Security: 802.1X Only
Click Reset to begin configuring this screen afresh. 10.2.2 Security: 802.1x Only Use this screen to set the selected profile to 802.1x Only security mode. Select 802.1x-Only in the Security Mode field to display the following screen. Figure 79 Security: 802.1x Only NWA-3166 User’s Guide... -
Page 135: Security: 802.1X Static 64-Bit, 802.1X Static 128-Bit
Use this screen to set the selected profile to 802.1x Static 64 or 802.1x Static 128 security mode. Select 802.1x Static 64 or 802.1x Static 128 in the Security Mode field to display the following screen. Figure 80 Security: 802.1x Static 64-bit, 802.1x Static 128-bit NWA-3166 User’s Guide... - Page 136 The default time interval is 3600 seconds (or 1 hour). Apply Click Apply to save your changes. Reset Click Reset to begin configuring this screen afresh. NWA-3166 User’s Guide...
-
Page 137: Security: Wpa
WLAN on a periodic basis. Setting of the Group Key Update Timer is also supported in WPA-PSK mode. The NWA default is 1800 seconds (30 minutes). Apply Click Apply to save your changes. Reset Click Reset to begin configuring this screen afresh. NWA-3166 User’s Guide... -
Page 138: Security: Wpa2 Or Wpa2-Mix
AP and all stations in a WLAN on a periodic basis. Setting of the Group Key Update Timer is also supported in WPA-PSK mode. The NWA‘s default is 1800 seconds (30 minutes). NWA-3166 User’s Guide... -
Page 139: Security: Wpa-Psk, Wpa2-Psk, Wpa2-Psk-Mix
The following table describes the labels not previously discussed Table 41 Security: WPA-PSK, WPA2-PSK or WPA2-PSK-MIX LABEL DESCRIPTION Profile Name Type a name to identify this security profile. Security Mode Choose WPA-PSK, WPA2-PSK or WPA2-PSK-MIX in this field. NWA-3166 User’s Guide... -
Page 140: Technical Reference
• If you don’t have WPA(2)-aware wireless clients, then use WEP key encrypting. A higher bit key offers better security. You can manually enter 64-bit or 128-bit. More information on Wireless Security can be found in Appendix B on page 255. NWA-3166 User’s Guide... -
Page 141: Chapter 11 Radius Screen
NWA. The NWA in turn queries the RADIUS server if the identity of clients A and U are allowed access to the Internet. In this scenario, only client U’s identity is verified by the RADIUS server and allowed access to the Internet. NWA-3166 User’s Guide... -
Page 142: What You Can Do In The Radius Screen
You can configure up to four RADIUS server profiles. Each profile also has one backup authentication server and a backup accounting server. These profiles can be assigned to an SSID profile in the Wireless > SSID configuration screen. NWA-3166 User’s Guide... -
Page 143: The Radius Screen
Backup servers. Requests can be issued from the client interface to use the backup server. The length of time for each authentication is decided by the wireless client or based on the configuration of the ReAuthentication Timer field in the Security screen. RADIUS Option NWA-3166 User’s Guide... - Page 144 The key must be the same on the external accounting server and your NWA. The key is not sent over the network. Apply Click Apply to save your changes. Reset Click Reset to begin configuring this screen afresh. NWA-3166 User’s Guide...
-
Page 145: Layer-2 Isolation Screen
Note: Intra-BSS Traffic Blocking is activated when you enable layer-2 isolation. Figure 86 Layer-2 Isolation Application MAC addresses that are not listed in the Allow devices with these MAC addresses table of the Wireless > Layer-2 Isolation screen are blocked from NWA-3166 User’s Guide... -
Page 146: What You Can Do In The Layer-2 Isolation Screen
MAC filtering on the NWA. If layer-2 isolation is enabled, you need to know the MAC address of each wireless client, AP, computer or router that you want to allow to communicate with the ZyXEL Device's wireless clients. NWA-3166 User’s Guide... -
Page 147: The Layer-2 Isolation Screen
This is the index number of the profile. Profile Name This field displays the name given to a layer-2 isolation profile in the Layer-2 Isolation Configuration screen. Edit Select an entry from the list and click Edit to configure settings for that profile. NWA-3166 User’s Guide... -
Page 148: Configuring Layer-2 Isolation
These are the MAC address of a wireless client, AP, computer or router. with these MAC A wireless client associated with the NWA can communicate with addresses another wireless client, AP, computer or router only if the MAC addresses of those devices are listed in this table. NWA-3166 User’s Guide... -
Page 149: Technical Reference
12.3 Technical Reference This section provides technical background information on the topics discussed in this chapter. The figure that follows illustrates two example layer-2 isolation configurations on your NWA (A). Figure 89 Layer-2 Isolation Example Configuration 00:00:c5:00:00:66 00:00:c5:00:00:cc NWA-3166 User’s Guide... - Page 150 • Enter the server’s and your NWA’s MAC addresses in the MAC Address fields. Enter “File Server C” in C’s Description field, and enter “Access Point B” in B’s Description field. Figure 91 Layer-2 Isolation Example 2 NWA-3166 User’s Guide...
-
Page 151: Chapter 13 Mac Filter Screen
Section 13.2 on page 152) to specify which wireless station is allowed or denied access to the ZyXEL Device. 13.1.2 What You Should Know About MAC Filter Every Ethernet device has a unique MAC (Media Access Control) address. The MAC address is assigned at the factory and consists of six pairs of hexadecimal NWA-3166 User’s Guide... -
Page 152: The Mac Filter Screen
This is the index number of the profile. Profile Name This field displays the name given to a MAC filter profile in the MAC Filter Configuration screen. Edit Select an entry from the list and click Edit to configure settings for that profile. NWA-3166 User’s Guide... -
Page 153: Configuring The Mac Filter
Chapter 13 MAC Filter Screen 13.2.1 Configuring the MAC Filter To change your NWA’s MAC filter settings, click WIRELESS > MAC Filter > Edit. The screen appears as shown. Figure 94 MAC Address Filter NWA-3166 User’s Guide... - Page 154 Click Reset to begin configuring this screen afresh. Note: To activate MAC filtering on an SSID profile, select the correct filter from the Enable MAC Filtering drop-down list box in the Wireless > SSID > Edit screen and click Apply NWA-3166 User’s Guide...
-
Page 155: Chapter 14 Ip Screen
14.1.2 What You Need To Know About IP The Ethernet parameters of the NWA are preset with the following values: • IP address of 192.168.1.2 • Subnet mask of 255.255.255.0 (24 bits) These parameters should work for the majority of installations. NWA-3166 User’s Guide... -
Page 156: The Ip Screen
NWA; over the WAN, the gateway must be the IP address of one of the remote nodes. Apply Click Apply to save your changes. Reset Click Reset to begin configuring this screen afresh. NWA-3166 User’s Guide... -
Page 157: Technical Reference
Note: Regardless of your particular situation, do not create an arbitrary IP address; always follow the guidelines above. For more information on address assignment, please refer to RFC 1597, Address Allocation for Private Internets and RFC 1466, Guidelines for Management of IP Address Space. NWA-3166 User’s Guide... - Page 158 Chapter 14 IP Screen NWA-3166 User’s Guide...
-
Page 159: Chapter 15 Rogue Ap Detection
(the dashed ellipse B) is well-secured, but the rogue AP uses inferior security that is easily broken by an attacker (X) running readily available encryption-cracking software. In this example, the attacker now has access to the company network, including sensitive data stored on the file server (C). NWA-3166 User’s Guide... -
Page 160: What You Can Do In The Rogue Ap Screen
(for example) you should also add these APs to the list, as they do not compromise your own network’s security. If you do not add them to the friendly AP list, these access points will appear in the Rogue AP list each time the NWA scans. NWA-3166 User’s Guide... - Page 161 This scenario can also be part of a wireless denial of service (DoS) attack, in which associated wireless clients are deprived of network access. Other opportunities for the attacker include the introduction of malware (malicious software) into the network. NWA-3166 User’s Guide...
-
Page 162: Configuration Screen
Click this button to upload the previously-saved list of friendly APs displayed in the File Path field to the NWA. Apply Click Apply to save your settings. Reset Click Reset to return all fields in this screen to their previously- saved values. NWA-3166 User’s Guide... -
Page 163: Friendly Ap Screen
This field displays the last time the NWA scanned for the AP. Description This is the description you entered when adding the AP to the list. Delete Click this button to remove an AP’s entry from the list. NWA-3166 User’s Guide... -
Page 164: Rogue Ap Screen
If you want to move the AP’s entry to the friendly AP list, enter a short, explanatory description identifying the AP before you click Add to Friendly AP List. A maximum of 32 alphanumeric characters are allowed in this field. Spaces, underscores (_) and dashes (-) are allowed. NWA-3166 User’s Guide... - Page 165 Section 15.2.1 on page 163). When the NWA next scans for rogue APs, the selected AP does not appear in the rogue AP list. Reset Click Reset to return all fields in this screen to their default values. NWA-3166 User’s Guide...
- Page 166 Chapter 15 Rogue AP Detection NWA-3166 User’s Guide...
-
Page 167: Remote Management Screens
Figure 102 Remote Management Example In the figure above, the NWA (A) is being managed by a desktop computer (B) connected via LAN (Land Area Network). It is also being accessed by a notebook (C) connected via WLAN (Wireless LAN). NWA-3166 User’s Guide... -
Page 168: What You Can Do In The Remote Management Screens
171) to configure through which interface(s) and from which IP address(es) you can use File Transfer Protocol (FTP) to manage the ZyXEL Device. You can use FTP to upload the latest firmware for example. • Use the WWW screen (see Section 16.4 on page... - Page 169 • You may only have one remote management session running at one time. The NWA automatically disconnects a remote management session of lower priority when another remote management session of higher priority starts. The priorities for the different types of remote management sessions are as follows: 1. Telnet 2. HTTP NWA-3166 User’s Guide...
-
Page 170: The Telnet Screen
You can change the server port number for a service if needed, however you must use the same port number in order to use that service for remote management. Server Select the interface(s) through which a computer may access the NWA Access using Telnet. NWA-3166 User’s Guide... -
Page 171: The Ftp Screen
You can upload and download the NWA’s firmware and configuration files using FTP. To use this feature, your computer must have an FTP client. To change your NWA’s FTP settings, click REMOTE MGMT > FTP. The following screen displays. Figure 105 Remote Management: FTP NWA-3166 User’s Guide... -
Page 172: The Www Screen
Web browser. This lets you specify which IP addresses or computers are able to communicate with and access the NWA. To change your NWA’s WWW settings, click REMOTE MGNT > WWW. The following screen shows. Figure 106 Remote Management: WWW NWA-3166 User’s Guide... - Page 173 Choose Selected to just allow the computer with the IP address that you specify to access the NWA using this service. Apply Click Apply to save your customized settings and exit this screen. Reset Click Reset to begin configuring this screen afresh. NWA-3166 User’s Guide...
-
Page 174: The Snmp Screen
SNMP Version Select the SNMP version for the NWA. The SNMP version on the NWA must match the version on the SNMP manager. Choose SNMP version 1 (SNMPv1), SNMP version 2 (SNMPv2) or SNMP version 3 (SNMPv3). NWA-3166 User’s Guide... - Page 175 Choose Selected to just allow the computer with the IP address that you specify to access the NWA using this service. Apply Click Apply to save your customized settings and exit this screen. Reset Click Reset to begin configuring this screen afresh. NWA-3166 User’s Guide...
-
Page 176: Technical Reference
16.6.2 Supported MIBs The NWA supports MIB II that is defined in RFC-1213 and RFC-1215 as well as the proprietary ZyXEL private MIB. The purpose of the MIBs is to let administrators collect statistical data and monitor status and performance. - Page 177 NWA’s physical and virtual ports. Table 57 SNMP Interface Index to Physical and Virtual Port Mapping TYPE INTERFACE PORT Physical enet0 Wireless LAN adaptor WLAN1 enet1 Ethernet port (LAN) enet2 Wireless LAN adaptor WLAN2 NWA-3166 User’s Guide...
- Page 178 Table 57 SNMP Interface Index to Physical and Virtual Port Mapping TYPE INTERFACE PORT Virtual enet3 ~ enet9 WLAN1 in MBSSID mode enet10 ~ enet16 WLAN2 in MBSSID mode enet17 ~ enet21 WLAN1 in WDS mode enet22 ~ enet26 WLAN2 in WDS mode NWA-3166 User’s Guide...
-
Page 179: Internal Radius Server
Figure 108 RADIUS Server Access Request Wired Network Allow / Deny The NWA can also serve as a RADIUS server to authenticate other APs and their wireless clients. For more background information on RADIUS, see Section 11.1.2 on page 142. NWA-3166 User’s Guide... -
Page 180: What You Can Do In This Chapter
17.2 Internal RADIUS Server Setting Screen Use this screen to turn the NWA’s internal RADIUS server off or on and to view information about the NWA’s certificates. Click AUTH. SERVER > Setting. The following screen displays. Figure 109 Setting Screen NWA-3166 User’s Guide... - Page 181 Expiring! or Expired! message if the certificate is about to expire or has already expired. Apply Click Apply to have the NWA use certificates to authenticate wireless clients. Reset Click Reset to start configuring this screen afresh. NWA-3166 User’s Guide...
-
Page 182: The Trusted Ap Screen
“external RADIUS” server fields of the trusted AP. Note: The first trusted AP fields are for the NWA itself. Apply Click Apply to save your changes. Reset Click Reset to begin configuring this screen afresh. NWA-3166 User’s Guide... -
Page 183: The Trusted Users Screen
The password on the wireless client’s utility must be the same as this password. Note: If you are using PEAP authentication, this password field is limited to 14 ASCII characters in length. Apply Click Apply to save your changes. Reset Click Reset to begin configuring this screen afresh. NWA-3166 User’s Guide... -
Page 184: Technical Reference
Configure wireless client user names and passwords in the Trusted Users database to use a trusted AP as a relay between the NWA’s internal RADIUS server and the wireless clients. The wireless clients can then be authenticated by the NWA’s internal RADIUS server. NWA-3166 User’s Guide... - Page 185 PEAP/MS-CHAPv2 settings, deselect the Use Windows logon name and password check box. When authentication begins, a pop-up dialog box requests you to type a Name, Password and Domain of the RADIUS server. Specify a name and password only, do not specify a domain. NWA-3166 User’s Guide...
- Page 186 Chapter 17 Internal RADIUS Server NWA-3166 User’s Guide...
-
Page 187: Chapter 18 Certificates
• Use the Certificates > Trusted CAs (see Chapter 18 on page 199) screens to save CA certificates to the NWA. This screen displays a summary list of certificates of the certification authorities that you have set the NWA to accept as trusted. NWA-3166 User’s Guide... -
Page 188: What You Need To Know About Certificates
64 ASCII characters to convert a binary PKCS#7 certificate into a printable form. 18.2 My Certificates Screen Use this screen to view the NWA’s summary of certificates and certification requests. Click Certificates > My Certificates. The following screen displays. Figure 114 Certificates > My Certificates NWA-3166 User’s Guide... - Page 189 This button displays when the NWA has the factory default certificate. The factory default certificate is common to all NWAs that use certificates. ZyXEL recommends that you use this button to replace the factory default certificate with one that uses your NWA's MAC address.
-
Page 190: My Certificates Import Screen
My Certificate Import screen. Note: You can import only a certificate that matches a corresponding certification request that was generated by the NWA. Note: The certificate you import replaces the corresponding request in the My Certificates screen. NWA-3166 User’s Guide... - Page 191 Browse Click Browse to find the certificate file you want to upload. Apply Click Apply to save the certificate on the NWA. Cancel Click Cancel to quit and return to the My Certificates screen. NWA-3166 User’s Guide...
-
Page 192: My Certificates Create Screen
You do not have to fill in every field, although the Common Name is mandatory. The certification authority may add fields (such as a serial number) to the subject information when it issues a certificate. It is recommended that each certificate have unique subject information. NWA-3166 User’s Guide... - Page 193 You also need to fill in the Reference Number and Key if the certification authority requires them. NWA-3166 User’s Guide...
- Page 194 Return and check your information in the My Certificate Create screen. Make sure that the certification authority information is correct and that your Internet connection is working properly if you want the NWA to enroll a certificate online. NWA-3166 User’s Guide...
-
Page 195: My Certificates Details Screen
NWA. Click Certificates > My Certificates to open the My Certificates screen (Figure 114 on page 188). Click the details button to open the My Certificate Details screen. Figure 117 Certificates > My Certificate Details NWA-3166 User’s Guide... - Page 196 This field displays the type of algorithm that was used to sign the Algorithm certificate. The NWA uses rsa-pkcs1-sha1 (RSA public-private key encryption algorithm and the SHA1 hash algorithm). Some certification authorities may use ras-pkcs1-md5 (RSA public-private key encryption algorithm and the MD5 hash algorithm). NWA-3166 User’s Guide...
- Page 197 Cancel Click Cancel to quit and return to the My Certificates screen. NWA-3166 User’s Guide...
-
Page 198: Trusted Cas Screen
Valid To This field displays the date that the certificate expires. The text displays in red and includes an Expiring! or Expired! message if the certificate is about to expire or has already expired. NWA-3166 User’s Guide... -
Page 199: Trusted Cas Import Screen
Click Certificates >Trusted CAs to open the Trusted CAs screen and then click Import to open the Trusted CAs Import screen. The following figure displays. Note: You must remove any spaces from the certificate’s filename before you can import the certificate. Figure 119 Certificates > Trusted CAs Import NWA-3166 User’s Guide... -
Page 200: Trusted Cas Details Screen
NWA to check a certification authority’s list of revoked certificates before trusting a certificate issued by the certification authority. Click Certificates > Trusted CAs to open the Trusted CAs screen. Click the details icon to open the Trusted CAs Details screen. Figure 120 Certificates > Trusted CAs Details NWA-3166 User’s Guide... - Page 201 (RSA public-private key encryption algorithm and the MD5 hash algorithm). Valid From This field displays the date that the certificate becomes applicable. The text displays in red and includes a Not Yet Valid! message if the certificate has not yet become applicable. NWA-3166 User’s Guide...
- Page 202 NWA to check the CRL that the certification authority issues before trusting a certificate issued by the certification authority. Cancel Click Cancel to quit and return to the Trusted CAs screen. NWA-3166 User’s Guide...
-
Page 203: Technical Reference
There are commercial certification authorities like CyberTrust or VeriSign and government certification authorities. You can use the NWA to generate certification requests that contain identifying information and public keys and then send the certification requests to a certification authority. NWA-3166 User’s Guide... -
Page 204: Checking The Fingerprint Of A Certificate
Use a secure method to verify that the certificate owner has the same information in the Thumbprint Algorithm and Thumbprint fields. The secure method may vary according to your situation. Possible examples would be over the telephone or through an HTTPS connection. NWA-3166 User’s Guide... -
Page 205: Chapter 19 Log Screens
206) to display all logs or logs for a certain category. You can view logs and alert messages in this page. Once the log entries are all used, the log will wrap around and the old logs will be deleted. NWA-3166 User’s Guide... -
Page 206: What You Need To Know About Logs
You can view logs and alert messages in this page. Once the log entries are all used, the log will wrap around and the old logs will be deleted. Click a column heading to sort the entries. A triangle indicates ascending or descending sort order. NWA-3166 User’s Guide... - Page 207 Click Email Log Now to send the log screen to the e-mail address specified in the Log Settings page. Refresh Click Refresh to renew the log screen. Clear Log Click Clear Log to clear all the logs. NWA-3166 User’s Guide...
-
Page 208: The Log Settings Screen
Use this screen to configure where and when the NWA will send the logs, and which logs and/or immediate alerts to send. Click Logs > Log Settings. The following screen displays. Figure 125 Logs > Log Settings NWA-3166 User’s Guide... - Page 209 Use the drop down list box to select which day of the week to send the logs. Time for Enter the time of the day in 24-hour format (for example 23:00 Sending Log equals 11:00 pm) to send the logs. NWA-3166 User’s Guide...
-
Page 210: Technical Reference
Someone has failed to log on to the NWA via telnet. TELNET Login Fail Someone has logged on to the NWA via FTP. FTP Login Successfully Someone has failed to log on to the NWA via FTP. FTP Login Fail NWA-3166 User’s Guide... - Page 211 Table 72 Sys log LOG MESSAGE DESCRIPTION This message is sent by the "RAS" when this syslog is Mon dd hr:mm:ss hostname generated. The messages and notes are defined in this src="<srcIP:srcPort>" appendix’s other charts. dst="<dstIP:dstPort>" msg="<msg>" note="<note>" NWA-3166 User’s Guide...
-
Page 212: Log Commands
3 ras> sys logs save ras> sys logs display access time source destination notes message 0 | 11/11/2002 15:10:12 | 172.22.3.80:137 | 172.22.255.255:137 | ACCESS BLOCK NWA-3166 User’s Guide... - Page 213 Chapter 19 Log Screens NWA-3166 User’s Guide...
- Page 214 Chapter 19 Log Screens NWA-3166 User’s Guide...
-
Page 215: Chapter 20 Vlan
• Use the Radius VLAN screen (Section 20.2.1 on page 219) to configure your RADIUS Virtual LAN setup. Your RADIUS server assigns VLAN IDs to a user or user group’s traffic based on what you set in this screen. NWA-3166 User’s Guide... -
Page 216: What You Need To Know About Vlan
VLAN, then that device cannot manage the NWA. Note: If no devices are in the management VLAN, then you will be able to access the NWA only through the console port (not through the network). NWA-3166 User’s Guide... -
Page 217: Wireless Vlan Screen
Chapter 20 VLAN 20.2 Wireless VLAN Screen Use this screen to enable and configure your Wireless Virtual LAN setup. Click VLAN > Wireless VLAN. The following screen appears. Figure 127 VLAN > Wireless VLAN NWA-3166 User’s Guide... - Page 218 VLAN ID or Second Rx VLAN ID fields. Section 20.3.4 on page 233 for more information. Apply Click this to save your changes to the NWA. Reset Click this to return this screen to its last-saved settings. NWA-3166 User’s Guide...
-
Page 219: Radius Vlan Screen
VLAN ID. See your RADIUS server documentation for more information on configuring VLAN ID attributes. Section 20.3.3 on page 223 for more information. Index This is the index number of the VLAN mapping ID. NWA-3166 User’s Guide... -
Page 220: Technical Reference
This section shows you how to create a VLAN on an Ethernet switch. By default, the port on the NWA is a member of the management VLAN (VLAN ID 1). The following procedure shows you how to configure a tagged VLAN. NWA-3166 User’s Guide... - Page 221 Type a VLAN Group ID. This should be the same as the management VLAN ID on the NWA. Enable Transmitted Packets (Tx) Tagging on the port which you want to connect to the NWA. Disable Tx Tagging on the port you are using to connect to your computer. NWA-3166 User’s Guide...
- Page 222 Figure 129 on page 221. In the NWA web configurator click VLAN to open the VLAN setup screen. Select the Enable VLAN Tagging check box and type a Management VLAN ID (10 in this example) in the field provided. NWA-3166 User’s Guide...
-
Page 223: Configuring Microsoft's Ias Server Example
Dynamic VLAN assignment can be used with the NWA. Dynamic VLAN assignment allows network administrators to assign a specific VLAN (configured on the NWA) to an individual’s Windows User Account. When a wireless station is successfully authenticated to the network, it is automatically placed into it’s respective VLAN. NWA-3166 User’s Guide... -
Page 224: Configuring Vlan Groups
Chapter 20 VLAN ZyXEL uses the following standard RADIUS attributes returned from Microsoft’s IAS RADIUS service to place the wireless station into the correct VLAN: Table 76 Standard RADIUS Attributes ATTRIBUTE NAME TYPE VALUE Tunnel-Type 13 (decimal) – VLAN Tunnel-Medium-Type 6 (decimal) –... -
Page 225: Configuring Remote Access Policies
20.3.3.2 Configuring Remote Access Policies Once the VLAN Groups have been created, the IAS Remote Access Policy needs to be defined. This allows the IAS to compare the user account being authenticated against the group memberships of each VLAN Group. NWA-3166 User’s Guide... - Page 226 Policy will be matched to one VLAN Group. An example may be, Allow - VLAN 10 Policy. Click Next. Figure 136 New Remote Access Policy for VLAN Group The Conditions window displays. Select Add to add a condition for this policy to act on. NWA-3166 User’s Guide...
- Page 227 Click OK and Next in the next few screens to accept the group value. Figure 138 Adding VLAN Group When the Permissions options screen displays, select Grant remote access permission. Click Next to grant access based on group membership. NWA-3166 User’s Guide...
- Page 228 Extensible Authentication Protocol check box. Select an EAP type depending on your authentication needs from the drop- down list box. Clear the check boxes for all other authentication types listed below the drop- down list box. Figure 140 Authentication Tab Settings NWA-3166 User’s Guide...
- Page 229 10 Click the Advanced tab. The current default parameters returned to the NWA should be Service-Type and Framed-Protocol. • Click the Add button to add an additional three RADIUS VLAN attributes required for 802.1X Dynamic VLAN Assignment. Figure 142 Connection Attributes Screen NWA-3166 User’s Guide...
- Page 230 11c Click the Add button. Figure 143 RADIUS Attribute Screen 12 The Enumerable Attribute Information screen displays. Select the 802 value from the Attribute value drop-down list box. • Click OK. Figure 144 802 Attribute Setting for Tunnel-Medium-Type NWA-3166 User’s Guide...
- Page 231 15 Return to the RADIUS Attribute Screen shown as Figure 143 on page 230. 15a Select Tunnel-Type. 15b Click Add. 16 The Enumerable Attribute Information screen displays. 16a Select Virtual LANs (VLAN) from the attribute value drop-down list box. NWA-3166 User’s Guide...
- Page 232 Note: Repeat the Configuring Remote Access Policies procedure for each VLAN Group defined in the Active Directory. Remember to place the most general Remote Access Policies at the bottom of the list and the most specific at the top of the list. NWA-3166 User’s Guide...
-
Page 233: Second Rx Vlan Id Example
SSID02 has no second Rx VLAN ID configured, and the NWA forwards only packets tagged with VLAN ID 2 to it. 20.3.4.1 Second Rx VLAN Setup Example The following steps show you how to setup a second Rx VLAN ID on the NWA. Log into the Web Configurator. NWA-3166 User’s Guide... - Page 234 Figure 149 Configuring SSID: Second Rx VLAN ID Example Click Apply to save these settings. Outgoing packets from clients in SSID03 are tagged with a VLAN ID of 3, and incoming packets with a VLAN ID of 3 or 4 are forwarded to SSID03. NWA-3166 User’s Guide...
- Page 235 Chapter 20 VLAN NWA-3166 User’s Guide...
- Page 236 Chapter 20 VLAN NWA-3166 User’s Guide...
-
Page 237: Chapter 21 Maintenance
21.1.2 What You Need To Know The following terms and concepts may help as you read through this chapter. Find firmware at www.zyxel.com in a file that (usually) uses the system model name with a "*.bin" extension, for example "[Model #].bin". The upload process uses HTTP (Hypertext Transfer Protocol) and may take up to two minutes. -
Page 238: Association List Screen
This field displays the time a wireless station first associated with the NWA. SSID This field displays the SSID to which the wireless station is associated. Signal This field displays the RSSI (Received Signal Strength Indicator) of the wireless connection. Refresh Click Refresh to reload the screen. NWA-3166 User’s Guide... -
Page 239: Channel Usage Screen
Network Mode “Network mode” in this screen refers to your wireless LAN infrastructure (refer to the Wireless LAN chapter) and security setup. Refresh Click Refresh to reload the screen. NWA-3166 User’s Guide... -
Page 240: F/W Upload Screen
Do not turn off the NWA while firmware upload is in progress! After you see the Firmware Upload in Process screen, wait two minutes before logging into the NWA again. Figure 153 Firmware Upload In Process NWA-3166 User’s Guide... - Page 241 After two minutes, log in again and check your new firmware version in the System Status screen. If the upload was not successful, the following screen will appear. Click Return to go back to the F/W Upload screen. Figure 155 Firmware Upload Error NWA-3166 User’s Guide...
-
Page 242: Configuration Screen
The backup configuration file will be useful in case you need to return to your previous settings. Click Backup to save the NWA’s current configuration to your computer. NWA-3166 User’s Guide... -
Page 243: Restore Configuration
If you uploaded the default configuration file you may need to change the IP address of your computer to be in the same subnet as that of the default NWA IP address (192.168.1.2). See your Quick Start Guide for details on how to set up your computer’s IP address. NWA-3166 User’s Guide... -
Page 244: Back To Factory Defaults
Use this screen to restart the NWA without turning it off and on. Click Maintenance > Restart. The following screen displays. Click Restart to have the NWA reboot. This does not affect the NWA's configuration. Figure 161 Restart Screen NWA-3166 User’s Guide... -
Page 245: Chapter 22 Troubleshooting
If the problem continues, contact the vendor. One of the LEDs does not behave as expected. Make sure you understand the normal behavior of the LED. See Section 1.7 on page Check the hardware connections. See the Quick Start Guide. NWA-3166 User’s Guide... -
Page 246: Nwa Access And Login
Area Network). Use the LAN MAC address when accessing the NWA over the wired network, and use the WLAN MAC address when accessing the NWA over the wireless interface. If this does not work, you have to reset the device to its factory defaults. See Section 2.3 on page NWA-3166 User’s Guide... - Page 247 NWA, check the remote management settings to find out why the NWA does not respond to HTTP. • If your computer is connected to the WAN port or is connected wirelessly, use a computer that is connected to a LAN/ETHERNET port. NWA-3166 User’s Guide...
- Page 248 I cannot use FTP to upload / download the configuration file. / I cannot use FTP to upload new firmware. See the troubleshooting suggestions for I cannot see or access the Login screen in the web configurator. Ignore the suggestions about your browser. NWA-3166 User’s Guide...
-
Page 249: Internet Access
Check the signal strength. If the signal is weak, try moving the NWA closer to the AP (if possible), and look around to see if there are any devices that might be interfering with the wireless network (microwaves, other wireless networks, and so on). NWA-3166 User’s Guide... -
Page 250: Wireless Router/Ap Troubleshooting
Make sure traffic between the WLAN and the LAN is not blocked by the firewall on the NWA. Make sure you allow the NWA to be remotely accessed through the WLAN interface. Check your remote management settings. NWA-3166 User’s Guide... -
Page 251: Appendix A Product Specifications
0 ~ 50 º C Temperature Storage Temperature -20 ~ 60 º C Operating Humidity 10 ~ 90 % (non-condensing) Storage Humidity 5 ~ 95 % (non-condensing) Dimensions 198.5 mm (L) x 138.5mm (W) x 47.5mm (H) Weight 450g NWA-3166 User’s Guide... - Page 252 SSL connection start with “https” instead of “http”. The NWA allows SSL connections to take place through the NWA. MAC Address Filter Your NWA checks the MAC address of the wireless station against a list of allowed or denied MAC addresses. NWA-3166 User’s Guide...
-
Page 253: Wall-Mounting Instructions
DFS (Dynamic Frequency Selection) allows a wider choice of 802.11a wireless channels. CAPWAP The ZyXEL Device can be managed via CAPWAP (Control And Provisioning of Wireless Access Points), which allows multiple APs to be configured and managed by a single AP controller. - Page 254 Figure 162 Wall-mounting Example The following are dimensions of an M4 tap screw and masonry plug used for wall mounting. All measurements are in millimeters (mm). Figure 163 Masonry Plug and M4 Tap Screw NWA-3166 User’s Guide...
-
Page 255: Appendix B Wireless Lans
(AP). Intra-BSS traffic is traffic between wireless clients in the BSS. When Intra-BSS is enabled, wireless client A and B can access the wired network and communicate NWA-3166 User’s Guide... - Page 256 This wired connection between APs is called a Distribution System (DS). This type of wireless LAN topology is called an Infrastructure WLAN. The Access Points not only provide communication with the wired network but also mediate wireless network traffic in the immediate neighborhood. NWA-3166 User’s Guide...
- Page 257 AP should be on a channel at least five channels away from a channel that an adjacent AP is using. For example, if your region has 11 channels and an adjacent AP is using channel 1, then you need to select a channel between 6 or 11. NWA-3166 User’s Guide...
- Page 258 RTS (Request To Send)/CTS (Clear to Send) handshake. You should only configure RTS/CTS if the possibility of hidden nodes exists on your network and the "cost" of resending large frames is more than the extra NWA-3166 User’s Guide...
-
Page 259: Fragmentation Threshold
Select Short preamble if you are sure the wireless adapters support it, and to provide more efficient communications. Select Dynamic to have the AP automatically use short preamble when wireless adapters support it, otherwise the AP uses long preamble. NWA-3166 User’s Guide... -
Page 260: Wireless Security Overview
Wireless security is vital to your network to protect wireless communication between wireless clients, access points and the wired network. Wireless security methods available on the NWA are data encryption, wireless client authentication, restricting access by device MAC address and hiding the NWA identity. NWA-3166 User’s Guide... - Page 261 RADIUS is based on a client-server model that supports authentication, authorization and accounting. The access point is the client and the server is the RADIUS server. The RADIUS server handles the following tasks: • Authentication Determines the identity of the users. NWA-3166 User’s Guide...
- Page 262 In addition to the shared key, password information exchanged is also encrypted to protect the network from unauthorized access. Types of EAP Authentication This section discusses some popular authentication types: EAP-MD5, EAP-TLS, EAP-TTLS, PEAP and LEAP. Your wireless LAN device may not support all authentication types. NWA-3166 User’s Guide...
- Page 263 EAP-TTLS is an extension of the EAP-TLS authentication that uses certificates for only the server-side authentications to establish a secure connection. Client authentication is then done by sending username and password through the secure connection, thus client identity is protected. For client authentication, EAP- NWA-3166 User’s Guide...
-
Page 264: Dynamic Wep Key Exchange
Table 85 Comparison of EAP Authentication Types EAP-MD5 EAP-TLS EAP-TTLS PEAP LEAP Mutual Authentication Certificate – Client Optional Optional Certificate – Server Dynamic Key Exchange Credential Integrity None Strong Strong Strong Moderate Deployment Difficulty Easy Hard Moderate Moderate Moderate Client Identity Protection NWA-3166 User’s Guide... -
Page 265: Wpa And Wpa2
PMK to dynamically generate unique data encryption keys to encrypt every data packet that is wirelessly communicated between the AP and the wireless clients. This all happens in the background automatically. NWA-3166 User’s Guide... - Page 266 A wireless client supplicant is the software that runs on an operating system instructing the wireless client how to use WPA. At the time of writing, the most widely available supplicant is the WPA patch for Windows XP, Funk Software's Odyssey client. NWA-3166 User’s Guide...
- Page 267 AP and the wireless clients. Figure 168 WPA(2) with RADIUS Application Example WPA(2)-PSK Application Example A WPA(2)-PSK application looks as follows. NWA-3166 User’s Guide...
- Page 268 MANUAL KEY IEEE 802.1X MANAGEMENT N METHOD PROTOCOL Open None Disable Enable without Dynamic WEP Open Enable with Dynamic WEP Key Enable without Dynamic WEP Disable Shared Enable with Dynamic WEP Key Enable without Dynamic WEP Disable NWA-3166 User’s Guide...
- Page 269 Appendix B Wireless LANs Table 86 Wireless Security Relational Matrix (continued) AUTHENTICATION METHOD/ KEY ENCRYPTIO ENTER IEEE 802.1X MANAGEMENT N METHOD MANUAL KEY PROTOCOL TKIP/AES Enable WPA-PSK TKIP/AES Disable WPA2 TKIP/AES Enable WPA2-PSK TKIP/AES Disable NWA-3166 User’s Guide...
- Page 270 Appendix B Wireless LANs NWA-3166 User’s Guide...
-
Page 271: Appendix C Pop-Up Windows, Javascripts And Java Permissions
Disable pop-up Blockers In Internet Explorer, select Tools, Pop-up Blocker and then select Turn Off Pop-up Blocker. Figure 170 Pop-up Blocker You can also check if pop-up blocking is disabled in the Pop-up Blocker section in the Privacy tab. NWA-3166 User’s Guide... - Page 272 Click Apply to save this setting. Enable pop-up Blockers with Exceptions Alternatively, if you only want to allow pop-up windows from your device, see the following steps. In Internet Explorer, select Tools, Internet Options and then the Privacy tab. NWA-3166 User’s Guide...
- Page 273 Select Settings…to open the Pop-up Blocker Settings screen. Figure 172 Internet Options: Privacy Type the IP address of your device (the web page that you do not want to have blocked) with the prefix “http://”. For example, http://192.168.167.1. NWA-3166 User’s Guide...
- Page 274 Figure 173 Pop-up Blocker Settings Click Close to return to the Privacy screen. Click Apply to save this setting. JavaScripts If pages of the web configurator do not display properly in Internet Explorer, check that JavaScripts are allowed. NWA-3166 User’s Guide...
- Page 275 Figure 174 Internet Options: Security Click the Custom Level... button. Scroll down to Scripting. Under Active scripting make sure that Enable is selected (the default). Under Scripting of Java applets make sure that Enable is selected (the default). NWA-3166 User’s Guide...
-
Page 276: Java Permissions
Figure 175 Security Settings - Java Scripting Java Permissions From Internet Explorer, click Tools, Internet Options and then the Security tab. Click the Custom Level... button. Scroll down to Microsoft VM. Under Java permissions make sure that a safety level is selected. NWA-3166 User’s Guide... - Page 277 Click OK to close the window. Figure 176 Security Settings - Java JAVA (Sun) From Internet Explorer, click Tools, Internet Options and then the Advanced tab. Make sure that Use Java 2 for <applet> under Java (Sun) is selected. NWA-3166 User’s Guide...
- Page 278 Appendix C Pop-up Windows, JavaScripts and Java Permissions Click OK to close the window. Figure 177 Java (Sun) NWA-3166 User’s Guide...
-
Page 279: Appendix D Ip Addresses And Subnetting
192.168.1.1). Each of these four parts is known as an octet. An octet is an eight-digit binary number (for example 11000000, which is 192 in decimal notation). Therefore, each octet has a possible range of 00000000 to 11111111 in binary, or 0 to 255 in decimal. NWA-3166 User’s Guide... -
Page 280: Subnet Masks
The following example shows a subnet mask identifying the network number (in bold text) and host ID of an IP address (192.168.1.2 in decimal). Table 87 Subnet Masks OCTET: OCTET: OCTET: OCTET (192) (168) IP Address (Binary) 11000000 10101000 00000001 00000010 Subnet Mask (Binary) 11111111 11111111 11111111 00000000 NWA-3166 User’s Guide... - Page 281 An IP address with host IDs of all zeros is the IP address of the network (192.168.1.0 with a 24-bit subnet mask, for example). An IP address with host IDs of all ones is the broadcast address for that network (192.168.1.255 with a 24-bit subnet mask, for example). NWA-3166 User’s Guide...
- Page 282 Table 90 Alternative Subnet Mask Notation SUBNET ALTERNATIVE LAST OCTET LAST OCTET MASK NOTATION (BINARY) (DECIMAL) 255.255.255.0 0000 0000 255.255.255.12 1000 0000 255.255.255.19 1100 0000 255.255.255.22 1110 0000 255.255.255.24 1111 0000 255.255.255.24 1111 1000 255.255.255.25 1111 1100 NWA-3166 User’s Guide...
- Page 283 You can “borrow” one of the host ID bits to divide the network 192.168.1.0 into two separate sub-networks. The subnet mask is now 25 bits (255.255.255.128 or /25). The “borrowed” host ID bit can have a value of either 0 or 1, allowing two subnets; 192.168.1.0 /25 and 192.168.1.128 /25. NWA-3166 User’s Guide...
- Page 284 Similarly, to divide a 24-bit address into four subnets, you need to “borrow” two host ID bits to give four possible combinations (00, 01, 10 and 11). The subnet mask is 26 bits (11111111.11111111.11111111.11000000) or 255.255.255.192. NWA-3166 User’s Guide...
- Page 285 Lowest Host ID: 192.168.1.129 192.168.1.128 Broadcast Address: Highest Host ID: 192.168.1.190 192.168.1.191 Table 94 Subnet 4 LAST OCTET BIT IP/SUBNET MASK NETWORK NUMBER VALUE IP Address 192.168.1. IP Address (Binary) 11000000.10101000.00000001 11000000 Subnet Mask (Binary) 11111111.11111111.11111111 11000000 NWA-3166 User’s Guide...
- Page 286 The following table is a summary for subnet planning on a network with a 24-bit network number. Table 96 24-bit Network Number Subnet Planning NO. “BORROWED” NO. HOSTS PER SUBNET MASK NO. SUBNETS HOST BITS SUBNET 255.255.255.128 (/25) 255.255.255.192 (/26) 255.255.255.224 (/27) 255.255.255.240 (/28) 255.255.255.248 (/29) 255.255.255.252 (/30) 255.255.255.254 (/31) NWA-3166 User’s Guide...
- Page 287 (for instance, 192.168.1.1) but make sure that no other device on your network is using that IP address. The subnet mask specifies the network number portion of an IP address. Your NWA will compute the subnet mask automatically based on the IP address that NWA-3166 User’s Guide...
-
Page 288: Setting Up Your Computer's Ip Address
"communicate" with your network. If you manually assign IP information instead of using dynamic assignment, make sure that your computers have IP addresses that place them in the same subnet as the NWA’s LAN port. NWA-3166 User’s Guide... - Page 289 In the Network window, click Add. Select Adapter and then click Add. Select the manufacturer and model of your network adapter and then click OK. If you need TCP/IP: In the Network window, click Add. Select Protocol and then click Add. NWA-3166 User’s Guide...
- Page 290 • If your IP address is dynamic, select Obtain an IP address automatically. • If you have a static IP address, select Specify an IP address and type your information into the IP Address and Subnet Mask fields. Figure 182 Windows 95/98/Me: TCP/IP Properties: IP Address NWA-3166 User’s Guide...
- Page 291 Click OK to close the Network window. Insert the Windows CD if prompted. Turn on your NWA and restart your computer when prompted. Verifying Settings Click Start and then Run. In the Run window, type "winipcfg" and then click OK to open the IP Configuration window. NWA-3166 User’s Guide...
- Page 292 For Windows XP, click start, Control Panel. In Windows 2000/NT, click Start, Settings, Control Panel. Figure 184 Windows XP: Start Menu For Windows XP, click Network Connections. For Windows 2000/NT, click Network and Dial-up Connections. Figure 185 Windows XP: Control Panel NWA-3166 User’s Guide...
- Page 293 Select Internet Protocol (TCP/IP) (under the General tab in Win XP) and click Properties. Figure 187 Windows XP: Local Area Connection Properties The Internet Protocol TCP/IP Properties window opens (the General tab in Windows XP). • If you have a dynamic IP address click Obtain an IP address automatically. NWA-3166 User’s Guide...
- Page 294 Gateway. To manually configure a default metric (the number of transmission hops), clear the Automatic metric check box and type a metric in Metric. • Click Add. • Repeat the previous three steps for each default gateway you want to add. • Click OK when finished. NWA-3166 User’s Guide...
- Page 295 Click Start, All Programs, Accessories and then Command Prompt. In the Command Prompt window, type "ipconfig" and then press [ENTER]. You can also open Network Connections, right-click a network connection, click Status and then click the Support tab. NWA-3166 User’s Guide...
- Page 296 Appendix D IP Addresses and Subnetting Macintosh OS 8/9 Click the Apple menu, Control Panel and double-click TCP/IP to open the TCP/ IP Control Panel. Figure 190 Macintosh OS 8/9: Apple Menu NWA-3166 User’s Guide...
- Page 297 Close the TCP/IP Control Panel. Click Save if prompted, to save changes to your configuration. Turn on your NWA and restart your computer (if prompted). Verifying Settings Check your TCP/IP properties in the TCP/IP Control Panel window. NWA-3166 User’s Guide...
- Page 298 • Select Built-in Ethernet from the Show list. • Click the TCP/IP tab. For dynamically assigned settings, select Using DHCP from the Configure list. Figure 193 Macintosh OS X: Network For statically assigned settings, do the following: NWA-3166 User’s Guide...
- Page 299 • Type the IP address of your NWA in the Router address box. Click Apply Now and close the window. Turn on your NWA and restart your computer (if prompted). Verifying Settings Check your TCP/IP properties in the Network window. NWA-3166 User’s Guide...
- Page 300 Appendix D IP Addresses and Subnetting NWA-3166 User’s Guide...
-
Page 301: Appendix E Text File Based Auto Configuration
Figure 194 Text File Based Auto Configuration Use one of the following methods to give the AP the IP address of the TFTP server where you store the configuration files and the name of the configuration file that it should download. NWA-3166 User’s Guide... - Page 302 Step 1 pwTftpServer Set the IP address of the TFTP server. Step 2 pwTftpFileName Set the file name, for example, g3000hcfg.txt. Step 3 pwTftpFileType Set to 3 (text configuration file). Step 4 pwTftpOpCommand Set to 2 (download). NWA-3166 User’s Guide...
- Page 303 1 xxx wcfg ssid save The first line must be !#ZYXEL PROWLAN. The second line must specify the file version. The AP compares the file version with the version of the last configuration file that it downloaded. If the version of the downloaded file is the same or smaller (older), the AP ignores the file.
- Page 304 1 wep key4 defgh wcfg security 1 wep keyindex 1 wcfg security save wcfg ssid 1 name ssid-wep wcfg ssid 1 security Test-wep wcfg ssid 1 l2iolation disable wcfg ssid 1 macfilter disable wcfg ssid save NWA-3166 User’s Guide...
- Page 305 3 idletime 3600 wcfg security 3 groupkeytime 1800 wcfg security save wcfg ssid 3 name ssid-wpapsk wcfg ssid 3 security Test-wpapsk wcfg ssid 3 qos 4 wcfg ssid 3 l2siolation disable wcfg ssid 3 macfilter disable wcfg ssid save NWA-3166 User’s Guide...
- Page 306 SSID profiles from the wcfg command configuration file examples and general wireless settings. You could actually combine all of this chapter’s example configuration files into a single configuration file. Remember that the commands are applied in order. So for example, you would place the NWA-3166 User’s Guide...
- Page 307 0 wlan ssidprofile ssid-wep !change operating mode -> MBSSID mode, !then select ssid-wpapsk, ssid-wpa2psk as running WLAN profiles wlan opmode 3 wlan ssidprofile ssid-wpapsk ssid-wpa2psk ! set output power level to 50% wlan output power 2 NWA-3166 User’s Guide...
- Page 308 Appendix E Text File Based Auto Configuration NWA-3166 User’s Guide...
-
Page 309: Appendix F How To Access And Use The Cli
Terminal Emulation VT100 Baud Rate 9600 bps Parity None Number of Data Bits Number of Stop Bits Flow Control None Press [ENTER] to open the login screen. Telnet Connect your computer to one of the Ethernet ports. NWA-3166 User’s Guide... -
Page 310: Command Conventions
60 minutes of inactivity after you use the sys stdio set 60 command. Use the sys stdio show command to display the current idle timeout setting. Command Conventions Command descriptions follow these conventions: NWA-3166 User’s Guide... - Page 311 Used for the name of a rule, policy, set, group and so on. name Used for a number, for example 10, that you have to enter. number Note: Commands are case sensitive! Enter commands exactly as seen in the command interface. Remember to also include underscores if required. NWA-3166 User’s Guide...
- Page 312 Log into the CLI. Type help and press [ENTER]. A list comes up which shows all the commands available for this device. ras> help alarm chsh config exit statistics switch voip ras> NWA-3166 User’s Guide...
-
Page 313: Logging Out
See the related section of this guide to see if a save command is required. Note: Unsaved configuration changes are lost once you restart the NWA Logging Out Use the exit command to log out of the CLI. NWA-3166 User’s Guide... - Page 314 Appendix F How to Access and Use the CLI NWA-3166 User’s Guide...
-
Page 315: Appendix G Legal Information
Published by ZyXEL Communications Corporation. All rights reserved. Disclaimers ZyXEL does not assume any liability arising out of the application or use of any products, or software described herein. Neither does it convey any license under its patent rights nor the patent rights of others. ZyXEL further reserves the right to make changes in any products described herein without notice. - Page 316 • To comply with FCC RF exposure compliance requirements, a separation distance of at least 20 cm must be maintained between the antenna of this device and all persons. 注意 ! 依據 低功率電波輻射性電機管理辦法 第十二條 經型式認證合格之低功率射頻電機,非經許可,公司、商號或使用 者均不得擅自變更頻率、加大功率或變更原設計之特性及功能。 第十四條 低功率射頻電機之使用不得影響飛航安全及干擾合法通信;經發現 有干擾現象時,應立即停用,並改善至無干擾時方得繼續使用。 NWA-3166 User’s Guide...
-
Page 317: Zyxel Limited Warranty
Canada. Viewing Certifications Go to http://www.zyxel.com. Select your product on the ZyXEL home page to go to that product's page. Select the certification you wish to view from this page. ZyXEL Limited Warranty ZyXEL warrants to the original end user (purchaser) that this product is free from any defects in materials or workmanship for a period of up to two years from the date of purchase. - Page 318 This warranty is in lieu of all other warranties, express or implied, including any implied warranty of merchantability or fitness for a particular use or purpose. ZyXEL shall in no event be held liable for indirect or consequential damages of any kind to the purchaser.
-
Page 319: Appendix H Customer Support
In the event of problems that cannot be solved by using this manual, you should contact your vendor. If you cannot contact your vendor, then contact a ZyXEL office for the region in which you bought the device. Regional offices are listed below (see also http://www.zyxel.com/web/contact_us.php). - Page 320 • Support E-mail: soporte@zyxel.co.cr • Sales E-mail: sales@zyxel.co.cr • Telephone: +506-2017878 • Fax: +506-2015098 • Web: www.zyxel.co.cr • Regular Mail: ZyXEL Costa Rica, Plaza Roble Escazú, Etapa El Patio, Tercer Piso, San José, Costa Rica Czech Republic • E-mail: info@cz.zyxel.com • Telephone: +420-241-091-350 •...
- Page 321 France • E-mail: info@zyxel.fr • Telephone: +33-4-72-52-97-97 • Fax: +33-4-72-52-19-20 • Web: www.zyxel.fr • Regular Mail: ZyXEL France, 1 rue des Vergers, Bat. 1 / C, 69760 Limonest, France Germany • Support E-mail: support@zyxel.de • Sales E-mail: sales@zyxel.de • Telephone: +49-2405-6909-69 •...
- Page 322 • Sales E-mail: sales@zyxel.com.my • Telephone: +603-8076-9933 • Fax: +603-8076-9833 • Web: http://www.zyxel.com.my • Regular Mail: ZyXEL Malaysia Sdn Bhd., 1-02 & 1-03, Jalan Kenari 17F, Bandar Puchong Jaya, 47100 Puchong, Selangor Darul Ehsan, Malaysia North America • Support E-mail: support@zyxel.com •...
- Page 323 • Support E-mail: support@zyxel.com.sg • Sales E-mail: sales@zyxel.com.sg • Telephone: +65-6899-6678 • Fax: +65-6899-8887 • Web: http://www.zyxel.com.sg • Regular Mail: ZyXEL Singapore Pte Ltd., No. 2 International Business Park, The Strategy #03-28, Singapore 609930 Spain • Support E-mail: support@zyxel.es • Sales E-mail: sales@zyxel.es •...
- Page 324 • Sales E-mail: sales@zyxel.co.th • Telephone: +662-831-5315 • Fax: +662-831-5395 • Web: http://www.zyxel.co.th • Regular Mail: ZyXEL Thailand Co., Ltd., 1/1 Moo 2, Ratchaphruk Road, Bangrak-Noi, Muang, Nonthaburi 11000, Thailand. Turkey • Support E-mail: cso@zyxel.com.tr • Telephone: +90 212 222 55 22 •...
- Page 325 • Sales E-mail: sales@zyxel.co.uk • Telephone: +44-1344-303044, 0845 122 0301 (UK only) • Fax: +44-1344-303034 • Web: www.zyxel.co.uk • Regular Mail: ZyXEL Communications UK Ltd., 11 The Courtyard, Eastern Road, Bracknell, Berkshire RG12 2XB, United Kingdom (UK) NWA-3166 User’s Guide...
- Page 326 Appendix H Customer Support NWA-3166 User’s Guide...
-
Page 327: Index
(accessing the CLI) auto configuration status contact information Control and Providioning of Wireless Access Points See CAPWAP copyright backup CTS (Clear to Send) Basic Service Set see BSS customer support bridge 19, 22 Bridge Protocol Data Units (BPDUs) NWA-3166 User’s Guide... - Page 328 Internet security gateway Internet telephony IP address 88, 157, 252 FCC interference statement IPSec VPN capability file version isolation filtering firmware file maintenance fragmentation threshold friendly AP list 160, 163 layer-2 isolation 17, 24 26, 169 LEDs restrictions NWA-3166 User’s Guide...
- Page 329 MSDU radio RADIUS message types messages shared secret key rapid STP network reauthentication time 135, 136, 137, 138, 140 network access registration product network bridge related documentation network number remote management limitations network traffic NWA-3166 User’s Guide...
- Page 330 STP path costs wcfg command STP port states STP terminology 19, 20, 22 web configurator subnet 17, 29, 31 subnet mask 88, 252, 280 WEP encryption subnetting Wi-Fi Multimedia QoS syntax conventions Wi-Fi Protected Access system name 17, 265 NWA-3166 User’s Guide...
- Page 331 WPA-PSK wireless client supplicant with RADIUS application example WPA2 17, 265 user authentication vs WPA2-PSK wireless client supplicant with RADIUS application example WPA2-Pre-Shared Key WPA2-PSK 265, 266 application example WPA-PSK 265, 266 application example NWA-3166 User’s Guide...
- Page 332 Index NWA-3166 User’s Guide...
Need help?
Do you have a question about the NWA-3166 and is the answer not in the manual?
Questions and answers