
Subscribe to Our Youtube Channel
Related Manuals for Excelsior Excelair EPA58043WB


Summary of Contents for Excelsior Excelair EPA58043WB
- Page 1 Scan QR Code for WiFi Setup EPA58043WB Portable Air INSTRUCTIONS Conditioner Important: Retain these instructions for future use. 04785G 09/24...
- Page 2 24 MONTH WARRANTY The warranty is not transferable to a subsequent This warranty does not apply to any defect, deterioration, purchaser if the appliance is sold by the original purchaser loss, injury or damage occasioned by or as a result of during the warranty period.
- Page 3 INSTALLATION - GENERAL INFORMATION INDOOR USE ONLY • Closely supervise any children and pets when the appliance is in use. • This appliance is not intended for use by persons (including children) with reduced physical, sensory or mental capabilities, or lack of experience and knowledge, unless they have been given supervision or instruction concerning use of the appliance by a person responsible for their safety.
- Page 4 PARTS GENERAL INFORMATION 1. The appliance shall be stored so as to prevent 6. Where electrical components are being mechanical damage from occurring changed, they shall be fit for the purpose and to the correct specification. At all times 2. Every working procedure (Such as below) that affects the manufacturer’s maintenance and service safety means shall only be carried out by competent guidelines shall be followed. If in doubt, consult the persons.
- Page 5 10. Under no circumstances shall potential sources - Cylinders shall be kept in an appropriate of ignition be used in the searching for or position according to the instructions. detection of refrigerant leaks. A halide torch (or - Ensure that the refrigerating system is any other detector using a naked flame) shall earthed prior to charging the system with not be used. refrigerant. - Label the system when charging is The following leak detection methods are deemed complete (if not already labelled). acceptable for all refrigerant systems. Electronic leak detectors may be used to detect - Extreme care shall be taken not to overfill refrigerant leaks but, in the case of flammable the refrigerating system. refrigerants, the sensitivity can be inadequate, or Prior to recharging the system, it shall be pressure- can need re-calibration. (Detection equipment shall tested with the appropriate purging gas. The system be calibrated in a refrigerant-free area.) Ensure that shall be leak-tested on completion of charging but the detector is not a potential source of ignition and prior to commissioning. A follow up leak test shall be is suitable for the refrigerant used. Leak detection carried out prior to leaving the site.
- Page 6 PARTS GENERAL INFORMATION Disposal 10) When the cylinders have been filled correctly and the process completed, make sure that the The environment and personal safety must be cylinders and the equipment are removed from considered when disposing of this appliance. Please site promptly and all isolation valves on the ensure the appliance is taken to a recycle center for equipment are closed off. safe recycling. DO NOT dispose of the appliance in land fill as the insulation and refrigerant gas 11) Recovered refrigerant shall not be charged into contained in these appliances are flammable. another refrigerating system unless it has been cleaned and checked. 14. When removing refrigerant from a system, either for servicing or decommissioning, it is required to follow good practice so that all refrigerants are removed safely. When transferring refrigerant into cylinders, ensure that only appropriate refrigerant recovery cylinders are employed. Ensure that the correct number of cylinders for holding the total system charge is available. All cylinders to be used are designated for the recovered refrigerant and labelled for that refrigerant (i.e. special cylinders for the recovery of refrigerant). Cylinders shall be complete with pressure-relief valve and associated shut-off valves in good working order. Empty recovery cylinders are evacuated and, if possible, cooled before recovery occurs. The recovery equipment shall be in good working order with a set of instructions concerning the equipment that is at hand and shall be suitable for the recovery of the flammable refrigerant. Consult manufacturer if in doubt. In addition, a set of calibrated weighing scales shall be available and in good working order. Hoses shall be complete with...
- Page 7 INSTRUCTION MANUAL - PLEASE READ CAREFULLY...
- Page 8 INSTALLATION General Information • Keep ventilation openings clear of obstruction. • The appliance shall be stored in a well-ventilated • Do not turn on the appliance if you have discovered area where the room size corresponds to the room damage to the appliance, cord or plug, if the appliance area as specified for operation.
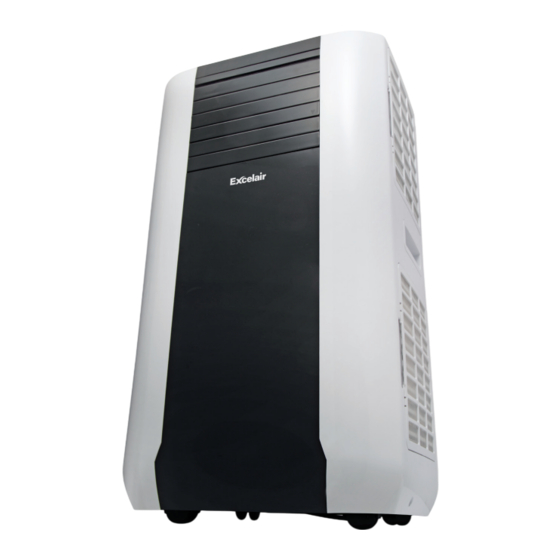
- Page 9 PARTS FRONT BACK Control panel 7. Power cord storage 2. Remote control receiver 8. Exhaust air outlet 3. Air vent 9. Drainage 4. Carrying handle 10. Air filter (air inlet) 5. Water tank access door (energy saver) 11. Air filter (air inlet) 6.
- Page 10 INSTALLATION This portable appliance can be moved from room to room as required. Before using your appliance, the exhaust pipe and window spacer kit must be installed to allow the condensed heat to escape outside to the open air. Using the included window spacer kit, follow the instructions below for the correct installation.
- Page 11 EXHAUST PIPE WINDOW MOUNTING Fig. 1 • Only use the exhaust pipe and fittings provided. • Connect the exhaust pipe to the back of the appliance and then to the flat adapter which was previously installed in the window spacer kit. •...
- Page 12 CARBON FILTER INSTALLATION This appliance is supplied with active carbon filters. The activated carbon is charcoal that has been treated with oxygen to open up millions of tiny pores between the carbon atoms. It is used to get rid of unwanted odors (smoke, fumes, and animal odor).
- Page 13 CONTROL PANEL 1. POWER button A. WiFi indicator 2. WiFi button B. Low fan speed indicator 3. SPEED (ventilation) button C. High fan speed indicator 4. SLEEP button D. Medium fan speed indicator 5. TIMER button E. Sleep mode indicator 6.
- Page 14 TURNING ON/OFF 1. Touch the ON/OFF button and the appliance will NOTE: start in AUTO (automatic) mode. Setpoint setting in Automatic Cooling mode 18-32°C 2. Touch the ON/OFF button again, to turn the At the default setpoint of 24°C, the appliance starts appliance Off.
- Page 15 SETTINGS Setting mode/function Dehumidify (DRY) mode Touch the MODE button to select the required operating The appliance will default to low speed when dehumidify mode: Cooling, Fan or Dehumidify (Dry). (dry) mode is selected. While operating in this mode, humidity is extracted from the air and collected. When The corresponding indicator of your selected mode will the appliance is operating in Dehumidify (Dry) mode, the illuminate.
- Page 16 AIR FLOW Adjust the air flow direction by manually moving the outer vent louvers ‘Up’ or ‘Down’ and the inner vent louvers ‘Left’ or ‘Right’ . IMPORTANT 1. To extend the life of the compressor, it is recommended to wait at least 3 minutes before turning the appliance back On, once it has been turned Off.
- Page 17 EFFICIENCY BOOSTING Settings The appliance is fitted with a energy efficient boosting function. By adding up to 3.0L of clean water to the water tank, energy efficiency can be enhanced. While the appliance is in operation, the temperature of the condenser will increase, and by adding the water after an hour of operation, will assist with the cooling of the condenser and at the same time, reduce power consumption.
- Page 18 DRAINAGE During normal operation of this appliance, moisture from the air will be collected in the internal water tank and will require emptying periodically. If the water tank fills to the maximum level, the ‘Water Full Indicator’ will illuminate, an alarm will sound, and the compressor will turn off.
- Page 19 Should you prefer to use the appliance without having to empty the tank every so often, proceed as follows: • Remove the drain knob and rubber plug and retain for future use. • Connect the drain tube supplied to the water outlet as shown and locate the other end into a drain.
- Page 20 MAINTENANCE For personal safety, always unplug the appliance from mains power prior to cleaning. To maximize the efficiency of this appliance, ensure that it is cleaned regularly following these simple steps. Cleaning the housing Use a soft cloth, dampened with water only to wipe down the outer case.
- Page 21 FAULT CHECK LIST FAULT CAUSE Is the appliance plugged in or turned On? Is there a power failure? The appliance does not turn On. Is the ‘Water Full’ indicator flashing? Empty if required. Is the room temperature below the set temperature? Is the appliance in direct sunlight? Close curtains if necessary.
- Page 22 NOTES...
- Page 23 INSTRUCTION MANUAL - PLEASE READ CAREFULLY...
- Page 24 PARTS SPECIFICATIONS ITEM No EPA58043WB Cooling capacity 4.3kW Power/Ampere consumption* (Cooling) 1650W/7.7A Air volume (max. speed) 500m3/hr Humidity removal capacity 40L/day Power supply 220 - 240V/50Hz Compressor Rotary Refrigerant R290/ 300g Fan speed Timer 24 Hours Working temperature Cooling: 18 ~ 32˚C Exhaust pipe Ø...
Need help?
Do you have a question about the Excelair EPA58043WB and is the answer not in the manual?
Questions and answers