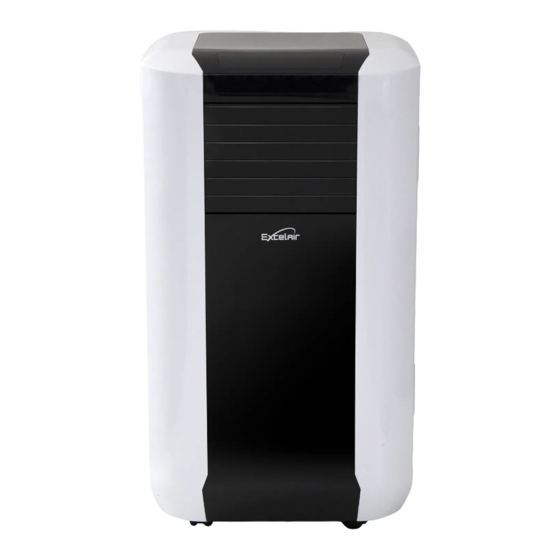
Summary of Contents for Excelsior Excelair EPA20A
- Page 1 Portable Air Conditioner Instruction Manual for EPA20A ☆ Read and retain these instructions for future reference...
-
Page 2: Specification
SPECIFICATION Model no. EPA20A Power supply 220-240V~, 50Hz Cooling capacity 5.3kW Power/Ampere consumption 1900W/8.5A Air Volume 675m³/hr Moisture Removal 51 ltr/day Compressor Rotary Refrigerant R-410A Fan speed Timer 1~24 hours Working temperature 18 ~ 32 Exhaust pipe Ø 165 x 1500 mm Net Weight 42.5 kg Dimension (WxDxH) - Page 3 BEFORE USE FOR INDOOR USE ONLY. DO NOT USE IN CABINETS, CLOSETS, BOATS, CARAVANS OR SIMILAR LOCATIONS. LEAVE THE UNIT TO STAND FOR 12 HOURS BEFORE CONNECTING TO THE MAINS SUPPLY AFTER TRANSPORT OR WHEN IT HAS BEEN TILTED (E.G. DURING CLEANING).
-
Page 4: Before Use
BEFORE USE DO NOT USE EXTENSION CORDS. IF THE SUPPLY CORD IS DAMAGED, IT MUST BE REPLACED BY AN ELECTRICIAN OR SIMILARLY QUALIFIED PERSON. THE MAINS SUPPLY MUST CONFORM TO THE SPECIFICATION SHOWN ON THE RATING PLATE AT THE BACK OF THE UNIT. THE APPLIANCE SHALL BE INSTALLED IN ACCORDANCE WITH NATIONAL WIRING REGULATIONS. - Page 5 PARTS...
-
Page 6: Installation
INSTALLATION The unit is a portable air conditioner that may be moved from room to room. 1. Using the supplied window spacer • Insert window spacer in window gap and adjust the length as you need. • Feed exhaust hose through the window spacer and slide window across so that spacer is held securely. - Page 7 • Use only the hose provided and clip exhaust hose and unit adaptor to the back of the air conditioner • Avoid kinks and bends in the exhaust hose as this will cause expelled moist air to build up causing the unit to overheat and shut down.
- Page 8 Installation of the carbon filter This machine is equipped with the active carbon filter. The activated carbon is charcoal that has been treated with oxygen to open up millions of tiny pores between the carbon atoms. It is used to get rid of unwanted odors (smoke, fumes, and animal odor). Please note, the carbon filter is not washable, its life span is variable and depends on the ambient conditions where the unit is used.
-
Page 9: Operation
OPERATION Soft Touch Control panel... - Page 10 Adjust the air vent Before using the unit, please do open the horizontal louver! Then Adjust the louvers to your desired direction Turning ON/OFF Press ON/OFF button, the unit will start in AUTO (automatic) mode. Automatic mode In automatic mode, the unit can cool, ventilate and heat depending on ambient temperature and setpoint adjustment.
- Page 11 Setpoint setting in automatic cooling mode 18-32°C If you set the setpoint at 24°C the unit starts to cool at 27°C (Setpoint + 3°C). It cools down to 25°C (Setpoint +1°C) and then switches back to the ventilation. cooling ventilatio °C Time Setting mode/function...
- Page 12 Setting ventilation speed Press SPEED button to choose the ventilation speed you need, high, medium or low. The sign of high or low ventilation will light on at the same time. Setting timer Touch TIMER button to set the operating hours you desired (1 to 24 hours, the sign of timer will light on).
- Page 13 Self-diagnosis This machine is equipped with self-diagnosis function. If something is wrong in the machine, the LED will show the word “E1” or “E2”. E1 means the sensor wire for room temperature does not connect well (this wire is located in the centre of the evaporator). E2 means the sensor wire for anti-frost does not connect well (this wire is located at the side of evaporator).
- Page 14 NOTE This efficiency feature by adding water is proposed to do after one hour operation and the water should NOT be over 3L, otherwise, the “water full” indicator will light in red and the unit will stop working. In case the “water full” indicator is in red, please drain the water from the drain point at the back side of the unit until the red light goes out.
- Page 15 1. Turn off the air conditioner and avoid moving it when full. 2. Position a container (a water tray for example) underneath the drain hole. 3. Remove the drain knob & rubber plug from the drain hole and allow the water to drain out.
-
Page 16: Maintenance
Please note 1. The drain must be at a lower level than the drain hole on the unit. 2. Flashing ‘Water Full’ indicator will not function in this mode of drainage. 3. If you want to extend the water tube, you can connect it with another tube (OD: 18mm). -
Page 17: Fault Check List
FAULT CHECK LIST The air conditioner does not run Ÿ Is the air conditioner plugged in? Ÿ Is there a power failure? Ÿ Is the ‘full water’ indicator flashing? Ÿ Is the room temperature below the set temperature? The machine seems to do little Ÿ... - Page 18 For any queries or assistance call Customer Service (Australia Only) 1300 174 876 Hours of operation: Monday to Friday 8am - 5pm EST IMPORTANT: RETAIN THESE INSTRUCTIONS FOR FUTURE USE. Excel is a trademark of Sitro Group Australia www.excelsiorproducts.com.au...


Need help?
Do you have a question about the Excelair EPA20A and is the answer not in the manual?
Questions and answers