
Subscribe to Our Youtube Channel
Related Manuals for Tefcold CK Series


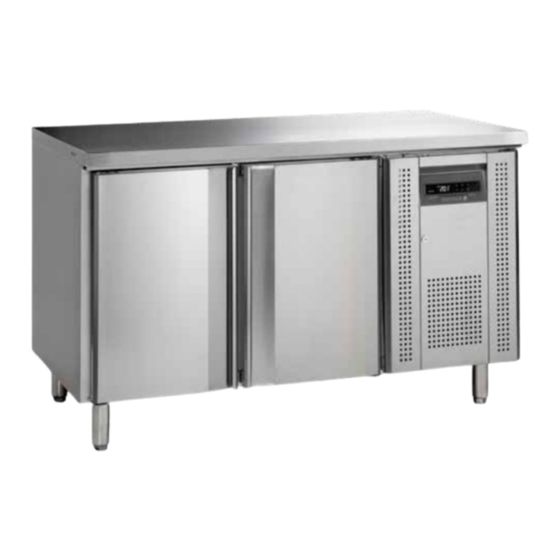
Summary of Contents for Tefcold CK Series
- Page 1 Gastro-Line Counters Users manual Models: CK Series CF Series SK Series BK Series UC Series SS Series PT Series...
- Page 3 CONTENTS Users manual Important safety instructions .................. 4 Unpacking and installation ..................4 Electrical connection ....................5 Start-up of the cabinet ................... 5 Thermostat ......................6 Defrosting ......................7 Maintenance and optimization of energy efficiency ..........7 Service ........................7 Disposal .........................
- Page 4 IMPORTANT SAFETY INSTRUCTIONS To get the best out of your cabinet, read these instructions thoroughly. The user is responsible for correct use of the cabinet in accordance with instructions. Contact your dealer immediately in the event of faults. Place cabinet in a dry, well ventilated room. Do not place close to sources of heat or in direct sunlight.
- Page 5 ELECTRICAL CONNECTION The cabinet operates on 220-240 V/50 Hz. The wall socket should be easily accessible. All earthing requirements stipulated by the local electricity authorities must be observed. The cabinet plug and wall socket should then give correct earthing. If in doubt, contact your local supplier or authorized electrician.
- Page 6 THERMOSTAT The thermostat is placed in the control panel. The thermostat has been pre-set and in most cases it is not necessary to adjust the settings. When turning on the cabinet the display will show the current temperature in the cabinet. Display set temperature: Press this key and the display will show the set temperature.
- Page 7 DEFROSTING The cabinet defrosts automatically with pre-set intervals. If the door to the cabinet is opened or the contents of the cabinet is changed frequently it may become necessary to defrost the cabinet manually. Pressing this key continuously for more than 3 seconds will start a manual defrosting and then return to normal operation.
- Page 8 Specifications subject to changes without prior notification. TEFCOLD A/S, Industrivej 25, DK-8800 Viborg © TEFCOLD A/S 2024...
- Page 9 Gastro-Line Kühltheken Betriebsanleitung Modelle: CK Serie CF Serie SK Serie BK Serie UC Serie SS Serie PT Serie...
- Page 11 INHALT Allgemeine Information Wichtige Sicherheitsvorschriften ................. 12 Aufstellen ......................12 Anschlieβen ......................13 Einschalten ......................13 Temperaturregelung .................... 14 Abtauen ....................... 15 Reinigung und Optimierung der Energieeffizienz ..........15 Wartung und Kundendienst .................. 15 Entsorgung ......................15 Schaltpläne ......................73 Thermostat Technische Bedienungsanleitung Dixell XW20LRH ....................
- Page 12 WICHTIGE SICHERHEITSVORSCHRIFTEN Vor Inbetriebnahme des Gerätes machen Sie sich bitte mit der Gebrauchanweisung insbesondere der Sicherheitsvorschriften vertraut. Bei Zuwiderhandlung gegen diese oder fahrlässigem Gebrauch übernimmt der Anwender des Produktes die Haftung für eventuell dadurch entstehende Sach- sowie Personschäden. Im Falle einer Störung kontaktieren Sie bitte daher umgehend Ihren Fachhändler. Platzieren Sie den Schrank an einem trockenen Standort.
- Page 13 ANSCHLIEβEN Das Gerät hat eine Spannung von 220-240 V/50 Hz. Der Stecker muss geerdet sein (Schuko). Sollten Sie das Kabel ersetzen müssen, benutzen Sie unbedingt ein entsprechendes geerdetes Kabel. Bitte beachten Sie, dass der Anschluss lediglich durch einen erfahrenen Elektriker erfolgen darf. Wenn der Kabel beschädigt ist sollte es bei entweder der Hersteller oder ein Service Vertreter ersetzt werden um Gefahr zu vermeiden.
- Page 14 TEMPERATURREGELUNG Der Thermostat befinden sich in der Bodenplatte. Der Regler ist voreingestellt für den Schrank und normalerweise es ist nicht notwendig die Einstellung zu regulieren. Bei Anschließen zeigt das Display die aktuelle Temperatur im Schrank. Eingestellt Temperatur gezeigt: Drücken Sie auf diesen Taster und Display zeigt die eingestellte Temperatur. Nochmal drücken um normale Temperatur zu zeigen .
- Page 15 ABTAUEN Der Schrank wird in vorprogrammierten Intervallen automatisch abgetaut. Falls der Schrank mit häufigen Öffnungen von Tür order häufige Auswechseln von Gefriergut äußerst belastet wird es ist vielleicht notwendig der Schrank manuell abzutauen. Drücken Sie auf diesen Taster mehr als 3 Sekunden fängt die manuellen Abtauung statt, und dann zu normalen Betrieb zurückkehren.
- Page 16 Specifications subject to changes without prior notification. TEFCOLD A/S, Industrivej 25, DK-8800 Viborg © TEFCOLD A/S 2024...
- Page 17 Gastro-Line Køleborde Brugsvejledning Modeller: CK Serie CF Serie SK Serie BK Serie UC Serie SS Serie PT Serie...
- Page 19 INDHOLD Brugsvejledning Vigtige informationer og energi besparende anbefalinger ........20 Udpakning og opstilling ..................20 El-tilslutning ......................21 Opstart ......................... 21 Termostaten ......................22 Afrimning ......................23 Vedligeholdelse ....................23 Service ......................... 23 Bortskaffelse ......................23 El-diagrammer ...................... 73 Termostater tekniske manualer Dixell XW20LRH ....................
- Page 20 VIGTIGE INFORMATIONER OG ENERGI BESPARENDE ANBEFALINGER For at få det fulde udbytte af kølemøblet, bør De læse denne brugsvejledning igennem. Det er brugers ansvar at anvende kølemøblet i henhold til instruktionerne. Kontakt omgående forhandleren, såfremt der opstår fejl ved kølemøblet. Kølemøblet bør anbringes i et tørt og tilstrækkeligt ventileret rum.
- Page 21 EL-TILSLUTNING Kølemøblet er beregnet for tilslutning til 220-240 V/50 Hz. Tilslutningen skal ske ved en stikkontakt, der bør være let tilgængelig. Dette kølemøbel skal ekstrabeskyttes ifølge stærkstrømsreglementet. Dette gælder også, selvom der er tale om udskiftning af et eksisterende kølemøbel, der ikke har været ekstrabeskyttet. I bygninger opført før 1.
- Page 22 TERMOSTATEN Termostaten er placeret i sidepanelet Termostaten er for-programmeret så kølemøblet er klar til brug. Hvis der skal justeres i indstillinger følg denne vejledning. Når skabet tændes vil display vise den aktuelle temperatur i møblet. Vis indstillet temperatur: Tryk på denne tast og display viser den indstillede temperatur, tryk igen for at vende tilbage til normal visning.
- Page 23 AFRIMNING Kølemøblet afrimer automatisk med forprogrammerede intervaller. Hvis møblet belastes ekstremt med hyppige åbninger af dør eller hyppig udskiftning af varer, kan det blive nødvendigt at udføre en manuel afrimning. Tryk på denne tast i mere end 3 sec., dette vil starte en manuel afrimning og derefter vende tilbage til normal drift.
- Page 24 Specifications subject to changes without prior notification. TEFCOLD A/S, Industrivej 25, DK-8800 Viborg © TEFCOLD A/S 2024...
- Page 25 Gastro-Line Kylbänker Bruksanvisning Modeler: CK Serie CF Serie SK Serie BK Serie UC Serie SS Serie PT Serie...
- Page 27 INNEHÅL Allmänna anvisningar Viktiga anvisningar ..................... 28 Uppackning och uppställning ................28 Elanslutning ......................29 Driftsstart ......................29 Termostaten ......................30 Avfrostning ......................31 Underhåll och optimering av energieffektivitet ............31 Service ......................... 31 Bortskaffande ...................... 31 Elscheman ......................73 Teknisk handbok för termostat Dixell XW20LRH ....................
- Page 28 VIKTIGA ANVISNINGAR Läs den här bruksanvisningen så att du får bästa möjliga nytta av kylskåpet. Det är användarens ansvar att använda kylskåpet enligt anvisningarna. Kontakta återförsäljaren omgående om det uppstår fel på kylskåpet. Kylskåpet bör placeras i ett torrt rum med god ventilation. Kylskåpet bör inte placeras i närheten av värmekällor eller i direkt solljus.
- Page 29 ELANSLUTNING Kylskåpet är beräknat för anslutning till 230 V/50 Hz. Anslutningen ska göras med en stickkontakt som bör vara lätt åtkomlig. Detta kylskåp ska extraskyddas enligt starkströmsbestämmelserna. Detta gäller också även vid utbyte av ett befintligt kylskåp som inte haft sådant extraskydd. Använd alltid jordade stickkontakter med tre ledare.
- Page 30 TERMOSTATEN Termostaten är placerad i teknik dörr. Termostaten är förprogrammerad för skåpet, och oftast behöver inga inställningar justeras. När skåpet startas kommer displayen att visa den aktuella temperaturen i skåpet. Visa inställd temperatur: Tryck på den här knappen så visar displayen den inställda temperaturen. Tryck på nytt för att återvända till normal visning.
- Page 31 AVFROSTNING Skåpet avfrostas automatiskt enligt förprogrammerade intervall. Om skåpet belastas extremt mycket med återkommande öppningar av dörren eller återkommande byte av innehållet kan en manuell avfrostning bli nödvändig. Tryck på den här knappen i minst tre (3) sekunder. Då startar den manuella avfrostningen och därefter återgår skåpet till normal drift.
- Page 32 Specifications subject to changes without prior notification. TEFCOLD A/S, Industrivej 25, DK-8800 Viborg © TEFCOLD A/S 2024...
- Page 33 Gastro-Line Comptoirs Mode d’ emploi Model: CK Série CF Série SK Série BK Série UC Série SS Série PT Série...
- Page 35 SOMMAIRE Informations générales Instructions importantes ..................36 Désassemblage et mise en place ................ 36 Branchement électrique ..................37 Démarrage......................37 Thermostat ......................38 Dégivrage ......................39 Maintenance et optimisation de l’efficacité énergétique ........39 Service ......................... 39 Élimination ......................39 Schéma électrique ....................
- Page 36 INSTRUCTIONS IMPORTANTES Avant d’utiliser votre armoire, nous vous recommandons de lire ce mode d’emploi dans son entier. C’est la responsabilité de l’utilisateur de manier l’appareil selon les instructions données. Contacter votre revendeur immédiatement en cas de défauts de fonctionnement de l’armoire. L’armoire doit être placée dans un endroit sec et ventilé.
- Page 37 BRANCHEMENT ÉLECTRIQUE L’armoire doit être branchée par une prise d’un accès facile avec la tension de 230 V/50 Hz. Les installations électriques doivent être effectués par un électricien spécialisé. DÉMARRAGE Avant d’utiliser votre armoire, nous vous recommandons de la nettoyer, voir la section « entretien ». Important ! Si l’armoire a été...
- Page 38 THERMOSTAT Le thermostat est placé dans le panneau de contrôle . Il est préprogrammé pour l’armoire ; dans la plupart des cas il est donc inutile de le régler. Quand l’armoire est allumée, l’afficheur va montrer la température actuelle à l’intérieur de l’armoire. Montrer la température réglée: Presser ce bouton et l’afficheur montre la température réglée, presser encore une fois pour retourner à...
- Page 39 DÉGIVRAGE L’armoire se dégivre automatiquement avec des intervalles programmés. Si l’armoire est exposée aux ouvertures de la porte ou remplacements des marchandises très fréquents, un dégivrage manuel peut être nécessaire. Presser ce bouton pendant plus de 3 secondes ; cela va lancer un dégivrage manuel et après retourner au fonctionnement normal.
- Page 40 Specifications subject to changes without prior notification. TEFCOLD A/S, Industrivej 25, DK-8800 Viborg © TEFCOLD A/S 2024...
- Page 41 Gastro-Line Banconi Manuale d’uso Modello: CK Serie CF Serie SK Serie BK Serie UC Serie SS Serie PT Serie...
- Page 43 SOMMARIO Informazioni generali Importanti nozioni di sicurezza ................36 Rimozione dell’imballaggio e installazione ............36 Collegamenti elettrici .................... 37 Inizializzazione dell’armadio ................. 37 Termostato ......................38 Sbrinamento ......................39 Manutenzione e ottimizzazione dell’efficienza energetica ........39 Assistenza ......................39 Smaltimento......................39 Schema elettrico ....................
- Page 44 INSTRUCCIONES DE SEGURIDAD IMPORTANTES Para obtener el máximo rendimiento del armario, recomendamos la lectura de este manual de instrucciones. Es responsabilidad del usuario utilizar el electrodoméstico de acuerdo con las instrucciones facilitadas. Póngase en contacto inmediatamente con su concesionario en caso de cualquier anomalía. Coloque el armario en un lugar seco y ventilado.
- Page 45 COLLEGAMENTI ELETTRICI L’apparecchio è adatto a 230 V/50 Hz. Il collegamento deve essere effettuato attraverso una presa accessibile. L’apparecchio deve essere dotato di protezione extra in base alle norme relative alla potenza. Lo stesso è previsto anche qualora venga sostituito un apparecchio senza protezione extra. Utilizzare sempre una spina a 3 poli.
- Page 46 TERMOSTATO El termostato se coloca en el panel inferior El termostato ya está programado para este aparato. En la mayoria de los casos, no es necesario ajustar las posiciones. Al encender el aparato, el display/pantalla mostrará la temperatura actual en el aparato. Para indicar temperatura: Apriete esta tecla y la pantalla mostrará...
- Page 47 DESCONGELACIÓN El aparato descongela automáticamente con intervalos fijos programados. Si la puerta del aparato está abierta o el contenido del aparato se cambia con frecuencia, puede llegar a ser necesario descongelar el aparato manualmente. Apriete esta tecla continuamente, más de 3 segundos, esto activará una escongelación manual, y después volverá...
- Page 48 Specifications subject to changes without prior notification. TEFCOLD A/S, Industrivej 25, DK-8800 Viborg © TEFCOLD A/S 2024...
- Page 49 Gastro-Line Mesas frías Manual del usuario Modelos: CK Serie CF Serie SK Serie BK Serie UC Serie SS Serie PT Serie...
- Page 51 SOMMARIO Información general Importantes instrucciones de seguridad ............... 52 Desembalaje e instalación..................52 Conexión eléctrica ....................53 Puesta en marcha del aparato ................53 Termostato ......................54 Descongelación ....................55 Mantenimiento y optimización de la eficiencia energética ........55 Servicio técnico ....................55 Como deshacerse del aparato ................
- Page 52 IMPORTANTES INSTRUCCIONES DE SEGURIDAD Para obtener el uso completo y adecuado del aparato, recomendamos leer este manual de instrucciones. Es responsabilidad del usuario el manejo adecuado del aparato, de acuerdo con las instrucciones dadas. Contacte a su comerciante inmediatamente en caso de cualquier funcionamiento defectuoso. Coloque el aparato en un lugar seco y ventilado.
- Page 53 CONEXIÓN ELÉCTRICA Este electrodoméstico está diseñado para su uso a 230 V/50 Hz. Debe enchufarse a una toma de corriente accesible. Este electrodoméstico debe disponer de una protección adicional de acuerdo con las normativas sobre electricidad. Esto es aplicable también en el caso de que reemplace una unidad existente que no disponga de protección adicional.
- Page 54 TERMOSTATO El termostato está colocado en el tablero de control. El termostato ya está programado para este aparato. En la mayoria de los casos, no es necesario ajustar las posiciones. Al encender el aparato, el display/pantalla mostrará la temperatura actual en el aparato. Para indicar temperatura: Apriete esta tecla y la pantalla mostrará...
- Page 55 DESCONGELACIÓN El aparato descongela automáticamente con intervalos fijos programados. Si la puerta del aparato está abierta o el contenido del aparato se cambia con frecuencia, puede llegar a ser necesario descongelar el aparato manualmente. Apriete esta tecla continuamente, más de 3 segundos, esto activará una descongelación manual, y después volverá...
- Page 56 Specifications subject to changes without prior notification. TEFCOLD A/S, Industrivej 25, DK-8800 Viborg © TEFCOLD A/S 2024...
- Page 57 Gastro-Line Mesas de refrigeração Manual do usuário Modelos: CK Serie CF Serie SK Serie BK Serie UC Serie SS Serie PT Serie...
- Page 59 ÍNDICE Información general Instruções importantes de segurança ..............60 Desembalagem e instalação ................60 Ligações Eléctricas....................61 Arranque da arca ....................61 Termostato ......................62 Descongelamento....................63 Manutenção e otimização de eficiência energética ..........63 Assistência Técnica ....................63 Eliminação ......................63 Diagrama de fiação ....................
- Page 60 INSTRUÇÕES IMPORTANTES DE SEGURANÇA Para se obter uma utilização plena desta arca vertical, recomendamos-lhe que leia este manual de instruções. A utilização do aparelho de acordo com as instruções fornecidas é da inteira responsabilidade do utilizador. Contacte imediatamente o distribuidor em caso de avarias. Coloque a máquina num local seco e ventilado.
- Page 61 LIGAÇÕES ELÉCTRICAS A arca funciona a 230 V/50 Hz. A tomada de parede deverá estar facilmente acessível. Todas as ligações à terra estipuladas pelas autoridades eléctricas locais deverão ser observadas. A ficha da arca e a tomada de parede deverão fornecer a ligação à terra adequada. Se houver qualquer dúvida, contacte o distribuidor local ou um electricista qualificado.
- Page 62 TERMÓSTATO O termóstato encontra-se no painel de controlo. O termóstato foi pré-regulado e, na maioria dos casos, não é necessário qualquer ajuste. Quando a arca é ligada, o visor irá exibir a temperatura actual na câmara. Exibir a temperatura definida: Pressione este botão e o visor vermelho irá...
- Page 63 DESCONGELAMENTO A arca descongela automaticamente em intervalos pré-definidos. Se houver frequentes aberturas da porta da arca ou mudanças do conteúdo, poderá ser necessário descongelar a arca manualmente. Se este botão for premido continuamente durante mais de 3 segundos, dá-se início à descongelação manual e depois regressará...
- Page 64 Specifications subject to changes without prior notification. TEFCOLD A/S, Industrivej 25, DK-8800 Viborg © TEFCOLD A/S 2024...
- Page 65 ‘Gastro-Line’ Столы Руководство пользователя модели:...
- Page 67 СОДЕРЖАНИЕ содержание Внимание ......................68 Распаковка и установка ..................68 Подключение к электросети ................69 Запуск ........................69 Термостат ......................70 Размораживание ....................71 Техобслуживание ....................71 Устранение неполадок ..................71 Утилизация ......................71 Электрическая схема ..................73 Техническое руководство по термостату Dixell XW20LRH ....................
- Page 68 ВНИМАНИЕ Перед использованием Бэк-бара необходимо прочитать инструкцию. Пользователь несёт ответственность за использование Бэк-бара в соотвествии с инструкциями. В случае неполадков свяжитесь с дистрибьютором. Бэк-бар должен быть расположен в сухом и хорошо проветриваемом помещении. Не допускается установка изделия вблизи источников теплового излучения, т.е.плит, батарей...
- Page 69 ПОДКЛЮЧЕНИЕ К ЭЛЕКТРОСЕТИ Бэк-бар должен быть подключён к питающей электрической сети 230 V/50 Hz. Розетка должна находится в легко доступном месте. Подключение к электросети допускается только через стационарную розетку или удлинитель с заземляющим проводом. ЗАПУСК Перед использованием Бэк-бар необходимо почистить, см. раздел «Обслуживание». Внимание! Если...
- Page 70 TЕРМОСТАТ Термостат находится на контрольной панели Термостат запрограммирован, поэтому нет необходимости в его настройке. При включении стола, на экране дисплея появится актуальная внутренняя температура стола. Показ внутренней температуры: Нажмите на данную кнопку и на экране дисплея покажется настроенная температура. Чтобы вернуться в исходное положение надо ещё раз нажать на кнопку.
- Page 71 РАЗМОРАЖИВАНИЕ СТОЛА Стол размораживается автоматически с запрограммированными интервалами. В случае частого открывания дверцы стола может возникнуть необходимость ручного размораживания Механическое размораживание запускается при помощи нажатия на данную кнопку более 3 секунд, после чего изделие запускается как обычно. Оттаявщая вода стекается в ванночку расположенную в компрессорном отделе. ТЕХОБСЛУЖИВАНИЕ...
- Page 72 Specifications subject to changes without prior notification. TEFCOLD A/S, Industrivej 25, DK-8800 Viborg © TEFCOLD A/S 2024...
- Page 73 COOLERS XW20LRH 1 1 1 1 1 1 2 2 1 1 0 0 Door frame heater (Replacement in cabinet) Condenser fan Evaporator fan Compressor Evaporator probe Cabinet probe FREEZERS XW60LRH 2 2 / / 5 5 1 1 0 0 1 1 2 2 1 1 1 1 Door frame heater (Replacement in cabinet)
- Page 74 Digital controller with off cycle defrost and auxiliary Auxiliary thermostat (es. anti-sweat heaters) Parameters involved: relay - ACH Type of regulation: heating/cooling; - SAA Set point auxiliary relay XW20LR –XW20LRH - SHy Differential for auxiliary relay - ArP Probe for auxiliary relay - Sdd Auxiliary output off during defrost By means of these 5 parameters the functioning of the auxiliary relay can be set.
- Page 75 NOTE2: the set value is stored even when the procedure is exited by waiting the time-out to expire. MODE FUNCTION Compressor enabled 6.6.2 HOW TO MOVE A PARAMETER FROM THE HIDDEN MENU TO THE FIRST LEVEL AND VICEVERSA. Flashing Anti-short cycle delay enabled Each parameter present in the HIDDEN MENU can be removed or put into “THE FIRST LEVEL”...
- Page 76 in = interval mode. The defrost starts when the time “Idf” is expired. with i2F= dor: door open signalling delay dFP Probe selection for defrost termination: nP = no probe; P1 =thermostat probe; P2 = with i2F= PAL: time for pressure switch function: time interval to calculate the number of the evaporator probe;...
- Page 77 13. HOW TO USE THE HOT KEY 8.7 ENERGY SAVING (i1F or i2F = ES) The Energy Saving function allows to change the set point value as the result of the SET+ HES 13.1 HOW TO PROGRAM A HOT KEY FROM THE INSTRUMENT (UPLOAD) (parameter) sum.
- Page 78 16. CONNECTIONS Label Name Range Value Level dAY* Current day Read only Hd1* First weekly holiday Sun ÷ SAt – nu Hd2* Second weekly holiday Sun ÷ SAt – nu ILE* Energy Saving cycle start during workdays 0 ÷ 23h5 dLE* Energy Saving cycle length during workdays 0 ÷...
- Page 79 3.3.1 Forced activation of fans Digital controller with defrost, fans and auxiliary relay This function managed by the Fct parameter is designed to avoid short cycles of fans, that could happen when the controller is switched on or after a defrost, when the room air warms the evaporator. management Functioning: if the difference of temperature between the evaporator and the room probes is more than the value of the Fct parameter, the fans are switched on.
- Page 80 3. Use “UP” or “DOWN” to change its value. To switch the instrument off, if onF = oFF. 4. Press “SET” to store the new value and move to the following parameter. To exit: Press SET + UP or wait 15s without pressing a key. To switch the light, if oA3 = Lig.
- Page 81 dAO Exclusion of temperature alarm at start-up: (from 0.0 min to 23.5h) time interval between the DISPLAY detection of the temperature alarm condition after instrument power on and alarm signalling. CF Temperature measurement unit: °C=Celsius; °F=Fahrenheit. WARNING: When the CONDENSER TEMPERATURE ALARM measurement unit is changed the SET point and the values of the parameters Hy, LS, US, Ot, ALU and ALL have to be checked and modified if necessary).
- Page 82 OTHER 11.1 CUT OUT Adr Serial address (1÷244): Identifies the instrument address when connected to a ModBUS compatible monitoring system. PbC Type of probe: it allows to set the kind of probe used by the instrument: PbC = PBC probe, ntc = NTC probe.
- Page 83 Label Name Range °C/°F Level Message Cause Outputs CF Temperature measurement unit °C - °F °C “CA” Serious external alarm (i1F=bAL) All outputs OFF. rES Resolution dE – in “rtc” Real time clock alarm Alarm output ON; Other outputs unchanged; Lod Probe displayed P1 - P2 - P3 - P4 - SEt –...
- Page 84 Label Name Range °C/°F Level Sd5* 5 holiday defrost start 0 ÷ 23H5;- nu Sd6* 6 holiday defrost start 0 ÷ 23H5;- nu Adr Serial address 1 ÷ 247 PbC Kind of probe PtC - ntC onF on/off key enabling nu - OFF –...
- Page 85 Heavy-duty Heavy-duty Heavy-duty Heavy-duty Refrigerant: R600a R600a R600a R600a R600a R600a R600a Refrigerant charge: (g.) GWP: AEC: 1022 1022 1168 1332 EEI: 33,5 45,5 34,8 Net. Volume Cooling: Net. Volume Freezing: Tefcold A/S Industrivej 25 DK-8800 Denmark www.tefcold.com CE-Declarations: www.tefcold.com...
Need help?
Do you have a question about the CK Series and is the answer not in the manual?
Questions and answers