
Related Manuals for Russell Hobbs RH60EDOEH6011B


Summary of Contents for Russell Hobbs RH60EDOEH6011B
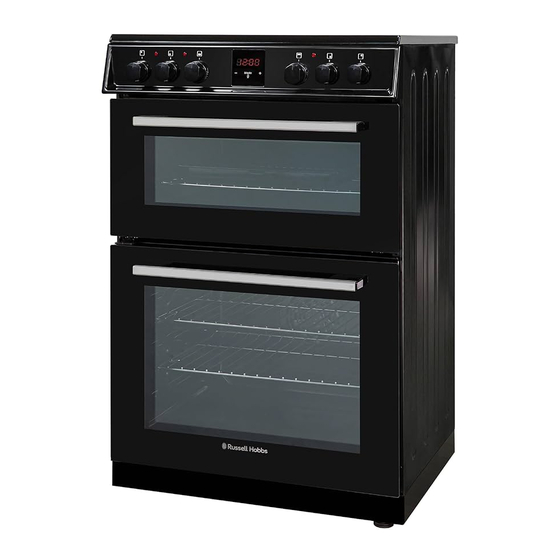
- Page 1 60cm Double Oven Cooker with Ceramic Hob Instruction Manual Model number: RH60EDOEH6011 (B) (SS) IMPORTANT: RETAIN FOR FUTURE REFERENCE...
-
Page 2: Table Of Contents
CONTENTS Page(s) Safety instructions Installation & Positioning 8-13 Product Overview How To Use Your Oven 15-26 Cleaning & Maintenance 27-33 Trouble shooting 34-36 Guarantee Product Information... -
Page 3: Safety Instructions
SAFETY INSTRUCTIONS Important Note: Please read this booklet before installing and switching on this appliance. The manufacturer assumes no responsibility for incorrect installation and usage as described in this booklet. This appliance can be used by children aged from 8 years and above and persons with reduced physical, sensory or mental capabilities or lack of experience and knowledge if they have been given supervision or instruction concerning use of the appliance in a safe way and understand... - Page 4 SAFETY INSTRUCTIONS • This appliance can only be installed in a well-ventilated place in accordance with existing regulations and ventilation specifications. • This appliance is intended for domestic use and the household environment only. The appliance is not intended for use outside. •...
- Page 5 SAFETY INSTRUCTIONS • The grill pan or any other kind of baking tray should not be placed on the bottom of the oven cavities. • Alcoholic vapours may catch fire in the hot cooking compartments. Never prepare food containing large quantities of drinks with a high alcohol content. Only use small quantities of drinks with a high alcohol content.
- Page 6 SAFETY INSTRUCTIONS • This cooker is intended for heating food and beverages only. The drying of food or clothing, and heating of warming pads, wheat bags, slippers, sponges, damp cloths and similar is extremely dangerous & may lead to risk of injury, ignition or fire.
- Page 7 SAFETY INSTRUCTIONS WARNING: The appliance and its accessible parts become hot during use. Care should be taken to avoid touching heating elements. Keep children less than 8 years of age away unless they are continually supervised. WARNING: Unattended cooking on a hob zone with fat or oil can be dangerous and may result in fire.
-
Page 8: Installation & Positioning
INSTALLATION & POSITIONING Preparation & Installation WARNING : This appliance must be installed by an authorised service person or qualified technician, according to the instructions in this guide and in compliance with the current local regulations. WARNING : Ensure that there are no electric wires, gas or water pipes in the area where holes are to be made. - Page 9 INSTALLATION & POSITIONING WARNING : THIS APPLIANCE MUST BE EARTHED. • Before connecting the appliance to the power supply, the voltage rating of the appliance (marked on the rating label), must be checked for correspondence to the available mains supply voltage, and the mains electric wiring should be capable of handling the appliance’s power rating (also indicated on the rating label).
- Page 10 INSTALLATION & POSITIONING WARNING : THIS APPLIANCE MUST BE EARTHED. Green/Yellow (Earth) wire to the terminal marked "PE". Brown (Live) wire to the terminal marked "L". Blue (Neutral) wire to the terminal marked "N".
- Page 11 INSTALLATION & POSITIONING Installing the appliance: 1. Ensure that there will be an electrical power point within adequate distance of the oven after it has been installed. 2. Ensure the space where the appliance will be situated measures at least (W)594 x (D)650mm, and is in compliance with the instructions on the previous page.
- Page 12 INSTALLATION & POSITIONING Anti-Tilting Kit: • The appliance comes with an anti-tilting kit in the document bag. • This is to ensure that the oven is secure and will not fall over due to poor balance. • Loosely attach the anti-tilting bracket (1) to the wall using the screw (2) and wall plug (3), following the measurements and directions shown below.
- Page 13 INSTALLATION & POSITIONING Adjusting the Feet: • Your product stands on four adjustable feet. • For safe operation, it is important that your appliance is correctly balanced. • Make sure the appliance is level prior to cooking. • To increase the height of the appliance, turn the feet anti-clockwise. To decrease the height of the appliance, turn the feet clockwise (as seen in the diagram below).
-
Page 14: Product Overview
PRODUCT OVERVIEW Top View: Front View: 1. Ceramic hob with 4 zones 8. Hob heat warning lights 2. Control panel 9. Adjustment Dials 3. Grill compartment 10.Clock/Programmer 4. Oven Compartment 11.3 x Wire shelf 5. Door handle 12. Anti-tilting kit 6. -
Page 15: How To Use Your Oven
HOW TO USE YOUR OVEN Control Panel The appliance has six dials and clock/digital timer. See explanations below: Top Left Hob Zone Dial Turn to change the temperature of the hob zone Bottom Left Hob Zone Dial Turn to change the temperature of the hob zone Bottom Oven Cavity Dial Dial to change the function of the bottom oven Displays the time and can be used to set various... - Page 16 HOW TO USE YOUR OVEN Clock/Digital Timer This display has multiple functions. See explanations below: Function Descriptions Auto cooking Mode function Manual cooking Decrease timer Cooking time Increase timer Timer display Minute minder Time Adjustment The time MUST be set before you start using the oven. After the oven has been connected to the power supply, both the symbol and “000”...
- Page 17 HOW TO USE YOUR OVEN 1. Press the button. 2. Select the desired time 3. The symbol will remain symbol will begin illuminated. This means that period using the to flash and “000” will be the time is saved and the buttons while the displayed.
- Page 18 HOW TO USE YOUR OVEN Adjusting the Volume of the Warning Sound To adjust the volume of the audible warning sound, while the current time of day is displayed, press and hold the button for 1-2 seconds until an audible signal sounds.
- Page 19 HOW TO USE YOUR OVEN Hob Zones • The hob zones are controlled by dials with 6 positions, and can be operated by switching a control dial to one of these positions. • Near each hob control dial, there is a small symbol that shows which hob zone is controlled by that dial.
- Page 20 HOW TO USE YOUR OVEN WARNING: When a hob zone is in operation, make sure that the pan is centred correctly on it. • Never use a pan with a smaller or larger diameter than that of the hob zone as this will waste energy.
- Page 21 HOW TO USE YOUR OVEN Bottom Oven Cavity • The bottom oven cavity has 2 different functions available, which are listed and explained in table on the next page. These can be set by turning the dial labelled 3 (page 14). •...
- Page 22 HOW TO USE YOUR OVEN Types of Heating Modes This oven has a number of modes. Below is an overview to enable you to find the suitable heat settings required for certain dishes/cooking. Top Oven Cavity: Temperature Symbol Function Range Grill: The whole area below the grill heating element becomes hot.
- Page 23 HOW TO USE YOUR OVEN Bottom Oven Cavity: Temperature Symbol Function Range Convection Heating: Turn the bottom oven control dial past the defrost symbol to use this function. The fan distributes the heated air that is emitted by the rear heating elements around the food. Preheating the 50°C - 220°C oven for 10 minutes is recommended.
- Page 24 HOW TO USE YOUR OVEN Accessories WARNING: • Correct placement of the shelves between the side supports is imperative. This will ensure that food does not fall off or slide out when in the oven or being carefully removed from the oven. •...
- Page 25 HOW TO USE YOUR OVEN Grill Pan and Handle – Use for grilling steaks and similar foods, such as bacon and sausages. You can also use this for toasting bread, and grilling dishes to brown the top of them e.g. pasta bake, cheese on toast etc. The grill pan can also be used under the wire racks in the oven to catch fat from food while cooking.
- Page 26 HOW TO USE YOUR OVEN Energy Saving The following advice is to help you save energy. When using your oven: • Only preheat the oven if this is specified in the recipe. • Keep the pre-heating time short. • Open the oven door as infrequently as possible. •...
-
Page 27: Cleaning & Maintenance
CLEANING & MAINTENANCE Important Notes: • The appliance will become hot during operation, so allow the appliance to cool down before cleaning. • Do not use any high-pressure cleaners or steam cleaners. • Wash new sponge cloths thoroughly before use. •... -
Page 28: Causes Of Damage
CLEANING & MAINTENANCE How to Clean: • To clean the hob, wait until it has cooled. Then, wipe the hob with a soft cloth dampened with water, and then run the hob for a short time to dry it completely. •... - Page 29 CLEANING & MAINTENANCE • Very dirty door seal: If the door seals are very dirty, the appliance doors will no longer close properly when the appliance is in use. The fronts of adjacent units could be damaged. Always keep the door seals clean. •...
-
Page 30: Removing The Door
CLEANING & MAINTENANCE Removing the Door Before you can deep clean the oven glass door, you must remove the oven door by following the steps below. 1. Open the door fully, you will see the door hinges on either side of the door. The hinges have locking levers which will be in the closed position. -
Page 31: Door Assembly
CLEANING & MAINTENANCE Door Assembly To reattach the door, please follow the below steps: 1. When installing the door, you must make sure that both hinges at the bottom of the oven door are aligned and fully inserted with the 2 small holes at the bottom of the front panel on the oven. - Page 32 CLEANING & MAINTENANCE To replace the inner glass: 1. Push the glass towards and under the location bracket (y), in the direction of 2. Place the glass under the location bracket (X) in the direction of C. If the oven door is a triple glass oven door, the third glass layer can be removed the same way as the second glass layer.
- Page 33 CLEANING & MAINTENANCE Removing the Side Racks The side racks in the oven cavity can be removed for deep cleaning. Follow the below steps (ensure the oven & side racks are cold and not hot): 1. Carefully hold the bottom of the side rack and pull it away from the cavity. 2.
-
Page 34: Trouble Shooting
TROUBLE SHOOTING Problem Possible Cause Solution The circuit break is Check circuit breaker is in working defective or turned off order and that it is not switched The hob or oven cavities can’t be Check whether other kitchen switched on Power cut or faulty appliances are working or check in fuse... - Page 35 TROUBLE SHOOTING Problem Possible Cause Solution Check that the temperature has been set correctly and/or adjust the shelf positions Cooking is Location of the uneven within Do not frequently open the door shelves are incorrect the oven or food unless you are cooking things that is being burnt need to be turned.
-
Page 36: Guarantee
Guarantee This product is guaranteed for 12 months from the date of the original purchase. If any defect arises due to faulty materials or workmanship you must contact Product Care with the original proof of purchase so a replacement or refund can be arranged. -
Page 37: Product Information
PRODUCT INFORMATION Model Number RH60EDOEH6011 (B) (SS) Rated Voltage 230V ~ 50Hz External Dimensions(HxWxD) 890mm x 594mm x 650mm... - Page 38 PRODUCT INFORMATION Model Number RH60DOEH6011B/SS Rated Voltage 230V ~ 50Hz External Dimensions (HxWxD) 890mm x 594mm x 650mm Type of Oven Electric Mass (kg) 50.7 Number of Cavities Energy Efficiency Index -Conventional 106.3 Energy Efficiency Index -Fan Forced Energy Class Energy Consumption (Electricity) –...
- Page 39 PRODUCT INFORMATION Type of Hob Electric Number of Cooking Zones Heating Technology Electric/Radiant Pan size (cm) Ø14.5 Heating type Radiant Energy Consumption (Wh/kg) 192.0 Wattage 1200W (Max) Pan size (cm) Ø14.5 Heating type Radiant Energy Consumption (Wh/kg) 192.0 Wattage 1200W (Max) Pan size (cm) Ø18.0 Heating type...
- Page 40 Swan Lane, Hindley Green, Wigan, WN2 4AY, United Kingdom Product Care (Ireland) Ltd, Unit 3D North Point House, North Point Business Park, New Mallow Road, Cork, T23 AT2P, Ireland. Russell Hobbs is the registered trademark of Spectrum Brands (UK) Ltd.
Need help?
Do you have a question about the RH60EDOEH6011B and is the answer not in the manual?
Questions and answers