
Subscribe to Our Youtube Channel
Related Manuals for Russell Hobbs RH60GH401


Summary of Contents for Russell Hobbs RH60GH401
- Page 1 Gas Hob Instruction Manual Model number(s): RH60GH401 (B) (SS) For Customer Services & Spare Parts please call 0345 208 8750 or visit us at https://mda.russellhobbs.com IMPORTANT: RETAIN FOR FUTURE REFERENCE...
-
Page 2: Table Of Contents
Contents Safety Instructions ………………………………………. Product Overview ………………………………………. Positioning ………………………………………. Installation ………………………………………. 9-14 Usage ………………………………………. 15-18 Cleaning & Maintenance ………………………………………. 19-21 Trouble shooting ………………………………………. 22-24 Connection to the mains ………………………………………. Guarantee ………………………………………. Technical specification ………………………………………. For Customer Services & Spare Parts please call 0345 208 8750 or visit us at https://mda.russellhobbs.com... -
Page 3: Safety Instructions
Safety Instructions Important note: Please read this booklet before installing and switching on this appliance. The manufacturer assumes no responsibility for incorrect installation and usage as described in this booklet. This appliance can be used by children aged from 8 years and above and persons with reduced physical, sensory or mental capabilities or lack of experience and knowledge if they have been given supervision or instruction concerning use of the appliance in a safe way and understand... - Page 4 Safety Instructions • Packaging material is dangerous to children. Never allow children to play with packaging material. • Check the appliance for damage after unpacking it. Do not connect the appliance if it has been damaged in transport. • The appliance can only be used safely if it is correctly installed according to the safety instructions.
- Page 5 Safety Instructions • Do not leave the appliance unattended during operation. The manufacturer is not liable for damage which is caused by improper use or incorrect operation. • Hot oil and fat can ignite very quickly. Never leave hot fat or oil unattended. Never use water to put out burning oil or fat.
-
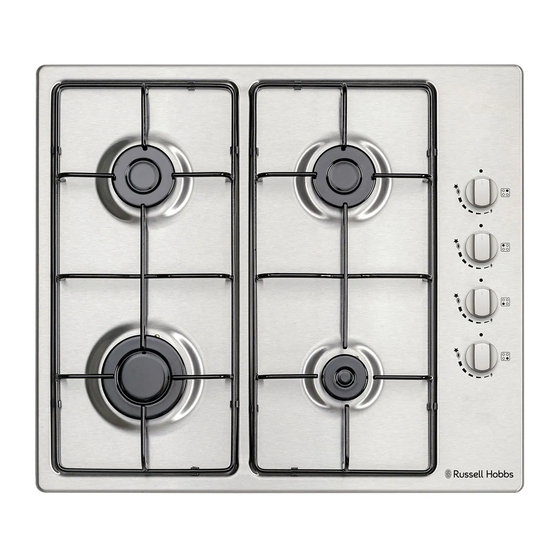
Page 6: Product Overview
Product overview 1. Hob 4. Dials 2. Burners 5. 4 x Sealing gasket A. Rapid burner 6. 4 x Bracket B. Semi rapid burners 7. 4 x Screws C. Auxiliary burner 8. 4 x Injector D. Semi rapid burners 9. Gas pipe bend 3. -
Page 7: Positioning
Positioning • This appliance is to be installed in a counter top. • Avoid damaging the product during installation. • The appliance can only be used safely if it is correctly installed according to the safety instructions. The installer is responsible for ensuring that the appliance works correct when installed. - Page 8 Positioning • You must have a minimum gap of 10mm between the underside of the appliance and any surface below it. 40mm 10mm (min.) Note: • Select heat-resistant work surface material to avoid larger deformation caused by the heat radiation from the appliance. •...
-
Page 9: Installation
Installation Preparation & installation Ensure that there are no electric wires, gas or water pipes in the area where holes are to be made. Components of the appliance may have sharp edges. Wear protective gloves. 1. Ensure that that there is an electrical plug socket and gas supply within adequate distance of the hob after it has been installed. - Page 10 Installation Gas connection • Gas appliances must be disconnected, installed and maintained by a Gas Safe registered engineer. This scheme has replaced the Corgi registration scheme. For details visit www.gassaferegister.co.uk or call 0800 408 5500. Failure to do so will invalidate your guarantee, liability claims and could lead to criminal prosecution.
- Page 11 Installation Gas supply replacement and installation guidelines For Customer Services & Spare Parts please call 0345 208 8750 or visit us at https://mda.russellhobbs.com...
- Page 12 Installation Electrical connection • This appliance is designed to be connected to a 220-240V~50Hz AC electricity supply. • Before proceeding with the electrical connection, verify that the current carrying capacity of the system and the isolator / main switch is adequate for the maximum power rating of the hob.
- Page 13 Installation Gas adjustment Before any adjustment is started the gas and electricity supply to the appliance must be turned off. Change the injector of the burners • Remove the pan support, burner cover and flame spreader • Unscrew the injector using a spanner and replace it with the stipulated injector for the new gas supply.
- Page 14 Installation • Refit the dial and make sure that the flame does not go out by quickly turning from maximum flame to minimum flame. If it does then remove the dial and make further adjustments to the gas flow, testing it again once the adjustment has been made.
-
Page 15: Usage
Usage Note: The appliance is fitted with a flame failure safety device on each burner, which is designed to stop the flow of gas to the burner head in the event of the flame going out. Dials The appliance has 4 dials and these control the 4 burners, to the right of each dial there is an illustration that shows the burner that each dial controls: Each dial has 4 icons, these are explained below: Gas off... - Page 16 Usage 3. You must keep the dial depressed so that the automatic ignition for the burner operates. 4. You should hold down the control knob for 15 seconds after the flame has ignited on the burner. If after 15 seconds the burner has not lit, stop operating the device and wait at least 1 min before trying to ignite the burner again.
- Page 17 Usage Pans & energy saving The following advice is to prevent damage to pans and help you save energy: Suitable pan sizes (diameter) Burners Minimum diameter (mm) Maximum diameter (mm) Rapid 200mm 240mm Semi-rapid 160mm 180mm Auxiliary 120mm 160mm Always use pans that are the right Do not use small pans on large size for each burner to avoid burners, the flame should never...
- Page 18 Usage Cooking recommendations: The following advice is to help you get the best cooking performance/results: Burner Very high, High Medium Reheating and keeping things hot: Boiling, steaming, griddling, cooked and pre-cooked dishes. Rapid toasting, paellas, Escalopes, burner steaks, omelettes, frying. Rice, white sauce Steaming: fish, and ragout.
-
Page 19: Cleaning & Maintenance
Cleaning and Maintenance: Important notes: • The appliance will become hot during operation, allow the appliance to cool down before cleaning. • Do not use any high-pressure cleaners or steam cleaners. • Wash new sponge cloths thoroughly before use. • Follow all instructions and warnings included with the cleaning agents. How to clean Observe the information in the table below to ensure that the different surfaces are not damaged by using the wrong type of cleaning agent. - Page 20 Cleaning and Maintenance: How to clean: • After each use, clean the surface of the respective burner parts once they have cooled down. If any residue is left (baked-on food, drops of grease etc.), however little, it will become stuck to the surface and more difficult to remove later.
- Page 21 Cleaning and Maintenance: Cleaning the burners: 1. Remove the burner cover and spreader by pulling them upwards and away from the hob. 2. Soak them in hot soapy water. 3. Clean them before drying them carefully, ensuring that the flame holes are clean and completely dry.
-
Page 22: Trouble Shooting
Trouble Shooting: Problem Solution The plug is not plugged in Connect the appliance to the electricity supply Power cut or faulty fuse Check whether other kitchen appliances are working or check in the fuse box to make sure that the fuse for the Not ignited appliance is working The burner cover is badly assembled... - Page 23 Trouble Shooting: Problem Solution The flame failure device is clogged Clean the flame failure device Food that is being cooked has boiled over and extinguished the flame Turn off the burner, wait for 1 minute and reignite the zone Flame goes out when in use The burner cover is badly assembled Assemble the burner cover correctly...
- Page 24 Trouble Shooting: Problem Solution The holes in the burner spreader are clogged or the igniter is clogged Clean the burner spreader and igniter Orange flame Yellow/orange flame This is caused by the presence of dust in the atmosphere, spilt liquids, etc. A different type of gas is being used Check gas supply Gas leakage...
-
Page 25: Connection To The Mains
Connection to the mains supply WARNING- THIS APPLIANCE MUST BE EARTHED This appliance is designed to operate from a mains supply of AC220 - 240V ~ 50HZ. Check that the voltage marked on the product corresponds with your supply voltage. For UK use only –... -
Page 26: Guarantee
Guarantee This product is guaranteed for 12 months from the date of the original purchase. If any defect arises due to faulty materials or workmanship you must contact our Customer Service team with the original proof of purchase so a replacement or refund can be arranged. -
Page 27: Technical Specification
Technical Specification Model number RH60GH401 (B) (SS) Rated Voltage 220V – 240V ~ 50Hz External Dimensions(HxWxD) 40mm x 580mm x 510mm Burner Power (KW) Rapid burner - 3.0 (285.7lt/h) Semi rapid burners – 1.75 (166.7lt/h) Auxiliary burner - 1.0 (95.2lt/h) - Page 28 For Customer Services & Spare Parts please call 0345 208 8750 or visit us at https://mda.russellhobbs.com This symbol is known as the 'Crossed-out wheelie bin Symbol'. When this symbol is marked on a product/batteries, it means that the product/batteries should not be disposed of with your general household waste. Only discard electrical/electronic/battery items in separate collection schemes, which cater for the recovery and recycling of materials contained within.
Need help?
Do you have a question about the RH60GH401 and is the answer not in the manual?
Questions and answers