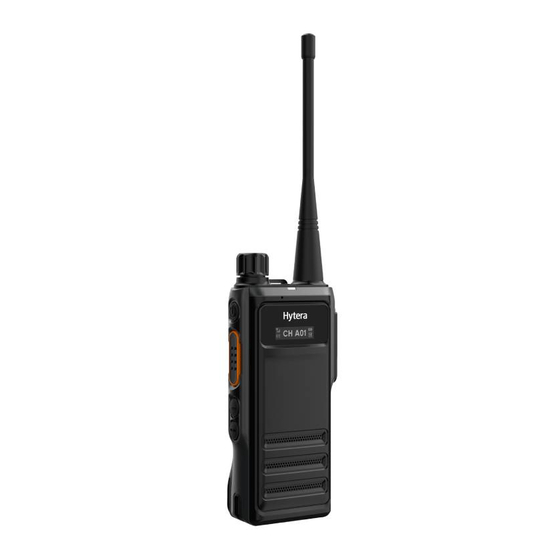
Page 1
Hytera Canada 8 Whatney, 100 Leek Crescent, Unit 11 Irvine, CA 92618 Richmond Hill, ON L4B 3E6 (949) 326-5742 (905) 305-7545 www.hytera.ca info@hytera.ca 1363 Shotgun Road, Sunrise, FL 33326 (954) 846-1011 www.hytera.us info@hytera.us (C) 2022 Hytera Communications Ltd. All rights reserved.
Page 2
Preface Welcome to the world of Hytera and thank you for purchasing this product. This manual includes a description of the functions and step-by-step procedures for use. To avoid bodily injury or property loss caused by incorrect operation, please carefully read the Safety Information Booklet before use.
Page 3
Copyright Information Hytera is the trademark or registered trademark of Hytera Communications Corporation Limited (the Company) in the People's Republic of China (PRC) and/or other countries or areas. The Company retains the ownership of its trademarks and product names. All other trademarks and/or product names that may be used in this manual are properties of their respective owners.
Page 4
This device may not cause harmful interference. This device must accept any interference received, including interference that may cause undesired operation. Note: Changes or modifications to this unit not expressly approved by the party responsible for compliance could void the user's authority to operate the equipment.
Page 5
ISEDC Statement The device has been tested and complies with SAR limits, users can obtain Canadian information on RF exposure and compliance. Après examen de ce matériel aux conformité aux limites DAS et/ou aux limites d’intensité de champ RF, les utilisateurs peuvent sur l’exposition aux radiofréquences et la conformité...
Page 6
Contents User Manual Contents Documentation Conventions ......................... 3 1. Packing List ..............................4 2. Product Overview ............................5 2.1 Product Layout ............................5 2.2 Programmable Keys ..........................6 3. Before Use ..............................7 3.1 Charging the Battery ..........................7 3.2 Attaching the Belt Clip ..........................7 3.3 Attaching the Battery..........................
Page 7
Contents User Manual 7. Supplementary Features .......................... 16 7.1 Profiles ..............................16 7.2 Audio Settings ............................16 7.2.1 Switching the Audio Options ....................... 16 7.2.2 Enabling the Noise Cancellation ....................17 7.3 Power Level ............................17 7.4 Scan ..............................17 7.5 Positioning ............................
Page 9
Documentation Conventions User Manual Documentation Conventions Icon Conventions Icon Description Indicates references that can further describe the related topics. Indicates situations that could cause data loss or equipment damage. Notation Conventions Item Description Example To save the configuration, click Apply. Denotes menus, tabs, parameter names, window names, dialogue names, and hardware The Log Level Settings dialogue box appears.
Page 10
Packing List User Manual 1. Packing List Please unpack carefully and check that you have received the following items. If any item is missing or damaged, contact your dealer. Item Quantity (PCS) Item Quantity (PCS) Radio Antenna Battery Belt Clip Charger Strap Power Adapter...
Page 11
Product Overview User Manual 2. Product Overview 2.1 Product Layout Part Name Part Name On-Off Key Antenna Push-to-Talk (PTT) Key Microphone Side Key 1 (SK1) Battery Latch Side Key 2 (SK2) Strap Hole Smart Knob Accessory Connector OLED Display Belt Clip Speaker Battery LED Indicator...
Page 12
Product Overview User Manual 2.2 Programmable Keys For enhanced convenience, you can request your dealer to program SK1 and SK2 as shortcuts to radio features. For details, consult your dealer.
Page 13
Before Use User Manual 3. Before Use 3.1 Charging the Battery Use the approved charger to charge the battery. Read the Safety Information Booklet before charging. The remaining lithium-ion battery power is limited to 30% pursuant to the new lithium battery shipment regulation approved by the International Air Transport Association (IATA).
Page 14
Before Use User Manual You can press and hold the belt clip spring plate and push the belt clip upwards to remove it. 3.3 Attaching the Battery Use the approved battery to avoid the risk of explosion. Dispose of the used battery according to "Precautions for Disposal" in the Safety Information Booklet. Align the tabs on the battery with the grooves in the battery slot.
Page 15
Before Use User Manual 3.5 Attaching the Audio Accessory For optimal waterproof and dustproof performance, do as follows: Attach the accessory with care to avoid scraping the silicone rubber surrounding the accessory connector screw hole. Close the accessory connector cover and fasten the screw after removing the accessory. Loosen the screw on the accessory connector cover, and then remove the cover.
Page 16
Before Use User Manual Tighten the screw on the audio accessory plug.
Page 17
Basic Operations User Manual 4. Basic Operations 4.1 Turning On or Off the Radio To turn on or off the radio, press and hold 4.2 Adjusting the Volume Rotate the Smart knob clockwise to increase the volume, or counter-clockwise to decrease the volume. 4.3 Selecting a Zone A zone is a group...
Page 18
Status Indications User Manual 5. Status Indications 5.1 OLED Icons 5.1.1 Basic Status Icon Radio Status The radio detects no signal. The number of bars indicates the signal strength. The radio is in emergency mode. The radio is scanning. The radio stays on an active channel. The radio stays on Priority Channel 1.
Page 19
Status Indications User Manual LED Indicator Radio Status Glows green The radio is receiving. Glows red The radio is transmitting. Flashes orange slowly The radio is scanning or roaming. Flashes orange rapidly The radio is operating in emergency mode. Call hang time: No voice is being transmitted or received during a call. Within such Glows orange a period, you can press and hold the PTT key to speak.
Page 20
Call Services User Manual 6. Call Services When you are speaking during a call, keep the microphone about 2.5 cm to 5 cm away from your mouth. This ensures optimal voice quality on the receiving radio. 6.1 Group Call A group call is a call from an individual user in a group to all the other members in the group. 6.1.1 Initiating a Group Call Through Preset Contact Press and rotate the Smart knob to select the digital channel preset with a group contact, and then press and hold the...
Page 21
Call Services User Manual 6.2.2 Answering a Private Call You can answer a private call without any operation. 6.2.3 Ending a Private Call A private call ends when the call hang time expires. 6.3 All Call An all call is a call from an individual user to all the other users on the current digital channel. 6.3.1 Initiating an All Call Through Preset Contact Press and rotate the Smart knob to select the digital channel preset with the all call contact, and then press and hold...
Page 22
Supplementary Features User Manual 7. Supplementary Features 7.1 Profiles The Profiles feature allows you to set the audio, alert tone, and vibration of the radio to suit your preference and work environments. The profiles include the following: General mode: It applies to the low-noise environment, such as a quiet street. ...
Page 23
Supplementary Features User Manual 7.2.2 Enabling the Noise Cancellation The Noise Cancellation feature allows the radio to automatically eliminate ambient noise when receiving or transmitting voice. This feature enhances the voice clarity, while also decreases the volume. If the feature is preprogrammed, press the preprogrammed Noise Cancellation key to enable it. 7.3 Power Level The Power Level feature allows you to set the TX power level to high or low.
Page 24
Supplementary Features User Manual 7.5.2 GPS Report The GPS Report feature allows the radio to report its location information to the control center. You can report the location information in either of the following ways: Press the preprogrammed GPS Report key. ...
Page 25
Supplementary Features User Manual After successful connection, the LED indicator of the radio flashes blue every 1.5s. 7.6.3 Switching the BT Audio Output With a BT device connected, you can press the preprogrammed BT Audio Switch key to switch the audio output device between BT earpieces and the radio.
Page 26
Supplementary Features User Manual To adjust the squelch level, press the preprogrammed Adjust Squelch Level key. 7.11 Priority Interrupt The Priority Interrupt feature allows you to interrupt the ongoing activities (such as a call, a call hang status, or remote monitor) on the current channel to release the channel, so as to initiate a new call or a new data service.
Page 27
Supplementary Features User Manual In addition, you can request your dealer to set one of the following emergency modes: Emergency Mode Description Note Call Only It allows you to initiate an emergency call. If the emergency type is Siren Only or Alarm It allows you to send an emergency alarm and initiate an Alarm w/Call w/Siren, you do not need...
Page 28
Supplementary Features User Manual To enable this feature, press the preprogrammed Man Down key. 7.14 Lone Worker The Lone Worker feature allows the radio to automatically send an emergency alarm to your companion or the control center in either of the following scenarios: ...
Page 29
Supplementary Features User Manual You can send the Revive command to a private contact to restore its radio to normal use. 7.18 Emergency Erase Data The Emergency Erase Data feature allows the radio to erase encrypted data in case of emergency, so as to prevent unauthorized access.
Page 30
Troubleshooting User Manual 8. Troubleshooting Phenomena Analysis Solution The battery may be installed improperly. Remove and reattach the battery. The battery power may have run out. Recharge or replace the battery. The radio cannot be turned The battery may suffer from poor contact caused by dirtied or damaged Clean the battery contacts.
Page 31
Troubleshooting User Manual Phenomena Analysis Solution Make sure call participants are within the The voice is unclear. The signal may be weak. communication range. The GPS cannot locate your The radio may be at an unfavorable Move to an open and flat area, and try position.
Page 32
Radio Care User Manual 9. Radio Care 9.1 Radio If the radio is seriously wet inside, do not turn on it. Contact your dealer or maintenance center for maintenance in time. To guarantee optimum performance as well as a long service life of the radio, follow the tips below: ...
Page 33
Radio Care User Manual Do not use the radio during charging. Charge the battery under the temperature from 0 ℃ to 45 ℃ . When the low battery alert occurs, replace or charge the battery in time. ...
Page 34
Radio Care User Manual Keep the radio away from the power supply and fire. Do not use the radio before it is fully dry. After sterilizing the accessory connector, put the cover back in place. It is recommended to sterilize the radio regularly. You can sterilize the radio by the following tips: Use the lint-free cloth with proper rubbing alcohol (density ≥...
Page 35
Optional Accessories User Manual 10. Optional Accessories Use the accessories approved by the Company only. Otherwise, we will not be liable for any loss or damage arising out of the use of unauthorized accessories. Contact your local dealer for the optional accessories used with the radio.
Page 36
Hytera Canada 8 Whatney, 100 Leek Crescent, Unit 11 Irvine, CA 92618 Richmond Hill, ON L4B 3E6 (949) 326-5742 (905) 305-7545 www.hytera.ca info@hytera.ca 1363 Shotgun Road, Sunrise, FL 33326 (954) 846-1011 www.hytera.us info@hytera.us (C) 2022 Hytera Communications Ltd. All rights reserved.
Need help?
Do you have a question about the HP60 Series and is the answer not in the manual?
Questions and answers
On a Hytera HP-602 how do you change channels ?
Can I leave the radios on the charger after it's been charged?