Advertisement
Quick Links
Advertisement

Related Manuals for S&P NEMBUS210-PH


Summary of Contents for S&P NEMBUS210-PH
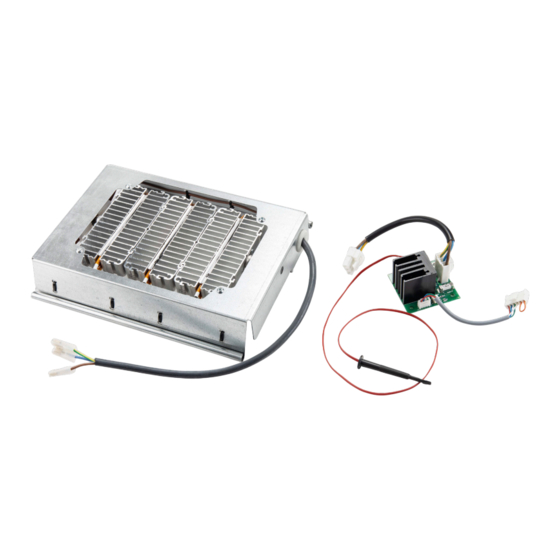
- Page 1 SABIK/NEMBUS PRE-HEATER...
- Page 2 • When installing the preheat coil, you must take into Item no. Description account and obey all necessary legal and national requirements (accident prevention provisions and 5800018200 NEMBUS210-PH (preheater) the generally acknowledged rules of technology). 5800023300 SABIK210-PH (preheater) • Any liability for damages that arise due to inappro- 5800018300...
- Page 3 3. INSTALLATION CAUTION Only qualified specialists may install the preheat coil, otherwise there is risk of injury or damage. RISK OF INJURY Before installation of the preheat coil, disconnect all poles of the ventilation system from the power grid, otherwise there is risk of injuries. 3.1.
- Page 4 M+P-26A-2166 6. Verriegelung (8) öffnen (Pfeil 6). 6. Open all locks (8) (Arrow 6). 8. Lay the cable of the preheat coil (9) into the forseen 7. Vorheizregister (9) bis zum Anschlag in das channel in the housing up to the main circuit board, as 7.
- Page 5 3.2. ASPV1.0, ASPV2.0, ASPV3.0 3.2. ASPV1.0, ASPV2.0, ASPV3.0 Für einen flexiblen Einbau des PluggEasy Wohnraumlüftu Für einen flexiblen Einbau des PluggEasy Wohnraumlüftu umgeschaltet werden. Dabei ändert sich die Belegung de umgeschaltet werden. Dabei ändert sich die Belegung de anschlusses. Vor der Installation des Vorheizregisters di anschlusses.
- Page 6 anschlusses. Vor der Installation des Vorheizregisters die eingestellte Version anhand der An anschlusses. Vor der Installation des Vorheizregisters die eingestellte Version anhand der An A (Auslieferungszustand) A (Auslieferungszustand) schlüsse oder am Kippcodierschalter 5 identifizieren. schlüsse oder am Kippcodierschalter 5 identifizieren. Kondensatanschluss Kondensatanschluss 3.2.1.
- Page 7 3.2.2. Vorheizregister installieren Hinweis: Alle nachfolgenden Beschreibungen sind am PluggEasy Wohnraumlüftungsgerät ASPV der Version A (Auslieferzustand) an der Anschlussseite 1 dargestellt. Bei der Installation des Vorheizregisters in das ASPV auf umgeschalteter Version B erfolgt der Einbau auf der Anschlussseite 2. Für die 3.2.2.
- Page 8 Version A Version B M+P-26A-2333 5. Verschlussstopfen (24) entfernen (Pfeil 3). 5. Remove sealing plugs (24) (Arrow 3). If the handing of the unit is B, remove sealing plug from fan 2. Don't 6. Version A: throw the sealing plug away, it will be used in the next Spannungsversorgung M1 (48) und Steuer- steps.
- Page 9 Version A Version B M+P-26A-2335 14. Zusatzplatine (11) des Vorheizregisters, wie 17. Verbindung zwischen Zusatzplatine (11) und 14. Install the extra circuit board (11) of the preheat coil, 16. Connect the cables (13) of the voltage supply of the in the position illustrated, next to the main circuit preheat coil with the extra circuit board (11).
- Page 10 M+P-26A-2336 18. Verschlussstopfen (33) entfernen (Pfeil 5). 18. Remove sealing plug (33) (Arrow 5). 22. Reinsert the cable of the exhaust air temperature 19. Kabel des Fortlufttemperaturfühlers (34) ein sensor (34) into the groove. 19. Loosen the cable of the exhaust air temperature sen- Stück aus der Nut herauslösen.
- Page 11 4. TECHNICAL DATA Description Pmax [W] Imax [A] NEMBUS210-PH SABIK210-PH SABIK350-PH 1125 SABIK500/600-PH 1500 5. DECOMMISSIONING/DISPOSAL 5.1. DECOMMISSIONING WITH DISASSEMBLY The decommissioning may only be carried out by quali- fied specialists. • Disconnect system from voltage. • Disconnect all poles of the entire system from the power grid.
- Page 12 S&P SISTEMAS DE VENTILACIÓN, S.L.U. C. Llevant, 4 Polígono Industrial Llevant 08150 Parets del Vallès Barcelona - España Tel. +34 93 571 93 00 www.solerpalau.com Ref. 9023106100-02...
Need help?
Do you have a question about the NEMBUS210-PH and is the answer not in the manual?
Questions and answers