Triangle BOREA Manual
- Owner's manual & warranty (44 pages) ,
- Owner's manual & warranty (33 pages)
Advertisement
- 1 UNPACKING
- 2 INSTALLATION PRECAUTIONS
- 3 Base and spikes assembly for BR07, BR08, BR09 & BR10
- 4 Spike assembly without base for BR07, BR08, BR09 & BR10
- 5 Assembling BR04 rubber pads
- 6 Assembling BRA1 & BRS1 rubber pads
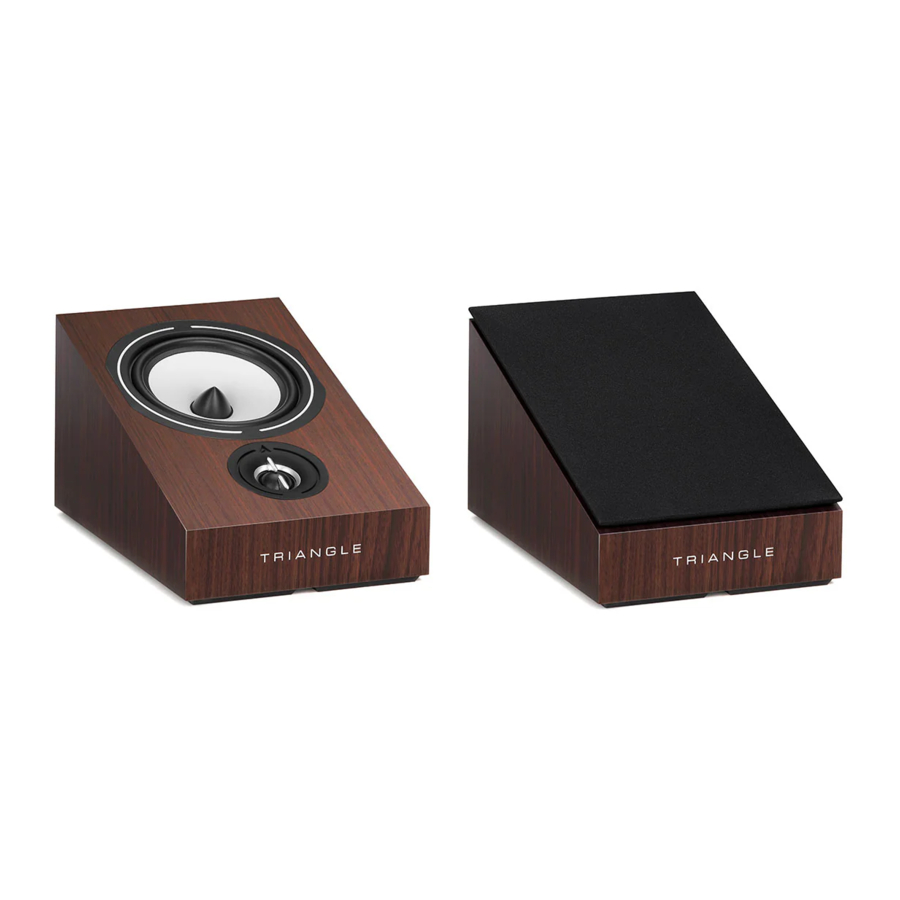
- 7 Positioning BRA1 on a speaker
- 8 Positioning BRA1 on a wall
- 9 CONNECTIONS FOR STEREO SETUP
- 10 POSITIONING FOR STEREO
- 11 CONNECTIONS FOR A HOME THEATER SETUP
- 12 POSITIONING FOR HOME THEATER
- 13 BRS1 POSITIONING FOR 5.1 HOME THEATER
- 14 BRS1 POSITIONING FOR 7.1 HOME THEATER
- 15 GAMME BOREA / BOREA RANGE
- 16 Documents / Resources
UNPACKING
Open the box, and take out the speakers and accessories. If you notice any defects in one of the elements as you unpack, please get in touch with your reseller.
Before disposing of the packaging, make sure there is nothing left inside. Each box contains:
Content pack (BRC1 & BRC2)
- 1 x central speaker
- 1 x protection mask
- 4 x adhesive rubber pads
- 1 x user manual
Content pack (BR02, BR03 & BR04)
- 2 x speakers
- 2 x protection masks
- 8 x adhesive rubber pads
- 1 x user manual
Content pack (BRA1 & BRS1)
- 2 x speakers
- 2 x protection masks
- 8 x adhesive rubber pads
- 1 x template
- 1 x user manual
Content pack (BR07, BR08, BR09 & BR10)
- 2 x speakers
- 2 x protection masks
- 2 x pedestals
- 8 x screws
- 1 x base mounting tool
- 8 x adhesive rubber pads
- 8 x decoupling spikes
- 1 x user manual
INSTALLATION PRECAUTIONS
Location to avoid
Install your speakers in a temperate place and avoid humid locations or direct sunlight.
Base and spikes assembly for BR07, BR08, BR09 & BR10

- Place your Speaker on the upper face (make sure to place it on a non-abrasive surface).
- Screw the base using the supplied key and screws.
- Choose spikes according to your ground.
Spike assembly without base for BR07, BR08, BR09 & BR10

- Place your speaker on the upper face (make sure to place it on a nonabrasive surface).
- Choose spikes according to your ground.
Assembling BR04 rubber pads

- Place the speaker on its top side (make sure to place it on a non-abrasive surface).
- Position the template (a.) on the face of your BR04, then fit the rubber pads in the appropriate places.
The template (a.) is required for use with TRIANGLE S01 and S02 speaker stands (the top plate fits perfectly into the stand, providing greater stability).
Assembling BRA1 & BRS1 rubber pads
- Cut out the template using a pair of scissors or a utility knife to cut around the dotted line.

- Position the template below the speaker, remove the protective stickers and position the pads.


Positioning BRA1 on a speaker
BRA1 fit perfectly on the BOREA BR03, BR07, BR08 and BR09 speakers. In this configuration, BRA1 pointing towards your ceiling, will add an effect of space when playing films or TV programs with this kind of sound format.
It is recommended to set the adjustment switch, located on the terminal block, to the position B. This position increases the high frequency of the speaker and thus compensates for the loss of directivity associated with its orientation.

Positioning BRA1 on a wall
The BRA1 can be installed on the wall to be used as effect channels. Using the template, you can easily determine the drilling points on your wall. Use screws and wall anchors adapted to your wallboard. The diameter of screws must not exceed 4mm.
It is recommended to set the adjustment switch, located on the terminal block, to the position A.
This position corresponds to a normal high-frequency level of the speaker in direct transmission.

CONNECTIONS FOR STEREO SETUP
For optimal sound reproduction, we suggest that you choose a speaker cable of high quality to connect your amplifier to your TRIANGLE speakers. You should use cables of the same length for the left and right channels and take special care to respect the + and - polarity for each channel. Don't forget to strip the end of cables.

POSITIONING FOR STEREO
When positioning your speakers, apply the following rules:

- Avoid rooms with too much reverberation, such as tiled rooms without carpets or curtains.
- Your listening position should no be too close to the speakers, leave a minimum of 2 m
- The distance between the speakers should be a minimum of 2 m for a good stereo effect.
- If possible, place the speakers so that sound is «diffused» lengthwise within the room.
- Avoid placing the speaker in corners; they should be at least at 40 cm away from the back wall and at least 50 cm from the sidewalls. Generally, a position close to the rear wall increase the response in the low frequencies (and reduce the imaging) and contrariwise, a position far from the back wall reproduces a wide and deep sound image. Carry out several test positions to find the best room set-up.
CONNECTIONS FOR A HOME THEATER SETUP
During your speaker installation, please make sure to follow the following rules:

- Ensure that you have a high enough cross-section cable, designed specifically for the connection of speakers.
- Use the same cable length for the left and right speakers. Ensure that the speaker connection polarity (+ and - ) is correct. Do not forget to strip end of cables if necessary.
- Disconnect your amplifier from AC power during the connection of the speakers. You must check the user's manual of your amplifier to connect your speakers, depending on where they are placed in your room.
- The illustration below may be different from the rear panel of your amplifier.
POSITIONING FOR HOME THEATER
A typical home theater installation includes:
- Two main speakers, left and right
- A center channel
- One or several subwoofers
- Surround speakers
To place the main speakers in the best position, follow the same rules as for a stereo installation (see previous page on stereo positioning).
- The center channel should be placed along the line formed by the two main speakers.
- For home cinema setups a subwoofer is highly recommended in order to reproduce the special bass effects channel featured on supports such as Blu-ray or streaming services. The positioning of the subwoofer is not critical if you select a crossover frequency below 80 Hz. Above this frequency, it is better to move the subwoofer closer to the main speakers. The best position being in between the two main speakers. Ensure that it is not placed in the corner of the room to avoid creating unpleasant resonances.
- We recommend that you place the rear speakers at between 1.5 and 2 m of height. Their role is to reproduce surround sound. Ensure that you take into account the weigh of the speaker when fixing it onto the wall.
You will find further instructions for configuring your installation in your A/V amplifier owner's manual.
5.1 Speaker position

7.1 Speaker position

BRS1 POSITIONING FOR 5.1 HOME THEATER
BRS1offer you 2 listening modes: Bipolar - Dipolar.
Bipolar mode is recommended for 5.1 installations (see diagram below).
In Bipolar mode, the loudspaker are in phase.

Connecting to a home-theater amplifier
FL: front speaker left
FR: front speaker right
C: center channel
SW: subwoofer
SL: surround speaker left
SR: surround speaker right
BRS1 POSITIONING FOR 7.1 HOME THEATER
Dipolar mode is recommended with a 7.1 installation (see diagram below).
In Dipolar mode, tweeters are out of phase to create a more diffuse background sound.
TAKE CARE to follow the right and left speaker placement with the sticker on the terminal on each speaker.

Connecting to a home-theater amplifier
FL: front speaker left
SL: surround speaker left
FR: front speaker right
SR: surround speaker right
C: center channel
SBL: surround back speaker left
SW: subwoofer
SBR: surround back speaker right
GAMME BOREA / BOREA RANGE

| Technical specifications | BRA1 | BRS1 | BRC1 | BRC2 | BR02 | ||||
| Type | Surround speaker | Surround speaker | Central channel | Central channel | Bookshelf Speakers | ||||
| Ways | 2 | 2 | 2 | 2 | 2 | ||||
| Speakers | Tweeter: 25mm / 1'' Medium/Bass: 16 cm / 6,5 '' | Tweeter: 25mm / 1'' Medium/Bass: 16 cm / 6,5 '' | Tweeter: 25mm / 1'' Medium/Bass: 13 cm / 5,1 '' | Tweeter: 25mm / 1'' Medium/Bass: 16 cm / 6,5 '' | Tweeter: 25mm / 1'' Medium/Bass: 13 cm / 5,1 '' | ||||
| (dB/W/m) Sensitivity | 89 | 89 | 90 | 91 | 89 | ||||
| Bandwidth (+/- 3dB Hz-KHz) | 90- 22 | 55 - 22 | 57 - 22 | 50 - 22 | 51 - 22 | ||||
| Power handling (WRMS) | 80 | 90 | 100 | 1 120 20 | 80 | ||||
| Minimal / Optimal impedance (Ohms) | 4,5 / 8 | 4,6 / 8 | 5.3 / 8 | 6 / 8 | 3.6 / 8 | ||||
| Dimensions (LxHxP) (mm/inch) | 206 x 180 x 300 8.11 x 7.08 x 11.8 | 380 x 275 x 150 14,96 x 10.82 x 5.9 | 485 x 176 x 260 19.09 x 6.92 x 10.23 | 580 x 200 x 260 22.83 x 7.8 x 10.23 | 176 x 310 x 274 6.92 x 12.2 x 10.78 | ||||
| Net weight with base | 3.75 kg 8.26 lbs | 5.82 kg 11.02 lbs | 7.52 kg 16.57 lbs | 10.84 kg 23.87 lbs | 4.87 kg 10.7 lbs | ||||

| BR03 | BR04 | BR07 | BR08 | BR09 | BR10 |
| Bookshelf Speakers | Bookshelf Speakers | Floorstand speakers | Floorstand speakers | Floorstand speakers | Floorstand speakers |
| 2 | 2 | 2.5 | 3 | 3 3 | 3 3 |
| Tweeter: 25mm / 1'' Medium/Bass: 16 cm / 6,5 '' | Tweeter: 25mm / 1'' Medium/Bass: 16 cm / 6,5 '' | Tweeter: 25mm / 1'' Medium: 16 cm / 6,5 '' Woofer: 16 cm / 6,5 '' | Tweeter: 25mm / 1'' Medium: 16 cm / 6,5 '' Woofer: 16 cm / 6,5 '' | Tweeter: 25mm / 1'' Medium: 16 cm / 6,5 '' Woofer: 16 cm / 6,5 '' | Tweeter: 25mm / 1'' Medium: 16 cm / 6,5 '' Woofer: 21 cm / 8,2 '' |
| 90 | 90 | 91 | 92 | 92.5 | 92 |
| 46 - 22 | 44 - 22 | 44 - 22 | 40 - 22 | 35 - 22 | 30 - 22 |
| 100 | 100 | 120 | 150 | 170 | 200 2 |
| 4.2 / 8 | 4.4 / 8 | 5 / 8 | 3 / 8 | 3.3 / 8 | 3 / 8 |
| 206 x 380 x 314 8.11 x 14.96 x 12.36 | 220 x 425 x 314 8.66 x 16.7 x 12.36 | 206 x 980 x 314 8.11 x 38.58 x 12.36 | 206 x 1020 x 314 8.11 x 40.15 x 12.36 | 206 x 1095 x 314 8.11 x 43.11 x 12.36 | 245 x 1110 x 380 9.64 x 43.7 x 14.96 |
| 7 kg 15.54 lbs | 8.5 kg 18.95 lbs | 18.95 kg 41.77 lbs | 21.2 kg 46.29 lbs | 23.4 kg 51.58 lbs | 29.5 kg 65.03 lbs |
Online registration
Register your product easily online at the following address:
http://register.trianglehifi.com/
Documents / Resources
References
Download manual
Here you can download full pdf version of manual, it may contain additional safety instructions, warranty information, FCC rules, etc.
Advertisement


Need help?
Do you have a question about the BOREA and is the answer not in the manual?
Questions and answers