Advertisement
Advertisement
Table of Contents

Related Manuals for Andersen A3


Summary of Contents for Andersen A3
- Page 1 Helping you get started with your new Andersen A3 charge point...
- Page 2 Andersen A3 Quick Start Guide v1.0 - Page 2...
- Page 3 Welcome to the world of convenient & stylish home EV charging Your new Andersen A3 has been installed at your property, in your unique colour combination, and it's now ready to go. This is your handy guide to get you started with using your Andersen A3 and the Andersen app.
-
Page 4: Guide Contents
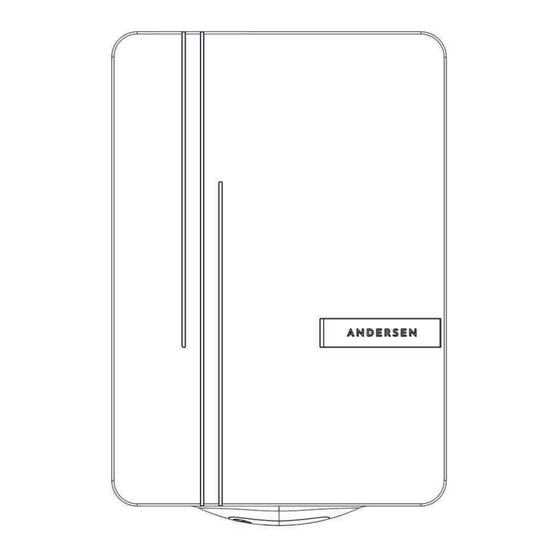
First Steps - Setting Up the Andersen App First Steps - Wi-Fi Setup 14-16 Overview Screen Charge History and Reporting Scheduled Charging Power Source Settings Settings Charge Point Settings 22-23 How to Care for your Charge Point Contact Andersen A3 Quick Start Guide v1.0 - Page 4... - Page 5 Convenient Lighting Cleaning Brushes Hidden Cable Slot LED Status Light Hidden Multi Function Button (Our customer care team may ask you to locate this) Charging Connector Storage Bespoke Front Fascia Convenient Lighting Andersen A3 Quick Start Guide v1.0 - Page 5...
-
Page 6: Led Light
Solid red LED - charge point has detected an error Flashing cyan LED - charge point is in setup mode Pulsating yellow LED - charge point is rebooting All colours pulsating sequence - Firmware update in progress Andersen Quick Start Guide v2.0 - Page 6... - Page 7 Lift the lid on the charge point and carefully remove the charging connector from the storage compartment. Unwind the tethered cable clockwise. Plug the Andersen connector firmly into your vehicle’s charge point socket. The charge point LED status light should pulsate green when your vehicle has started charging successfully.
- Page 8 Make sure the connector pins face down into the charge point. Close the lid to ensure the connector is protected. Andersen Quick Start Guide v2.0 - Page 8...
-
Page 9: Government Regulations
You can do this by downloading the Andersen app and visiting the Regulations page Settings. For more help and information, please scan the QR code. Andersen Quick Start Guide v2.0 - Page 9... - Page 10 Guide to the Andersen App Andersen Quick Start Guide v2.0 - Page 10...
- Page 11 Overview Page Once the setup of your Andersen App is complete, you will be able to instantly see your charging status with clearly displayed information. The live breakdown of your charge session includes information such as, the duration of a charge session, the cost of your charge session and the amount of energy used.
- Page 12 Once you have verified your account and have logged in, you will be prompted to connect your charge point. After this, the next screen will prompt you to connect your charge point to Wi-Fi. Andersen Quick Start Guide v2.0 - Page 12...
- Page 13 2212410194 Note: your installer may have already set-up the Wi-Fi when commissioning your charge point. If this is the case please skip this step. Andersen Quick Start Guide v2.0 - Page 13...
-
Page 14: Overview Screen
Please note: You can start and stop a charge session at any time, even if you have schedules enabled. Using the ‘Charge Now’, button does not remove or change any active schedules. Andersen Quick Start Guide v2.0 - Page 14... - Page 15 Please note, solar monitoring is only available if solar has been configured with your charge point. Your installer will have to install an additional CT clamp for this function to activate. Andersen Quick Start Guide v2.0 - Page 15...
- Page 16 This graph will appear once your vehicle has been charging for over 10 minutes and more than 500 Watts or 0.5 kWh has been delivered to the vehicle. Andersen Quick Start Guide v2.0 - Page 16...
- Page 17 Please note: If you tap on any of the charge sessions, apart from ‘Overview’, you will be able to view these as a graph. Andersen Quick Start Guide v2.0 - Page 17...
- Page 18 You can turn the default schedules off by using the toggle on this screen Settings. Government Regulations cannot be deleted, due to legal requirements. Andersen Quick Start Guide v2.0 - Page 18...
- Page 19 A3 charge point. If you have solar energy enabled and setup, you will have the option to supplement your solar energy with grid power using the toggle & slider. Andersen Quick Start Guide v2.0 - Page 19...
- Page 20 Set and amend charge point profiles Switch between Light and Dark mode Home charger Find the Help Centre & Tutorials Control notifications such as: Session started Session ended Error warnings Weekly charging usage Device online status Andersen Quick Start Guide v2.0 - Page 20...
- Page 21 Within the Light settings you are able to adjust both the convenient lighting and LED light brightness Andersen Quick Start Guide v2.0 - Page 21...
- Page 22 We want to ensure you get the most from your charge point, so here are our top tips on how to care and look after your new Andersen A3 home charge point. Andersen Quick Start Guide v2.0 - Page 22...
- Page 23 Cleaning your charge point If you have a metal front to your A3 unit, we recommend using a damp cloth to keep your charge point clean. This applies to the sides of your unit also. Please do not use any abrasive cleaner as this may damage your unit.
-
Page 24: We're Here To Help
Call us Ask us a question, leave Prefer to chat? some feedback or just say Mon-Fri 08:00 - 19:00 hello. Sat 09:00 - 14:00 helpdesk@andersen-ev.com +44 (0) 1234 916125 For more information, please see the support section of our website www.andersen-ev.com...
Need help?
Do you have a question about the A3 and is the answer not in the manual?
Questions and answers