Advertisement
Quick Links
Installation
1.Check if the power is off. Remove the display frame by pushing a non sharp
instrument (for example the point of a ballpoint pen) carefully in the square hole
underneath the thermostat.
2.Connection schedule:
L/N lead : Connect the power cord using the terminal block.
L1/N1 lead : Use a terminal block to connect the load line(Max 16A).
S1/COM/ : Connect the floor sensor.
Pilot : Connect the pilot to L when the pilot wire function needs to be enabled.
WARNINGS: 1.Disconnect the main power supply before wiring.
Installation needs to be done by a qualified electrician in accordance with
all current wiring and building regulations. 2.Electric floor heating cable/
mat must be in accordance with the supply voltage. The terminals are
designed to handle a cross-section of wire measuring 12-22AWG.
3.The display frame and the cover frame can be removed. Position the
thermostat and install onto the back box (not supplied). Place the display frame
back into position by pushing it softly.
Supply voltage:
Load:
Setpoint range:
Temperature range:
Cover:
Approvals:
Floor sensor type:
Operation and LED
Keys operation:
Middle buttons:
Adjustment up and down (± or
To scroll through settings
USER MANUAL
USER MANUAL
Model: MIC2
POWER
01
02
04
03
Note:
According to user preference,
the circular and square outer
frame can be replaced.
05
85-265 VAC 50/60 Hz
max.16 A (resistive load)
+5 to +40°C / +41 to +104°F
+5 to +45°C / +41 to +113°F
IP21
CE/UKCA
NTC B=3740 12k
)
Left button:
Push right button in main screen to go straight to Menu settings (2.4)
Confirming a choice
Select an option (
)
Right button:
Push left button in main screen to go straight to Mode functions (2.3)
To get back to last screen or main screen(← or X )
Always go back to the main screen after making changes.
Explanation of LED colours / signals :
Red:
Green:
Red light flashing on and off:
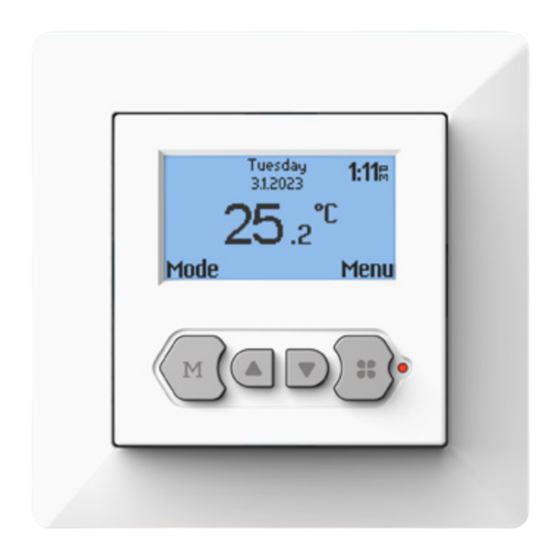
Date
Measured Temp
Mode
Mode/get back
Start up wizard
1
2
Language
-make your language choice.
- Clock;
This is the first question in the
choose 12 or 24 hour clock
start up menu.
time (am/pm) .
- Temperature;
choose °C or °F scale .
4
5
Time
-program time;
-This function enables the
program the actual clock time
thermostat to calculate when
it needs to switch on so that
the required temperature is
reached at the set time.
7
8
Surface material
-If you choose floor heating.
-Floor or room sensor.
Wood or other. If you choose
If you choose floor heating,
other, the question is asked if
we advise you to control the
there is a floor sensor installed
floor temperature by using
the floor sensor.
11
10
Temperature
-Containing the selected
-Program the comfort temp-
erature of your choice for a
heating periods according the
heating period. Standard
standard program.
temperature for a "different
heating system is program-
med at 21 degree Celsius and
23 degree Celcius for a floor
heating system.
Mode selection
1.Automatic mode:
According to the weekly program, the thermostat automatically adjusts the
set temperature operation.
H H e e a a t t i i n n g g
S S y y s s t t e e m m o o p p e e r r a a t t i i o o n n ( ( s s t t a a n n d d a a r r d d o o r r C C o o s s t t u u m m ) )
S S e e n n s s o o r r f f a a u u l l t t
Time
Menu
Menu/Confirm
LED
Up/Down/Scroll
3
Units
-year;
program the current year.
-month;
program the current month.
-day number;
program the current day.
6
Intelligence
Heating system
-Floor heating or different
heating system. If you choose
a different heating system the
question will be whether the
system needs to function on
the internal room sensor or
external sensor.
9
Temp.to control
-Containing the current
settings.
Overview wizard
12
Slow heating
-It is possible to choose this
option (Ref Mode selection
point 7 slow start up).
Date
Summary
Advertisement

Related Manuals for Klima Mic2


Summary of Contents for Klima Mic2
- Page 1 Push left button in main screen to go straight to Mode functions (2.3) USER MANUAL To get back to last screen or main screen(← or X ) Model: MIC2 Always go back to the main screen after making changes. Explanation of LED colours / signals :...
- Page 2 6. Settings: 2.Temporary temperature: With this function you can change settings related with the operating of the To temporarily override the temperature in the automatic thermostat.The following options can be changed: program. The override will operate until the next automatic event. - Date and time: Thermostat will change summer and winter clock change automatically.
Need help?
Do you have a question about the Mic2 and is the answer not in the manual?
Questions and answers