BARSKA AX11224 Manual
Also See for AX11224:
- User manual (2 pages) ,
- User manual (2 pages) ,
- User manual (2 pages)
Advertisement
Table of Contents
Contents
BARSKA AX11224 Manual
INTRODUCTION
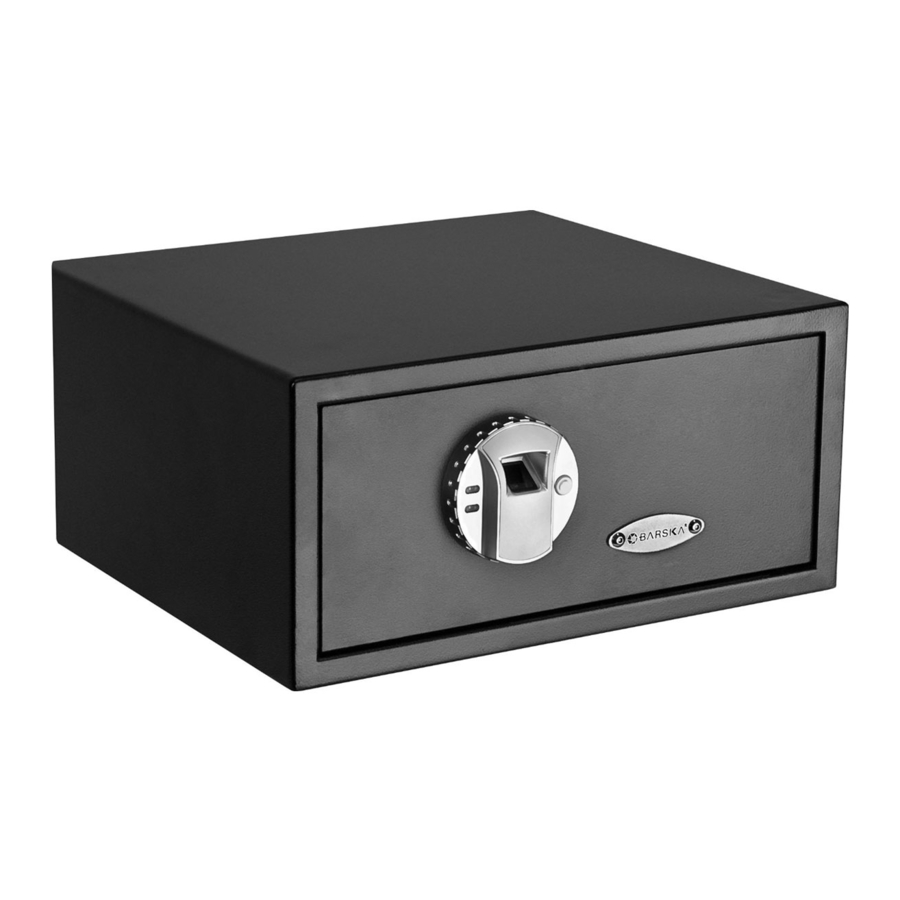
Keep your valuables from the wrong hands with the Barska Biometric Safe. The safe opens at the touch of a finger but only yours. Fingerprint control can store up to 30 permanent or temporary users, allowing you to control of who can access safe. The compact design makes it easy to hide nearly anywhere. Weight of safe is 31 pounds.
NOTE
When selecting a place for the safe please keep in mind
- Safe must be supported beneath by a shelf and/or floor.
- The door of the safe must be able to swing open at least 850
- For added security, purchase 3 1/2 wood screws at your local hardware store. When using alternate screws, adjust mounting instructions accordingly.
- Metallic anchors supplied may not reach wall stud
- These instructions are meant to keep safe in place, and will not deter theft
SETUP
Tools Needed
1x - Drill
1x -15/32" Drill Bit
1x - 1 5/32" Socket Wrench

Parts Included
1x - Allen Wrench
2x - Emergency Keys
2x - Flat Washers
2x - Metallic Anchors
WALL MOUNTING

- Two of the three mounting holes in the rear of the safe will be used to fasten the safe to the wall.

- Place the safe into position, with the door of the safe open, mark mounting holes 1 and 2 on the rear wall from inside the safe. Set safe aside.
- According to the marks, drill two 15/32" holes.
- Disassemble one metallic anchor. Fit the nut into the groved end of the shaft. See diagram A. above. Insert this assembled piece into wall hole. Repeat this step with the other metallic anchor and into the other hole.
- Set safe into place, aligning the holes of the safe to the holes of the wall.
- Open safe and from the inside of the safe insert washer into screw. Slide this piece into the shaft. See diagram B. above.
- Tighten the metallic anchors using the 15/32" socket wrench.
- Close safe.

FLOOR MOUNTING


- One of the mounting holes in the bottom of the safe will be used to fastened safe to the floor.
- Pull back any carpet off the floor. Place the safe into position, remove liner from safe and with the door of the safe open, mark the hole on the bottom of the safe from the inside.
Note: The safe can be mounted to the floor directly on top of the existing carpet, but may not be as secure. Set safe aside - According to the mark, drill a 15/32" hole into the floor.
- Disassemble metallic anchor. Fit the nut into the groved end of the shaft. See Diagram A. Insert this assembled piece into the hole in the floor.
- Set safe into position aligning the hole of the safe to the hole of the floor.
- Open safe. From the inside of the safe insert washer into screw. Slide this piece into the shaft. Diagram B.
- Tighten the metallic anchor using the 15/32" socket wrench.
- Replace liner and close safe.
Documents / Resources
References
Download manual
Here you can download full pdf version of manual, it may contain additional safety instructions, warranty information, FCC rules, etc.
Advertisement


Need help?
Do you have a question about the AX11224 and is the answer not in the manual?
Questions and answers