acaia Orion Mini AO203 / AO202 Manual
- User manual (15 pages) ,
- User manual (17 pages)
Advertisement
Introduction
Features
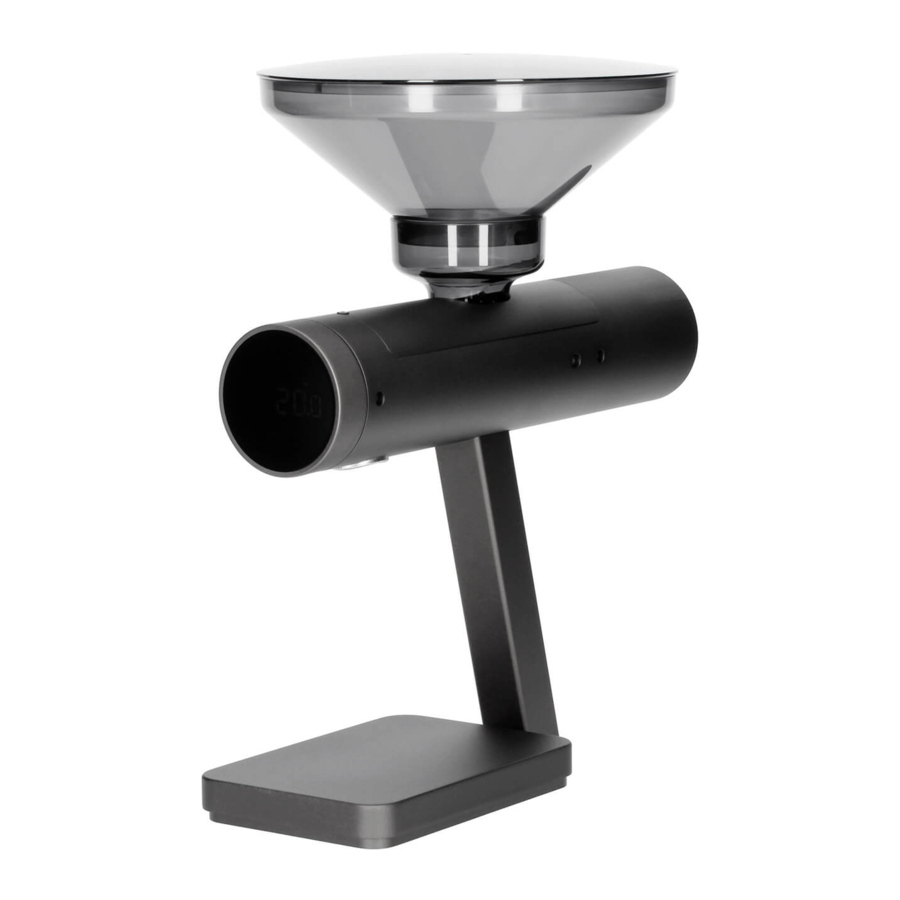
The Orion Mini Bean Doser is designed for dosing green beans or roasted coffee beans based on weight.
Fast Weight-Based On-Demand Dosing
The Orion Mini Bean Doser can dose 225 grams (1/2 lbs) in 12 seconds and 20 grams in 3 seconds within the error margin of 2-3 beans.
Full Automatic Mode
Designed with a fully automatic mode for continuous dosing of multiple containers without pressing any buttons.
Intuitive Dial Interface
A new dial interface with three preset modes for storing different target weights and allowing easy access by rotating the dial for different functions.
Weighing Scale Mode
The Orion Mini Bean Doser can function as a smart industrial weighing scale with a capacity of up to 3000 grams.
Statistic Tracking System
The Orion Mini Bean Doser can track statistical information such as total number of doses or total weight of the dosing session.
Interface Overview

Getting Started
Initial Setup
- Prior to using your Orion Mini for the first time you should rinse and clean the bean hopper in warm soapy water. Dry immediately after cleaning.
- Attach the bean hopper on top.
- Place a container on the weighing platform to avoid accidental dispensing.
- Connect the power cord to the Orion Mini.
- Place coffee beans into the hopper.
Getting Started
- Make sure that the weighing platform is clean.
- Turn on the Orion Mini by pressing Power and place the container on the platform.
- Set target weight by pressing Power. Adjust values with Dial then short press Power to confirm.
- Press Dose to start dosing. If the display shows [ CUP ] [ rESEt ], please place a container on the platform.
- When a dose is complete, press Power to return to dosing.
General Operation
The Orion Mini is designed for dosing portions of beans from 5 grams to a maximum of 3000 grams per dose with an accuracy of +/- 2 beans (~0.5 g).
There are two dosing modes in the Orion Mini — Manual mode and Auto mode. To choose between modes, press and hold the Power button and the display will show the current mode of operation. Rotate the dial to switch modes.
To take full advantage of the Orion Mini's many features, carefully read through the entire manual, which contains step-by-step procedures, examples, and other information.

Incorrect handling of this product could result in personal injury or physical damage.
Product Care Information
Battery Charge
The Charging indicator will display when the battery is charging and will turn off when the charger is removed. If the USB cable is not working, the indicator does not appear.
Please note that the Orion Mini ONLY charges on the AC-DC adapter included in the package. It does NOT charge with any other USB-C charger.

Calibration
- While the Orion Mini is in Weighing Mode and the weighing unit is in grams, rapidly press the Dose button multiple times until the LED display shows [ CAL ] and then [ 500 ].
- Place a 500-gram calibration weight on the platform and wait for the Doser to execute the calibration procedure.
- The display shows [ -End- ] when the calibration procedure is completed.
* Note: Calibration weights of 100 g, 1000 g, 1500 g, 2000 g, and 3000 g can also be used. For highest accuracy use Acaia calibration weights or F1 or F2 Class calibration weights. Inexpensive lower-class calibration weights have a higher deviation from a true accurate weight.
Care and Cleaning
- Use a soft cloth with warm water only to clean the product.
- Do not use detergent or other chemicals for cleaning and soaking as it can damage the anodized coating on the product.
Operations
Basic Operations
| Action | Operation |
| Turn On Scale | Press Power |
| Turn Off Scale | Double press Power |
| Toggle Presets | Rotate Dial |
| Set Preset Weight | Press Power, rotate Dial, then press Power / Dose |
| Switch Mode | Press and hold Power, rotate Dial, then press Power / Dose |
| Start Dosing | Press Dose |
| Reset Mode | Press Power |
| Empty Hopper | Press and hold Dose |
| Stop Emptying Hopper | Press Dose |
In the main display menu, you may use the controls above to choose between presets, enter different dosing modes, or start dosing with the current mode.
Set Preset Weight
| Action | Operation |
| Enter Preset Weight Setting | Press Power |
| Change Value | Rotate Dial |
| Save Preset Value | Press Power / Dose |
There are 3 presets in the Orion Mini for storing desired weights. For example, you can set preset 1 at 18 g for dosing, preset 2 at 20 g, and preset 3 at 35 g. You may adjust the preset value with the controls above.
Switch Mode
| Action | Operation |
| Enter Mode Setting | Press and hold Power |
| Switch Mode | Rotate Dial |
| Set Mode | Press Power / Dose |
There are 2 different modes in the Orion Mini for operation — Manual dosing mode and Auto dosing mode. You may set different modes using the controls above.
Empty Hopper
| Action | Operation |
| Empty Hopper | Press and hold Dose |
| Stop Emptying | Press Dose |
| Back to Preset | Press Power |
To empty the bean hopper, you can press and hold the Dose button. The Orion Mini will continuously dispense the beans until you press the Dose button again to stop. Make sure you place a large container on the platform for this operation.
There will be an 'E' indicator on the top left corner of the display when emptying the hopper.
Mode Introduction
Manual Dosing Mode
Mode 1 - Manual Dosing Mode
This is the default mode for dosing.

| Action | Operation |
| Start Dosing | Press Dose |
| Stop Dosing | Press Dose |
| Pulse Beans | Press Dose |
| Reset Mode | Press Power |
- Select a preset by rotating the Dial. Adjust the preset value by pressing Power and rotating the Dial. Press Power to confirm.
- Press Dose, and the Orion Mini will begin dosing until desired weight is reached within +/- 0.5 g (solid green LED will display to indicate an accurate dose).
- At the end of dosing, you may press Dose several times to 'pulse'. Pulse will slowly add a few more beans if needed.
- Press Power to start a new dose.
- Manual dosing mode can dose on demand with a selected preset.
- A [ NOISE ] message will show when a container is removed from the Orion Mini or when the platform is touched during dosing. Please dose again.
Pulse in Manual dosing mode
The Orion Mini has a pulse function that adds a few beans to the dose manually at the end of each dose. To pulse (add) a few more beans at the end of each dose, simply press the Dose button and the Orion Mini will add a small amount of beans with each press. If one press doesn't drop any beans, you can press it multiple times until the desired weight is reached.
Auto Dosing Mode
Mode 2 - Auto Dosing Mode
Auto dosing mode can dose automatically whenever a container is placed on the platform. There will be an 'A' indicator on the top left corner of the display when in Auto mode.

At the end of auto dosing, you may press the Dose button to 'pulse' a few more coffee beans if required. A [ rEADY ] message will show on the display when auto dosing mode is in action. To leave the [ rEADY ] display, press the Power button. You will be able to return to the preset selection display.
| Action | Operation |
| Enter Ready State | Press Dose |
| Start Dosing | Press Dose |
| Stop Dosing | Press Dose |
| Pulse Beans | Press Dose |
| Reset Mode | Press Power |
| Display | Description |
| rEADY | Place container on the platform; dosing will start when weight is detected |
- Switch into automatic dosing mode by pressing and holding Power and selecting the Auto mode with the Dial. Press Power again to confirm the mode.
- Select or adjust a preset weight.
- Press Dose to start automatic dosing, the display will show [ rEADY ].
- To start the first dose, press Dose again and the automatic dosing will begin.
- Remove the completed dose, and wait for the display to show [ rEADY ] again.
- Place another container on top of the platform and dispensing will start again.
- Press Power to set a different dose and leave the current auto dosing session.
- Auto dosing mode can dose automatically whenever a container is placed on the platform.
- There will be an 'A' indicator on the top left corner of the display when in Auto mode.
- A [ NOISE ] message will show when a container is removed from the Orion Mini or the platform is touched during dosing. Please dose again.
Pulse in Auto dosing mode
The pulse function also works in the auto dosing mode. To pulse (or add) a few more beans at the end of each dose, simply press the Dose button and the Orion Mini will add a small amount of beans with each press. If one press does not dispense any beans, you can press it multiple times until the desired weight is reached.
Weighing Mode
Mode 3 - Weighing Mode
The weighing mode is the Orion Mini's smart scale mode. It will function like an industrial weighing scale with a 3000-gram capacity. To switch to weighing mode, rotate the Dial until a 'W' indicator appears on the top left corner of the display.

| Action | Operation |
| Reset Mode/Zero | Press Power |
| Tare | Press Dose |
- The weight of the object on the platform will be shown on the display.
- The Power and Dose buttons will function as 'Zero' and 'Tare'.
Settings
Accessing the Orion's Settings
- With Orion Mini powered on, press and hold Power to enter the Settings mode. The display will show [ SEt ].
- Press Dose to enter the Settings Menu. It will show the first setting for [ SPEEd ].
| Action | Operation |
| Enter Setting Mode | Press and hold Power |
| Enter Setting Menu | Press Dose |
Diagram of the Settings Menu
| Setting | Display | Options | Default |
| Speed | SPEEd | FASt, PrEC, grEEn | PrEC |
| Zero Tracking | trAcE | 05, 1 d, 2 d, 3 d, 4 d, 5 d, Off | 1 d |
| Key Sound | bEEP | On, Off | On |
| Default Weighing Unit | Unit | g, oZ | g |
| Cup Detection | CUP.d | On, Off | On |
| Calibration | CAL | (Start calibration) | - |
| About | About | (Show the current Orion Mini Firmware version) | - |
Dosing Speed [ SPEEd ]
You may adjust the dosing speed to prioritize either the accuracy or the speed of dosing. There are three speed settings available:
- PrEC — Precision: Default speed, high accuracy. (default)
- FASt — Fast: Faster speed, default accuracy (227 grams within 12 seconds); recommended for doses of 100 grams or more.
- GrEEn — Green Bean: Default speed for green beans or light roast beans.
To save your selection and exit the settings sub-menu, press Dose. [ SPEEd ] will display on the LED to confirm that the selected option has been saved.
Zero Tracking Setting [ trAcE ]
Zero Tracking is a function to help compensate the weight readout fluctuations at zero point to improve the usability of the scale. The Acaia Orion Mini is allowed to compensate fluctuations by up to 2d according to industrial weighing guidelines.
- Off: It is not recommended to turn off Zero Tracking; the zero indication can drift easily as the room temperature changes.
- 0.5 d~3 d: For example, since each division is 0.1 g, 3 d = 0.3 g. When Zero Tracking is set to be 3 d, any initial weight between +/- 0.3 g on the weighing pan will be zeroed out.
- 2 d is recommended in general for the Orion Mini.
To save your selection and exit the settings sub-menu, press Dose. [ trAcE ] will display on the LED to confirm that the selected option has been saved.
Key Sound Setting [ bEEP ]
- Set the Key Sound function to Off/On to turn off/turn on the beeping sound.
To save your selection and exit the settings sub-menu, press Dose. [ bEEP ] will display on the LED to confirm that the selected option has been saved.
Default Weighing Unit [ Unit ]
- The Default Weighing Unit is set to grams if [ 9 ] is selected and ounce if [ o2 ] is selected.
- Rotate Dial to switch the Default Weighing Unit between grams and ounces.
To save your selection and exit the settings sub-menu, press Dose. [ Unit ] will display on the LED to confirm that the selected option has been saved.
Cup Detection [ CUP.d ]
- The default setting is on.
- On: Cup detection enabled. Orion will check if there is a container on the weighing platform. If no container is detected, Orion will not start dispensing the coffee beans.
- Off: Cup detection disabled. Orion will start dispensing the coffee beans even if no container is detected.
Calibration [ CAL ]
Please go to Calibration section for more information.
About [ About ]
Shows the current Orion Mini Firmware version.
To update to the latest version, please use Orion Mini Updater on www.acaia.co/pages/apps.
Buttons
| Button | Function | Example |
| Power Button | Turn On | Press to turn on the Orion Mini |
| Turn Off | Double press to turn off the Orion Mini | |
| Set/Save Preset Weight | Press to set/save preset weight | |
| Set Modes | Press and hold to switch to Manual/Auto Mode | |
| Save the Setting and Return to Menu | Press to save the Setting and go back to Menu | |
| Dose Button | Start Dosing | Press to start dosing when in Manual/Auto mode |
| Empty Hopper | Press and hold for 5 seconds to empty the hopper | |
| Stop Emptying Hopper | Press to stop emptying the hopper | |
| Save the Setting and Return to Menu | Press to save the Setting and go back to Menu | |
| Rotate Dial | Toggle Presets/Modes | Rotate to toggle presets/modes |
| Adjust Preset Weights | Rotate to adjust the preset weights |
* Please go Operations section for more details.
LED Indicators

Green Light - Dosing progress indicator
When the green light is blinking, dosing is in progress. Once dosing is complete, the indicator will display a solid green light.
Yellow Light - Dose warning indicator
When the yellow light is lit, it means that the current dose is at least 0.5 grams less or more than the target amount. You may want to add some beans with the pulse function or remove some.
Red Light - System message indicator
When the red light is displayed, there is a system error with the Orion Mini. Restart the Orion Mini. If the problem persists, please contact us at support@acaia.co.
Error Codes
| Error Code | Description |
Error 100 | Code error |
Error 101 | EEPROM error |
Error 102 | AD read error |
Error 303 | Unable to make zero point because the initial weight exceeds the limit (250% of capacity). |
 | Over load: The weight is over the maximum capacity. |
 | Under load: The weight is under the minimum capacity. |
Error 304 | Please calibrate the Doser in a stable environment free of vibration, wind, etc. |
Error 802 | Unable to tare because the weight exceeds the tare range. |
Error 803 | Unable to tare due to unstable weight. |
Error 904 | Password error (the default password is 0000). |
Other
| Display Code | Description |
UPdAtE | The Orion Mini is in Update mode. Note: If you want to exit update mode, the Orion Mini will automatically turn off and exit update mode after 1 minute and 30 seconds of no use. |
Specifications
| Model Number | AO203 / AO202 |
| Dimensions | W: 303 mm L: 202 mm H: 352 mm |
| Weight | 2850 g ± 10 g |
| Measuring Units | g, oz |
| Max Capacity | 3000 g / 105.82 oz |
| Min Weight | 0.1 g |
| Readability | 0.1 g |
| Repeatability | 0.1 g |
| Linearity | 1 d / 2 d / 4 d |
| Indication Limit | 3090 g / 108.99 oz |
| Input | 12 Vdc, 2.0 A |
| Dosing Error Margin | +/- 0.2 g |
| Battery | Li-Ion 18650 7.4 V 2600 mAh |
| Battery Life | Up to 48 hours |
| Display | LED |
| Connectivity | Bluetooth 4.0 |
| Inside the Package | Acaia Orion Mini Bean Doser × 1 Hopper with capacity for 350~400 g of beans × 1 Power Adapter × 1 |
Documents / Resources
References
Download manual
Here you can download full pdf version of manual, it may contain additional safety instructions, warranty information, FCC rules, etc.
Advertisement


Need help?
Do you have a question about the Orion Mini and is the answer not in the manual?
Questions and answers