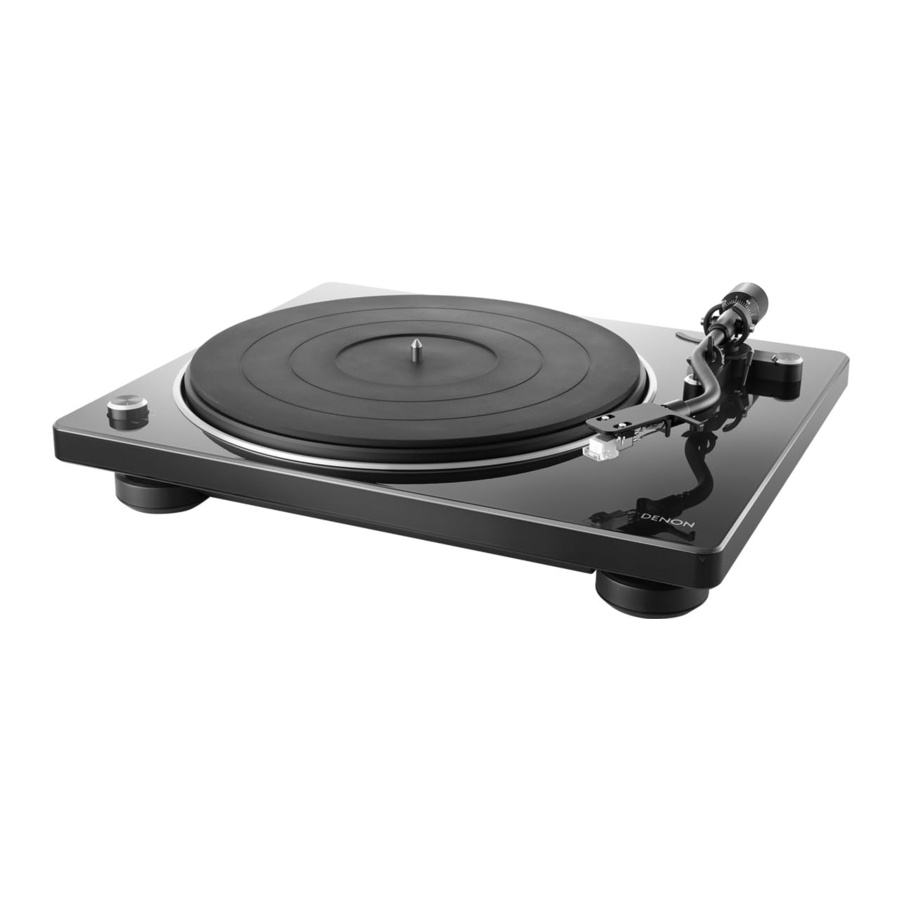
Denon DP-400 Manual
- Owner's manual (51 pages) ,
- Quick start manual (13 pages) ,
- Owner's manual (41 pages)
Advertisement
Accessories
Check that the following parts are supplied with the product.

Features
- Modern design
Much like the PMA-60, DRA-100 and other devices in our Denon Design Series, all unnecessary decoration has been eliminated for an updated minimalistic design. - The automatic arm lifter function automatically raises the tone arm at the end of record playback
- Stabilizing rotation control improves rotation precision
A sensor has been installed that measures the RPM to maintain a precise rotation speed. - An MM cartridge is pre-attached to the headshell to enable immediate use without assembly
- Equipped with an equalizer switch to turn the built-in phono equalizer on and off
The phono equalizer is built in to enable direct connection, even if the amplifier or mini component system does not have phono input. Use the switch to turn the equalizer off to enable connection to amplifiers with a phono input. - Equipped with a function to switch RPM between 33 1/3, 45 and 78
Change record playback speed between 33 1/3, 45 and 78 RPM as needed. This means that both 7 inch and 12 inch record playback in all RPM formats is supported. - Equipped with a dust cover that can be used as a record stand
The included dust cover can also be set up for use as a record stand.
Use it to display the sleeves of your records.
Part names and functions
Front panel

- Power/rpm switch knob
Turn the power on and off and change the RPM as needed during record playback. (see "Record Playback") - Turntable
Attached by mounting on the center spindle on the main unit. The belt is equipped underneath. (see "Mounting the device") - Turntable sheet
Mounted on top of the turntable. (see "Mounting the device") - Center spindle
Place the turntable and records so that it comes out through the center. - Tone arm
- The counterweight is mounted on the back. (see "Mounting the counterweight")
- The head shell with cartridge is attached to the tip. (see "Mounting the head shell with cartridge")
- Counterweight
Attached to the back of the tone arm to adjust stylus pressure.- "Mounting the counterweight"
- "Adjusting the stylus pressure"
- Anti-skating dial
Adjusts anti-skating. (see "Adjusting anti-skating") - Head shell with cartridge
Attached to the tip of the tone arm. (see "Mounting the head shell with cartridge") - Armrest
Rest the tone arm here when it is not in use for record playback. - Lifter lever
Raises and lowers the tone arm. Lowering the lever slowly lowers the tone arm to place the stylus without damaging it or the record to be played.
Rear panel

- EQUALIZER ON/OFF switch
This switches the built-in equalizer on and off. Switch as needed depending on whether the connected amplifier or mini component system are equipped with phono input or not.- "Connecting devices that do not have a phono input"
- "Connecting devices that have a phono input"
- PHONO OUT connectors
For connecting devices with external audio or phono inputs.- "Connecting devices that do not have a phono input"
- "Connecting devices that have a phono input"
- SIGNAL GND terminal
Use the grounding wire on the supplied audio cable, even when connecting this device to amplifiers with grounded connections. (see "Connecting devices that have a phono input") - AUTO STOP ON/OFF button
Automatically raises the tone arm and stops the turntable at the end of a record when this function is on during record playback. (see "Using the automatic stop function") - AC adapter input connector
For connecting the included AC adapter. (see "Connecting the AC adapter")
Assembly

Mount these included parts on the main unit before use.
Make sure to perform setup on a stable, even surface to prevent the influence of vibration or slanted angles on record playback.
NOTE
- Make sure the AC adapter is not connected from this unit to a wall socket during assembly.
Mounting the device
- Mount the hole in the center of the turntable on the center spindle.
- Turn the turntable until the roller of the main unit is visible from the square hole on the side with the ribbon tape.
- Pull out the ribbon tape, and hang the belt on the roller.
![]()
- Remove the ribbon tape after hanging the belt.


- Take care not to twist the belt when hanging it.
- Store the ribbon tape after use, as it is required when replacing the belt.
- Mount the turntable sheet on the turntable.
-
![information]() Mount the sheet with the side featuring the DENON logo facing down.
Mount the sheet with the side featuring the DENON logo facing down.
-
Mounting the counterweight
- Insert the counterweight into the shaft on the back of the tone arm, and turn it in the direction of the arrow while gently pushing it.

![information]() Mount the counterweight so that its stylus pressure adjustment ring is facing the front.
Mount the counterweight so that its stylus pressure adjustment ring is facing the front.

Mounting the head shell with cartridge
- Insert the head shell into the tip of the tone arm.
- Insert the head shell with its guide pin facing up and aligned with the hole on the top of the tone arm.
![]()
- Insert the head shell with its guide pin facing up and aligned with the hole on the top of the tone arm.
- Turn the lock nut in the direction of the arrow to secure the head shell.
![]()


NOTE
- Perform this operation with the stylus cover of the cartridge lowered to protect the stylus tip.
Attaching the dust cover
- Mount the hole on the dust cover on the center spindle.

![information]() Remove the dust cover before record playback.
Remove the dust cover before record playback.

Using the dust cover as a record stand
Attach the dust cover to the included dust cover stand to use it as a record stand. Use it in this way when it is not attached to the main unit.
- Face the dust cover as shown in the picture below to insert it into the groove in the dust cover stand.
![]()
- Record sleeves can be fitted into the indent on the dust cover stand and leaned against the dust cover.
![]()


Adjustments

NOTE
- Make sure the AC adapter is not connected from this unit to a wall socket when performing adjustments.
Adjusting the stylus pressure
To enable the record stylus to follow the grooves of the record and pick up sound (vibrations), it is necessary to apply a constant pressure (stylus pressure) to the record from the stylus tip. A suitable stylus pressure value is specified for each cartridge. If the stylus pressure is higher or lower than the specified value, not only will the record playback sound be distorted and the stylus jump, but the record stylus may wear out faster and the record may become damaged. Therefore, make sure to adjust the stylus pressure to the suitable value.
- Set the anti-skating dial to "0".
![]()
- Lower the lifter lever.
- Release the armrest lock.
![]()
- Holding the finger lift of the headshell, move the tone arm over the turntable.
![]()


NOTE
- Perform this operation with the stylus cover of the cartridge lowered to protect the stylus tip.
- Turn twist the counterweight so that the tone arm is floating parallel to the turntable.

- Perform adjustment by turning the counterweight gradually while periodically removing your hand to check the position.
- Return the tone arm to the armrest.
- Holding the counterweight with a finger so that it does not move, turn the stylus pressure adjustment ring so that its "0" mark is lined up with the line on the tone arm.
![]()
- Turn the counterweight in the direction of the arrow so that the "2" mark of the stylus pressure adjustment ring is lined up with the line on the tone arm.
![]()


![information]() The appropriate stylus pressure for the cartridge included with this unit is 2.0 g (19.6 mN).
The appropriate stylus pressure for the cartridge included with this unit is 2.0 g (19.6 mN).
Adjusting anti-skating
Anti-skating adjustment is performed to counter the force which pulls the stylus tip inside due to the record rotation.
- Turn the anti-skating dial so that it is lined up with "2".
![]()

![information]() Make sure that the anti-skating value is the same as the stylus pressure value.
Make sure that the anti-skating value is the same as the stylus pressure value.
Connections
NOTE
- Do not plug in the AC adapter until all connections have been completed.
- Do not bundle AC adapter together with connection cables. Doing so can result in humming or noise.
Connecting devices that do not have a phono input
This unit has a built-in phono equalizer that enables record playback when connected to devices with external audio input without a built-in phono equalizer or with mini component system. Use the EQUALIZER ON/OFF switch to turn the phono equalizer on this unit "ON" when connected to a device without a built-in phono equalizer.

- It is recommended that the earth wire of the included audio cable is kept out of the way by securing it with a tie such as the twist tie of the audio cable.
- If the EQUALIZER ON/OFF switch is not set correctly, audio will be extremely low or distorted.
Connecting devices that have a phono input
When connected to a device with a built-in phono equalizer, use that device's phono equalizer during record playback. Use the EQUALIZER ON/OFF switch to turn the phono equalizer on this unit "OFF" when connected to a device with a built-in phono equalizer.

- If a device connected to this unit has an earth terminal, connect the earth wire of the audio cable (supplied) to the earth terminal of this unit (SIGNAL GND). This may reduce noise during playback.
- If the EQUALIZER ON/OFF switch is not set correctly, audio will be extremely low or distorted.
Connecting the AC adapter
Wait until all connections have been completed before connecting the AC adapter.
Attach the plug needed for your wall outlet as shown in the figure below.
Attaching the AC adapter plug
- Insert the nubs on the bottom of the AC adapter plug into the grooves on the AC adapter as shown in the picture below.
![]()
- Push in the direction of the arrow until it locks in with an audible click.
![]()


Removing the AC adapter plug
- Slide the AC adapter plug out in the direction of the arrow as far as it can go while holding the
![]() button.
button.
![]()
- Once the AC adapter plug has been slid out as far as possible, lift it up in the direction of the arrow to remove.
![]()
 button.

Connecting the AC adapter

Playback and recording
Record playback

- Place a record on the turntable.
![information]() For EP ("doughnut") records, insert the included 45 rpm adapter onto the center spindle.
For EP ("doughnut") records, insert the included 45 rpm adapter onto the center spindle.
- Turn the power/rpm switch knob to match the turntable rpm with the rpm of the record.
The turntable will start turning.
- You can select 33 1/3, 45, 78 rpm as the turntable speed per minute.
- The record rpm is normally indicated on the jacket or label of the record.
- Raise the stylus cover of the cartridge.
![]()
- Release the arm rest lock and raise the lifter lever.
![]()
- Grip the finger lift, and move the stylus tip directly above the start position of the track to play.
![]()
- Lower the lifter lever.
The tone arm slowly lowers, and playback starts when the stylus tip reaches the record.
![]()


- Be careful not to scratch records.
- Observe the following during playback.
- Do not touch the tone arm or turntable.
- Do not disconnect the power.
- Make sure the device is not subjected to vibration or impact.
- Do not change the record until the turntable has completely stopped.
- Do not apply pressure with your hand to stop the turntable while it is turning. Doing so creates internal heat which can lead to equipment failure or fire.
Stopping playback
- Raise the lifter lever.
Raise the tone arm to remove the stylus from the record. - Holding the finger lift of the headshell, return the tone arm to the armrest.
- Lower the lifter lever.
- Lock the tone arm into the armrest.
![]()
- Turn the power/rpm switch knob to OFF.
The turntable stops.

NOTE
- Flip down the stylus cover to protect the stylus in the cartridge when this unit is not in use.
Using the automatic stop function
When automatic stop is on, the tone arm automatically raises after playback and then the turntable stops. This keeps the turntable from continuing to turn and cause stylus wear should you accidentally fall asleep while listening to a record, etc.
- The default setting is on.
- Press AUTO STOP ON/OFF on the rear panel to turn the automatic stop function on.


- Make sure that AUTO STOP ON/OFF is pressed all the way in to make ensure that automatic stop is on.
- The power will turn off approximately 20 minutes after the turntable stops. Use the power/rpm switch knob to restart playback.
Troubleshooting
If a problem should arise, first check the following:
- Are the connections correct?
- Is the set being operated as described in the owner's manual?
- Are the other devices operating properly?
If this unit does not operate properly, check the corresponding symptoms in this section.
If the symptoms do not match any of those described here, consult your dealer as it could be due to a fault in this unit. In this case, disconnect the power immediately and contact the store where you purchased this unit.
Power does not turn on/Power is turned off
Power is not turned on.
- Check whether the power plug is correctly inserted into the power outlet. (see "Connecting the AC adapter")
- The power is off. Turn the power/rpm switch knob to the appropriate setting for the record you want to play. (see "Record playback")
Power automatically turns off.
- Automatic stop is on. Press the AUTO STOP ON/OFF button on the rear panel to turn the automatic stop function off. (see "Using the automatic stop function")
The unit does not spin
The turntable does not spin.
- Check whether the power plug is correctly inserted into the power outlet. (see "Connecting the AC adapter")
- Make sure that the belt is hooked on both the turntable and roller correctly. Follow the following steps if the belt has come off.
- Take the turntable off the main unit and turn it over.
- Hook the belt around the outside edge of the circular part on the bottom of the turntable.
- Turn the turntable right-side up and pass the ribbon from the square hole between the turntable and the belt.
- Set up the turntable as shown in "Mounting the device" section.
No sound comes out
No sound is produced. Or sound is distorted.
- Check the connections for all devices. (see "Connections")
- Insert connection cables all the way in.
- Check that input connectors and output connectors are not reversely connected.
- Check cables for damage.
- Check the amplifier's functions and controls and adjust as necessary.
- Make sure the stylus is correctly attached. (see "Replacing the stylus")
- If connecting an amplifier, mini component system, etc. with no built-in phono equalizer to this unit, set the EQUALIZER ON/OFF switch of this unit to "ON". (see "Connecting devices that do not have a phono input")
Audio skips/scratches or is distorted
Audio skips/scratches or is distorted.
- The correct stylus pressure is not applied. Adjust to the correct pressure. (see "Adjusting the stylus pressure"
- Make sure there are no scratches on the record.
- Make sure the record is not warped.
- Make sure there is no dirt or dust on the stylus or the record.
- Make sure the stylus has not been worn down. Replace the stylus if necessary. (see "Replacing the stylus")
Howling is produced
Howling is produced
- This unit and speaker are too close together. Move the speaker away from this unit.
- This unit is in an unstable position. Install in a stable, level location.
- Playback volume is too loud. Adjust the volume of the connected amplifier to the appropriate level.
The tone arm stops moving halfway
The tone arm not tracking during playback.
- Make sure there are no scratches on the record.
- Make sure nothing is obstructing the tone arm.
Replacing the stylus
The supplied stylus is good for approximately 400 hours of playback. Replace the stylus in a timely fashion to prevent damage to your record collection.
When replacing the stylus, make sure to request the DSN-85 for dedicated use with this unit at either the location where you purchased this unit or a local repair shop.
Removing the stylus

Holding the cartridge in one hand, use your other hand to hold the stylus and pull it down in the direction of arrow  , then pull the stylus in the direction of arrow
  to remove it.
Attaching a stylus

Holding the cartridge in one hand, use your other hand to hold the stylus and insert the hooked part of the stylus into the long hole in the cartridge in the direction of arrow , then push it up in the direction of arrow until it clicks in place.
- Make sure this unit and any connected amplifiers are off before replacing the stylus.
- Be very careful when handling the delicate stylus tip. Remove dirt or dust from the stylus tip with a soft brush, etc.
- Replacing the stylus is easier when the headshell is removed from the tone arm.
Specifications
| Turntable section | |
| Drive type: | Belt drive |
| Motor: | DC servo motor |
| RPM speeds: | 33 1/3, 45, 78 RPM |
| Wow & flutter: | 0.1% WRMS |
| S/N ratio: | 62 dB |
| Tone arm section | |
| Tone arm: | Static balanced type |
| Tone arm effective length: | 220 mm |
| Overhang: | 16 mm |
| Stylus pressure range: | 0 – 4.0 g (0 – 39.2 mN) 1 gradation is 0.1 g (0.98 mN) |
| Compatible cartridge weight: | 5.0 – 13.0 g (59.2 mN – 127.5 mN) |
| Cartridge section | |
| Cartridge: | MM type |
| Output voltage: | Equalizer off: 2.5 mV Equalizer on: 150 mV |
| Optimum stylus pressure: | 2.0 g (19.6 mN) |
| Replacement stylus product number: | DSN-85 |
| General | |
| Power supply: | AC 100 – 230 V, 50/60 Hz |
| Power consumption: | 10 W |
| Power consumption in standby mode: | 0.5 W or less* |
*When automatic stop function is enabled
For the purpose of improvement, the specifications and design are subject to change without notice.

Dimensions (Unit: mm)

[With dust cover attached]
Weight: 5.6kg (including the dust cover)
Documents / ResourcesDownload manual
Here you can download full pdf version of manual, it may contain additional safety instructions, warranty information, FCC rules, etc.
Advertisement


Need help?
Do you have a question about the DP-400 and is the answer not in the manual?
Questions and answers