Advertisement
IMPORTANT SAFETY WARNINGS
 TO REDUCE RISK OF INJURY: Before any use be sure everyone using this product reads and understands all safety instructions and other information contained in this manual.

Wear appropriate personal hearing protection during use. Under some conditions and duration of use, noise from this product may contribute to hearing loss.
Save these instructions and review frequently prior to use and in instructing others.

When using electric gardening appliances, basic safety precautions should always be followed to reduce risk of fire, electric shock, and personal injury, including the following:
READ ALL INSTRUCTIONS
GENERAL SAFETY
REPLACEMENT PARTS
When servicing use only identical replacement parts.
POLARIZED PLUGS - To reduce the risk of electric shock, this product has a polarized plug. Polarized connections will fit together only one way. Make sure that the receptacle end of the extension cord has large and small blade slot widths. If the plug does not fit fully into the extension cord, reverse the plug. If it still does not fit, obtain a suitable extension cord. If the extension cord does not fit fully into the outlet, contact a qualified electrician to install the proper outlet. Do not change the plug on the tool or the extension cord in any way.
AVOID DANGEROUS ENVIRONMENTS - Don't use this product in rainy, stormy, damp or wet locations. Do not operate in gaseous or explosive atmospheres. Motors in these products normally spark, and the sparks might Ignite fumes. Don't use in rain.
KEEP CHILDREN AWAY - All visitors, children and pets should stay at a safe distance from the work area.
DRESS PROPERLY- Don't wear loose clothing or jewelry and wear protective hair covering to contain long hair. They can be caught in moving parts. Use of rubber gloves and substantial footwear is recommended when working outdoors.
USE SAFETY GLASSES - Wear safety glasses with side shields or goggles that are marked to comply with ANSI Z87.1 standard when operating this product. Use face or dust mask if environment is dusty.
USE RIGHT APPLIANCE - Do not use this product for any job except that for which it is intended.
GROUND FAULT CIRCUIT INTERRUPTER (GFCI) protection should be provided on the circuit or outlet to be used for the tiller/cultivator. Receptacles are available having built-in GFCI protection and may be used.
To reduce the risk of electric shock, use only with an extension cord intended for outdoor use, such as an extension cord of cord type SW-A, SOW-A, STW-A, STOW-A, SJW-A, SJOW-A, SJTW-A. or SJTOW-A.
EXTENSION CORD. Make sure your extension cord is in good condition. When using an extension cord be sure it is heavy enough to carry the current your product will draw. An undersized extension cord will cause a drop in line voltage resulting in loss of power and overheating. The following table shows the correct size to use depending on cord length and nameplate ampere rating. If in doubt, use the next heavier gage. The smaller the gage number, the heavier the cord.

It is possible to tie the extension cord and power cord in a knot to prevent them from becoming disconnected during use. Make the knot as shown, then connect the plug end of the power cord into the receptacle end of the extension cord. This method can also be used to tie two extension cords together.

Use one of the plug-receptacle retaining straps or connectors described in this manual.
Avoid Unintentional Starting – Don't carry plugged-in appliance with finger on switch. Be sure switch is off when plugging in.
DON'T ABUSE CORD - Never carry this product by the cord or yank the cord to disconnect from the receptacle. Keep cord from heat, oil, and sharp edges.
DON'T FORCE APPLIANCE – It will do the job better and with less likelihood of a risk of injury at the rate for which it was designed.
DON'T OVERREACH - Guide the tiller/cultivator at a walking pace only. Keep proper footing and balance at all times.
STAY ALERT - Watch what you are doing. Use common sense. Do not operate the tiller/cultivator when you are tired or under the influence of drugs or medication.
DISCONNECT APPLIANCE – Disconnect the appliance from the power supply when not in use, before servicing, when changing accessories such as blades, and the like.
STORE IDLE UNIT INDOORS - When not in use, the tiller/cultivator should be stored indoors in a dry area out of children's reach.
MAINTAIN UNIT WITH CARE - Keep clean for best performance and to reduce the risk of injury. Follow instructions for lubricating and changing accessories. Inspect unit cord periodically, and if damaged, have it repaired by an authorized service facility. Inspect extension cord periodically and replace if damaged. Keep handles dry, clean and free from oil.
CHECK FOR DAMAGED PARTS - Before further use of the product, any part that is damaged should be carefully checked to determine that it will operate properly and perform its intended function. Check for alignment of moving parts, binding of moving parts, breakage of parts, mounting and any other condition that may affect its operation. Any part that is damaged should be properly repaired or replaced. For assistance call our customer service help line at 1-800-633-1501.

Keep hands and feet away from blades.
 DOUBLE INSULATION – The tiller/cultivator has double insulation. This means that all external metal parts are insulated from the electrical supply. This is achieved by introducing an insulation layer between electrical and mechanical parts. The double insulation guarantees you the greatest possible safety.
To reduce the risk of electric shock, do not expose unit to water or operate unit on wet ground.
To reduce the risk of injury to persons, do not operate without guards in place.
Be aware of the extension cord while operating the tiller/cultivator. Be careful not to trip on the cord. Always guide the cord away from the tines.
OVERHEAT PROTECTION - If the tiller/cultivator is blocked by a foreign object or if the motor is overloaded, the motor will switch off automatically by the protection device. Release the trigger lever and wait for the motor to cool down (approx. 15 minutes) before starting the tiller again.
The tiller/cultivator may bounce upward and/or jump forward if the tines strike extremely hard packed soil, frozen ground, or buried obstacles such as large stones, roots or stumps.
Replace damaged cord immediately.
LIGHTING - Only operate your tiller/cultivator in daylight or good artificial light.
Do not operate the tiller/cultivator on a slope that is too steep for safe operation. When on slopes, slow down and make sure you have good footing.
Before starting the tiller/cultivator make sure the tines are not touching any object and are free to move.
Grip the guide bar firmly with both hands. Never operate the tiller/cultivator with one hand.
Do not operate the tiller/cultivator near underground electrical cables, telephone lines, pipes or hoses.
If the tiller/cultivator strikes a foreign body, turn it off immediately, wait for the tines to stop and check for damage. If necessary, repair before restarting.
If the tiller/cultivator starts to vibrate abnormally, turn it off immediately and check for the cause.
Vibration is generally a warning of trouble.

RISK OF CUT - Wear gloves and use caution when cleaning or performing maintenance on the tiller/cultivator.
Always turn off the tiller/cultivator, disconnect from the power supply and wait until the tines come to a complete stop before carrying out any maintenance or repairs.
Tines do not stop immediately after the tiller/cultivator is turned off.
Risk of injury. Do not put hands, feet or any body part or clothing near the rotating tines.
California Proposition 65:
This product contains chemicals known to the State of California to cause cancer, birth defects or other reproductive harm.
Some dust and debris created by the use of this tool could contain chemicals known to the State of California to cause cancer and birth defects or other reproductive harm. Some examples of these chemicals are:
- chemicals in fertilizers
- compounds in insecticides, herbicides, and pesticides
- arsenic and chromium from chemically treated lumber
Your risk from exposure to these chemicals varies, depending on how often you do this type of work. To reduce your exposure, work in a well-ventilated area and with approved safety equipment such as dust masks that are specially designed to filter out microscopic particles.
Cancer and Reproductive Harm - www.P65Warnings.ca.gov.
PRODUCT SPECIFICATIONS
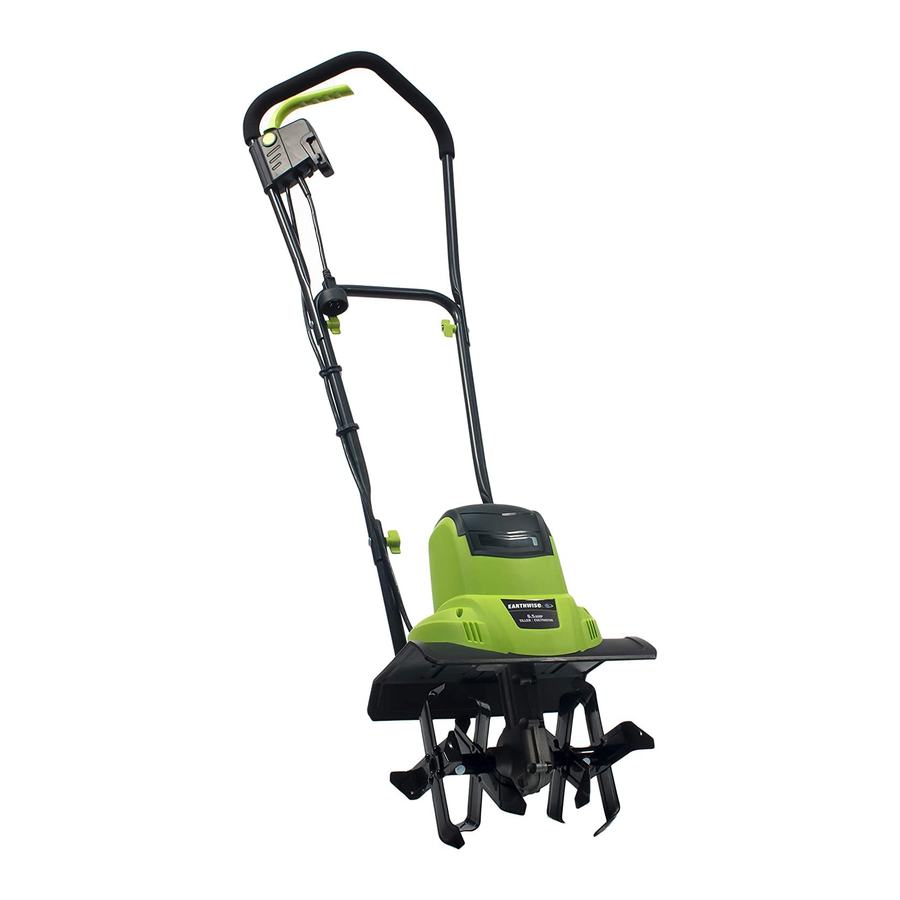
Model: TC70065
| Power supply voltage: | 120V-60HZ | Working width: | 11-IN |
| Tine Speed: | 360 RPM | Working depth max: | 8-IN |
| Power Consumption: | 6.5 Amp | ||

| No. | Description | No. | Description |
| 1 | Upper handle section | 7 | Center handle section |
| 2 | Switch box and power cable assembly | 8 | Lower handle section |
| 3 | Cord retainer | 9 | Motor housing |
| 4 | Cable clip | 10 | Protective shield |
| 5 | Wing nut | 11 | Tine assembly 1 |
| 6 | Carriage bolt M6 x 45 | 12 | Tine assembly 2 |
ASSEMBLY
This product requires assembly.
Carefully remove the product and any accessories from the box. Make sure that all items listed in the packing list are included.
Inspect the product carefully to make sure no breakage or damage occurred during shipping.
Do not discard the packing material until you have carefully inspected and satisfactorily operated the product.
PACKING LIST
- Tiller
- Upper Handle Section
- Center Handle Section
- Hardware Bag
- Owner's Manual
If any parts are damaged or missing, do not operate this product until the parts are replaced. Failure to heed this warning could result in serious personal injury.
If any parts are damaged or missing, please call customer service at 1-800-633-1501 for assistance.
Do not connect to power supply until assembly is complete. Failure to comply could result in accidental starting and possible serious personal injury.
Do not attempt to modify this product or create accessories not recommended for use with this product. Any such alteration or modification is misuse and could result in a hazardous condition leading to possible serious personal injury.
This product must be assembled correctly before use.

- Attach the center handle section (7) to the lower handle sections (8) using the two supplied M6x45 bolts (6) and wing nuts (5). (Fig. 2-1)
- Fasten the upper handle section (1) to the center handle section (7) using the two supplied M6x45 bolts (6) and wing nuts (5) (Fig. 2-2).
- Remove the switch box cover at the back of the switch box.
- Install the switch box and power cable assembly onto the upper handle section using the two supplied bolts (3.9x19). (Fig.2-3)
- Use the two supplied cable clips (4) to secure the cord. (Fig. 2-4)
OPERATING
STARTING:
Secure the extension cord into the cord retainer. The loop of the extension cord must be long enough for the cord retainer to freely slide from one side to the other. Plug the extension cord into the power cord plug on the tiller. (See Fig. 3)

Move the tiller/cultivator to the work area prior to starting the motor.
Do not start tiller with any person or object directly in its path.
Hold the tiller/cultivator firmly while starting. The tines will pull the tiller/cultivator forward during operation. Lower the tines slowly into the ground being tilled.
To Start
To start the tiller/cultivator, press and hold the safety lock button (A) on the safety switch while pulling the trigger lever (B) up and against the handle. The motor will start and the tines will begin to rotate. (See Fig. 4) To stop the tiller/cultivator, simply release the lever.

Before use, remove any visible stones or other foreign bodies from the area.
Before moving the tiller/cultivator from one area to another switch off the motor and wait for the tines to come to a complete stop. Be careful not to let the tines touch the ground while moving the tiller/ cultivator. The tines as well as the unit itself may be damaged even if the motor is switched off.
Use the tiller/cultivator for breaking sod, preparing seed beds, and for cultivating gardens and flower beds. The tiller/cultivator can also dig small holes for planting saplings or potted plants.
For breaking sod or deep tilling, allow the tines to pull the tiller/cultivator forward to the end of your arm's reach, then firmly pull it back toward yourself. You will achieve the best results by repeatedly allowing it to move forward and pulling it back.
By pulling the tiller/cultivator back towards yourself, the tines will dig deeper and more aggressively.
To prevent tripping, take extra precautions when moving backwards and when pulling the tiller/cultivator back toward yourself.
If the tiller/cultivator digs deep enough to stay in one spot, gently rock it side to side until it starts moving forward again.
Never pass the tiller/cultivator over the extension cord. Make sure the cord is always in a safe position behind you.
When working on inclines always stand diagonally to the incline to retain a firm, safe footing. Do not work on extremely steep slopes.
For preparing seed beds, we recommend using one of these tilling patterns: (See Fig. 5)
Tilling Pattern A– Make two passes over area to be tilled, the second at a right angle to the first.
Tilling Pattern B– Make two passes over area to be tilled, the second overlapping the first.

Clearing foreign objects:
During operation a stone or root could become lodged in the tines, or tall grass or weeds may become wrapped around the tine shaft. To clear the tines or tine shaft release the trigger lever, wait for the tines to come to a complete stop and unplug the tiller/cultivator. Dislodge or remove the foreign matter from the tines or tine shaft. To simplify removal of tall grass or weeds from the tine shaft, remove one or both sets of the tines. See Tine Removal and Installation.
MAINTENANCE
Before carrying out maintenance operations, disconnect power supply. Failure to heed this warning could result in serious personal injury.
Before each use check the extension cord for signs of damage or aging. Replace the cable if it is cracked, split or otherwise damaged. Check the condition of the tines and ensure that all threaded connections are securely tightened. If the tines become dull or blunt, sharpen or replace them. Call our customer service help line at 1-800-633-1501 for assistance.
Once per season lubricate the tines and shaft. At the end of the season, check the tiller/cultivator for damage prior to storing. Repair or replace damaged or broken parts.
Always clean the tiller/cultivator after each use. Failure to carry out proper cleaning can result in damage to the tiller/cultivator or result in poor performance.
Clean the underside of the motor support plate and housing around the tines with a scrub brush, and a soft cloth dampened with a mild soap and water mixture. Never use a water hose to clean the tiller! To remove soil and debris from the transmission and tines, use a stiff brush or a dampened cloth. Clean the vents on the motor housing and remove any remaining grass or dirt. Once cleaned, wipe the tines and shaft dry and apply a light coat of oil to prevent rust.
Tines maintenance: Worn tines invite poor performance and overload of the motor. Check tines before each use. Sharpen or replace the tine assemblies with new ones when necessary. Call 1-800-633-1501 for assistance.
Injury can occur while working on the tines. Wear protective gloves.
Tine Removal and Installation (Fig. 6)
To remove the complete tine assemblies from the shaft, remove the M8 X 40 hex head bolt from the shaft. Remove the tine assembly from the shaft.
Reverse above steps to install tines.

Replace worn or damaged parts with original replacement parts only. Parts from another tiller/ cultivator may not fit properly causing an unsafe situation.
Make sure all protective devices are secure and in good condition. Repair or replace if necessary.
Lubrication (Fig. 7): The tines drive transmission case has grease installed at the factory. It is not required that the grease level be checked nor recommended that grease be added during the first 2 years of use. After the second season of use, follow the directions as described below:

Drain screw plugs are located on the right side of transmission housing. Lay the tiller/cultivator on its left side and clean the transmission of dirt and debris prior to removing the drain screw plugs. If necessary, remove tine assemblies to have better access to the drain screw plug. Use a 5mm hex key to unscrew the plugs.
Using a squeeze bottle or tube, add approximately 2.4 oz. (70ml) of auto gear lube. Do not overfill. When completed, reinstall both drain screw plugs into the transmission.
STORAGE
Store the Tiller/Cultivator in a dry, clean area out of reach of children. During extended periods of storage, ensure that the tiller/ cultivator is protected against corrosion and rust.
At the end of the season, or if the tiller/cultivator is not being used for longer than a month, wipe over all metal surfaces with an oil impregnated cloth to protect them from corrosion or spray with a fine coat of oil. Fold the upper handle down, and store the tiller/cultivator in a suitable place.
TROUBLESHOOTING
| Problem | Possible causes | Remedy |
Motor does not start | Unit not plugged in No electricity Defective cable Defective safety switch/plug Overheat protection activated | Plug in the unit Check power supply Check cable. Repair or replace if required Arrange for repair
|
Abnormal noises | Blade is jammed Lubricating grease level too low Bolts, nuts or other components are loose. | Switch off. Wait till tines comes to a complete stop. Remove jammed objects. Tiller/cultivator must be repaired. Call our customer service help line at 1-800-633-1501 for assistance. Tighten all components. Arrange for repair if noises continue. |
Abnormal vibrations | Blades damaged or worn Working depth too large | Replace damaged or worn blades. Set to correct working depth. |
Poor results | Working depth too small Worn blades | Set to correct working depth. Replace damaged or worn blades. |
CALL US FIRST!!
Call us first with questions about operating or maintaining your tiller at 1-800-633-1501 between 8:00 a.m. – 5:00 p.m. Eastern Standard Time, or get assistance on www.americanlawnmower.com.
PARTS AND SERVICE
For parts or service, please call 1-800-633-1501 or visit us online at www.americanlawnmower.com. Be sure to provide all relevant information when you call or visit.
REPAIR PARTS (KITS/ ITEMS)
The model/ serial number of this tool is found on a plate or label attached to the housing. Please record the serial number in the space provided below.
MODEL NUMBER TC70065_____
SERIAL NUMBER________________
Always mention the model number when ordering kits/items for this tool.

| No. | Kit/Item Number | Description | QTY |
| 1 | RTC70065-HK | Handle Kit | 1 |
| 2 | RTC70065-DTK | Dual Tine Kit | 1 |
CALL US FIRST!!
Call us first with questions about operating or maintaining your tiller at 1-800-633-1501 between 8:00 a.m. – 5:00 p.m. Eastern Standard Time, or get assistance on www.americanlawnmower.com.
Documents / Resources
References

Download manual
Here you can download full pdf version of manual, it may contain additional safety instructions, warranty information, FCC rules, etc.
Advertisement


Need help?
Do you have a question about the TC70065EW and is the answer not in the manual?
Questions and answers