Roland V-Synth GT Quick Start Manual
Roland v-synth gt: quick start
Hide thumbs
Also See for V-Synth GT:
- Owner's manual (248 pages) ,
- Service notes (75 pages) ,
- Supplementary manual (40 pages)
Table of Contents
Advertisement
Quick Links
Advertisement
Table of Contents

Related Manuals for Roland V-Synth GT


Summary of Contents for Roland V-Synth GT
- Page 1 Quick Start...
- Page 3 And now in 2007 , the V-Synth engine has evolved to Dual Core, giving birth to the V-Synth GT and bringing you “AP-Synthesis” which creating realistic sounds based on an analysis of the playing techniques characteristic of instruments such as violin and sax, and “Vocal Designer”...
-
Page 4: Table Of Contents
What the V-Synth GT can do ........ -
Page 5: An Overview Of The V-Synth Gt
An overview of the V-Synth GT This chapter introduces you to what can be done using the V-Synth GT. Read this chapter fi rst to get a glimpse into the world of the V-Synth GT. -
Page 6: What The V-Synth Gt Can Do
There are performance techniques that are possible only on the V-Synth GT You can use the following two performance techniques to perform sounds that can be produced only by the V-Synth GT. You can apply a variety of eff ects by touching the Time Trip pad while you hold down keys on the keyboard. - Page 7 Vocal Designer → refer to “Performing with Vocal Designer” (p. 34) ion of the vocoder, giving you possibilities ice to realistic backing choruses. wn voice as part of the sound- Analog Modeling / COSM → refer to “What is COSM?” (p. 12) nalog synthesiz- s of famous of fi lters as...
-
Page 8: What Is Ap-Synthesis
What is AP-Synthesis? AP-Synthesis (Articulative Phrase Synthesis) is one of the new features on the V-Synth GT. It en- ables performance expression that exceeds the realism of sampling. A new method of expression that’s neither sampling nor modeling A new method of expression that s neither sampling nor modeling AP-Synthesis is a completely new method of sound generation;... - Page 9 Beyond reality Beyond reality AP-Synthesis modeling types also include variations that are possible only on a synthesizer; you can select distinctive models such as “analog lead synth sounds played using violin performance technique. ” These sounds can then be processed by COSM, and layered with VariPhrase sounds to create sounds that are not limited to re-creations of conventional instruments.
-
Page 10: What Is Vocal Designer
What is Vocal Designer? “Vocal Designer” is a further evolution of the “vocoder. ” This function was featured on the VP-550, and is also provided on the V-Synth GT. Vocal Designer Vocal Designer Vocal Designer uses cutting-edge model- ing technology to attain a revolutionary leap in synthesis precision, succeeding in producing “human voice”... -
Page 11: What Is Variphrase
Of course, you can also change just the “time” or just the “formants” to transform the bark of a large dog into the bark of a small dog. In this way, the VariPhrase that’s at the core of the V-Synth GT gives you a range of control that was not possible on conventional samplers. -
Page 12: What Is Cosm
When you play a chord, the eff ect produced by a conventional eff ect processor will apply to the combined sound of all notes of the chord. However the V-Synth GT’s COSM eff ects are applied individually to each note within the chord. -
Page 13: Basic Operation
Basic operation This chapter explains basic operation of the V-Synth GT, focused mainly on the screen. -
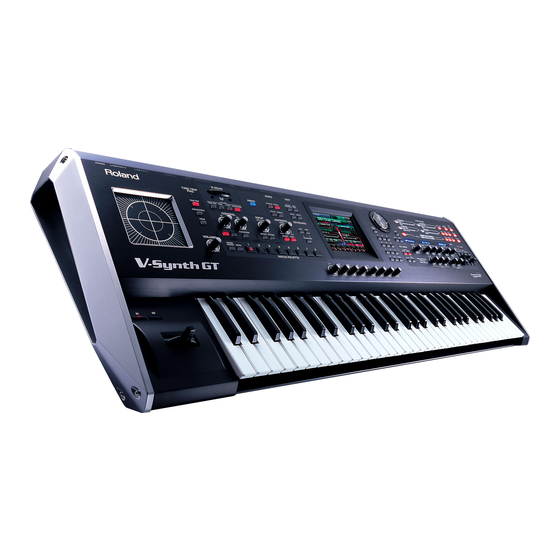
Page 14: About The Panel
Edit area Display area The V-Synth GT’s panel contains numerous buttons and knobs, but we can broadly group these into three areas. We’ll describe each of these below. For details on what each control actually does, refer to the “Owner’s Manual. ”... - Page 15 Section on/off buttons You can change the way in which the Here you can directly turn on/off each sec- V-Synth GT sound generator’s elements tion in the structure. While you’re editing, (sections) are connected. The way in which this gives you a convenient way to hear the sections are connected is called the what each section is actually doing.
- Page 16 3 3 . Display area Display area This area groups the buttons and knobs that are related to operations in the display. Touch panel Cursor buttons You can perform various op- Use these to move the cursor in the display. erations by directly touching the buttons or knobs shown VALUE dial...
-
Page 17: About The Display
About the display The V-Synth GT’s display is a touch panel. You can perform a variety of operations by directly touching the display. There are many screens, but here we’ll introduce some basic rules. Help MENU Screen name If this icon is lit... -
Page 18: Basic Touch Panel Operations
Basic touch panel operations The V-Synth GT uses a touch panel. You can perform a variety of operations simply by touching the display. Here we’ll try actually switching between screens, and editing the value of a parameter. The touch panel will operate when you simply touch it lightly with your fi nger. Pressing it strongly or with a hard object may damage the panel. - Page 19 Editing the value of a parameter Editing the value of a parameter Touch the <Level> knob. When you touch the <Level> knob, the numerical area will turn blue, and the cursor will move to Level. Continue touching the <Level> knob, and drag your fi nger up/down or left/right.
-
Page 20: Convenient Functions
Convenient functions Shortcuts By pressing a button in conjunction with the panel [SHIFT] button, you can use a variety of short- cut functions. Shortcuts to screens Shortcuts to screens Pres s ss s a bu tton while holding down the on while n while holding n while... -
Page 21: Calibrating The Touch Panel
Calibrating the touch panel If the touch panel no longer responds as you expect, use the following procedure to calibrate it. Press the [UTILITY] button. The Utility Menu screen will appear. Touch <Calibration>. Touch <Touch Screen>. Successively touch each “+” symbol as it is enclosed in the square bor- der in the screen (left →... -
Page 22: Changing The Wallpaper
Importing wallpaper Importing wallpaper The V-Synth GT lets you use any bitmap image (Windows standard 24-bit BMP format, 320 x 240 pixels) as wallpaper. Use your computer to save the desired image in bitmap form on your USB memory device (in the root level). -
Page 23: Playing Sounds
Playing sounds On Roland synthesizers, each sound is called a “ patch. ” This chapter explains how to play patches, and how to apply various eff ects to the sound. We’ll also explain special playing techniques to get the most out of AP-Synthesis and... -
Page 24: Selecting A Patch
Selecting a patch Press the panel [PATCH] button to access the Patch Play screen. Touch the patch name. Select a patch number by turning the VALUE dial or by pressing the [INC/+] or [DEC/-] buttons. If you turn the VALUE dial while holding down the [SHIFT] button, the patch number will change in steps of ten. - Page 25 Selecting a patch from a Selecting a patch from a list list In the upper left of the screen, touch <Search>. From the displayed list, select a patch. You can scroll the list by dragging it up or down. You can also use the VALUE dial or the [INC/+][DEC/-] buttons to select a patch.
-
Page 26: Using Controllers To Modify The Sound
You can apply a variety of eff ects to the sound by touching the Time Trip pad located in the left of the V-Synth GT’s panel, or by moving your hand above the D Beam controller. Select preset patch number 301. - Page 27 D Beam D Beam Press the D Beam [PITCH] button to make it light. If you want to turn off the D Beam, press the lit button once again. [PITCH] button is lit While holding down a note on the keyboard, position your hand above the D Beam controller, and slowly move it up/down/left/right.
-
Page 28: Performing With Ap-Synthesis
There’s no need to perform diffi cult opera- tions. Just play the keyboard as you feel, and the V-Synth GT will respond. By using a foot switch (separately sold DP series or BOSS FS-5U), you’ll be able to take the fullest advantage of the expressive power off ered by AP-Synthesis. -
Page 29: Violin Phrase Model
✍ The V-Synth GT’s AP-Synthesis is generally for solo (monophonic) sounds. However, de- pending on how you play it, the violin VariPhrase model can produce up to four notes of polyphony in order to simulate the sound of a violin’s four strings. -
Page 30: Erhu Phrase Model
Performing with AP-Synthesis Erhu phrase model The Erhu is a traditional bowed-string instrument of China. The sound produced by its unique structure is quite distinctive, and rich in expressive power. The characteristic feature of the Erhu is pitch change while playing. On conventional synthesizers, it was extremely diffi cult to express the kind of pitch changes that are typical of an Erhu performance. -
Page 31: Sax Phrase Model
Sax phrase model A distinctive characteristic of the sax is the way in which the sound changes in the instant you begin blowing, or when you change the pitch. This phrase model also expresses the sensation of breath being blown into the instrument, and the key noise produced by fi ngering. Select preset patch number 304. -
Page 32: Flute Phrase Model
Performing with AP-Synthesis Flute phrase model The distinctive character of the fl ute lies in how the attack sound at the beginning of each note changes, and the way in which the sound changes when you play legato and slurs. This phrase model expresses even the subtle noises of the breath you blow, as well as the changes that occur when you change the pitch. -
Page 33: Multifade Phrase Model
Multifade phrase model Multifade is not a phrase model that portrays a specifi c instrument. It combines elements from the operation models of existing instruments to allow more synthesizer-like control. Select preset patch number 306. → “Selecting a patch” (p. 24) This patch combines the “Multifade phrase model”... -
Page 34: Performing With Vocal Designer
Performing with Vocal Designer You’ll need a mic in order to perform using Vocal Designer. Connect a mic before you continue. Setup Setup Connect your mic to the “MIC IN jack” as shown in the illustration. Press the [SETTING] button. Press the [SETTING] button located below the panel INPUT knob to access the Audio Input Set- tings screen. - Page 35 Performing Performing Select preset patch number 307. → Selecting a patch (p. 24) Play the keyboard. While holding down a key, y, vocalize into the mic. Vocal Designer will produce sound according to the volume of your voice. Even if you’re holding down a key, Vocal Designer won’t produce sound unless you’re vocalizing into the mic.
- Page 36 It’s easy to get that “stereotypical” robot voice that was frequently used in techno music of the 1980’s. You can also apply COSM eff ects to produce new vocoder sounds obtainable only with the V-Synth GT.
-
Page 37: Creating Sounds
Creating sounds This chapter introduces you to the types of sound you can create using the V-Synth GT. -
Page 38: How Patches And Tones Are Related
How Patches and Tones are related What is a Patch? On Roland synthesizers, each sound is called a “patch. ” On the V-Synth GT as well, the individual sounds you play are called “patches. ” The screen will show as follows. -
Page 39: What Is A Tone
What is a Tone? A tone is an element that makes up a patch. There are two tones: upper and lower. The tones used in a patch are shown in the screen as follows. T O N T O N E O N / O o n e l e v e l... - Page 40 Elements of a Tone OSC1, OSC2 This section lets you select the waveform that is the basis of the sound. On the V-Synth GT, you can choose from sampled PCM waveforms, waveforms that model an analog synthesizer, and external audio input.
- Page 41 (Side Band Filter) for COSM1 to create the char- acter of the sound, and choose TVF for COSM2 to adjust the tone. The sound of the V-Synth GT’s new AP-Synthesis can be mixed into the fi nal result. Structure Type 2...
-
Page 42: Selecting A Tone
Selecting a tone Touch the upper tone’s <tone number>. The tone number area will turn blue, and the cursor will move to the tone number. If you want to select the lower tone, touch the lower tone’s <tone number>. Turn the VALUE dial or use the [INC/+][DEC/-] buttons to select the desired tone. - Page 43 Selecting a tone from a Selecting a tone from a list list Touch <Search>. When you touch <Search>, the tone list will appear. Choose a tone from the list. You can scroll the list by dragging it up or down with your fi nger. You can also make a selection by using the VALUE dial or the [INC/+][DEC/-] buttons.
-
Page 44: Editing A Tone
Editing a tone SOUND SHAPER II It allows you to quickly create the sound you want by focusing your editing on relevant aspects of the sound, just like a professional sound designer. S O U N D S H A P E R I I T o n e s e l e c... - Page 45 Press the panel [PATCH] button to access the Patch Play screen. Touch <SOUND SHAPER II>. Turn the E1–E8 knobs to adjust the sound. Use the tabs located at the bottom of the screen to switch between the diff erent sec- tions.
-
Page 46: Pro Edit
If you’ve lost track of what you’re editing, touch <MAP> to see where you are. The V-Synth GT Map screen gives you a convenient way to turn each section of the upper tone and lower tone on or off . - Page 47 Press the panel [PATCH] button to access the Patch Play screen. Touch <PRO EDIT>. Use the section tabs at the bottom of the screen to select a section such as OSC or COSM, and use the detail tabs at the left to select detailed settings within that section.
-
Page 48: Volume Volume
The type of sound we experience is determined by the shape of this wave. The V-Synth GT makes it easy to create new sounds simply by moving the controllers of the panel. It’s a good idea to start by selecting a patch that’s similar to the sound you’re trying to create. - Page 49 (waveform) of the level partials which are cut sound. It is a popular method for creating composite waveforms. The V-Synth GT provides several frequency types of fi lters, giving you a broad range of sound-creating possibili- ties. Higher partials are cut, making the...
-
Page 50: Saving Patches And Tones
Saving patches and tones A patch or tone you edit is temporary; it will be lost if you turn off the power or select another patch or tone. If you want to keep a patch or tone you’ve edited, you must save it as follows. In the upper right of the screen, touch <MENU>. -
Page 51: Initializing A Patch Or Tone
Initializing a patch or tone Initializing means to return the currently selected patch or tone to a standard set of values. If you want to create a patch or tone from scratch, rather than starting from an existing patch or tone, you can execute the Initialize operation. -
Page 53: Index
Index... - Page 54 Index Analog Modeling ..........7 MAP ............17, 46 AP-Synthesis......... 6, 8, 40 MENU..............17 Performing with AP-Synthesis ..... 28 MOD ..............40 Calibrating ............21 Numeric keys........... 24, 42 Category search ........25, 43 Control knobs ..........14 COSM ............12, 40 OSC ..............
- Page 55 Upper tone ............38 Utility ..............21 V-Synth GT An overview ............5 The genesis of the V-Synth ......3 V-Synth GT Map ..........46 VALUE dial ............16 VariPhrase............11 Vocal Designer ........7, 10, 40 Performing with Vocal Designer....34 Vocoder .............
- Page 56 04671390 07-04-1N...
Need help?
Do you have a question about the V-Synth GT and is the answer not in the manual?
Questions and answers