Britax ADVOCATE CLICKTIGHT, BOULEVARD CLICKTIGHT - Car Seat Manual
- User manual (25 pages) ,
- User manual (51 pages) ,
- User manual (96 pages)
Advertisement
- 1 Child Seat Features
- 2 Safety Information
- 3 Rear-Facing Installation
- 4 Forward-Facing Installation
- 5 Securing Your Child
-
6
Child Seat Functions
- 6.1 Click & Safe Snug Harness Indicator
- 6.2 Adjusting the Harness Height
- 6.3 Adjusting the Harness Length
- 6.4 Shortening the Harness
- 6.5 Lengthening the Harness
- 6.6 Harness Buckle Position
- 6.7 Using the Harness Buckle
- 6.8 Using the Chest Clip
- 6.9 Comfort Pillow
- 6.10 Seat Positions
- 6.11 Using the Recline Indicator
- 6.12 Overhang
- 6.13 Uninstalling the Seat
- 6.14 Anti-Rebound Bar (Select Models)
- 6.15 Using the Lower Anchors and Tethers for Children (LATCH)
- 6.16 Lower Connectors
- 6.17 Impact Absorbing Tether
- 6.18 Using the Tether
- 6.19 The Tether as a Crash Indicator
- 7 Vehicle Compatibility
- 8 Maintenance
- 9 Cleaning
- 10 Troubleshooting
- 11 Documents / Resources
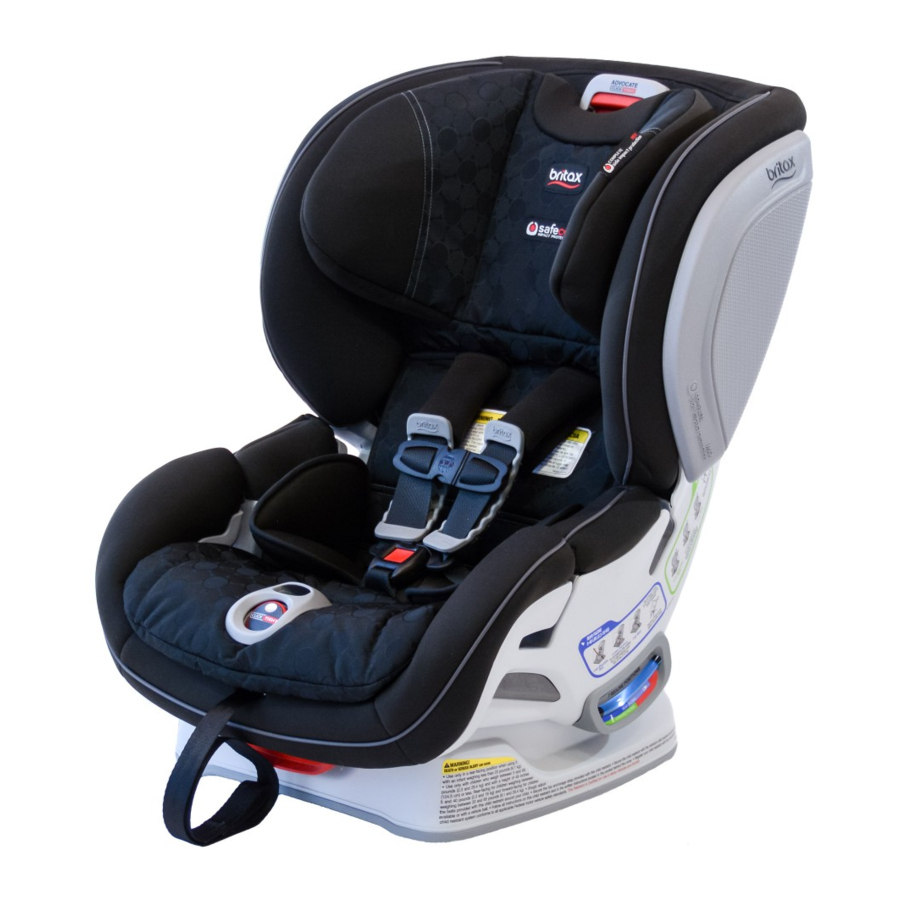
Child Seat Features

Description
- Cover
- Harness Height Adjuster
- Head Restraint
- Side Impact Cushions (ADVOCATE only)
- Comfort Pads
![]() User Guide Storage (in pocket behind cover)
User Guide Storage (in pocket behind cover)- Chest Clip
- Comfort Pillow
- Forward-Facing Belt Slot / Harness Holder
- Lower Connector Strap (LATCH component)
- Lower Connector Adjuster Release Button (LATCH component)
- Lower Connector Adjuster (LATCH component)
- Lower Connector (LATCH component)
- CLICKTIGHT Bezel
- Harness Release Button (red)
- CLICKTIGHT Dial
- Impact Absorbing Chest Pads
- Harness Buckle
- EZ-Buckle™ Belly Pad
- Serial Number & Manufactured Date Label (under seat cover)
- CLICKTIGHT Mechanism
- Click & Safe Snug Harness Indicator (under cover)
- Harness Adjuster Strap
- Recline Adjustment Handle
- Anti-Rebound Bar (select models)
- Shell
- Rear-Facing Belt Slot
- Recline Indicator
- Impact Absorbing Base
- Impact Absorbing Tether (Top Anchorage Strap - LATCH component) - stored in Tether Storage Compartment
- Tether Storage Compartment
- Harness Yoke
- Harness Straps
- Lower Connector Storage
Safety Information

Failure to follow all warnings and instructions could result in SERIOUS INJURY or DEATH.
FIT REQUIREMENTS
- Use only in a rear-facing position when using it with an infant weighing less than 20 lbs (9.1 kg).
- Use only with children who weigh between 5 and 65 lbs (2.3 and 29.4 kg) and whose height is 49 in. (124.5 cm) or less. Use rear-facing for children who weigh between 5 and 40 lbs (2.3 and 18 kg). Use forward-facing for children who weigh between 20 and 65 lbs (9.1 and 29.4 kg).
- Snugly adjust the belts provided with this child restraint around your child.
INSTALLATION
- Secure the top anchorage strap provided with this child restraint.
- Secure this child restraint with the vehicle's child restraint anchorage system if available, or with a vehicle belt.
- Use the buckle slot closest to, but not underneath, your child when installing the child seat.
GENERAL USAGE
- Follow all instructions on this child restraint and in the written instructions.
- Register your child restraint with the manufacturer.
- In a vehicle with rear designated seating positions, vehicle owners should be alerted that, according to accident statistics, children are safer when properly restrained in the rear seating positions than in the front seating positions. To ensure your child's safety, please study Vehicle Seating Positions and consult your vehicle owner's manual.
- Always make sure the child restraint system is secured to the vehicle, even when unoccupied, since in a crash an unsecured child restraint system may injure occupants.
- To prevent injury due to deterioration or hidden damage, discontinue use of this child seat if it is older than ten (10) years or has been in a moderate or severe crash (see below). SeeSerial Number and Manufactured Date Label on child seat.
- The use of non-Britax covers, inserts, toys, accessories, or tightening devices is not approved by Britax. Their use could cause this child seat not to perform as intended in a crash.
- ADVOCATE ONLY - Prevent the Side Impact Cushions from being punctured. Puncture damage will cause the cushions not to perform as intended in a crash.
Important Notes
- Do not install with the lower anchors for a child weighing more than:
- ADVOCATE: 30 lbs (13.6 kg) rear facing or 35 lbs (15.8 kg) forward facing.
- BOULEVARD: 35 lbs (15.8 kg) rear facing or 40 lbs (18 kg) forward facing.
- Do not use the top tether strap with rear-facing installations.
- Ensure that the shell cover is properly secured behind the CLICKTIGHT bar to allow for proper functioning of the CLICKTIGHT mechanism.
- Discontinue use of this child seat if it has been in a moderate or severe crash. It is not necessary to replace a car seat after a minor crash, defined by the US National Highway Traffi c Safety Administration (NHTSA) as:
- The vehicle is drivable from the crash site;and
- The vehicle door nearest the child seat was not damaged;and
- No vehicle occupants were injured;and
- There is no visible damage to the child seat;and
- The airbags (if present) did not deploy.
- Cover the child seat when the vehicle is parked in direct sunlight. Metal parts of child seat could become hot enough to burn a child.
- Store the child seat in a safe place when it is not being used. Avoid placing heavy objects on top of it.
- Do not, except as described in this booklet, attempt to disassemble any part of the child seat or change the way the harness or vehicle's seat belts are used.
- Never use the harness adjuster strap to lift or carry this child seat. Doing so could cause damage to harness adjuster and webbing. Always carry this child seat by its shell or tether straps.
Registration
Child restraints could be recalled for safety reasons. You must register this restraint to be reached in a recall. Send your name, address, e-mail address if available and the restraint's model number and manufacturing date to Britax Child Safety, Inc. P.O. Box 91167 Allentown, PA 18109-9925, or call 1-888-427-4829 or 1-704-409-1699, or register online at us.britax.com/registration. For recall information, call the U.S. Government's Vehicle Safety Hotline at 1-888-327-4236 (TTY 1-800-424-9153), or go to http://www.NHTSA.gov.
This Restraint is Certified For Use in Motor Vehicles and Aircraft
Motor Vehicles
This child seat system conforms to all applicable Federal motor vehicle safety standards (FMVSS 213).
Aircraft

This child seat is certified for aircraft use. The FAA recommends that a child weighing up to 40 lbs (18 kg) use a certified, harnessed child seat while traveling on an aircraft. Contact the airline about their policy prior to traveling.
For rear-facing aircraft installation:
- Recline this child seat and place rear-facing on the aircraft seat.
- Slide the aircraft lap belt into the rear-facing belt slots over the cover with the CLICKTIGHT in the closed position.
- Ensure the lap belt is not twisted, buckle, and remove all slack.
![]()

For forward-facing aircraft installation:
- Place this child seat forward-facing on the aircraft seat in the upright position.
- Slide the aircraft lap belt into the forward-facing belt slots under the cover with the CLICKTIGHT in the closed position.
- Ensure the lap belt is not twisted, buckle, and remove all slack.
![]()

- Install your child seat in a window seat to avoid blocking the aisle.
- If the aircraft lap belt is too short, ask a flight attendant for a belt extender.
- Your child may experience discomfort if the buckle is located in the seating area of the child seat after installation.
- Inflatable aircraft lap belts are not compatible with this child seat.
- This seat may not fit all aircraft. Contact your airline prior to travel to verify fit.
Child Fit Information
Rear Facing: 5 – 40 lbs (23 – 18 kg)
Britax strongly recommends that children ride rear facing to the highest weight or height specified.
Use rear facing:
- with harness straps in the closest position at or below the child's shoulders and
- with children who weigh 5 – 40 lbs (2.3 – 18 kg) and
- when the top of the child's head is at least 1 in. (2.5 cm) below the top of the head restraint.
![]()

Forward Facing: 20 – 65 lbs (91 – 294 kg)
Britax strongly recommends that children should be secured with a harness system until they exceed the weight or height limits specified.
Use forward facing:
- with harness straps in the closest position at or above the child's shoulders, parallel to level ground and
- with children who weigh 20 – 65 lbs (9.1 – 29.4 kg) and
- who are 49 in. (124.5 cm) or less in height and
- when the top of the ears are below the top of the head restraint.
![]()
![]()


Rear-Facing Installation
Lap-Shoulder Belt Installation (Preferred Method)
- Open the CLICKTIGHT.

- Press the dimple on the CLICKTIGHT dial.
- Rotate dial clockwise until CLICKTIGHT releases and lift to open.
- Attach the anti-rebound bar, if included

- Recline the unoccupied child seat and place rear facing on the vehicle seat. Ensure that no more than 3 in. (7.6 cm) of the base hangs over the edge of the vehicle seat.

- Slide both the lap and shoulder parts of the vehicle belt into the rearfacing belt slots.

- Ensure the vehicle belt is not twisted and buckle the seat belt.


 NOTE:It is not necessary to lock the lap-shoulder belt when installing with CLICKTIGHT.
- Remove slack from the lap part (a), then the shoulder part (b) of the vehicle belt.

- Close the CLICKTIGHT.


- A click confirms the CLICKTIGHT is secure.
Rear-Facing Installation with Lap-Shoulder Belt

CHECKLIST
- Ensure that the logo on the CLICKTIGHT dial has returned to a horizontal position.
- Ensure that the recline indicator ball is within the allowable blue section for the size of the child and that no more than 3 in. (7.6 cm) of the base hangs over the edge of the vehicle seat.
- Check that all connections are secure and straps are not twisted.
- Check that the child seat cannot be moved front to back or side to side more than 1 in. (2.5 cm) at the belt path. If the child seat is not secure, repeat installation or use a different seating location.
Lower Anchor Installation

Do not install rear facing with lower anchors for a child weighing more than:
- ADVOCATE: 30 lbs (13.6 kg)
- BOULEVARD: 35 lbs (15.8 kg)
- Open the CLICKTIGHT.

- Press the dimple on theCLICKTIGHT dial.
- Rotate dial clockwise until CLICKTIGHT releases and lift to open.
- Attach the anti-rebound bar, if included

- Recline the unoccupied child seat and place rear-facing on the vehicle seat. Ensure that no more than 3 in. (7.6 cm) of the base hangs over the edge of the vehicle seat.

- Remove the lower connectors from the storage compartment at the rear of the seat and pull the strap to full length toward the child's left side.

- Slide the lower connector strap into the rear-facing belt slots and firmly press the lower connectors over their adjacent lower anchors.


- Verify that the connectors are secure and the strap is not twisted.
- Pull the end of the lower connector strap to remove slack.


- Close the CLICKTIGHT.


- A click confirms the CLICKTIGHT is secure.
Rear-Facing Installation with Lower Anchors

CHECKLIST
- Ensure that the logo on the CLICKTIGHT dial has returned to a horizontal position.
- Ensure that the recline indicator ball is within the allowable blue section for the size of the child and that no more than 3 in. (7.6 cm) of the base hangs over the edge of the vehicle seat.
- Check that all connections are secure and straps are not twisted.
- Check that the child seat cannot be moved front to back or side to side more than 1 in. (2.5 cm) at the belt path. If the child seat is not secure, repeat installation or use a different seating location.
Lap Belt Installation
- Open the CLICKTIGHT.

- Press the dimple on the CLICKTIGHT dial.
- Rotate dial clockwise until CLICKTIGHT releases and lift to open.
- Attach the anti-rebound bar, if included

- Recline the unoccupied child seat and place rear-facing on the vehicle seat. Ensure that no more than 3 in. (7.6 cm) of the base hangs over the edge of the vehicle seat.

- Slide the vehicle belt into the rear-facing belt slots.

- Ensure the vehicle belt is not twisted and buckle the seat belt.

- Lock and remove slack from the vehicle belt.


NOTE:Ensure that the vehicle belt is locked as directed by your vehicle owner's manual.
- Close the CLICKTIGHT.


- A click confirms the CLICKTIGHT is secure.
Rear-Facing Installation with Lap Belt

CHECKLIST
- Ensure that the logo on the CLICKTIGHT dial has returned to a horizontal position.
- Ensure that the recline indicator ball is within the allowable blue section for the size of the child and that no more than 3 in. (7.6 cm) of the base hangs over the edge of the vehicle seat.
- Check that all connections are secure and straps are not twisted.
- Check that the child seat cannot be moved front to back or side to side more than 1 in. (2.5 cm) at the belt path. If the child seat is not secure, repeat installation or use a different seating location.
Forward-Facing Installation
Lap-Shoulder Belt Installation (Preferred Method)
- Remove the tether from the tether storage compartment and retainer tabs and place it up and over the child seat back.

- Place upright forwardfacing on the vehicle seat. Ensure that the base of the child seat is flat on the vehicle seat and no more than 3 in. (7.6 cm) of the base hangs over the edge of the vehicle seat.

- Open the CLICKTIGHT.

- Press the dimple on the CLICKTIGHT dial.
- Rotate dial clockwise until CLICKTIGHT releases and lift to open.
- Slide both the lap and shoulder parts of the vehicle belt into the forward-facing belt slots.

- Ensure the vehicle belt is not twisted and buckle the seat belt.


NOTE:It is not necessary to lock the lap-shoulder when installing with CLICKTIGHT.
- Remove slack from the lap part (a), then the shoulder part (b) of the vehicle belt.


- Close the CLICKTIGHT. – A click confirms the CLICKTIGHT is secure.

- Attach the tether to a designated anchor (see vehicle owner's manual) and remove slack.


Forward-Facing Installation with Lap-Shoulder Belt

CHECKLIST
- Ensure that the logo on the CLICKTIGHT dial has returned to a horizontal position.
- Check that all connections are secure and straps are not twisted.
- Ensure that the recline indicator ball is within the allowable green section and that no more than 3 in. (7.6 cm) of the base hangs over the edge of the vehicle seat.
- Check that the child seat cannot be moved front to back or side to side more than 1 in. (2.5 cm) at the belt path. If the child seat is not secure, repeat installation or use a different seating location.
- Check that any excess tether webbing is contained within your vehicle and secured in the elastic strap.
Lower Anchor Installation
Do not install forward facing with lower anchors for a child weighing more than:
- ADVOCATE: 35 lbs (15.8 kg)
- BOULEVARD: 40 lbs (18 kg)
- Remove the lower connectors from the storage compartment at the rear of the seat and pull the strap to full length toward the child's left side.

- Remove the tether from the tether storage compartment and retainer tabs and place it up and over the child seat back.

- Place upright forwardfacing on the vehicle seat. Ensure that the base of the child seat is flat on the vehicle seat and no more than 3 in. (7.6 cm) of the base hangs over the edge of the vehicle seat.

- Open theCLICKTIGHT.

- Press the dimple on the CLICKTIGHT dial.
- Rotate dial clockwise until CLICKTIGHT releases and lift to open.
- Slide the lower connector strap into the forwardfacing belt slots and firmly press the lower connectors over their adjacent lower anchors.


- Verify that the connectors are secure and the strap is not twisted.
- Pull the end of the lower connector strap to remove slack.


- Close the CLICKTIGHT.
![]()

- A click confirms the CLICKTIGHT is secure.
- Attach the tether to a designated anchor (see vehicle owner's manual) and remove slack.
![]()

Forward-Facing Installation with Lower Anchors

CHECKLIST
- Ensure that the logo on the CLICKTIGHT dial has returned to a horizontal position.
- Check that all connections are secure and straps are not twisted.
- Ensure that the recline indicator ball is within the allowable green section and that no more than 3 in. (7.6 cm) of the base hangs over the edge of the vehicle seat.
- Check that the child seat cannot be moved front to back or side to side more than 1 in. (2.5 cm) at the belt path. If the child seat is not secure, repeat installation or use a different seating location.
- Check that any excess tether webbing is contained within your vehicle and secured in the elastic strap.
Lap Belt Installation
- Remove the tether from the tether storage compartment and retainer tabs and place it up and over the child seat back.

- Place upright forwardfacing on the vehicle seat. Ensure that the base of the child seat is flat on the vehicle seat and no more than 3 in. (7.6 cm) of the base hangs over the edge of the vehicle seat.

- Open the CLICKTIGHT.

- Press the dimple on the CLICKTIGHT dial.
- Rotate dial clockwise until CLICKTIGHT releases and lift to open.
- Slide the vehicle belt into the forward-facing belt slots.

- Ensure the vehicle belt is not twisted and buckle the seat belt.

- Push down into the middle of the child seating area with moderate force (approximately 45 lbs/20.4 kg), compressing the vehicle seat while tightening the vehicle belt.


NOTE:Ensure that the vehicle belt is locked as directed by your vehicle owner's manual.
- Close the CLICKTIGHT. – A click confirms the CLICKTIGHT is secure.


NOTE: If the CLICKTIGHT is difficult to close, repeat step 6 with less tension in the vehicle belt
- Attach the tether to a designated anchor (see vehicle owner's manual) and remove slack


Forward-Facing Installation with Lap Belt

CHECKLIST
- Ensure that the logo on the CLICKTIGHT dial has returned to a horizontal position.
- Check that all connections are secure and straps are not twisted.
- Ensure that the recline indicator ball is within the allowable green section and that no more than 3 in. (7.6 cm) of the base hangs over the edge of the vehicle seat.
- Check that the child seat cannot be moved front to back or side to side more than 1 in. (2.5 cm) at the belt path. If the child seat is not secure, repeat installation or use a different seating location.
- Check that any excess tether webbing is contained within your vehicle and secured in the elastic strap.
Securing Your Child
Impact absorbing chest pads are highly recommended for forward-facing mode. Removal of chest pads is optional for rear-facing mode to ensure a snug fit for small infants.
- Make the proper adjustments to the harness and buckle

- Loosen the harness.

- Press harness release button.
- Pull both harness straps forward.
- Open the chest clip.

- Press tabs.
- Pull apart.
- Release the buckle and attach the harness straps to the harness holders.

- Place the child in the child seat. Ensure the child is positioned upright in the child seat and not slouching. Their bottom must touch the child seat, and their back must rest flat against the back of the child seat.

- Position the harness straps around the child.

![]()
Adjust the harness to fit the clothes the child is wearing. Remove bulky coats and/ or jackets before putting the child in the child seat. - Fasten the harness buckle. Proper connection is confirmed with a click after inserting each buckle tongue.

- Check for proper harness height and pull any excess slack up to the child's shoulder area before tightening.

- Pull the harness adjuster strap to tighten the harness. The Click & Safe indicator will click when the harness is within range of appropriate snugness

![information]() NOTE: The harness should have a snug fit around the child. A snug strap should not allow any slack. It lies in a relatively straight line without sagging. It does not press on the child's flesh or push the child's body into an unnatural position. You should not be able to pinch excess.
NOTE: The harness should have a snug fit around the child. A snug strap should not allow any slack. It lies in a relatively straight line without sagging. It does not press on the child's flesh or push the child's body into an unnatural position. You should not be able to pinch excess. - Fasten the chest clip and place the chest pads in a comfortable position for the child within the range of a correctly placed chest clip.


NOTE: The correct height for the chest clip is at the middle of the chest at armpit level.
CHECKLIST
Before traveling, verify that the:
- Harness straps are not twisted.
- Harness is snug.
- Buckle is fastened.
- Chest clip is at the child's armpit level.
Child Seat Functions
Click & Safe® Snug Harness Indicator
The Click & Safe is designed to sense tension when the adjuster strap is pulled and will provide an audible indication when the child seat harness is within range of appropriate snugness. The harness should have a comfortable but snug fit around the child. A snug strap should not allow any slack. It lies in a relatively straight line without sagging. It does not press on the child's flesh or push the child's body into an unnatural position. You should not be able to pinch excess webbing at the shoulder. Follow the steps below to tighten the harness.
To tighten the harness:
- Remove any bulky clothing from your child before tightening the harness.
- Check for proper harness height.
- Pull any excess slack in the harness up to the child's shoulder area.
- Pull the harness adjuster strap straight out from the child seat until a click is heard. The Click & Safe indicator will click when the harness is within range of appropriate snugness
NOTE: If there is still slack in the harness, repeat the steps above until another click indicates a snug harness. It may be necessary to double check that the harness is within range of appropriate snugness. Always confirm a snug fit by attempting to pinch excess webbing in the shoulders.
CHECKLIST
- Check that the harness is buckled and secure.
- Check that the harness is snug and you can not pinch excess webbing at the shoulder.
Adjusting the Harness Height
- In rear-facing mode, the harness straps should be in the closest position at or below your child's shoulders.
- In forward-facing mode, the harness straps should be in the closest position at or above your child's shoulders.
- Loosen the harness.

- Push harness release button.
- Pull both harness straps forward.
- Squeeze the harness height adjuster, slide the harness into the desired position and release.

- Ensure the harness has locked into position.


Adjusting the Harness Length
Adjust the harness to the shortened length if a snug harness cannot be achieved with a small infant (approx. 10 lbs and under).
Shortening the Harness
- Open the CLICKTIGHT.

- Press the dimple on the CLICKTIGHT dial.
- Rotate dial clockwise until CLICKTIGHT releases and lift to open.
- Disconnect the end of one harness from the anchor.

- Thread the end of the harness through the opening on the inside of the metal bar behind the anchor to the bottom of the seating area.

- Wrap the end of the harness around to the outside of the bar and slide the harness loop fully onto the anchor ensuring that it is secure.

- Repeat on the other side.
![information]() NOTE: Hold harness straps up and away from seat while closing the CLICKTIGHT.
NOTE: Hold harness straps up and away from seat while closing the CLICKTIGHT.


Lengthening the Harness
- Open the CLICKTIGHT.

- Press the dimple on the CLICKTIGHT dial.
- Rotate dial clockwise until CLICKTIGHT releases and lift to open.
- Disconnect the end of one harness from the anchor on the bottom side of the seating area.

- Unwrap the end of the harness from the metal bar and pull to the top of the seating area.

- Slide the harness loop fully onto the same anchor from the top of the seating area ensuring that it is secure.

- Repeat on the other side.


Harness Buckle Position
The child seat shell contains an inner buckle slot and an outer buckle slot. Position the buckle in the slot closest to but not under the child.

Reposition the harness buckle.
NOTE: NEVER leave the buckle in the adjustment slot.
Using the Harness Buckle
To Fasten:
- Insert one tongue at a time into the buckle. Proper connection is confirmed with a click after inserting each buckle tongue.


To Release:
- Press the release button and pull the tongues from the buckle.


NOTE: Periodically clean the buckle to ensure proper operation.
Using the Chest Clip
- Open the chest clip.

- Press tabs.
- Pull apart.
- Push together to fasten.

![information]() NOTE: Always position the chest clip at armpit level.
NOTE: Always position the chest clip at armpit level.


Comfort Pillow
The comfort pillow is designed to provide better fit and comfort for infants using this child seat.

NOTE: Remove the comfort pillow after the child can sit comfortably in the child seat without additional support.
Seat Positions
This child seat has 7 recline positions. To adjust the recline position:
- Pull the recline handle then rotate the child seat shell until the recline indicator ball is in the correct position for the specific installation (See Using the Recline Indicator below).
- Release the recline handle, then verify the child seat has locked into position.


NOTE: Set the seat position BEFORE installing.
Using the Recline Indicator
- Rear Facing Installations - It is important that the child seat be properly reclined. Use the recline indicator on the child seat to help achieve an acceptable recline angle for:

- infants and children with no head and neck control - recline indicator ball in the light blue section
- older children with proper head and neck control - recline indicator ball in light blue or dark blue.

NOTE: If necessary, the proper recline angle can be achieved by placing a rolled towel or pool noodle in the vehicle seat bight.
- Forward Facing Installations - Use the recline indicator on the child seat to help achieve an acceptable recline angle, with the recline indicator ball in the green section.
Overhang
It is important that the base of the child seat rests completely flat on the vehicle seat with no side overhang. As seen in the illustration, it is permissible to allow up to 3 in. (7.6 cm) of the base to hang over the front edge of the vehicle seat. If the vehicle seat does not allow enough of the child seat base to make contact, adjust the recline angle to a more upright position. Not doing so could cause the child seat to not perform as intended.

In some cases, the vehicle head restraint can prevent the child seat head restraint from being raised high enough to properly adjust the harness for the fit of your child when using a forward facing reclined position. DO NOT force the child seat head restraint past the vehicle head restraint. Doing so could cause the child seat not to perform as intended. If the location of the vehicle head restraint interferes with the child seat head restraint, raise or remove the vehicle head restraint. If the vehicle head restraint cannot be removed, move the child seat to the upright position or try a different seating location.

Uninstalling the Seat
- Unbuckle the vehicle seat belt.

- Open the CLICKTIGHT.


Anti-Rebound Bar (Select Models)
In the event of a crash, the anti-rebound bar is designed to prevent rebound rotation in rear-facing car seat installations.
The anti-rebound bar is not intended for use as a carry handle. Do not use the anti-rebound bar to carry this child seat.
The anti-rebound bar MUST be removed for forward-facing installation.
Installing the Anti-Rebound Bar

- Open the CLICKTIGHT.
- Pull back on the shell cover behind the red marker and locate the open end of the structure tube.
- Insert one end of the antirebound bar into the tube as shown, then repeat for other side.
- Lift up on the anti-rebound bar to ensure both ends are properly set inside the structure tubes.
NOTE: Closing the CLICKTIGHT will completely secure the anti-rebound bar.
Removing the Anti-Rebound Bar
- Open the CLICKTIGHT.
- Grasp the anti-rebound bar at both sides and pull away from the child seat.


Using the Lower Anchors and Tethers for Children (LATCH)
The Lower Anchors and Tethers for Children or LATCH, is a system available on this child seat that off ers an alternative to vehicle seat belt installation methods. The figure below shows typical locations for lower anchors and tether anchors in a vehicle. See LATCH components on this child seat.
LATCH SYSTEM ANCHOR LOCATIONS

Check your vehicle owner's manual to learn if it is equipped with LATCH, the maximum weight rating for the lower anchors, tether anchors capacities, and information on the lower anchor locations and designated seating positions available for use with this child seat.
Lower Connectors
Using the Lower Connectors
The lower connectors are located in the back of the base of the child seat. Store the connector assembly in the compartment when not in use.
To attach the lower connectors:
- Remove the lower connectors from the storage compartment at the rear of the seat and pull the strap to full length toward the child's left side.

- Press the lower connector hook over its adjacent lower anchor.


To remove the lower connectors:
- Push the lower connector adjuster release button to loosen the lower connector strap

- Push down in the seating area and open the CLICKTIGHT.
- Squeeze the lower connector hook and lift off the lower anchor.


Impact Absorbing Tether
Failure to follow the guidelines below may cause the child seat not to perform as intended.
- Britax recommends that the tether be used when installing the child seat forward facing. Using the tether will improve the stability of your child seat and reduce the risk of injury.
- Attach the tether only to tether anchors identified by your vehicle manufacturer as tether anchorage points. Only use the designated tether anchor for each seating position.
- If your vehicle does not currently have a tether anchor attachment, refer to your vehicle owner's manual or contact your vehicle manufacturer for assistance. DO NOT modify your vehicle without advice from your vehicle manufacturer.
- Store the tether in the compartment on the back of the child seat when not in use.
Tether anchor locations vary from vehicle to vehicle. Check your vehicle owner's manual for tether anchor capacities and look for the tether anchor symbol shown in the diagram to help identify where the top tether anchor points are located in your vehicle.

Using the Tether
Do not use the top tether strap with rearfacing installations. To improve rear-facing performance of this child seat an anti-rebound bar can be purchased at us.britax.com.
To attach the tether to a tether anchor:
- Firmly press the hook over the tether anchor point.

- Pull the loose end of the webbing to remove slack from the tether.


NOTE: If the tether is too short for use in your vehicle, contact Britax Consumer Services at 1-888-427-4829 or 1-704409-1699 to obtain a tether extender.
To remove the tether from a tether anchor:
- Loosen the tether.

- Tilt the lock up.
- Pull the tether webbing.
- Remove the tether hook from the tether anchor.

NOTE: Store the tether in the tether compartment when not in use and ensure the tether compartment door is fully closed.
The Tether as a Crash Indicator
The tether can indicate when the child seat has been in a moderate or severe crash (see "Important Notes" ) and replacement of the child seat is necessary.
Figure 1 shows a tether acceptable for continued use (provided the child seat has not been involved in a crash). The colored stitching will be intact.

Figure 2 shows an example of when the tether has been damaged and is unacceptable for continued use. If any of the colored stitching has ripped, the child seat is no longer acceptable for use.

Discontinue use of child seat if it has been involved in a moderate or severe crash, regardless of whether the colored stitching has been ripped.
Vehicle Compatibility
Vehicle Seating Positions

DO NOT place child seat rear-facing in the front seat of a vehicle with a passenger air bag. DEATH or SERIOUS INJURY can occur. Owners of vehicles with front passenger side airbags should refer to their owner's manual for child restraint installation instructions. The back seat is the safest place for children 12 and under.
Some vehicles have no seating positions which are compatible with this child seat. If in doubt, contact the vehicle manufacturer for assistance.
Forward-facing vehicle seats MUST be used with this child seat. Side-facing or rear-facing seats CANNOT be used. See the diagram below.

Incompatible Vehicle Seat Belts
Vehicle seats and seat belts diff er from vehicle to vehicle. Refer to your vehicle owner's manual for specific information about your vehicle seat belts and their use with child seats.
The following types of vehicle seat belts are NOT compatible with this child seat. If any of the belt types listed below are in the chosen seating position, choose another vehicle seating position or check your vehicle owner's manual for information on installing a car seat in your vehicle.

Lap belts with a sewn-in latch plate that have a retractor that locks only in case of a sudden stop

Lap belts forward of the vehicle seat bight

Lap-shoulder belts with top or bottom anchor points on the vehicle door

Motorized, automatic vehicle seat belts
NOTE: This Britax car seat may not be compatible with every inflatable lap-shoulder belt. See FAQs in the support section of the Britax website (us.britax.com/faqs) for additional instructions.
Maintenance
Before each use, check this car seat and its components to make sure they are in good condition and good working order.
Cover
Removing the Cover
Never remove the buckle tongues from the harness. They cannot be reattached after removal. If reassembled incorrectly, the child seat may not perform as intended.
- Loosen and unbuckle the harness.

- Push harness release button.
- Pull both harness straps forward.
- Unbuckle the harness.
- Open the chest clip.

- Press tabs.
- Pull apart.
- Remove the comfort pillow and comfort pads if necessary.
- Remove the belly pad and buckle.
- Open the CLICKTIGHT and remove the two elastic loops on the bottom of the CLICKTIGHT.

- Lift the front of the seat cover and pull over the CLICKTIGHT bezel to access the buckle strap connection.

- Remove the harness buckle by turning the buckle strap sideways and routing the retainer out of the front buckle slot in the child seat.

- Pull the end of the belly pad and buckle retainer out of the buckle slot in the cover to remove.– Turn the buckle retainer sideways and slide the buckle out of the belly pad.

- Remove seat cover.
- Open the CLICKTIGHT and remove the two elastic loops on the bottom of the CLICKTIGHT.
- Detach the hook and loop fasteners on the head restraint from around the harness.

- Remove the head restraint.
- Raise the harness to the highest position.
- Detach the elastic straps from the rear of the head restraint.

- Ensure the CLICKTIGHT is open and remove the lower shell cover.
- Detach elastic loops at front of shell.

- Lift up from the front to remove the lower shell cover.

- Pull cover up at sides and around rear-facing belt paths.
- Detach elastic loops at front of shell.
- Lower the harness, reach around the head restraint, and pull the upper shell cover towards you to remove.


Replacing the Cover
- Attach one side of the upper shell cover at the forward-facing belt path, pull the cover over the back of the shell, and secure at opposite belt path.

- Replace lower shell cover.
- Open the CLICKTIGHT.

- Tuck one of the plastic tabs on the lower shell cover into the outer side of the shell between the forward and rear-facing belt paths.

- Tuck the lower shell cover around the inner and outer sides of the shell from the forwardfacing belt paths to the front of the child seat.

- Continue replacing the lower shell cover around the seat to the other forward-facing belt path and tuck the second plastic tab into the shell between the forward and rearfacing belt paths.

- Open the CLICKTIGHT.


Ensure shell cover is secured behind red markers to allow for proper function of CLICKTIGHT.

- Thread the harness adjuster strap through the front of the lower shell cover.

- Reattach the two elastic loops at the front of the lower shell.


- Replace the belly pad and buckle:
- Turn the buckle retainer sideways and route it through the belly pad.

- Route the belly pad and buckle retainer through the buckle slot in the cover.– Ensure that the buckle is through the correct cover slot for the buckle position.

- Turn the buckle retainer sideways, route it through the front buckle slot and into the desired buckle position in the child seat.

- Turn the buckle retainer sideways and route it through the belly pad.
- Pull the seat cover around the CLICKTIGHT bezel and over the front of the seat.

- Ensure the seat cover is tucked behind the CLICKTIGHT bar.

- Reattach the two elastic loops on the underside of the seat cover


- Replace the head restraint.
- Raise the harness to the highest position.
- Reattach the elastic straps to the rear of the head restraint.

- Reattach the hook and loop fasteners on the head restraint around the harness.
- Replace the comfort pads.


Harness Buckle
If your child eats and drinks while in the child seat, you will need to check the buckle periodically and rinse out any accumulated debris.
Removing the Harness Buckle
- Unbuckle the harness and open the CLICKTIGHT.

- Lift the front of the seat cover and pull over the CLICKTIGHT bezel to access the buckle strap connection.

- Remove the harness buckle by turning the buckle strap sideways and routing the retainer out of the front buckle slot in the child seat.


- Pull the end of the belly pad and buckle retainer out of the slot in the seat cover to remove.

- Turn the buckle retainer sideways and route the buckle assembly out of the belly pad.


Replacing the Harness Buckle
- Turn the buckle retainer sideways and route it through the fabric strip on the belly pad.


- Route the belly pad and buckle retainer through the buckle slot in the cover. – Ensure that the buckle is through the correct cover slot for the desired buckle position.

- Slide the end of the belly pad over the seat and (if applicable) over the comfort foam.

- Turn the buckle retainer sideways and route it into the corresponding buckle slot in the seat. – Ensure that the buckle is in the correct position and the red release button faces out.


- Replace the cover, ensuring the seat cover is tucked behind the CLICKTIGHT bar, then close the CLICKTIGHT.


Impact Absorbing Chest Pads
Impact absorbing chest pads are highly recommended for forward-facing mode. Removal of chest pads is optional for rear-facing mode to ensure a snug fit for small infants.
Removing the Impact Absorbing Chest Pads
- Loosen the harness.

- Press harness release button.
- Pull both harness straps forward.
- Adjust the harness to the lowest position and unhook the harness straps from the yoke at the back of the child seat.

- Pull one harness strap through the harness slot to the front of the seat.

- Route the harness strap out of the comfort pad, chest pad, and the chest clip.
- Reroute the harness strap back through the chest clip and comfort pad, ensuring that the harness strap is not twisted.

- Repeat for other strap.
- Route the harness straps through the seat to the back. Ensure that the harness straps pass over the tube.

- Nest the end of the left harness strap into the right.

- Slide the harness straps completely onto the yoke. Ensure that the adjuster and harness straps are not twisted and that the ends of the harness straps are securely attached to the yoke.


Store the chest pads in a safe location when not in use.
Replacing the Impact Absorbing Chest Pads
- Loosen the harness.

- Press harness release button.
- Pull both harness straps forward.

- Adjust the harness to the lowest position and unhook the harness straps from the yoke at the back of the child seat.

- Pull one harness strap through the harness slot to the front of the seat.
- Route the harness strap out of the comfort pad and chest clip.

- Reroute the harness strap through the chest pad, chest clip, and comfort pad.

- Repeat for other strap.
- Route the harness straps through the seat to the back. Ensure that the harness straps pass over the tube.

- Nest the end of the left harness strap into the right.

- Slide the harness straps completely onto the yoke. Ensure that the adjuster and harness straps are not twisted and that the ends of the harness straps are securely attached to the yoke


Cleaning
| Shell and Side Impact Cushions |
| DO NOT
|
Prevent the Side Impact Cushions from being punctured. Puncture damage will cause the cushions not to perform as intended. | ||
| Cover |
| DO NOT
|
| Harness |
| DO NOT
|
| Harness Buckle |
| DO NOT
|
| Anti-Rebound Bar |
| DO NOT
|
Troubleshooting
| Problem | Possible Solution |
| The CLICKTIGHT will not close with a click to signal that it is secure | There may be debris or other objects interfering with the mechanism. Ensure the seat area is clear of any obstructions and try closing the CLICKTIGHT again. There may be too much tension in the belt/strap. Do not overtighten the belt/strap before closing the CLICKTIGHT. Only remove slack. |
| The logo on the CLICKTIGHT dial will not return to a horizontal position | Press down again on the CLICKTIGHT to the left and right of the bezel to ensure the CLICKTIGHT pins have fully engaged. |
| The harness release button will not operate | There may be debris in the mechanism. Clean the mechanism, then try using the button again. |
| The harness cannot be adjusted to its full height | Check the seating position where the child seat is installed. The vehicle head restraint may obstruct the path of the child seat harness height adjuster. Remove or raise the vehicle head restraint and try adjusting the harness height again. |
| The harness cannot achieve a snug fit | The harness can be adjusted to a shortened length for use with small infants (approx. 10 lbs and under). See instructions on adjusting the harness length. |
| The harness is hard to adjust | Check for harness twisting and ensure that the comfort pads and impact absorbing chest pads are not interfering with the harness. Pull comfort pads and impact absorbing chest pads down. |
| The harness is uneven | Pull comfort pads and impact absorbing chest pads down. Hold harness straps up and away from seat while closing the CLICKTIGHT. |
| The buckle will not fasten with a click after each tongue is inserted | There may be debris in the buckle mechanism. Clean the buckle, then try fastening the buckle again. |
Please contact Britax Consumer Services at 1-888-4274829 or 1-704-409-1699 if you have an issue not listed here.
Documents / Resources
References
Product Registration Car Seats
NHTSA | National Highway Traffic Safety Administration
![us.britax.com]() Britax | Home
Britax | Home![us.britax.com]() Britax | Frequently Asked Questions
Britax | Frequently Asked Questions
Download manual
Here you can download full pdf version of manual, it may contain additional safety instructions, warranty information, FCC rules, etc.
Download Britax ADVOCATE CLICKTIGHT, BOULEVARD CLICKTIGHT - Car Seat Manual
Advertisement


Need help?
Do you have a question about the ADVOCATE CLICKTIGHT and is the answer not in the manual?
Questions and answers