Nesco MWR18 Series, MWR18-13, MWR18-12, MWR18-47 - Roaster Manual
- Care/use and recipe manual (16 pages)
Advertisement
Introduction
Questions?
![]()

NESCO Customer Service is available 8 am to 4 pm CST.
Email: nescocs@nesco.com
Phone: 1-800-288-4545
Live Chat at www.nesco.com
Returns
Please do not return this item to the place of purchase. If you are missing any parts or need assistance, contact NESCO Customer Service.
Visit us at nesco.com
Follow us on

#YourKeyIngredient
Technical Specifications:
Model: MWR18 Series Roasters
Input: 120 Volts / 60HZ /1450 Watts
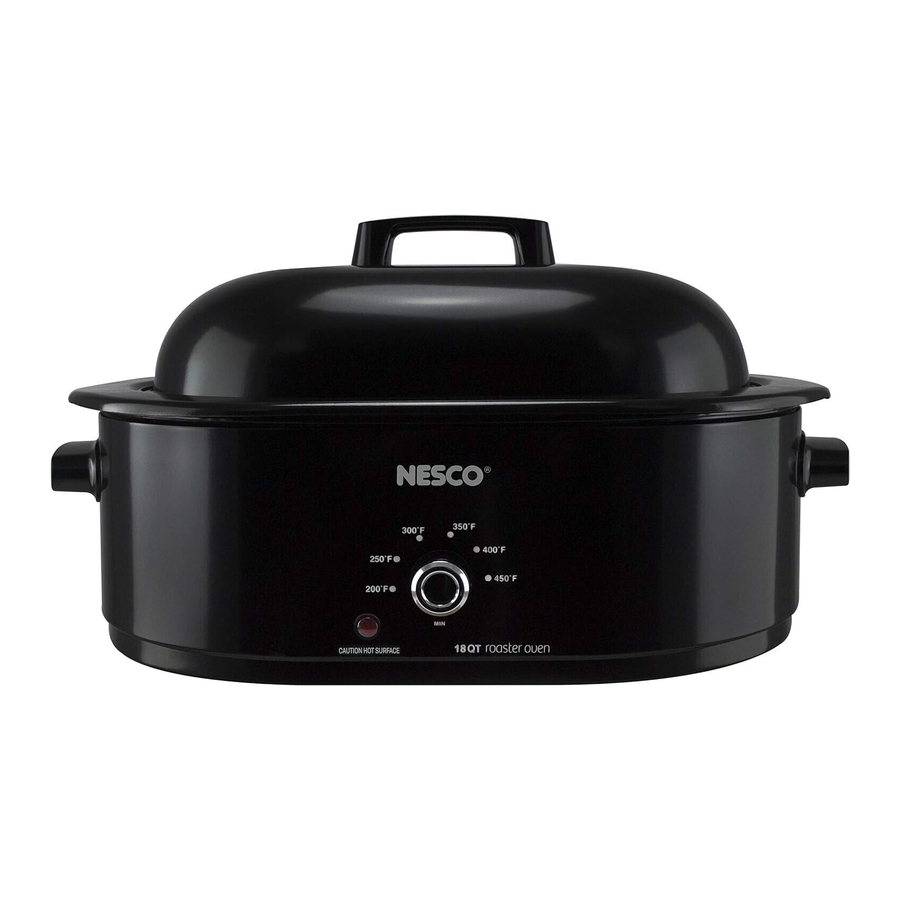
Component List

Before First Use
- Read and follow all instructions and save for reference.
- Remove all packaging and labels.
- Clean all parts, except base, following the instructions in the "Care and Cleaning " section.
- Wipe the roaster base with a damp cloth.
- TO REDUCE RISK OF SHOCK HAZARD - NEVER IMMERSE THE BASE IN WATER OR ANY OTHER LIQUID.
![information]() NOTE: Cooking high acidic foods, such as tomatoes, may cause discoloration of the enamel coating on the cookwell.
NOTE: Cooking high acidic foods, such as tomatoes, may cause discoloration of the enamel coating on the cookwell.
 NOTE: Cooking high acidic foods, such as tomatoes, may cause discoloration of the enamel coating on the cookwell.
"SMOKE OUT" OVEN BEFORE USE
It is necessary to "SMOKE OUT" your roaster oven before regular use. You will only need to perform this procedure once. It is NORMAL for smoke and odor to bepresent during this process. The "SMOKE OUT" process:
- Place the roaster base in a well ventilated area on a heat-resistant surface.
- Set the control knob to minimum setting and plug the cord into a 120 volt AC outlet.
- Turn control knob to maximum setting (450ºF). Operate the roaster base empty (without the cookwell, cover or rack) for approximately 60 minutes, or until any odor or smoking disappears.
- When finished, turn the control knob to minimum setting, unplug the unit from the electrical outlet and allow to cool.
Operating Instructions
- Place appliance on a flat, heatresistant, stable surface in a well ventilated area.
- Place the cookwell into the roaster base and cover cookwell with lid. Always put food in the cookwell. NEVER PLACE FOOD DIRECTLY INTO THE ROASTER BASE.
- Preheating is recommended. To preheat, place the cookwell into roaster base and cover with lid. Set the control knob to its minimum setting. Plug into a 120 volt AC outlet. Reset the control knob to desired temperature. Preheat 20 minutes. Use hot pads and carefully remove lid. Add food into the cookwell.
- The rack may be used for baking or roasting. Other foods, such as soups and stews, are prepared without the rack.
- Replace the lid. Always cook with the cookwell and lid in place.
- If the roaster oven has not been preheated, turn the control knob to its minimum setting. Plug the cord into a 120 volt AC outlet. Set the control knob to the desired temperature. Fill the cookwell with food as desired.
- Cook the food for the desired amount of time. When finished, turn the control knob to its minimum setting, unplug the cord from the 120 volt outlet. Allow the roaster oven to cool and clean as recommended.
- Cookwell and lid will be hot while in use. Use hot pads when removing lid or cookwell from the roaster base. Tilt lid away from you to prevent steam burns.
- Do not move the appliance while in operation. Always remove cord from outlet and allow to cool.
ROAST:
- For additional browning, add 1 tbsp. browning sauce to oil and brush over skin before roasting.
- To sear meat: preheat covered oven at 450ºF. Add margarine to bottom of cookwell, then sear meat 10 to 15 minutes per side until lightly browned.
- "Alternative" browning method for self-basting turkeys: preheat at 400°F for 20 minutes. Roast for 1 hour at 400°F. Reduce heat to 350° using time in chart, approximately 13 - 18 minutes per pound. Prior to the last hour of roasting, increase temperature to 400°F and remove all excess juices in bottom of cookwell.
COOK:
- Cut meats and vegetables should be of uniform size pieces.
- Add additional liquid sparingly, not much escapes during cooking.
BAKE:
- Use the rack when baking to allow better air flow.
- Two loaf pans will fit into the cookwell. Try meat and vegetables or two loaves of bread at the same time.
- Cover baking rack with aluminum foil or use a baking sheet.
- Most 1 and 2 quart casserole dishes, 9 x 13 baking pans and pie plates will fit into the cookwell. Place on the rack for better heat circulation while baking.
- Frozen entrees or convenient foods can be baked in the oven simply by following package directions. Place item on wire rack for best results.
Care & Cleaning
- Turn control knob to MINIMUM setting and unplug cord from power outlet.
- After the Roaster Oven has cooled, remove lid, rack (if used) and cookwell. Wash these items in warm soapy water using a sponge or soft cloth.
- To easily remove baked-on food residue, place cookwell in roaster base; then fill cookwell with water. Cover and heat at 350ºF for 30 minutes. Turn off and allow to cool completely. Wash cookwell as directed above.
- NEVER IMMERSE THE ROASTER BASE IN WATER. To clean, wipe outside of roaster base with a damp cloth and dry. Do not use abrasive cleansers on exterior surface.
- Porcelain enamel cookwell has a strong finish and provides easy cleaning and years of use. However, it will chip if subjected to sharp blows or if it's mistreated.
- Water spots or mineral deposits (characterized by a white film on surface) may be removed by wiping with household vinegar and a soft cloth.
Baking Chart
| Preheat roaster oven for 20 minutes. Set rack in preheated cookwell. Suggested times are only a guide. | ||
| Type of Food | Temperature Setting | Bake Time in Minutes |
| Baking potatoes | 400°F | 60 to 70 |
| Sweet potatoes | 400°F | 55 to 60 |
| Winter squash: Butternut, Buttercup, Acorn (halved or quartered) | 400°F | 45 to 60 |
| Brownies | 350°F | 25 to 30 |
| Packaged cake | 375°F | 30 to 35 |
| Cookies | 375°F | 11 to 13 |
RECIPES
Access recipes tailored to your roaster oven by visiting nesco.com or scan this QR code.

Roasting Chart
| Preheat covered oven for 20 minutes. Suggested times are only a guide. Use a meat thermometer for more accurate roasting. Set meat on rack and place into preheated cookwell. | ||||
| Type of Food | Weight in pounds | Temp. SettingPreheat/Roast | Roast Time in Minutes/Lb. | |
| BEEF | ||||
| Corned beef | 3.5 to 4 lbs. | 350°F/300°F | 15 to 20 (med-well) | |
| Pot roast, boneless | 4 to 6 lbs. | 350°F/325°F | 15 to 22 (med-well) | |
| Tenderloin | 3.5 to 4 lbs. | 450°F/450°F | 8 to 12 (rare-med) | |
| Sirloin tip | 3 to 5 lbs. | 350°F/325°F | 20 to 25 (medium) | |
| Standing rump | 4 to 6 lbs. | 350°F/325°F | 15 to 22 (rare-med) | |
| Standing rump | 2.25 to 3 lbs. | 425°F/400°F | 12 to 15 (rare-med) | |
| LAMB | ||||
| Leg, sirloin | 5 to 8 lbs. | 400°F/350°F | 25 to 30 (med-well) | |
| Shoulder, boneless | 3 to 4 lbs. | 400°F/350°F | 25 to 30 (med-well) | |
| PORK | ||||
| Chops, center cut | 4 to 5 lbs. | 450°F/325°F | 15 to 20 (well) | |
| Loin roast, center | 3 to 5 lbs. | 400°F/350°F | 15 to 20 (well) | |
| Shoulder rolled | 3 to 4 lbs. | 375°F/350°F | 25 to 30 (well) | |
| Ribs, lean country (Precook ribs to tender; finish at 425°F in roaster or the grill.) | 8 to 10 lbs. | 250°F/250°F | 15 to 20 (med-well) | |
| Ham, slice | 8 to 12 lbs. | 350°F/325°F | 15 to 20 (well) | |
| Ham, precooked | 5 to 10 lbs. | 350°F/325°F | 15 to 25 (heated) | |
| VEAL | ||||
| Veal shoulder, roast | 3 to 5 lbs. | 350°F/325°F | 30 to 35 (well) | |
| POULTRY | ||||
| Chicken pieces | 6 to 8 lbs. | 400°F/375°F | 8 to 10 (well) | |
| Chicken whole | 3.5 to 5 lbs. | 400°F/400°F | 13 to 18 (well) | |
| Cornish hens (4) | 3.5 to 4.5 lbs. | 450°F/450°F | 15 to 20 (well) | |
| Duck | 4 to 5 lbs. | 450°F/425°F | 20 to 25 (well) | |
| Turkey, whole | 20 to 22 lbs. | 400°F/400°F | 15 to 20 (well) | |
| *To obtain additional browning on poultry, mix 4 tbsp. melted margarine with 1 tsp. browning sauce; brush evenly over skin before roasting. | ||||
One-Year Limited Warranty
You may register your product on our website but will need to retain a copy of your proof of purchase should a warranty issue arise. We suggest you staple your receipt to this care and use guide.
https://www.nesco.com/customer-service/warranty-registration
Or fill in your warranty card and return it within one week from date of purchase along with a copy of proof of purchase.
MWR 18 Series / NESCO 18 Qt. Roaster
C/O MW
PO Box 237
Two Rivers, WI 54241-0237
IMPORTANT SAFEGUARDS
- This product is designed for household use only -
When using electrical appliances, basic safety precautions should always be followed, including the following:
- READ ALL INSTRUCTIONS.
- Do not touch hot surfaces. Use handles or knobs.
- Turn control knob to minimum then plug appliance cord into electrical outlet. Adjust temperature dial to desired setting for cooking. When finished cooking turn control knob to minimum setting and remove cord from electrical outlet.
- To protect against electrical shock and personal injury, do not immerse this appliance, including cord and plug, in water other liquid.
- This appliance is not intended for use by children or by persons with reduced physical, sensory or mental capabilities, or lack of experience and knowledge, unless they have been given supervision or instruction concerning use of the appliance by a person responsible for their safety.
- Unplug from outlet when not in use and before cleaning. Allow to cool completely before putting on or taking off parts, and before cleaning.
- Do not operate any appliance with a damaged cord or plug or after the appliance malfunctions or has been damaged in any manner. Contact NESCO® Customer Service for assistance.
- The use of accessory attachments not recommended by the manufacturer may cause injuries.
- Do not use outdoors.
- Do not let cord hang over edge of table or counter, or touch hot surfaces. Never pull on cord.
- Do not place on or near a hot gas or electrical burner or in a heated oven.
- Extreme caution must be used when moving an appliance containing hot oil or hot liquids.
- Do not use appliance for other than its intended use, as described in this manual.
- Do not use metal scouring pads on the exterior surface of the roaster base. Pieces can break off the pads and touch electrical parts creating a shock hazard.
- Always place the roaster base on a flat, non-flammable, heat resistant surface when cooking.
- Never use near or on carpet, furniture, or other combustible materials.
- Operate oven in a well-ventilated area away from walls and other combustible materials.
![]()
Steam escaping from under lid or food is hot and can cause burns.- Use oven mitts to remove the cookwell from the roaster oven, or to remove cooked food or a baking pan from the cookwell.
- Do not use the appliance for deep-frying.

SAVE THESE INSTRUCTIONS
POLARIZED PLUG: This appliance has a polarized plug (one blade is wider than the other). To reduce risk of electric shock, plug is intended to fit into polarized outlet only one way. If the plug does not fit fully into the outlet, reverse the plug. If it still does not fit, contact a qualified electrician. Do not try to modify the plug in any way.
SHORT CORD INSTRUCTIONS: A short power supply cord is provided to reduce the risk resulting from becoming entangled in or tripping over a longer cord. Extension cords may be used if care is exercised in their use. If an extension cord is used, the marked electrical rating of the cord should be at least as great as the electrical rating of the appliance. The longer cord should be arranged so that it will not drape over the tabletop where it can be pulled on by children or tripped over unintentionally.
Documents / Resources
References
![www.nesco.com]() NESCO®: Roaster Ovens | Dehydrators | Small Appliances | Jerky Spices Nesco
NESCO®: Roaster Ovens | Dehydrators | Small Appliances | Jerky Spices Nesco![nesco.com]() NESCO®: Roaster Ovens | Dehydrators | Small Appliances | Jerky Spices Nesco
NESCO®: Roaster Ovens | Dehydrators | Small Appliances | Jerky Spices Nesco![www.nesco.com]() NESCO® | Warranty Registration
NESCO® | Warranty Registration
Download manual
Here you can download full pdf version of manual, it may contain additional safety instructions, warranty information, FCC rules, etc.
Download Nesco MWR18 Series, MWR18-13, MWR18-12, MWR18-47 - Roaster Manual
Advertisement


Need help?
Do you have a question about the MWR18 Series and is the answer not in the manual?
Questions and answers