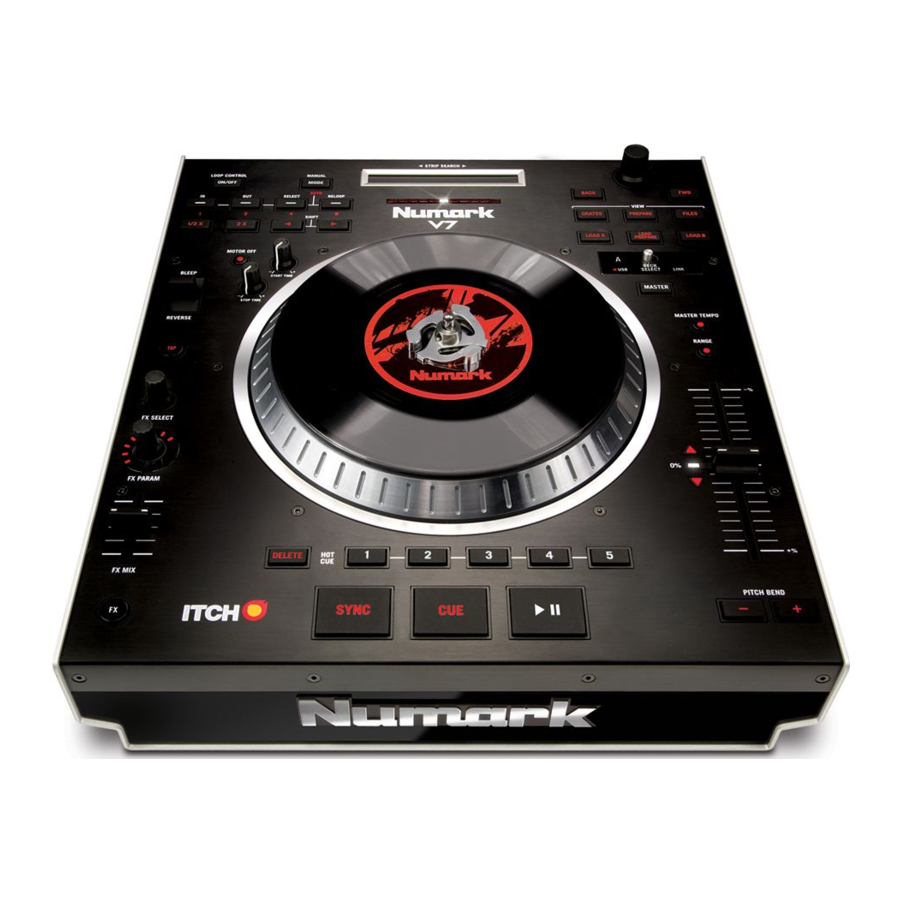
Numark V7 - Turntable Software Controller Manual
- Quick start manual (45 pages) ,
- Reference manual (200 pages)
Advertisement
BOX CONTENTS
- ƒ ƒV7
- Platter assembly
- Aluminum platter
- Slipmat
- Vinyl (with 45 RPM adapter attached)
- ƒ2 stereo audio cables (RCA)
- ƒIEC power cable
- ƒUSB cable
- ƒLink cable
- ƒSoftware/driver CD
- ƒSpindle screw
- ƒAllen wrench
- ƒQuickstart Guide
- ƒSafety & Warranty Information Booklet
REGISTRATION
Please go to http://www.numark.com to register your V7. Registering your product ensures that we can keep you up-to-date with any new product developments and provide you with world-class technical support, should you run into any problems.
GETTING STARTED WITH SERATO ITCH
To get started using your new V7 with Serato ITCH:
- Visit www.serato.com/itch and download the latest version of Serato ITCH with built-in effects!
- Assemble V7 (see PLATTER ASSEMBLY below).
- Double-click the ITCH installer file.
- Follow the instructions on the screen to begin the installation process. During this process, you will be prompted to connect the V7 to your computer.
Windows users: throughout the installation:- if Windows warns you that any of the drivers' certificates cannot be verified, approve them anyway.
- if Windows warns you that the hardware installation was not successful or may not work properly, ignore it.
- if you see any dialog boxes flash briefly on the screen before disappearing, ignore them.
These warnings are normal and are simply Windows' reaction to the cancellation of its own hardware installer. (V7 and Serato ITCH use their own installation processes.)
If you selected the default location during the installation process, you can find the program in the following location:
- XP: Start Menu
![]() Programs
Programs ![]() ITCH
ITCH - Vista: Windows Menu
![]() All Programs
All Programs ![]() Serato
Serato ![]() ITCH
ITCH
 Programs
 - Open the latest version of Serato ITCH!

Do NOT connect two V7s to the same computer via USB!
PLATTER ASSEMBLY
- Remove V7 from the packaging. Remove the platter assembly from package.
Place V7 on a flat, stable surface for operation. Ensure unit has adequate air flow to all ventilation ports (especially if installed in a case). - Place the platter onto V7 by aligning the pins in the bottom of the platter with the holes in V7's motor.
![]()
- Place the slipmat onto the platter, then place the vinyl over the slipmat.
![]()
- Line up the notch in the spindle with the screw in the vinyl's 45 RPM adapter. Use the allen wrench (included) to tighten the screw, locking the platter assembly to the spindle.
![]()


REAR PANEL FEATURES

- POWER IN – Use the included power cable to connect V7 to a power outlet. While the power is switched off, plug the cable into V7 first, then plug the cable into a power outlet.
- POWER SWITCH – Turns V7 on and off. Turn on V7 after all input devices have been connected and before you turn on amplifiers. Turn off amplifiers before you turn off V7.
- USB – This USB connection sends and receives audio and control information from a connected computer.
- DECK A / DECK B OUTPUT (RCA) – Use standard RCA cables to connect these outputs for Deck A and Deck B to the left and right channels (respectively) of your mixer.
- MOTOR TORQUE – Flip this switch to adjust the torque of the PLATTERS. At the high setting, the PLATTERS will have the heavier, stronger feel of "modern" turntables. At the lower setting, they are lighter and more graceful – the feel of a "classic" turntable.
- REMOTE – Reserved for future use.
- LINK CONNECTION – If you are using two V7s, connect their LINK CONNECTIONS with the included link cable.
- DECK LOCATION SWITCH – Reserved for future use.
TOP PANEL FEATURES

USEFUL TERMS:
- Audio Pointer: The current position in a track from where audio will play. When you select a track and begin playing, the Audio Pointer will usually start from the beginning and stop at the end.
- Cue Point: A marked position in a track, which will be permanently stored by the software. You can set, return to, or delete Cue Points with the CUE CONTROLS.
- Temporary Cue Point: A marked position in a track, which will only remain while that track is still loaded in the Deck. You can set and return to the Temporary Cue Point with the CUE button.
PLAYBACK CONTROLS
- PLATTER / SLIPMAT / VINYL – This motorized platter (with slipmat and vinyl) controls the Audio Pointer in the software.
- PLAY / PAUSE – Starts or resumes playback if the Deck is paused. Pauses playback if the Deck is playing. (The rate at which the playback shifts from "play" to "pause" and from "pause" to "play" is controlled by the START TIME and STOP TIME knobs.)
- CUE – If no Temporary Cue Point is assigned, or if the Deck is paused, press CUE to set a Temporary Cue Point. While the track is playing, press it again to return to the Temporary Cue Point and pause playback.
You can hold down CUE to start playback from the Temporary Cue Point. Release it to return to the Temporary Cue Point and pause playback.
You can hold down CUE and PLAY / PAUSE simultaneously to start playback from the Temporary Cue Point. Release both buttons to allow playback to continue. - SYNC – Automatically matches the corresponding Deck's tempo with the other Deck's tempo.
- START TIME / STOP TIME – Control the rate at which the playback shifts from "play" to "pause" and from "pause" to "play."
- BLEEP / REVERSE – Reverses audio playback of the track on the corresponding deck.
- When the switch is in the REVERSE position, the playback of the track will be reversed. Returning the switch to its center (deactivated) position will resume normal playback from wherever the Audio Pointer stops.
- When the switch is held in the BLEEP position, the playback of the track will be reversed. Returning the switch to its center (deactivated) position will resume normal playback from where it would have been if you had never engaged the BLEEP function (i.e., as if the track had been playing forward the whole time).
CUE CONTROLS
- DELETE CUE – Press or hold this to enable Delete Cue Mode, so you can erase assigned Cue Points from the HOT CUE BUTTONS. When the DELETE CUE button is lit bright red, it is in Delete Cue Mode. You can then press a red HOT CUE BUTTON to delete its assigned Cue Point. (Pressing the DELETE CUE button to enable Delete Cue Mode will let you delete one Cue Point at a time. Holding the DELETE CUE button to enable Delete Cue Mode will let you delete multiple Cue Points.)
- HOT CUE BUTTONS (1-5) – Assigns a Cue Point or returns the track to that Cue Point. When a HOT CUE BUTTON is unlit, you can assign a Cue Point by pressing it at the desired point in your track. Once it is assigned, the HOT CUE BUTTON will light up white. To return to that Cue Point, simply press it.
Tip: If the Deck is paused, holding a lit HOT CUE BUTTON will start playback from that Cue Point. Releasing it will return the track to that Cue Point and pause playback.
Note: Cue Points cannot be overwritten. You must first erase a Cue Point by pressing or holding the DELETE CUE button while pressing the appropriate HOT CUE BUTTON.
LOOP CONTROLS
- ON / OFF – Press this to turn a loop on or off. If the Deck is already looping, it will exit the loop. If the Deck is not looping, the currently selected loop will be enabled (once the Audio Pointer enters the loop region). If no loop is set, nothing will happen.
- IN – Press this to set a "Loop In" point where your loop will begin. If you are already in a loop when you press it, you can "fine tune" the placement of the "Loop In" point by moving the PLATTER. (Be sure the SCRATCH OFF button is lit so the PLATTER's motor is not running.) If no track is assigned to the Deck, nothing will happen.
- OUT – Press this to set a "Loop Out" point where your loop will end. If you are already in a loop when you press it, you can "fine tune" the placement of the "Loop Out" point by moving the PLATTER. (Be sure the SCRATCH OFF button is lit so the PLATTER's motor is not running.) If no track is assigned to the Deck, nothing will happen.
- SELECT – Press this to rotate through the loops set in the track. From here, you can edit, reloop, or enable the loop you have selected. (Also, if you pressed LOOP IN but want to cancel the loop before completing it, press SELECT, which will toggle out of it.)
- RELOOP – Press this to jump to the start of the loop and enable it. If the Deck is already looping when you press it, the Audio Pointer will jump to the start of the loop and continue. If no loop is set, nothing will happen.
- MODE – Press this to switch between Manual Mode and Autoloop Mode, which changes the functions of the bottom four LOOP CONTROL buttons. In Manual Mode, the LOOP CONTROL buttons function as IN, OUT, SELECT, and RELOOP (explained above). In Autoloop Mode, the LOOP CONTROL buttons will set 1-, 2-, 4-, and 8-beat loops, respectively. Each loop will start at the Audio Pointer's location when the button is pressed.
Note: Due to the way the software analyzes beats per minute (BPM), the length of 1-, 2-, 4-, and 8-beat loops will vary between tracks with different BPM readings. - 1/2 X – Press this to halve the length of the selected loop.
- 2 X – Press this to double the length of the selected loop.
- SHIFT LEFT (
![]() ) – Press this to shift the selected loop to the left. It will move left the same distance as the length of the loop itself.
) – Press this to shift the selected loop to the left. It will move left the same distance as the length of the loop itself. - SHIFT RIGHT (
![]() ) – Press this to shift the selected loop to the right. It will move right the same distance as the length of the loop itself.
) – Press this to shift the selected loop to the right. It will move right the same distance as the length of the loop itself.
 ) – Press this to shift the selected loop to the left. It will move left the same distance as the length of the loop itself.
 ) – Press this to shift the selected loop to the right. It will move right the same distance as the length of the loop itself.
TRACK CONTROLS
- STRIP SEARCH – The length of this strip represents the length of the entire track. Place your finger on a point along this sensor to jump to that point in the track. (If you want to scroll through a track, we recommend using your computer rather than running your finger along the strip.)
PITCH CONTROLS
- TAP – Tap this button at the same tempo as the track to help the software detect a more accurate BPM reading.
- SCRATCH OFF – Press this to disable the PLATTER's motor and bring it to a stop.
- MASTER TEMPO – If you have changed the pitch of the track, you can press the MASTER TEMPO button to return the track's pitch to its original key. The track's tempo will remain at the speed designated by the PITCH FADER.
- PITCH RANGE – Press this to adjust the range of the PITCH FADER to ±8%, ±16%, and ±50%.
- PITCH FADER – Controls the track's playback speed. An LED next to the fader will light up when set at 0%.
- PITCH BEND ( + / – ) – Press or hold down either of these buttons to temporarily adjust the track's playback speed. When released, the track playback will return to the speed designated by the PITCH FADER.
- BPM METER – This meter is an aid for matching the tempo of both decks. When the white center LED is lit, the BPMs are matched. Otherwise, the meter will tend towards the faster deck. The further from center, the greater the difference between the two BPMs.
The meter is also an aid while adjusting Loop In or Loop Out points. If you are making fine adjustments to your Loop In or Loop Out points using the PLATTERS, the lit LED will "wrap around" the meter. It will rest on the white center LED whenever the loop's length has been doubled or halved exactly.
Note: The BPM METER will aid in loop adjustments only if (1) a BPM reading has been entered for that track and (2) the two Decks' tempos have been synchronized. - TAKEOVER LEDs – When you select the other Deck with the DECK SELECT switch, the position of the V7's PITCH FADER may not match the Pitch setting for that Deck in the software. Slowly move the PITCH FADER in the direction indicated by the TAKEOVER LED arrow until it turns off. At this point, the PITCH FADER matches the Pitch setting in the software and can control it again.
NAVIGATION CONTROLS
- SCROLL KNOB – Use this knob to scroll through lists of tracks, Crates, etc. in the software. You can also press it to move between the panels shown in the software.
- FWD / BACK – These buttons move the selector between various panels in the software.
- CRATES – Press this to move the selector to the Crates Panel in the software.
- PREPARE – Press this to move the selector to the Prepare Panel in the software.
- FILES – Press this to move the selector to the Files Panel in the software.
- LOAD A / LOAD B – Press one of these buttons while a track is selected to assign it to Deck A or Deck B, respectively.
Tip: Pressing the LOAD A or LOAD B button twice quickly will load the opposite Deck's track to that Deck as well, with its Audio Pointer in the same position. For more information, see "Instant Doubles" under "Playback" in the SOFTWARE SETUP section. - LOAD PREPARE – Press this to add a selected track to the list of tracks in the Prepare Panel in the software.
EFFECTS CONTROLS
- FX SELECT – Turn this knob to select an effect to apply to the channel, which will be displayed in the software. You can also press the knob to move automatically to the next effect.
- FX MIX – Adjusts the amount of the effect, which will be displayed the software. To hear less of the effect (a "dry" mix), move this fader to the left. To hear more of the effect (a "wet" sound), move this fader to the right.
- FX PARAM – Turn this knob to adjust the parameter of the effect, which will be displayed in the software.
- FX ON / OFF – Press this button to activate or deactivate the effect. The button's LED will illuminate when the effect is on.
USB CONTROLS
- DECK SELECT – Set this switch to assign the software Deck which the V7 will control. The left position is Deck A; the right position is Deck B.
- USB LED – This LED will illuminate when the V7 can communicate with a computer connected to the USB port on the rear panel.
- LINK LED – This LED will illuminate when the V7 can communicate with another V7 connected to the LINK CONNECTION on the rear panel.
- MASTER BUTTON – This button determines which computer the V7 is controlling:
- When the MASTER BUTTON is lit, the V7 is controlling the computer it is connected to via USB.
- When the MASTER BUTTON is unlit, the V7 is controlling the computer connected to a V7 it is connected to via the LINK CONNECTION on the rear panel.

- Before connecting the V7 to your computer, insert the included CD to install the latest drivers as well Serato ITCH. (Visit www.serato.com/itch to check for available software updates.)
- When reconnecting the V7 to your computer, the V7 will recall the previous positions of the software (e.g., Pitch, effects parameters, etc.). Be mindful of this before playing a track.
SETTING UP ONE V7

- Connect the V7's DECK A OUTPUT to your mixer's left channel (line-level) input.
- Connect the V7's DECK B OUTPUT to your mixer's right channel (line-level) input.
- Connect the V7 to a USB port on your computer then open Serato ITCH. It will automatically detect the V7.
- Check V7 for the following:
- The MASTER BUTTON should be lit. (If not, then press it.)
- The USB LED should be lit.
Notes:
- You can select Deck A or Deck B in the software with the V7's DECK SELECT switch.
- The LOAD A and LOAD B buttons will always load the selected track to their respective Decks in the software (regardless of the DECK SELECT switch position).
- If you adjust a Deck's pitch with the PITCH FADER, when you switch to the other Deck, the V7's PITCH FADER may not match that Deck's Pitch position in the software. When this happens, one of the TAKEOVER LEDs will illuminate (and the PITCH FADER will become inactive). Slowly move the PITCH FADER in the direction indicated until the light goes out. At that point, the PITCH FADER is in the correct software position and can now be used to adjust the track's Pitch.
- Except for the PITCH FADER, Deck-specific controls (whose positions may change when switching between decks) will cause the software's positions to "snap" automatically to match the hardware's positions. Be mindful of this as you switch between Decks.
ADDING A SECOND V7
To complete a dual-V7 setup, set up one V7 (as described above) then follow these steps:

Do NOT connect two V7s to the same computer via USB!
- Connect the V7s' LINK CONNECTIONS to each other with the included link cable.
- Use the DECK SELECT switches to set the left V7 as "Deck A" and the right as "Deck B."
Note: Do not change the switches during your session. - Make sure your first V7 is connected a USB port on your computer then open Serato ITCH. It will automatically detect the V7s.
- Check for the following:
- On the V7 connected to your computer, the MASTER BUTTON should be lit. (If not, then press it.)
- On the V7 connected to your computer, the USB LED should be lit.
- On the V7 that is not directly connected to your computer, the MASTER BUTTON should be unlit. (If not, then press it.)
- On the V7 that is not directly connected to your computer, the USB LED should be unlit.
- Both V7s' LINK LEDs should be lit. (If not, then reconnect them securely with the link cable.)
SETTING UP TO TRANSITION BETWEEN TWO DJs
Numark V7s allow you to transition smoothly between two DJs (each with his own computer) without interrupting the music. To prepare for this, set up a dualV7 setup (as described above) then follow these steps:

Note: The instructions in this section address a setup with a mixer that supports multiple line-level inputs on two channels. However, you may also adapt these instructions to a four-channel mixer setup.
- Connect both V7s' DECK A OUTPUTS to your mixer's left channel (line-level) inputs.
- Connect both V7s' DECK B OUTPUTS to your mixer's right channel (line-level) inputs.
- With a USB cable, the new DJ ("DJ 2") should connect his computer to the V7 that is not connected the current DJ's ("DJ 1"'s) computer.
- As DJ 1 is playing his last track, DJ 1 should press the MASTER BUTTON on the unused V7.
- On the unused V7, DJ 2 can now cue up his first track and fade it in with the mixer.
- When DJ 2 has finished transitioning into his first track, he should press the MASTER BUTTON the opposite V7. He can now control Serato ITCH on his computer using both V7s.
- DJ 1 can now disconnect his computer from the setup without any interruption of the music.
Documents / Resources
References
Download manual
Here you can download full pdf version of manual, it may contain additional safety instructions, warranty information, FCC rules, etc.
Advertisement


Need help?
Do you have a question about the V7 and is the answer not in the manual?
Questions and answers