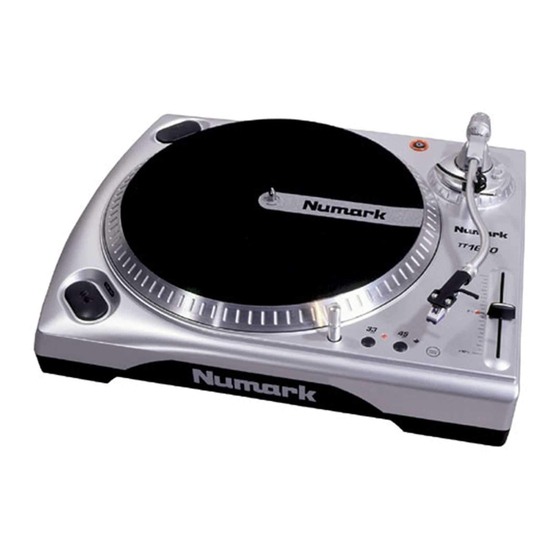
Summary of Contents for Numark TT-1650
- Page 1 TT-1650 Operating Instructions INSIDE THE BOX: (1) Aluminum Platter (1) TT-1650 Turntable (1) Counter Weight (1) Headshell w/ (1) IEC Power Cable Cartrdige (1) RCA Cord w/ (1) Slipmat Ground Wire...
-
Page 2: Safety Precautions
Thank you for buying this Numark product. Please read these operating instructions so you will know how to operate this equipment properly. After you have finished reading these instructions, keep them for future reference. WARNING: TO PREVENT FIRE OR SHOCK HAZARD, DO NOT EXPOSE THIS APPLIANCE TO RAIN OR MOISTURE. -
Page 3: Table Of Contents
CAUTION! TO PREVENT THE RISK OF ELECTRIC SHOCK, DO NOT REMOVE COVER (OR BACK). NO USER-SERVICEABLE PARTS INSIDE. REFER SERVICING TO QUALIFIED SERVICE PERSONNEL. IMPORTANT The lightning flash with arrowhead symbol, within an equilateral triangle, is intended to alert the user to the presence of un-insulated "dangerous voltage" within the product's enclosure that may be of sufficient magnitude to constitute a risk of electric shock to persons. -
Page 4: Controls
CONTROLS General Controls 1. Power Button Pushing this button down turns on the turntable. 2. Start/Stop Buttons These buttons start and stop the turntable motor. Both buttons have the same function. 3. Platter This turntable has a special edge design that has been optimized for "dragged" platter slow downs. 4. -
Page 5: Controls
CONTROLS continued Tone Arm Parts 7. Counter Weight and Scale Ring The Counterweight is used to balance the head shell and cartridge assembly so that the proper amount of stylus pressure is applied to the record. 8. Anti-Skate Adjustment This knob is used to compensate for inward tracking forces. See Tonearm Setup for more details. -
Page 6: Setup & Installation
SETUP & INSTALLATION This turntable has been designed exclusively for DJ use and can be setup in a variety of different ways depending on your mixing style. The turntable should rest on a level and stable surface that is clear of obstructions. -
Page 7: Platter Setup
PLATTER SETUP WARNING: Incorrect Platter setup can lead to poor turntable performance, platter instability or permanent motor damage. 1. Start by inspecting the bottom of the aluminum platter to check that both locking pins have rubber fittings on them. 2. Next, rotate the top of the motor assembly (brass in color) so that two holes are aligned parallel with the front of the turntable. -
Page 8: Cable Setup
CABLE SETUP This turntable is shipped with two sets of special cables: (1) Right Angle IEC Power Cord (1) Right Angle RCA cord w/ground wire NOTE: Before connecting any cables, make sure that the voltage selector switch is set to the proper setting, either 110V or 220V depending on region. -
Page 9: Tone Arm Setup
TONE ARM SETUP A properly adjusted tone arm and cartridge setup will minimize vinyl record wear and optimize the performance of the turntable. Follow these simple steps for setting the tone arm on the turntable: Balancing the Tone Arm 1. Begin the balancing process by lifting the cue lever to the up position (or make sure that the stylus protector is on the cartridge.) 2. -
Page 10: Cartridge Setup
CARTRIDGE SETUP For Head Shell Mounted Cartridges: The cartridge that comes with this turntable should be preinstalled on the head shell. If it isn't, please follow the below instructions for installing a cartridge onto the head shell. 1. Position the head shell and the cartridge so that the four connector pins are visible. Make sure that the stylus cover is installed to prevent damage to the stylus during installation. -
Page 11: Operation
OPERATION This turntable was designed to accommodate a variety of different mixing styles. Here are some general operation guidelines to optimize the performance of the turntable. 1. Do not place the turntable on or near a speaker or subwoofer. This may cause unwanted noise depending on the environment conditions. -
Page 12: Limited Product Warranty
LIMITED PRODUCT WARRANTY 1. What is covered and for how long? NUMARK INDUSTRIES LCC ("NUMARK") warrants to the original purchaser that NUMARK'S products; including but not limited to DJ mixers, amplifiers, CD players, CD Mix Stations, turntables, preamplifiers, beatkeepers, equalizers, microphones, headphones, cartridges, and all other accessories; are to be free from defects in material and workmanship under normal use and service for the period commencing upon the date of purchase from an authorized NUMARK dealer for a period of (1) Year. -
Page 13: Return Information
Requests must be submitted in writing with merchandise returned. g) The defective Numark equipment should be sent, FREIGHT PREPAID with Return Authorization number clearly printed on the outer packaging and original sales receipt enclosed to: NUMARK INDUSTRIES Attention: Service Department 200 Scenic View Drive... -
Page 14: Specifications
SPECIFICATIONS Turntable Section: Type: 2 speed, fully manual Motor: Direct Drive Starting Torque: > 1 Kg/cfm Platter: Aluminum Diecast Speed: 33.333 and 45 RPM Wow & Flutter: < 0.25% WRM S/N ratio: > 50dB Pitch Range: +/-10% Tonearm Section: Type: Universal S-Shaped Aluminum Height Range:... -
Page 15: Troubleshooting
Problem Turntable does not turn on. The sound level is very low. The sound is on one side only. The output sound is very distorted. The Output sound exhibits excessive hum or buzzing. The turntable skips like crazy. NOTE: Static electricity and/or other external interference may cause this unit to malfunction. To reset the unit to its normal condition, turn the power off and then on again. - Page 16 TT-1600, TT-1650 Manual /English - rev B Copyright Numark Industries, LLC 2002...


Need help?
Do you have a question about the TT-1650 and is the answer not in the manual?
Questions and answers