Advertisement
Advertisement
Table of Contents

Subscribe to Our Youtube Channel
Summary of Contents for Vytronix AMC22B
- Page 1 Cordless Vacuum Cleaner...
-
Page 3: Getting To Know Your Vacuum
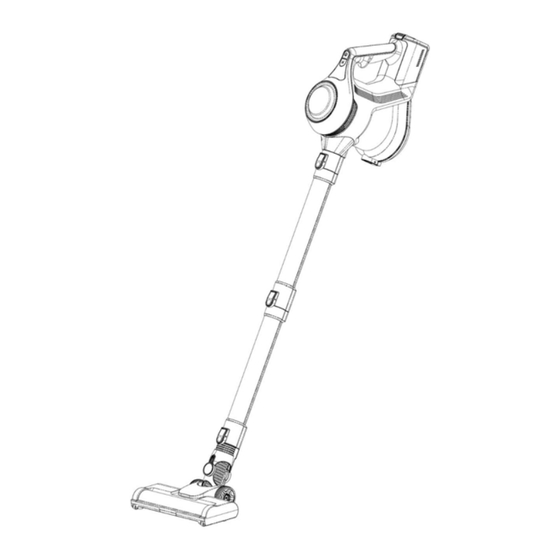
GETTING TO KNOW YOUR VACUUM 1. Brush roller 10. Filter Assembly 2. Motorized Floor head 11. HEPA filter 3. Floor head release button 12. Battery 4. Extension wand (2pcs) 13. Screws for wall mount 5. Extension wand release button 14. Wall mount 6. -
Page 4: Technical Specifications
ACCESSORIES Extension wand: Use for extended reach when using as an upright unit or for those hard to reach places. Motorized Floor head: Use this for hard floors and carpets. Easily picking up dirt dust and small debris. 2-in-1 Dusting/ Upholstery Nozzle: Use this for vacuuming fabric furnishings such as sofas armchairs and curtains, switch to dusting nozzle for radiators and shelving. -
Page 5: Important Safety Instructions
Always unplug before servicing. 3. For indoor use only. 4. Do not use AMC22B vacuum cleaner if the charger or battery are damaged. 5. Do not use this product without the dust container and filter in place. - Page 6 Vytronix support at support@vytronix.com. 17. Ensure the appliance is checked prior to first use for any damage or defect. Contact Vytronix Ltd upon receipt to seek advice. 18. Ensure correct maintenance of the appliance is followed on a regular basis.
- Page 7 ASSEMBLY INSTRUCTIONS NOTE: Before assembling the appliance, fix the included mount to the wall and ensure it is placed high enough for the vacuum to be securely mounted. Install the battery into the housing by sliding it into battery housing on the main body.
- Page 8 3. Attach the floor head to the extension wand to use as an upright cleaner. 4. If using the floor head without the wand, simply attach it to the main body to the main body via the dust inlet connector. It will "click" when secure. Assembling accessories: Attach the extension wand to the main body by slotting it into place the via dust inlet connector.
- Page 9 2. Attach the crevice nozzle or 2-in-1 tool to the base of the extension wand via the connector. It will "click" into place. 3. If using accessories without the wand, simply attach them to the main body via the dust inlet connector.
-
Page 10: Before First Use
BEFORE FIRST USE 1. Plug the charger into the power inlet located on the side of the battery. When charging, the indicator light will be illuminated RED. Once fully charged this indicator light will change to WHITE.. Once fully charged , turn off the charger and unplug from the power socket. -
Page 11: Operating The Vacuum
2. Ensure that the wand and air vent opening on the main body are free from blockages and dust. Should they become clogged, switch off the vacuum immediately and clear the blockage before continuing use. 3. Remove any sharp or large objects from the path of the vacuum before use as these may irreparably damage the appliance. - Page 12 Maintenance is recommended to prolong the lifespan of your vacuum cleaner, prevent blockages and keep your home clean. Failure to maintain your vacuum can invalidate your warranty. Cleaning the dust container: Switch off the vacuum cleaner. 2. Disassemble by removing floor head and extension wand from the main body. 3.
- Page 13 4. Rinse the HEPA filter thoroughly with clean water. Do not use soap or other cleaning products. Clean the assembly with a damp cloth. 5. Allow the filter to dry naturally for 24 hours before placing back into the vacuum. Do not place on radiators or use appliances such as a hair dryer, to dry the filter.
- Page 14 3. If brush roller becomes damp, allow to dry naturally before replacing. 4. Slide fastener (A) to the original position to secure the brush roller.
-
Page 15: Troubleshooting
TROUBLESHOOTING The appliance will not power on: This may be caused by a flat battery. This can occur if the appliance has been used or stored for an extended period. Connect the vacuum to the charger and allow for a full charging cycle to complete. The vacuum stopped suddenly: This will occur if the safety cut-out device has been activated. - Page 16 Do not attempt to use if the cable is split, frayed or otherwise damaged. Instead, seek a replacement charger by contacting customer services via email (support@vytronix.com) The running time of the vacuum is less than it used to be: Ensure the battery has completed a full charging cycle. An insufficient charging cycle will result in reduced application time.
-
Page 17: Warranty
WARRANTY To register you free Vytronix warranty visit www.vytronix.com using product code: brandnew-vytronix-amc22b Your original order number will be required make a note of it here: Any issues affecting product functionality will be rectified by a replacement or repair, providing that the product has been used and maintained in accordance with the instructions in this manual. - Page 18 If you have any queries or require assistance with using your product including set up, troubleshooting or registration please email our customer care on support@vytronix.com Register your warranty at www.vytronix.com...


Need help?
Do you have a question about the AMC22B and is the answer not in the manual?
Questions and answers