Table of Contents
Advertisement
Quick Links
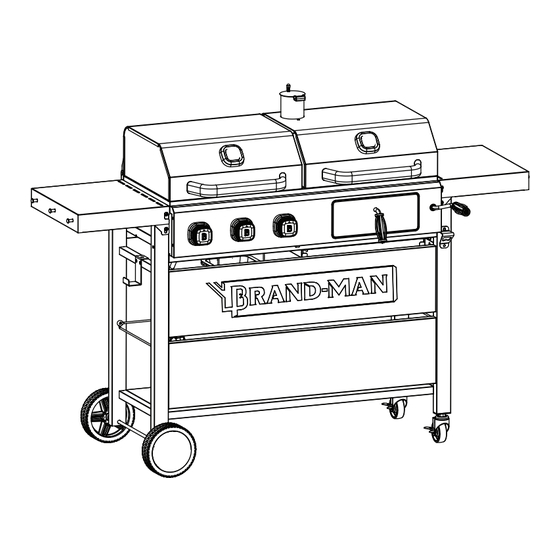
Hoss Series
Gas & Charcoal Grill
Important: Keep this Owner's Manual for convenient reference and for part replacement.
Read this Owner's manual carefully and be
sure your gas grill is properly assembled,
installed and maintained. Failure to follow
these instructions could result in serious
injury and/or property damage.
Please make sure the cylinder valve
connection device shall properly and
safely connected with the connection
device attached to the inlet of the
pressure regulator.
OWNER'S MANUAL
For Outdoor Use Only
Captivate Brands USA, Inc.
25541 Arctic Ocean Drive,
Lake Forest, CA.92630
If you have any questions or problems,
you can contact our customer service at
1-855-200-8445 ext 102 or
help@supportandspare.com
from 9:00 AM - 5:00 PM Monday to Friday.
(Pacific). All emails and voice-mail calls
will be answered within 24 hours.
1
Model: BMHOS-GC
Item:
BG2421A3
Advertisement
Table of Contents

Related Manuals for BRAND-MAN Hoss BMHOS-GC


Summary of Contents for BRAND-MAN Hoss BMHOS-GC
- Page 1 OWNER’S MANUAL Hoss Series Gas & Charcoal Grill Model: BMHOS-GC Item: BG2421A3 Important: Keep this Owner’s Manual for convenient reference and for part replacement. For Outdoor Use Only Read this Owner’s manual carefully and be sure your gas grill is properly assembled, Captivate Brands USA, Inc.
-
Page 2: Safety Precautions
SAFETY PRECAUTIONS READ ALL INSTRUCTIONS BEFORE INSTALLING AND USING THE APPLIANCE SAVE THESE INSTRUCTIONS DANGER WARNING Do not store or use gasoline or If you smell gas: other flammable liquids or Shut off gas to the appliance. vapors in the vicinity of this or Extinguish any open flame. - Page 3 pressure of 11” water column (W.C.) for connection SAFETY PRECAUTIONS to an LP gas cylinder. • Only use the regulator and the hose assembly The LP gas cylinder must be constructed and supplied with your gas grill. Replacement regulators marked in accordance with specifications of the and hose assemblies must be those specified in this U.S.
-
Page 4: Beware Of Flash-Back
Burner Flame Check WARNING A strong gas smell, or the hissing sound of gas Flame Slight indicates a serious problem with your gas grill or Yellow the LP gas cylinder. Failure to immediately follow Slight the steps listed below could result in a fire or Blue explosion that could cause serious bodily injury, Burner... -
Page 5: Table Of Contents
TABLE OF CONTENTS Safety Precautions ----------------------------------2-4 Beware of Flash-Back----------------------------------4 Burner Flame Check----------------------------------- 4 Model Description------------------------------------- 6 Tools Required for Assembly------------------------ 6 Parts Diagram------------------------------------------- 6 Parts List-------------------------------------------------- 7 Hardware ------------------------------------------------ 7 Assembly Steps -------------------------------------8-18 Connecting LP Gas cylinder to LP Grill --------- 19 Operating Instructions ------------------------- 19-22 Cleaning and Care ------------------------------- 23-25 Warranty ------------------------------------------------ 26... -
Page 6: Model Description
3 Burners Combo Charcoal Grill Description 3 Burners Combo Charcoal Grill designed with 3 independently controlled stainless steel burners and a charcoal grill area; The rated power of each main burner is 10,000 BTU and a total of 30,000 BTU for the Grill; Push and turn ignition system for firing up;... -
Page 7: Parts List
Parts List Part# Description Part# Description Side Shelf 2pcs Grill Assembly Left Leg Cooking Grid 4pcs Right Leg Flame Tamer 3pcs Grease Tray Condiment Shelf Bottom Shelf Front Panel Gas Tank Blocker-Long Wire for Condiment Shelf 2pcs Gas Tank Blocket-Short 2pcs Chimney Components Air Damper... -
Page 8: Assembly Steps
Assembly Steps Step 1 • Attach and install Bottom Shelf (21) between Left Leg (2) and Right Leg (3) with four Screws (A) as shown below. Step 2 • Install on the two Castors with brake (10) on the Right Leg (3) as shown. •... - Page 9 Assembly Steps Step 3 • Secure two screws (B) onto each side of the Grill Assembly (1) with leaving 2.1 inches gap on each screw. • With the help of another person, put the Grill Assembly (1) on the cart assembly prepared in step 2 as shown below.
- Page 10 Assembly Steps Step 5 • Install the Front Panel (5) onto the front of the cart with four screws (A) as shown below. Step 6 • Install the Magnet Assembly (8) on each side of the cart with two screws (H) each as shown below.
- Page 11 Assembly Steps Step 7 • Install the Condiment Shelf (4) at the front of the cart and on top of the Front Panel with two screws (I) as shown. Step 8 • Attach the two Wire for Condiment Shelf (22) onto the condiment shelf with four screws (H) as shown below.
- Page 12 Assembly Steps Step 9 • Install the Cylinder Hook (13) on the left side of cart with two screws (A). • Ensure the screws are tightened. Step 10 • Install the Side Shelf (17) with four screws (E) on each side. Follow gure 1 and gure 2 for the side shelf installation.
- Page 13 Assembly Steps Step 11 • Unscrew the screws from the Lid Handles (16) and set aside. • Install the Lid Handle (16) onto each Lid with the at washers and screws set aside previously as shown below. • Open the lid. Step 12 •...
- Page 14 Assembly Steps Step 13 • Install the Charcoal Door Handle (27) onto the front of right rebox as gure 3. • Unscrew the pre-installed screw from the Lifting Handle (28), then attach the Lifting Handle (28) onto the side of right rebox front panel and secure it with the screw as shown in gure 4 and gure 5.
- Page 15 Assembly Steps Step 15 • With the lid open, attach the two Warming Rack (31) onto the barbecue as shown below accordingly. Step 16 • With the lid open, put on one Cooking Grid (18) into each rebox as shown below.
- Page 16 Assembly Steps Step 17 • Install the Ash Receiver Sup-L (25) and Ash Receiver Sup-R(26) underneath the right rebox with four screws (A) as shown below. Step 18 • Attach one Gas Tank Blocker-Short (7) on each side of the cart and sercure with two screws (J) each as shown.
- Page 17 Assembly Steps Step 19 • Slide in the Grease Tray (20) from the back of left rebox as shown below. • Slide in the Ash Receiver Tray (29) from the back of right rebox as shown in the diagram. Step 20 •...
- Page 18 Assembly Steps Step 21 • Put on the gas cylinder onto the cylinder hook as shown.
-
Page 19: Connecting Lp Gas Cylinder To Lp Grill
USING, CONNECTING & DISCONNECTING LP GAS TANK The installation must conform with local codes or, in the absence of local codes, with either the National Fuel Gas Code, ANSI Z223.1/NFPA 54, or the Natural Gas and Propane Installation Code CSA B149.1, or Propane Storage and Handling Code, CSA B149.2, or the Standard for Recreational Vehicles, ANSI A119.2/NFPA 1192, and CSA 2240 RV Series, Recreational Vehicle Code 20 lb... - Page 20 OPERATING INSTRUCTIONS (CONTINUE) Checking for leaks 1. Make two to three oz. of leak solution by mixing one part liquid dishwashing soap with three parts water. 2. Make sure control knobs are in the “OFF” position. 3. Spray some solution on the tank valve up to the regulator connection. 4.
- Page 21 OPERATING INSTRUCTIONS (CONTINUE) Figure D CAUTION: DO NOT obstruct the flow of combustion and ventilation air. 1. Check for obstructions of airflow to the burners. Spiders, insects and Flame Slight webs can clog the burner/venturi tube. A clogged burner tube can Yellow lead to a fire.
- Page 22 OPERATING INSTRUCTIONS (CONTINUE) Operating Charcoal Grill CAUTION: Never use charcoal that has been pre-treated with lighter fluid. Use only a high grade plain charcoal, charcoal/wood mixture, lump charcoal or cooking wood. First Use 1. Make sure all labels, packaging and protective films have been removed from the grill. 2.
-
Page 23: Cleaning And Care
CLEANING AND CARE CAUTION: 1. All cleaning and maintenance should be done when Barbecue is cool and with the fuel supply disconnected. 2. DO NOT clean any barbecue part in self-cleaning oven. The extreme heat will damage the finish. 3. DO NOT enlarge valve orifices or burner ports when cleaning the valves or burners. Notices 1. - Page 24 CLEANING AND CARE Clean venturi of each burner with small bottle brush or compressed air. Remove all residue and dirt from burner surface. 10. Clean any clogged ports with a stiff wire (such as an opened paper clip). 11. Inspect burners for any damage (cracks or holes). If damage is found, replace with new burner(s) from manufacturer.
- Page 25 CLEANING AND CARE First Use Before cooking on your gas grill and charcoal combo for the first time, you will want to “burn off” the grill to eliminate any odor or foreign matter. Just ignite the burners, lower the hoods, and operate grill on max setting for 3 to 5 mintes.
-
Page 26: Warranty
Warranty Two-Year Limited Warranty This warranty is non-transferable and does not cover failures due to misuse of improper installation or maintenance. This warranty is for replacement of defective parts only. We are not responsible for incidental or consequential damage. This warranty does not cover corrosion or discoloration after the grill is used, or lack of maintenance, hostile environment, accidents, alterations, abuse or neglect. -
Page 27: Troubleshooting
Troubleshooting Problem Possible Cause Prevention/Cure Make sure regulator is securely attached to the LP gas tank per LP gas tank valve is closed “Installing LP Gas Tank,” then turn LP gas tank valve to “OPEN” LP gas tank is low or empty Exchange, refill or replace LP gas tank Turn LP gas tank valve to “CLOSED”... - Page 28 Troubleshooting Problem Possible Cause Prevention/Cure High or gusting winds Do not use grill in high winds Low on LP Gas Exchange, refill or replace LP gas tank Flame goes out Overfilling prevention device may have been Refer to “Sudden drop in gas flow or reduced flame height” (see above) activated Grease buildup...
- Page 29 Captivate Brands USA, Inc. 25541 Arctic Ocean Drive, Lake Forest, CA.92630 If you have any questions or problems, you can contact our customer service at 1-855-200-8445 ext 102 or help@supportandspare.com from 9:00 AM - 5:00 PM Monday to Friday. (Pacific). All emails and voice-mail calls will be answered within 24 hours.
Need help?
Do you have a question about the Hoss BMHOS-GC and is the answer not in the manual?
Questions and answers