Table of Contents
Advertisement
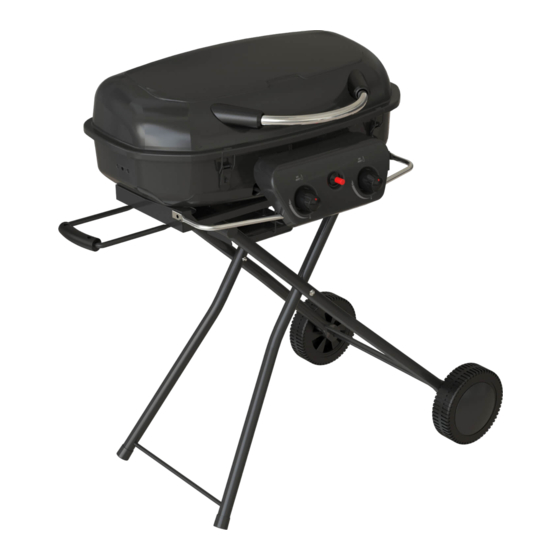
2 BURNER
PORTABLE GAS BBQ
Model BG2102D2
•
Folding stand with wheels
•
22 Mj/H output with piezo
ignition
Important: Please save these instructions for future reference
THIS BARBEQUE IS INTENDED FOR OUTDOOR USE ONLY
USER GUIDE
•
Porcelain-enamelled hood and grill
•
Hose and LCC27 gas regulator included
Advertisement
Table of Contents

Related Manuals for BRAND-MAN BG2102D2


Summary of Contents for BRAND-MAN BG2102D2
- Page 1 USER GUIDE 2 BURNER PORTABLE GAS BBQ Model BG2102D2 • • Folding stand with wheels Porcelain-enamelled hood and grill • • 22 Mj/H output with piezo Hose and LCC27 gas regulator included ignition Important: Please save these instructions for future reference...
- Page 2 IMPORTANT SAFETY AND USE INFORMATION Important. Read these instructions for use carefully. Familiarise yourself with the appliance before connecting it to its gas container. Keep these instructions for future reference. • WARNING! FOR OUTDOOR USE Do not store any gas cylinder not connected for use in the vicinity of this FOR OUTDOOR USE ONLY! appliance.
- Page 3 IMPORTANT SAFETY AND USE INFORMATION Important. Read these instructions for use carefully. Familiarise yourself with the appliance before connecting it to its gas container. Keep these instructions for future reference. GAS CYLINDER, TYPE AND IF YOU SMELL GAS REGULATOR DANGER! •...
-
Page 4: Setting Up The Barbeque
SETTING UP THE BARBEQUE This appliance shall only be used in an above ground open air location with natural ventilation. POSITIONING ANY ENCLOSURE IN WHICH THE BARBEQUE IS USED SHALL COMPLY WITH ONE OF THE FOLLOWING: • An enclosure with walls on all sides, but at least one permanent opening at ground level and no overhead cover (EXAMPLE 1). - Page 5 PARTS AND HARDWARE LIST Before assembling your barbeque, carefully unpack all parts from packaging. Check that all parts, hardware and tools are included. Check packaging carefully for any missing parts. If any items are missing, please call customer service. Barbeque Parts List No Part Name Hood Handle Hood Handle Left Support...
-
Page 6: Assembly Tips
ASSEMBLY TIPS Allow approximately 20 minutes. • Count all parts and hardware before assembling (see page 5). If any parts are missing, call customer service. Please do not return this item to the store where you purchased it. • Choose a firm, smooth surface for assembly where parts and hardware can’t fall or be misplaced. - Page 7 STEP 2 Attach Left Leg (20) to Right Leg (21) with Truss Head Step Bolts (K) and Hex Nuts (L). Ensure Left leg Caps (22) are pressed firmly onto ends of Left Leg. Insert Wheels (24) onto Axle (25) with Spacers (H) and secure with Hex Nuts (C). TIP: Use both wrenches provided and tighten Hex Nuts (C) at the same time.
- Page 8 STEP 4 Attach Bottom Hood Hinges (8) to back of Hood using hardware as shown. Tighten all bolts securely. E G D E G D Nickel-plated Phillips Truss Head Nickel-plated Phillips Truss Head Heat-resistant Washer Qty 4 Qty 4 Screw M6X16 Screw M6X20 Ø6.4mm Nickel-plated Locking Washer...
- Page 9 STEP 7 Stand the barbeque upright in the locked position. Lift it up, unfold the legs and hook the Left Leg under the Stand Lock. STEP 8 Attach Burner Control Knobs (16) to front of barbeque by pressing each knob onto its spindle.
- Page 10 STEP 10 Place Hood on Firebox and make sure that Top and Bottom Hood Hinge holes align, then connect hinges by inserting Bolt (I) through hinge holes and secure with hardware as shown. Tighten all bolts securely. Nickel-plated Phillips Truss Head Qty 2 Bolt M6X47 Nickel-plated Washer...
- Page 11 FOLDING, UNFOLDING AND TRANSPORTING THE BARBEQUE WARNING! HOOD LATCHES MUST BE CLOSED TO LOCK THE HOOD WHILE FOLDING OR TRANSPORTING THE BARBEQUE. HOOD MUST BE OPEN WHEN LIGHTING BARBEQUE. Close hood latches by hooking over hood and pushing the lever down Open hood latches by lifting lever and disengaging latch TO FOLD BARBEQUE...
- Page 12 TO UNFOLD BARBEQUE Make sure barbeque is on a firm, level surface. Disengage lock on rear of barbeque. Lift barbeque up, unfold the legs and hook the left leg under the stand lock. Release the hood latches. Barbeque is now ready for use. When unfolding barbeque, disengage lock by unhooking from screw on rear of barbeque...
- Page 13 USING, CONNECTING & DISCONNECTING PROPANE CYLINDER To operate, you will need a standard Place gas barbeque propane cylinder with external cylinder on a firm valve threads. level surface (LCC27 cylinder connection) 9 kg 31cm diameter CAUTION! FOR OUTDOOR USE Never move barbeque with propane cylinder in place.
- Page 14 OPERATING INSTRUCTIONS Fig. 1 BURNER CONNECTIONS Make sure the regulator hose and valve connections are securely fastened to the burner and the cylinder. Visually check the connection between the burner/venturi tube and orifice (Fig. 1). Make sure the burner/venturi tube fits over the orifice. Please refer to diagram for proper installation.
- Page 15 OPERATING INSTRUCTIONS (cont'd) After lighting, observe the burner flame. Make sure all burner ports are lit and flame height and appearance matches correct flame appearance below. NOTE: each burner lights independently. Follow steps 6 - 8 to light the other burner. CAUTION! Before lighting barbeque make sure outdoor cooking appliance areas are clear and free from combustible materials, gasoline and other...
- Page 16 OPERATING INSTRUCTIONS (cont'd) BURNER CONTROL SETTINGS FOR DIRECT AND INDIRECT GRILLING Designed for high heat output when the hood is closed, this barbeque is ideal for quickly searing juicy steaks and burgers. Use the burners as shown below for delicious grilling results - every time by making the most of indirect and direct cooking zones.
-
Page 17: Controlling Flare-Ups
OPERATING INSTRUCTIONS (cont'd) CONTROLLING FLARE-UPS CAUTION! If a grease fire develops, turn control knobs to the 'OFF' position and propane cylinder valve to 'CLOSED'. Do NOT use water on a grease fire. This can cause the grease to splatter and could result in serious burns, bodily harm or other damage. Do NOT leave barbeque unattended while preheating or burning off food residue on or 'HIGH'. -
Page 18: Before Each Use
BARBEQUE CLEANING AND CARE CAUTION! All cleaning and maintenance should be done when the barbeque is completely cool and the gas supply has been disconnected (see page 13). Do NOT clean any part of the barbeque in a self-cleaning (pyrolytic) oven. The extreme heat generated during pyrolysis will damage the finish. -
Page 19: After Each Use
BARBEQUE CLEANING AND CARE (cont'd) Remove all residue and dirt from burner surfaces. Clean any clogged ports with a stiff wire brush (or an opened paper clip). Inspect burners for any damage (cracks or holes). If damage is found, replace with new burner(s). -
Page 20: Technical Information
TO BE USED WITH THIS BARBEQUE, OR ANY OTHER ASPECT OF THE Barbeque’S USE AND FUNCTION, PLEASE CONTACT OUR CUSTOMER SUPPORT. FOR REPLACEMENT PARTS, CONTACT OUR CUSTOMER SERVICE CENTRE. BRAND-MAN GRILLS CUSTOMER SERVICE CENTRE: Hours - 9AM to 5:00PM AEST M-F (excluding holiday) PHONE: 1300 667 146 (AUS) -
Page 21: Troubleshooting Guide
TROUBLESHOOTING GUIDE Problem Possible Cause Prevention/Fix Make sure regulator is securely attached to the propane cylinder per ‘Connecting propane Propane cylinder valve is closed cylinder,’ then turn gas cylinder valve to ‘OPEN’ Propane cylinder is low or empty 1. Turn propane cylinder valve to ‘CLOSED’ Propane cylinder is leaking 2. -
Page 22: Warranty Information
WARRANTY INFORMATION 12 MONTH LIMITED WARRANTY Thank you for your purchase. Your new product is warranted to be free from defects in material and workmanship for the period stated above, from the date of purchase, provided that the product is used in accordance with accompanying recommendations or instructions where provided.
Need help?
Do you have a question about the BG2102D2 and is the answer not in the manual?
Questions and answers