Table of Contents
Advertisement
Quick Links
Advertisement
Table of Contents

Related Manuals for Fisher-Price POWER WHEELS WILD THING


Summary of Contents for Fisher-Price POWER WHEELS WILD THING
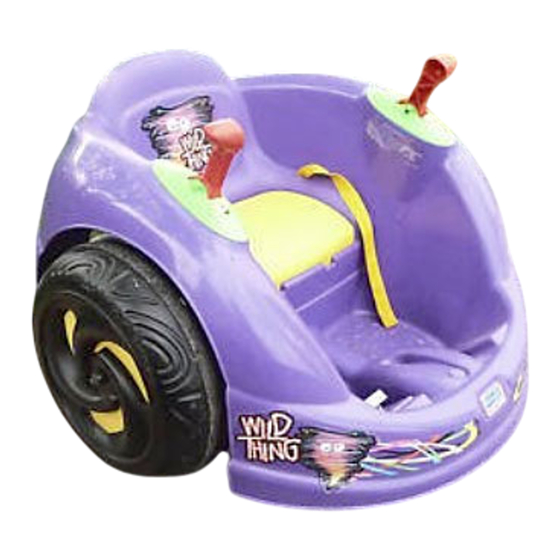
- Page 1 This Owner's Manual is provided and hosted by Appliance Factory Parts. FISHER PRICE 74180 Owner's Manual Shop genuine replacement parts for FISHER PRICE 74180 Find Your FISHER PRICE Ride On Parts - Select From 999 Models -------- Manual continues below --------...
- Page 2 ® Owner's Manual with Assembly Instructions Please read this manual and save it with your original sales receipt. For Model 74180 Tools needed for assembly: Phillips Screwdriver, Safety Scissors and Hammer. ® ® Use only with a Power Wheels Type H 6 Volt Battery, Power Wheels Thermal Fuse and Power ®...
-
Page 3: Table Of Contents
Table of Contents Important Information ..............2 Warnings . -
Page 4: Warnings
Warnings WARNING • Children can be harmed by small parts, sharp edges and sharp points in the vehicle’s unassembled state, or by electrical items. Care should be taken in unpacking and assembly of the vehicle. Children should not handle parts, including the battery, or help with assembly of the vehicle. -
Page 5: Parts
Parts • If you experience a problem with this product, or are missing a part, please call us at 1-800-348-0751, rather than return this product to the store. • Please identify all parts before assembly and save all packaging material until assembly is complete to ensure that no parts are discarded. - Page 6 Parts Round Bushing - 3 6 Volt Battery 6 Volt Charger Thermal Fuse Hex Bushing - 2 Wire Retainer -4 #8 x 1" Screw - 12 #12 x 1 " Screw " (Large Diameter) " (Small Diameter) Washer - 2 Washer - 2 .437 (Large Diameter) Cap Nut - 4* .354 (Small Diameter) Cap Nut - 4*...
-
Page 7: Parts Diagram
Parts Diagram 1. Vehicle Body 11. Seat " (Small Diameter) Washer - 2 2. Long Axle 12. Retainer Straps - 2 Sets 19. Thermal Fuse 3. Wheel - 2 (Seat Belt and Battery) 20. #8 x 1" Screw - 12 4. -
Page 8: Battery Charging
Battery Charging CAUTION WARNING Use the charger indoors only. • The battery must be handled by adults only. The battery is heavy and contains sulfuric acid (electrolyte). Dropping the Important Notes: battery could result in serious injury. • Your new battery must be charged for at least 18 •... - Page 9 Battery Charging Thermal Fuse • If you are charging the battery for the first time, insert a thermal fuse into the battery. The battery will not charge unless a thermal fuse is installed. • If you are recharging your battery, make sure the thermal fuse already installed in the battery is in good condition.
-
Page 10: Assembly
Assembly Round Bushing Wire Retainer Screw Peg Hole Vehicle Rear View Body • Position the vehicle body upright. • Fit and hold a round bushing into the hole in the rear of the vehicle body. Metal Bracket Large Hole Screw Bottom View Slot Square... - Page 11 Assembly Wire Retainer Long Axle Screw Bottom View .437 Cap Nut • Fit a #8 x 1" screw through a wire retainer and into the screw peg at the left side of the vehicle body, near the wire connectors. The square opening in the wire retainer •...
- Page 12 Assembly Gearbox Temporary Wheel Retainer Driver Long Strap Axle Driver Bushing " Washer HERE Long Gearbox Axle .437 " Washer Temporary Retainer Strap Wheel HERE Bottom View • Fit a " (large diameter) washer onto the end of the Bottom View long axle.
- Page 13 Assembly • Fit the skid guard under the vehicle body with the .354 Cap Nut pegs on the skid guard aligned with the holes in the vehicle body floor. • Insert four #8 x 1" screws through the vehicle body floor and into the skid guard.
- Page 14 Assembly • Insert the end T-loops on the strap through a slot in the battery compartment. Do not insert the second set of T-Loops T-loops through the slots. • Pull up gently on the each end of the strap to make sure the end T-loops are secure in the slots.
-
Page 15: Label Decoration
Label Decoration Proper label application will help to keep the labels looking their best! • Wash you hands before applying the labels. • Make sure the areas where the labels will be applied are clean and dry. Wipe your vehicle with a clean, soft, dry cloth to remove any dust or oils. -
Page 16: Battery Installation
Battery Installation Important Note: Use only a Power Wheels ® Type H 6 volt Motor battery with a Power Wheels ® thermal fuse installed. Use of Harness any other battery or fuse will damage your vehicle. Make Connector sure that you charge the battery for at least 18 hours using Battery the enclosed Power Wheels ®... -
Page 17: Battery Care And Disposal
Battery Care Rules For and Disposal Safe Driving Care WARNING If a battery leak develops, avoid contact with the leaking acid and place the damaged battery in a plastic bag. See information below for proper disposal. • Adult supervision is required. Children If acid comes in contact with skin or eyes, flush with cool water for at least 15 minutes and call a physician. - Page 18 Rules For Safe Driving 6. Always wear shoes or sneakers when operating Teach Safety Rules to Children this vehicle. While children can quickly develop the skill necessary to 7. Never put anything near any moving parts. Rotating drive this vehicle, it is important to remember that their parts such as motors, gear boxes and wheels can judgement skills are still very immature.
-
Page 19: How To Operate Your Vehicle
How to Operate Your Vehicle Your vehicle has been designed with a REVERSE LOCK-OUT system and has been pre-set to drive forward only. The vehicle will not drive in reverse or spin until you fasten the reverse connectors on the underside of the vehicle body. We recommend that your child master use of the shifter handles and the foot pedal to start and stop the vehicle before fastening the reverse connectors. -
Page 20: Caring For Your Vehicle
Statement of Caring for Limited Warranty Your Vehicle • Check all screws, retainers and protective coverings 90-day limited warranty for the Power regularly and tighten as required. Check plastic parts on Wheels ® Ride-On Toy Vehicle a regular basis for cracks or broken pieces. A 6-month battery warranty applying only to •... -
Page 21: Problems And Solutions Guide
Problems and Solutions Guide IMPORTANT! If you experience a problem with your vehicle, first check the Problems and Solutions Guide below. If you still experience a problem, please contact Power Wheels ® Consumer Affairs, toll-free at 1-800-348-0751 between 8 AM and 6 PM (EST) Monday through Friday. - Page 22 Problems and Solutions Guide Problem Possible Cause Solution Vehicle drives forward only Reverse lock-out feature not disabled See page 18 for instructions on fastening the reverse connectors to allow the vehicle to drive in forward, reverse and spin. Vehicle was running but Loose wire or loose connectors Check all wires and connectors.
- Page 23 Problems and Solutions Guide Problem Possible Cause Solution Vehicle runs sluggishly Undercharged battery Charge the battery. A new battery should have been charged for at least 18 hours before using the vehicle for the first time. After first-time use, recharge the battery for at least 14 hours after each use.
- Page 24 Problems and Solutions Guide Problem Possible Cause Solution Vehicle constantly trips the fuse Wrong type or improperly installed fuse Make sure that the battery has a properly installed Power Wheels ® thermal fuse before charging. For best performance, do not use substitute parts. Vehicle is overloaded and/or Make sure you do not overload the vehicle by allowing driving conditions are too stressful...
-
Page 25: Authorized Service Centers
Authorized Service Centers We are continually expanding our Authorized Service Center Network. Please check this listing for the Authorized Service Center nearest you. If there is not one in your area, please call Power Wheels ® Consumer Affairs at 1-800-348-0751. ALABAMA WEST LOS ANGELES - California Electric Service Center, 2314 S. - Page 26 Authorized Service Centers GEORGIA MADISONVILLE - Kuester’s Hardware, N. Main St., Martin Mall, 42431, (502) 825-2818 ATLANTA - Georgia Service Center, 5366 Buford Hwy., 30340, (770) 455-1716, MT. WASHINGTON - Mt. Washington Auto Supply, 520 N. Bardstown Rd, P.O. Box 316, (800) 455-1715 40047, (502) 538-4296 ATLANTA (MARIETTA) - Philips Consumer Electronics, 200 N.
- Page 27 Authorized Service Centers MISSISSIPPI RICHMOND HILL - Lockdoctor Locksmiths, 104-37 Atlantic Ave., 11418 (718) 441-6242 HATTIESBURG - Champion Cycle & Fitness, 104 South 37th Avenue, 39401, ROCHESTER - Benfante Appliance Service, 1286 Mt. Hope Avenue, 14620, (601) 264-8233 (716) 473-8765 IUKA - W.
- Page 28 Authorized Service Centers PHILADELPHIA (COLLINGDALE) - J.F. Kenney Electric, 920 MacDade Boulevard, PASADENA - Larry’s TV Service, 3520 Fairmont Parkway, 77504, (713) 998-0122, 19023, (610) 534-7373 (800) 244-0281 PITTSBURGH - Ferry Electric Service Co., 7498 McKnight Road, 15237, (412) 364-3403 ROMA - True Value Hardware, 1004 E.
- Page 29 Authorized Service Center. For the location nearest you, refer to the Authorized Service Center list in this manual. Fisher-Price, Inc., a subsidiary of Mattel, Inc., East Aurora, New York 14052, U.S.A. 74180 1 74180-0920 ©1998 Mattel, Inc. All Rights Reserved.
Need help?
Do you have a question about the POWER WHEELS WILD THING and is the answer not in the manual?
Questions and answers