Table of Contents
Advertisement
Available languages
Available languages
Quick Links
UK -
Installation and operating instructions
DE -
Montage- und Gebrauchsanweisung
NL -
Installations- og brugsanvisning
PL -
Instrukcja Montażu i Obsługi
Manualen må oppbevares under hele produktets levetid. Manualen skal opbevares under hele produktets levetid.
Manualen skall sparas under hela produktens levtid. Käyttöohje on säilytettävä tuotteen koko käyttöiän ajan.
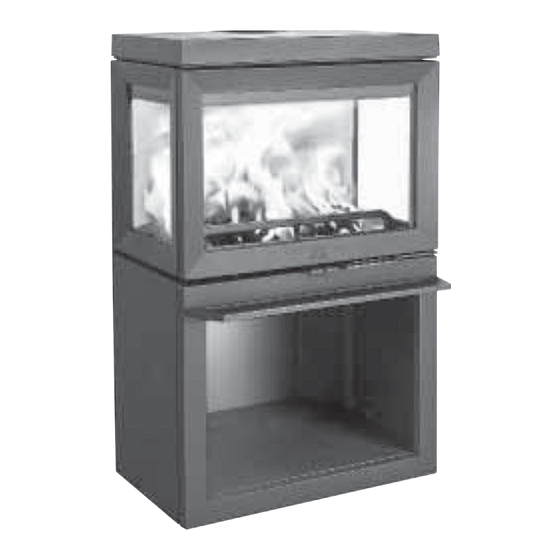
Jøtul F 520
20
35
50
5
Advertisement
Table of Contents

Related Manuals for Jøtul F 520 BP


Summary of Contents for Jøtul F 520 BP
- Page 1 Jøtul F 520 UK - Installation and operating instructions DE - Montage- und Gebrauchsanweisung NL - Installations- og brugsanvisning PL - Instrukcja Montażu i Obsługi Manualen må oppbevares under hele produktets levetid. Manualen skal opbevares under hele produktets levetid. Manualen skall sparas under hela produktens levtid. Käyttöohje on säilytettävä tuotteen koko käyttöiän ajan.
- Page 2 EU no. 215/1186 - 24/04/2015 Datasheet / Fiche Technique / Ficha técnica / Scheda dati / Datasheet / Datenblatt Requirements / Exigences / Requisitos / Requisiti / Vereisten / Forderungen Supplier / Jøtul AS Fabricante / Fornitore / Vereisten / Lieferant: Product models Jøtul F 520...
- Page 3 Meldeskjema og sjekkliste for montering av ildsted Tlf. Eiers navn Eiendommens adresse: Post nr. Sted: Gnr. Bnr. Ildstedets navn og type: Maks. effekt i kW Brenseltype Skorsteinstype (eks. tegl, element eller stålskorstein): Høyde fra røykinnføring til skorsteinstopp og innvendig diameter: Antall ildsteder på...
-
Page 5: Table Of Contents
ENGLISH 1.0 Relationship to the Table of contents authorities Relationship to the authorities ....5 • Installation of a fi replace must be carried out in compliance Technical data .......... 5 with national laws and regulations. All local ordinances, including those that refer to national and European standards, must be complied with when products are Safety ............ -
Page 6: Safety
ENGLISH 3.0 Safety 3.2 Floor NB! To guarantee optimal performance and safety, Jøtul Foundation recommends that its stoves are fi tted by a qualifi ed You need to make sure the foundation is suitable for a fi replace. installer (see www.jotul.com for a complete list of dealers). See “2.0 Technical Data”... - Page 7 ENGLISH...
- Page 8 ENGLISH...
-
Page 9: Fresh Air Supply
ENGLISH Fresh air supply Fig. 2B, through the fl oor and ground plate The air used for combustion in any well-insulated house needs to be replaced. This is particularly important in houses with mechanical ventilation. Such replacement air can be procured in several ways. -
Page 10: Installation
ENGLISH 4.0 Installation Fig. 4 NB: Check that the fi replace is undamaged before installation begins. NB: The product is heavy! Ensure you have help when positioning and installing it. Make sure the product does not topple over. NB: Do not place anything on the top plate of the stove as this could cause permanent damage to the paint. -
Page 11: Approval Label
ENGLISH Approval label Alternative through a rear outlet Fig. 6b Fig. 5 4.2 Outside air connection through the base Through a rear outlet Fig. 7 Jøtul F 520 is delivered with air inlet mounted underneath the product. If needed, the air inlet may be mounted in the rear of the product. - Page 12 ENGLISH 4.4 Chimney and fl ue pipe Fig. 8 • The fi replace must only be connected to a chimney and fl ue pipe approved for solid fuel fi replaces with fl ue gas temperatures as specifi ed in «2.0 Technical Data». •...
-
Page 13: Daily Use
ENGLISH 4.5 Fitting a fl ue pipe with a top outlet 4.6 Mounting of ash lip The product is supplied from the factory with the smoke outlet fi tted for the top outlet. Fig. 10 1. Thread the fl ue pipe (A) through the top plate and place it in the top smoke outlet. -
Page 14: Initial Lighting
ENGLISH Be especially careful never to use the following materials Adding fi rewood as fuel in your fi replace: Stoke the stove frequently but only add small amounts of fuel • Household rubbish, plastic bags, etc. at a time. If the stove is fi lled too full, the heat created may •... -
Page 15: Maintenance
ENGLISH 6.0 Maintenance 7.0 Servicing Warning! Any unauthorised changes to the product are 6.1 Cleaning the glass illegal! Only original spare parts may be used! The product is equipped with an air wash for the glass. Air is 7.1 Service/replacing parts in the burn sucked in through the air vent on the top of the product and down along the inside of the glass. - Page 16 ENGLISH Fig. 16 Fig. 18 5. Lower the exhaust defl ector and lift it out. 6. When refi tting, follow the same procedure in reverse order. 7.2 Replacing the air duct and 3. Turn one corner towards you and pull it out sideways. inner bottom Fig.
- Page 17 ENGLISH 7.3 Self-closing door Fig. 20 By making this change, you make the door self-closing. Fig. 22 2. Take hold of the hole (B) at the front edge of the inner bottom (A) and lift it up. Fig. 21 1. Loosen the two Allen screws. 2.
-
Page 18: Operational Problems - Troubleshooting
ENGLISH 8.0 Operational problems 10.0 Recycling - troubleshooting 10.1 Recycling packaging Your fi replace is delivered with the following packaging: Poor draught • A wooden pallet that can be cut up and burned in the Check the length of the chimney and that it complies with fi... - Page 19 ENGLISH Pellets stoves, glass, stone, concrete, enamel and paint fi nish (e.g. but not limited to chipping, cracking, bubbling or discolouration and crazing) are applicable to the national legislation governing the sale of consumer goods. This guarantee is valid for purchases made within the territory of the European Economic Area.
-
Page 20: Behördliche Aufl Agen
DEUTSCH Inhalt 1.0 Behördliche Aufl agen Die Kamininstallation muss gemäß den geltenden nationalen 1.0 Behördliche Aufl agen........20 Gesetzen und Regelungen erfolgen. 2.0 Technische Daten ........20 Bei der Produktinstallation müssen alle lokalen und nationalen Bestimmungen sowie europäische Richtlinien eingehalten werden. 3.0 Sicherheit............ - Page 21 DEUTSCH 3.0 Sicherheit 3.2 Boden Hinweis: Um maximale Leistung und Sicherheit zu Fundament gewährleisten, empfi ehlt Jøtul, seine Kamine Stellen Sie sicher, dass das Fundament für einen Kamin ausgebildetem Fachpersonal installieren zu lassen. (Eine ausgelegt ist. Das Gewicht geht aus Abschnitt 2.0 Technische vollständige Händlerliste fi...
- Page 22 DEUTSCH...
- Page 23 DEUTSCH...
- Page 24 DEUTSCH Frischluftzufuhr Abb. 2B, durch Fußboden und Bodenplatte Die für eine Verbrennung benötigte Luft muss in jedem gut isolierten Haus ersetzt werden. Dies ist insbesondere in Häusern mit mechanischer Lüftung wichtig. Diese Ersatzluft lässt sich auf verschiedene Weise beschaff en. Dabei kommt es darauf an, die Luft in den Raum zu leiten, wo sich der Kaminofen befi...
- Page 25 DEUTSCH 4.0 Installation Abb. 4 Hinweis: Vergewissern Sie sich vor Beginn der Installation, dass der Kamin unversehrt ist. Hinweis: Das Produkt ist schwer! Bei Positionierung und Installation benötigen Sie Hilfe. Stellen Sie sicher, dass das Produkt nicht umkippt. Hinweis: Stellen Sie nichts auf die Deckplatte des Kaminofens.
- Page 26 DEUTSCH 4.2 Außenluftzufuhr Abb. 7 Durch einen rückseitigen Abzug Der Jøtul F 520 ist vorbereitet für externe Verbrennungsluftversorgung von unten. Wenn gewünscht, kann die Luftversorgung auch nach hinten montiert werden. Abb. 6 Click 1. Die vorgestanzte Platte mittels einer Beißzange abmontieren Alternativ durch einen rückseitigen Abzug...
- Page 27 DEUTSCH 4.3 Schornstein und Rauchgasrohr Abb. 8 • Der Kamin darf nur mit einem Schornstein und einem Rauchgasrohr verbunden werden, für Festbrennstoff kamine mit Rauchgastemperaturen gemäß Abschnitt 2.0 Technische Daten zugelassen sind. • Schornsteinquerschnitt muss für Kamin dimensioniert sein. Mithilfe Abschnitts Technische Daten...
-
Page 28: Tägliche Nutzung
DEUTSCH 4.6 Montage von Asche Lippe Abb. 10 1. Führen Sie das Rauchgasrohr (A) durch die Deckplatte und positionieren Sie es im Rauchabzug an der Oberseite. 2. Schließen Sie die Verbindung mit einer Dichtung (B). 4.5 Leistungsprüfung Kontrollieren Sie nach der Produktmontage stets den Einstellhebel. - Page 29 DEUTSCH Holzqualität • Öff nen Sie Luftzufuhr. • Legen Sie zwei Scheite auf den Boden der Brennkammer Als Qualitätsholz bezeichnen wir die meisten bekannten und stapeln Sie schichtweise Anmachholz darüber. Holzarten wie Birke, Fichte und Kiefer. • Legen Sie oben auf den Stapel einen mittelgroßen Scheit. •...
- Page 30 DEUTSCH 5.1 Überhitzungsgefahr 6.3 Rauchgasrohre zum Kamin kehren Der Kamin darf bei seiner Benutzung niemals überhitzt Rauchgasrohre müssen über Rauchgasrohr- Reinigungsklappe oder die Türöff nung gekehrt werden. werden. Leitblech und Auslassleitblech müssen zunächst demontiert werden. Zu einer Überhitzung kommt es durch zu viel Brennstoff und bzw.
- Page 31 DEUTSCH 7.0 Instandhaltung Abb. 16 Warnung! Unberechtigte Änderungen Produkt sind nicht zulässig! Es dürfen nur Originalersatzteile verwendet werden! 7.1 Wechsel von Brennerplatten, Leitblech und Auslassleitblech Hinweis: Verwenden Sie Werkzeuge mit größter Sorgfalt! Andernfalls können die Vermiculitplatten beschädigt werden. Abb. 14 3.
- Page 32 DEUTSCH Abb. 18 Abb. 20 5. Senken Sie das Auslassleitblech ab und heben Sie es 2. Ergreifen Sie die Öff nung (B) an der Frontseite des inneren heraus. Bodens (A) und heben Sie ihn an. 6. Gehen Sie bei der erneuten Installation in der umgekehrten Reihenfolge vor.
-
Page 33: Betriebsstörungen - Fehlersuche
DEUTSCH 8.0 Betriebsstörungen - 7.3 Selbstschließende Tür Durch diese Änderung schließen Sie die Tür selbst. Fehlersuche Abb. 22 Geringer Zug Überprüfen Sie, ob die Länge des Schornsteins die Anforderungen nationaler Gesetze und Vorschriften erfüllt. (Weitere Informationen fi nden Sie unter «2.0 Technische Daten». - Page 34 DEUTSCH 9.0 Zusatzausstattung 11.0 Garantiebedingungen 1. Umfang unserer Garantie: 9.1 Abdeckung für Außenluftchluss Jøtul AS garantiert, dass externe Gusseisenteile zum Kaufzeitpunkt frei von Material- oder Herstellungsfehlern sind. Art.nr. 51049688 Sie können die Garantie für die externen Gusseisenteile auf 25 Jahre ab Lieferdatum verlängern, indem Sie das 9.2 Außenluftset Ø80 Produkt im Internet unter jotul.com registrieren und die Garantieverlängerungskarte innerhalb von drei Monaten...
-
Page 35: Wettelijke Voorschriften
NEDERLANDS 1.0 Wettelijke Inhoudsopgave voorschriften Wettelijke voorschriften ......35 Een haard moet in overeenstemming met de in uw land Technische gegevens ......35 geldende wet- en regelgeving worden geïnstalleerd. Bij het installeren van de producten moeten alle lokale Veiligheid ..........36 voorschriften die betrekking hebben op nationale en Europese normen, worden nageleefd. - Page 36 NEDERLANDS 3.0 Veiligheid 3.2 Vloer Fundering NB! Om optimale prestaties en veiligheid te garanderen, raadt Jøtul aan haar kachels te laten monteren door een Controleer of de fundering geschikt is om een haard te dragen. gekwalifi ceerd installateur (zie www.jotul.com voor een Zie “2.0 Technische gegevens”...
- Page 37 NEDERLANDS...
- Page 38 NEDERLANDS...
- Page 39 NEDERLANDS Toevoer van frisse lucht Afb. 2B, via de vloer en grondplaat De lucht die gebruikt wordt voor verbranding in een goed geïsoleerd huis moet worden ververst. Dit is met name van belang voor huizen met mechanische ventilatie. Deze luchtverversing kan op een aantal manieren worden bereikt. Het belangrijkste is dat er lucht wordt aangevoerd naar de ruimte waar de kachel geplaatst is.
- Page 40 NEDERLANDS 4.0 Installatie Afb. 4 NB: Controleer voordat u met de installatie begint of de haard onbeschadigd is. NB: Het product is zwaar! Zorg voor hulp bij het plaatsen en installeren. De verbrandingskamer is zwaar. Zorg dat het product niet kantelt.
- Page 41 NEDERLANDS 4.2 Externe luchttoevoer Afb. 7 Via een achteruitlaat Jotul F 520 wordt geleverd met de buitenluchtaansluiting aan de onderzijde van het products. Wanneer gewenst, de buitenluchtaansluiting kan worden gemonteerd aan de achterzijde van het product. Afb. 6 Click 2. Verplaatst de luchtaansluiting van de onderzijde naar de 1.
- Page 42 NEDERLANDS Door de vloer 4.3 Schoorsteen en kachelpijp • De haard mag uitsluitend worden aangesloten op een Afb. 9 schoorsteen en kachelpijp die zijn goedgekeurd voor haarden op vaste brandstof met rookgastemperaturen zoals gespecifi ceerd in «2.0 Technische gegevens». • De doorsnede van de schoorsteen moet geschikt zijn voor een haard.
-
Page 43: Dagelijks Gebruik
NEDERLANDS 4.4 Een kachelpijp met een De Jøtul F 520 is voorzien van de volgende bedieningsopties: bovenuitlaat verbinden • Trek de ontstekingsopening naar buiten (A) (de luchtopening (B) volgt automatisch). Het product wordt door de fabriek geleverd met een rookuitlaat als bovenuitlaat. 4.6 As lippen Afb. - Page 44 NEDERLANDS Houtkwaliteit • Open de luchtopening • Plaats twee blokken op de bodem van de verbrandingskamer et kwaliteitshout bedoelen we de meest bekende soorten en stapel het aanmaakhout hier in lagen op. hout zoals berk, spar en den. • Plaats tenslotte een middelgroot blok op deze stapel. •...
-
Page 45: Groot Onderhoud
NEDERLANDS 5.1 Gevaar van oververhitting schoorsteen De haard mag nooit zo gebruikt worden dat er oververhitting Kachelpijpen moeten worden geveegd via een veegluik voor ontstaat. de kachelpijp of via de deuropening. Oververhitting treedt op als de haard te veel brandstof bevat Eerst moet een van de schotten worden verwijderd om dit te en/of de luchtopening te ver openstaat zodat er te veel hitte kunnen doen. - Page 46 NEDERLANDS NB: Wees uiterst voorzichtig met het gereedschap! De Afb. 16 vermiculietplaten kunnen beschadigd raken als u ze ruw behandelt. Afb. 14 1. Verwijder eerst de blokhouder . 3. Draai één hoek naar u toe en trek deze zijdelings naar Afb.
- Page 47 NEDERLANDS Afb. 18 Afb. 20 5. Laat de uitlaatplaat zakken en til deze eruit. 6. Volg voor het installeren dezelfde procedure in omgekeerde volgorde. 2. Pak het gat (B) vooraan in de binnenste bodemplaat vast (A) en til deze op. Afb.
-
Page 48: Optionele Extra's
NEDERLANDS 7.3 Zelfsluitende deur Het vuur gaat na enige tijd uit • Controleer of het brandhout droog genoeg is. Door deze wijziging aan te brengen, maakt u de deur • Controleer of er onderdruk is in de woning, sluit zelfsluitend. mechanische ventilatiesystemen en open een raam dicht bij de haard. - Page 49 NEDERLANDS 10.0 Recycling Voor pelletkachels, glas, steen, beton, email en lak (waaronder begrepen maar niet beperkt tot breuken, scheuren, barsten, blaasjes, verkleuring of craquelé) geldt de nationale wetgeving die van toepassing is op de verkoop 10.1 Recyclen van de verpakking van consumentengoederen.
-
Page 50: Zgodność Z Przepisami
POLSKI 1.0 Zgodność z Spis treści przepisami 1.0 Zgodność z przepisami......... 50 • Montaż pieca należy wykonać zgodnie z przepisami obowiązującymi w danym kraju. W trakcie montażu 2.0 Dane techniczne ........... 50 urządzenia należy przestrzegać wszelkich przepisów lokalnych, jak również przepisów odnoszących się do norm krajowych lub europejskich. - Page 51 POLSKI 3.0 Bezpieczeństwo Komin stalowy W przypadku, gdy urządzenie ma być podłączone do stalowego komina od góry, należy użyć rury dymowej, której UWAGA! Aby zagwarantować optymalne funkcjonowanie izolacja będzie zaczynała się ok. 10 mm nad ścianą górną bezpieczeństwo użytkowania, montaż urządzenia pieca.
- Page 52 POLSKI...
- Page 53 POLSKI...
- Page 54 POLSKI Dopływ świeżego powietrza Rys. 2B, podłączenie przez podłogę i płytę fundamentową Powietrze potrzebne do procesu spalania w domu, w którym znajduje się piec, musi ulegać wymianie. Jest to w szczególności istotne w domach zaopatrzonych w mechaniczny system wentylacyjny. Taka wymiana powietrza może zachodzić...
-
Page 55: Tabliczka Znamionowa
POLSKI 4.0 Montaż Rys. 4 UWAGA! Przed montażem pieca należy dokładnie sprawdzić, czy nie ma na nim śladów uszkodzeń. UWAGA! Produkt jest ciężki! Należy podnosić oraz montować piec z pomocą innych osób. Zabezpieczyć produkt przed przewróceniem się! UWAGA! Nie kłaść ciężkich przedmiotów na górnej powierzchni pieca –... - Page 56 POLSKI 4.2 Podłączenie świeżego powietrza Rys. 7 przez podstawę Podłączenie świeżego powietrza przez osłonę tylną Jøtul F 520 jest dostarczany z króćcem dopływu powietrza do zamontowania od spodu urządzenia. W razie potrzeby króciec powietrza może zostać zamontowany z tylu urządzenia. Rys.
- Page 57 POLSKI Podłączenie świeżego powietrza przez • Przekrój poprzeczny kanału dymowego mieć przynajmniej tę samą wielkość jak przekrój króćca podłogę dymowego. Aby obliczyć prawidłowy i wymagany przekrój kanału, należy odnieść się do specyfi kacji zamieszczonej w Rys. 9 dziale «2.0 Dane techniczne». •...
- Page 58 POLSKI 4.6 Montaż półki popielnikowej 4.4 Montaż rury dymowej / górny wylot Rys. 12 Urządzenie jest fabrycznie dostosowane do podłączenia od góry. Rys. 10 1. Przeciągnąć rurę dymową (A) przez płytę górną i umieścić w króćcu dymowym. 2. Dokładnie uszczelnić uszczelką (B) 4.5 Kontrola działania 5.0 Eksploatacja Gdy piec jest podłączony należy zawsze przeprowadzić...
- Page 59 POLSKI Jakość drewna opałowego Pierwsze rozpalenie Poprzez dobrą jakość drewna opałowego rozumiemy • Otworzyć regulatory dopływu powietrza przez całkowite polana np.: z brzozy, buku oraz grabu. wyciągnięcie rączek. (Należy użyć rękawicy lub podobnego przedmiotu o funkcjach ochronnych, na wypadek gdyby Drewno dobrej jakości powinno być...
- Page 60 POLSKI 6.0 Konserwacja Układanie drewna Rys. 14 6.1 Czyszczenie szyby Niniejsze urządzenie jest zaopatrzone system samooczyszczania szyby (air wash), który pomaga utrzymać szybę w odpowiedniej czystości. Powietrze jest zasysane przez kurtynę powietrzną na górze urządzenia i idzie ku dołowi, wzdłuż wewnętrznej powierzchni szyby. Niestety niewielkie ilości sadzy zawsze będą...
- Page 61 POLSKI 6.5 Konserwacja części zewnętrznych Rys. 16 Po kilku latach eksploatacji części pokryte farbą mogą zmienić kolor. W takich przypadkach należy oczyścić powierzchnię produktu usuwając wszystkie odstające cząsteczki, a następnie pomalować piec. Powierzchnie produktów emaliowanych należy oczyścić używając do tego celu jedynie czystej suchej szmatki. Nie należy stosować...
- Page 62 POLSKI 7.2 Wymiana kanału powietrznego i Rys. 18 płyty dennej Rys. 20 4. Usunąć deflektor (A) rozpoczynając od uniesienia go. Następnie popchnąć go do tyłu. Rys. 19 1. Unieść kanał powietrzny (A) i wyjąć go z pieca. Rys. 21 5. Obniżyć defl ektor, a następnie wyjąć. 6.
- Page 63 POLSKI 8.0 Problemy eksploatacyjne Rys. 22 - rozwiązywanie problemów Słaby ciąg kominowy Sprawdź wysokość komina i jego zgodność z krajowymi przepisami i regulacjami. (Patrz także «2.0 Dane techniczne»). Upewnij się, że minimalny przekrój przewodu dymowego jest zgodny z «2.0 Dane techniczne» w instrukcji montażu. Sprawdź...
-
Page 64: Wyposażenie Dodatkowe
POLSKI 9.0 Wyposażenie 11.0 Gwarancja dodatkowe 1. Gwarancja Jøtul obejmuje: Jøtul gwarantuje, że wszystkie żeliwne części zewnętrzne w momencie zakupu nie posiadają wad materiałowych, ani 9.1 Pokrywa dopływu świeżego produkcyjnych. Istnieje możliwość przedłużenia gwarancji na powietrza – podłączenie przez zewnętrzne części żeliwne do 25 lat od daty sprzedaży. podstawę... - Page 65 POLSKI Piece na pellet, szkło, kamień, beton (takie uszkodzenia jak odpryski, pęknięcia, wybrzuszenia, odbarwienie, pękanie) mają zastosowanie do krajowego ustawodawstwa obowiązującego w sprzedaży towarów konsumpcyjnych. Niniejsza gwarancja obowiązuje w przypadku urządzeń nabytych w Europejskiej Strefi e Ekonomicznej. Wszelkie kwestie dotyczące gwarancji i reklamacji należy zgłaszać...
- Page 67 NO | Kvalitet- og sikkerhetskontroll Siden 1853 har Jøtul vært kjent for å produsere ovner og peiser av høy kvalitet og med lang levetid. Vi ønsker å tilby våre kunder de absolutt beste produktene og gir derfor også markedets lengste garanti. Gjennom vår pro- dukt- og kvalitetskontroll vektlegges nettopp dette –...
- Page 68 Jøtul arbeider kontinuerlig for om mulig å forbedre sine produkter, og vi forbeholder oss retten til å endre spesifi kasjoner, farger og utstyr uten nærmere kunngjøring. Jøtul bemüht sich ständig um die Verbesserung seiner Produkte, deshalb können Spezifi kationen, Farben und Zubehör von den Abbildungen und den Beschreibungen in der Broschüre abweichen. Jøtul pursue a policy of constant product development.
Need help?
Do you have a question about the F 520 BP and is the answer not in the manual?
Questions and answers