Table of Contents
Advertisement
Quick Links
UKCA information
UK
-
Installation and operating instructions
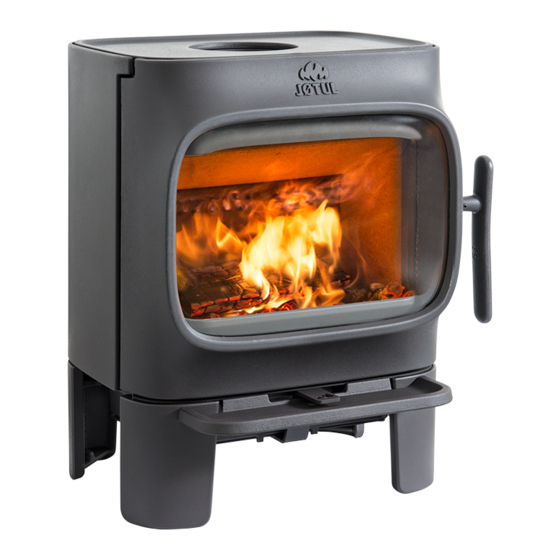
Jøtul F 105 B
The manuals which are enclosed with the product must be kept throughout the product's entire service
manuels fournis avec le produit doivent être conservés pendant toute la durée de vie du produit..
Jøtul F 105 R UKCA
Jøtul F 105 LL
Jøtul F 105 SL
2
4
life.Les
Advertisement
Table of Contents

Related Manuals for Jøtul F 105 R Series


Summary of Contents for Jøtul F 105 R Series
- Page 1 Jøtul F 105 R UKCA UKCA information Installation and operating instructions Jøtul F 105 B Jøtul F 105 LL Jøtul F 105 SL The manuals which are enclosed with the product must be kept throughout the product’s entire service life.Les manuels fournis avec le produit doivent être conservés pendant toute la durée de vie du produit..
- Page 2 Attention! Use this approval label when the stoves has been installed (only for UK). Cut off the bottom part and replace the label already attached with this one. It is important that the lot + pin number is viewable. Note: An approved CO monitor should be installed in the same room as the appliance.
- Page 3 Jøtul F 105 B Jøtul F 105 R B (Base) (Base) Jøtul F 105 LL Jøtul F 105 R LL (Long legs) (Long legs) Jøtul F 105 SL Jøtul F 105 R SL (Short legs) (Short legs)
-
Page 4: Table Of Contents
ENGLISH 1.0 Relationship to the Table of contents authorities Technical data ......... 4 • Installation of a fi replace must be carried out in compliance Relationship to the authorities ....4 with national laws and regulations. All local ordinances, including those that refer to national and European standards, must be complied with when products are Safety ............ -
Page 5: Safety
ENGLISH 3.0 Safety 3.1 Fire Prevention Measures There is a certain element of danger every time you use NB! To guarantee optimal performance and safety, Jøtul your fi replace. The following instructions must therefore be recommends that its stoves are fi tted by a qualifi ed followed: installer (see www.jotul.com for a complete list of dealers). - Page 6 ENGLISH...
- Page 7 ENGLISH...
- Page 8 ENGLISH...
- Page 9 ENGLISH...
- Page 10 ENGLISH...
- Page 11 ENGLISH...
- Page 12 ENGLISH Requirements for protection of wooden Fresh air supply fl ooring beneath the fi replace The air used for combustion in any well-insulated house needs to be replaced. This is particularly important in houses with The function of a fl oor plate is to protect the fl oor and mechanical ventilation.
-
Page 13: Installation
ENGLISH 4.0 Installation Fig. 2C, through the fl oor and basement NB: Check that the fi replace is undamaged before installation begins. NB: The product is heavy! Ensure you have help when positioning and installing it. Make sure the product does not topple over. - Page 14 ENGLISH 4.1 Prior to installation - Jøtul F 105 Fig. 5 with long legs Fig. 4 8. Install the height adjustment screws with plastic caps placed in the bag of screws. 9. Lift the stove from the pallet. 10. Set up the stove and adjust using a cap wrench to a horizontal position with the 4 height adjustment screws.
- Page 15 ENGLISH 4.2 Preparations for Jøtul F 105 with Fig. 8 short legs Jøtul F 105 SL (with short legs) can only be installed on fl oors whose surface and structure are both made of non- fl ammable materials. This applies also if the product rests on a fl...
- Page 16 ENGLISH 4.3 Preparations for Jøtul F 105 with Fig. 11 base Fig. 10 13. Install the height adjustment screws with plastic caps placed in the bag of screws. 14. Lift the stove from the pallet. 15. Set up the stove and adjust to a horizontal position with the 4 height adjustment screws.
- Page 17 ENGLISH External air supply through the fl oor External air supply through a rear outlet Fig. 13 Fig. 15 1. Fasten the adapter (A) to the bottom side of the burn chamber using the accompanying screws (B) (pre- mounted on Jøtul F 105 B). 1.
- Page 18 ENGLISH Outside air connection through the base 4.4 Chimney and fl ue pipe • The fi replace must only be connected to a chimney and Through a rear outlet fl ue pipe approved for solid fuel fi replaces with fl ue gas temperatures as specifi...
- Page 19 ENGLISH 4.5 Fitting a fl ue pipe with a top outlet 4.6 Fitting a fl ue pipe with a rear outlet The product is supplied from the factory with the smoke outlet The product is supplied from the factory with the smoke outlet fi...
- Page 20 ENGLISH Fig. 22 Fig. 24 3. Unscrew the screws (A) and remove the smoke outlet (B) from the top outlet. 2. Fasten the smoke outlet (A) to the rear outlet using the two screws (C) from the inside of the burn chamber. 3.
- Page 21 ENGLISH 4.7 Performance check Fig. 26 Always check the control handles once the product has been assembled. These should move easily and work in a satisfactory manner. Fig. 28 7. Insert the fl ue pipe into the rear outlet. NB: It is important for the joints/fl ue pipes to be sealed completely.
-
Page 22: Daily Use
ENGLISH 5.0 Daily use Initial lighting • Open the air vent and ignition vent by pulling the handles (fi g. 28) all the way out. (Use a glove or something similar Odours when using the fi replace for the to protect your hand in case the handles are hot.). fi... -
Page 23: Maintenance
ENGLISH 5.2 Ash removal Thoroughly clean the gasket grooves, apply ceramic glue (available from your local Jøtul dealer) and press the gasket • The Jøtul F 105 R has an ash pan that makes it easy to well into place. The joint will dry quickly. remove the ash. - Page 24 ENGLISH 7.2 Replacing glass and gaskets in Fig. 30 the door Fig. 31 1. Remove the baffl e by lifting at the rear edge, and remove the two screws. Then twist it out of the burn chamber. 1. Unscrew the nuts (A) and unhook the door. Lay it carefully down onto the cardboard box.
- Page 25 ENGLISH Fig. 32 Fig. 34 1. Remove the gasket (A) placed on the inside of the door, clean the gasket groove and glue on a new gasket. 3. Remove the glass (A) carefully. Remove the gaskets (B), and clean the gasket grooves. 4.
-
Page 26: Optional Extras
ENGLISH 8.0 Optional extras 10.0 Guarantee terms Jøtul is a renowned manufacturer of high quality stoves 8.1 Kit for outside air connection and fi replaces with long service life, which has been on the market since 1853. We are so sure of our quality that we off er Outside air connection, Ø80 mm - Cat. - Page 28 Jøtul pursue a policy of constant product development. Products supplied may therefore diff er in specifi cation, colour and type of accessories from those illustrated and described in the brochure. Jøtul vise sans cesse à améliorer ses produits. C’est pourquoi, il se réserve le droit de modifi er les specifi...
Need help?
Do you have a question about the F 105 R Series and is the answer not in the manual?
Questions and answers