Table of Contents
Advertisement
Quick Links
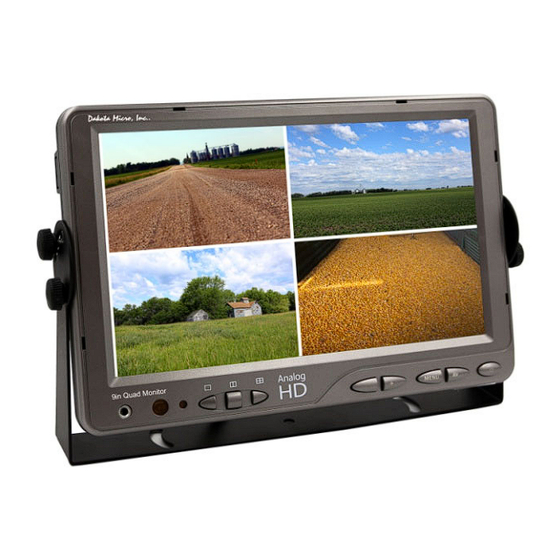
Dakota Micro, Inc. 9" AHD Quad Monitor Pre-Installed into AGCO Combines
*Kit shown without all components included in double camera kit
MORE
Rev: 10/21/20 Page 1 of 12
Users Manual
Table of Contents
III.
IV.
V.
VI.
B. Remote Operations
VII.
VIII.
C. Quad Processor
IX.
X.
XI.
XII.
XIII.
Author: CNR
2
3
3
4
4
6
7-8
9
10
11
11
12
12
Advertisement
Table of Contents

Subscribe to Our Youtube Channel
Related Manuals for Dakota Micro AG-H9QDTM


Summary of Contents for Dakota Micro AG-H9QDTM
-
Page 1: Table Of Contents
Users Manual Dakota Micro, Inc. 9” AHD Quad Monitor Pre‐Installed into AGCO Combines Table of Contents I. Standard Features 2 A. Cameras B. Monitors C. Cables II. Parts of an AgCam 3 III. Camera Mounting 3 A. Temporary Mounting B. Permanent Mounting C. Suggestions for Camera Mounting Camera Warnings 4 Cable Routing Tips & Warnings 4 *Kit shown without all components included in double camera kit ... -
Page 2: Standard Features
AG‐H9QDTM User Manual STANDARD FEATURES A. Cameras True HD Resolution (720P) Made in the USA with US and Global Components 3 Year Warranty 3 way programmability – Video System (NTSC or PAL), Video Output Type (AHD or Analog) and Mirroring 16:9 aspect ratio so image doesn’t need to be “stretched” to match monitors Improved color and clarity over standard analog video cameras Increased ability to interpret shadowed areas, allowing for a larger viewing area IP69 Anodized Aluminum camera body ‐ Waterproof, shockproof, and suitable for nearly any use. Built‐in, high quality CCD camera with high performance IR’s IR has effective range of 75’+ in complete darkness, resists blooming and back reflection Our exclusive camera body lens darkens in bright conditions and becomes completely transparent under low light conditions. This lens is also transparent of infrared light, allowing the LED’s to penetrate even when it is darkened Solid billeted aluminum camera body featured Dakota Micro’s proprietary triple o‐ring seal making the 100% waterproof even under direct high pressure spray and underwater use Triple hardened glass lens resists scratching, scuffing and static buildup Anodized camera body resists corrosion even in the harshest environments Standard camera lens features a 92° horizontal field of view. ... -
Page 3: Parts Of An Agcam
AG‐H9QDTM User Manual IMPORTANT INFORMATION REGARDING ANALOG AND AHD EQUIPMENT After the introduction of the complete line of AHD Monitors, Dakota Micro will no longer offer Analog monitors. Utilizing the pre‐installed AgCam monitor, customer cannot “mix and match” analog and AHD cameras. PARTS OF AN AGCAM (Part Number: AG‐LCP) III. CAMERA MOUNTING After camera is securely mounted, plug the camera pigtail into rear of AgCam® / EnduraCam camera. You can now plug the remaining end of the pigtail into your power/video extension cable. Make sure the extension cables are securely attached and locked (¼ turn will lock the cables together). A. Temporary Mounting For temporary mounting, it is recommended that you use the supplied 65# pull magnet. If using magnetic mount, fasten camera cable with a zip tie or other style fastener. This will act as a “safety wire” in the event your camera is knocked loose for some reason. When selecting a location, make sure that the equipment surface is clean of all foreign material and as flat as possible to ensure that the magnetic camera base will have good contact and not vibrate off. The thicker the metal base, the more securely your magnet will hold. B. Permanent Mounting For permanent mounting, it is recommended that you remove the magnet and attach the camera bracket to any solid surface with two (2) screws. C. Suggestions for Camera Mounting When determining the location for the camera, it is always best to use a solid surface to minimize vibration. Important‐ Ladders are not good mounting choices due to lack of stability. If you will be using your AgCam® for assisting in visibility for towing, you will want to position the camera so you can see the desired area and a portion of the vehicle/trailer in tow; this will give you some reference to distance. Rev: 10/21/20 Page 3 of 12 ... -
Page 4: Camera Warnings
AG‐H9QDTM User Manual CAMERA WARNINGS A. NEVER RELY ON YOUR AGCAM® AS A SAFETY FEATURE. It is up to your discretion to keep your road travel and other operations safe. Your AgCam®/ EnduraCam® will provide you with information only based on what it sees. Operation of machinery safety guidelines still apply. CABLE ROUTING TIPS & WARNINGS There are two (2) lengths of cable that come standard with our AgCam®/ EnduraCam® camera kits: One (1) 20’ and one (1) 60’. If you would like to purchase different, or additional, cable lengths, please contact your local AgCam® dealer. A. Cable routing is important; where you choose to run the cables should not interfere with the normal operation of the machine or any safety equipment. B. ALWAYS be aware of any “pinch points” or other potential hazards to the cable(s). C. Secure all cables to vehicle/equipment using cable clips, zip ties or other style fasteners. D. If you intend to use your AgCam® for short length PTO operated implement, avoid excess cable lengths, if possible. When you decide on a location, you should fix the camera to a permanent bracket using ¼ inch bolts, and attach any loose cable securely so there is no chance of entanglement in the PTO or other moving parts. E. If you use your AgCam®/ EnduraCam® to monitor a combine hopper or other combine operations, take care to remember ... -
Page 5: Remote & Monitor Operation
AG‐H9QDTM User Manual REMOTE & MONITOR OPERATION A. Quad Monitor Operations Headphone 1 Output for audio (disabled) Jack N/A Not functional 2 3 N/A Not functional 4 N/A Not functional 5 ‐ Key To decrease parameter/Up/Down 6 + Key To increase parameter/Up/Down 7 MENU Enables / Disables Menu 8 AV Key Will show cameras 1/2/3/4 each time pressed/ In MENU acts as ENTER key & Down arrow 9 POWER Turns monitor ON/OFF. Rev: 10/21/20 Page 5 of 12 Author: CNR ... - Page 6 AG‐H9QDTM User Manual NOTE: Turn the monitor on only after it has been securely mounted, supplied with power, and the cameras are connected B Remote Operations POWER ON (give it a few seconds) / OFF Switches between video channels Displays Menu Navigation Arrows Navigation Arrows Navigation Arrows Navigation Arrows Brings Channel 1/Camera 1 Full screen Brings Channel 2/Camera 2 Full screen Brings Channel 3/Camera 3 Full screen Brings Channel 4/Camera 4 Full screen Rev: 10/21/20 Page 6 of 12 Author: CNR ...
-
Page 7: Monitor Menu Settings
AG‐H9QDTM User Manual XII. MONITOR MENU SETTINGS 1. Press the MENU key on the face of monitor or remote. Use the AV button to toggle between menu sections 2. Use – and + keys on the monitor or the LEFT and RIGHT arrow keys on the remote to move through the icons at the top of the screen. 3. Use the AV key on the monitor (up and down arrows on remote) to select an item under each section. Selected menu items turn green. 4. Use – or + on the monitor (left and right arrows on remote) to change the value of the highlighted item. 5. To exit: Press the MENU button monitor (left or right arrow on remote) multiple times until the menu goes away. Allow monitor to time out (approximately 10 seconds). VIDEO BRIGHTNESS: Adjusts the brightness of the image CONTRAST: Adjusts the contrast of the image COLOR: Adjusts the color of the image SHARPNESS: Adjusts the sharpness of the image ADVANCED CONTROL: Accesses additional display controls VIDEO (ADVANCED CONTROL) ... -
Page 8: Setting Menu Language
AG‐H9QDTM User Manual SETTING MENU LANGUAGE: Adjusts menu language AHD1 TRIGGER DELAY: Turns ON/OFF Trigger Delay for Camera 1 AHD2 TRIGGER DELAY: Turns ON/OFF Trigger Delay for Camera 2 AHD3 TRIGGER DELAY: Turns ON/OFF Trigger Delay for Camera 3 AHD4 TRIGGER DELAY: Turns ON/OFF Trigger Delay for Camera 4 BLUE: A llows for selection of BLUE or BLACK screen when no camera present on video input RESET DEFAULTS: Restores all default settings PICTURE SETUP AHD1‐4 MIRROR: Turns ON/OFF individual camera mirror functions AHD1‐4 GUIDE LINE: Turns ON/OFF individual camera guide line Rev: 10/21/20 Page 8 of 12 Author: CNR ... -
Page 9: Specifications
AG‐H9QDTM User Manual XIII. SPECIFICATIONS A. Camera Image Sensor 1 / 2.7” CMOS Sony 3 Way –Video System (NTSC or PAL), Video Output Type (AHD or Programmability CVBS/Analog), Forward or Mirrored Programmable at factory level only Video System NTSC (Silver body) / PAL (Black body) – reprogrammable at factory AHD ‐ Set from factory to 1280x720 = 720P Resolution Legacy Analog (CVBS) – Set from factory to 480P Minimum Illumination 0.01 LUX @ F1.2 Environmental Rating IP69 Camera Board Lens Standard=92° FOV, Custom= 46°, 21°, and 15° FOV Electronic Shutter Auto / 1/25 (1/30) – 1/50,000 sec. Construction Anodized 6061 Aluminum Case Scanning System Progressive Operating Temp ‐45°F~150°F (‐42°C~66°C) Connector Type 5 pin Conxall/Switchcraft (AgCam/EnduraCam connector) Back Light Compensation Auto On/Off Warranty 3 Years Connections Video in (5 pin)/ 12v or AC power IN / Audio In Camera Front Glass Triple Hardened auto darkening glass Power 12v 80mA (10‐15 V Min/Max) ... -
Page 10: Warnings
AG‐H9QDTM User Manual XIV. WARNINGS When selecting a camera system from Dakota Micro, be sure to utilize the appropriate system for your use. AgCam and EnduraCam cameras are designed for high impact, moisture, vibration and a variety of other rough conditions. OverView cameras and kit components are designed for light use, low vibration and low moisture. OverView equipment is not warranted when used in situations outside of the above mentioned parameters. We always request that customers keep in mind that our less expensive OverView product line is cheaper because it does not feature the reliability and durability of our AgCam and EnduraCam lines. The warranty available on these products reflects that durability. To avoid electrical shock and maintain optimal functionality, do not open the enclosures. High voltage may be present and there are no user serviceable parts inside. All warranties will be void should any enclosures be tampered with in any way. Do not use any harsh chemical solvents, cleaning agents or corrosive detergent to clean away dirt on the surface of the screen or lens. On AgCam and EnduraCam products, the photo‐chromic camera lenses have been made impact‐resistant and have been drop‐ ball tested according to Sec. 3.84,21 CRF BUT ARE NOT UNBREAKABLE. Because they have been hardened chemically, they show no stress pattern. Inspect your lenses frequently. Chipped or scratched surfaces will reduce protection. Such lenses should be replaced only by the manufacturer. Power to cameras is not interrupted by turning off monitor; 12v power source must be terminated when not in use to avoid battery drain. To avoid this problem be sure when hard wiring a unit, use a 5 amp fused circuit. Do not use your Dakota Micro camera system for anything other than legal surveillance and observation uses. Dakota Micro, Inc. is not liable for any illegal or nefarious usage. PRODUCT WARRANTY/REPAIR PROCESS 1. For Technical Support call 1 701‐538‐4403 OR email techsupport@dakotamicro.com 2. Technician will assist in troubleshooting product malfunction. 3. If product malfunction cannot be remedied and a repair is deemed necessary, Technician will issue a Repair Authorization (RA) number. IMPORTANT NOTE: The Technician will note on the RA form if the repair APPEARS to be a warranty or non‐warranty issue based on customer description of the issues at hand. No final determination can be made until inspection and testing of the equipment is completed at the factory. 4. -
Page 11: Consumer Limited Warranty
AG‐H9QDTM User Manual XVI. CONSUMER LIMITED WARRANTY LIMITED WARRANTY Subject to the disclaimer, limitations and other directions stated hereafter, Dakota Micro, Inc. warrants that the Product will be free from defects in material and workmanship for periods as stated hereafter from the date of original purchase. THIS WARRANTY IS EXPRESSLY MADE IN LIEU OF ANY AND ALL OTHER WARRANTIES, EXPRESS OR IMPLIED, INCLUDING THE IMPLIED WARRANTIES OF MERCHANTABILITY OR FITNESS. THE EXCLUSIVE REMEDY OF THE BUYER IS LIMITED TO REPAIR OR REPLACEMENT OF THE PRODUCT. EXCEPT AS STATED IN THIS WARRANTY, DAKOTA MICRO SHALL NOT BE LIABLE FOR ANY LOSS, INCONVENIENCE, OR DAMAGE, INCLUDING DIRECT, SPECIAL, INCIDENTAL, OR CONSEQUENTIAL DAMAGES, RESULTING FROM THE USE OR INABILITY TO USE THE PRODUCT, WHETHER RESULTING FROM BREACH OF WARRANTY, NEGLIGENCE, STRICT LIABILITY OF ANY OTHER LEGAL THEORY. Any oral statements or representations made by anyone which are contrary to or at variance with the terms stated in this LIMITED WARRANTY are void. Dakota Micro will, at its option, either repair the defect or replace the defective Product or part thereof with a new or remanufactured equivalent at no charge to the purchaser for parts or labor for the period of three (3) years for AgCam® /EnduraCam® and InnoPro® cameras; two (2) years for AgCam®/ EnduraCam® monitors, and Wireless components; Twelve Months (12) for all Overview Cameras & Monitors, cables and all other accessories. The Dakota Micro limited warranty periods outlined above apply throughout the United States and Canada only. A one (1) year maximum limited warranty for all Products applies to all other geographic locations unless otherwise stated in writing by Dakota Micro. This limited warranty does not apply to any issues connected with appearance that have no relation to the performance of the Product nor to any Product the exterior of which has been damaged or defaced, which has been subjected to improper voltage or other misuse, abnormal service or handling, or which has been altered or modified in design or construction. In order to enforce the rights under this limited warranty, the purchaser should follow the steps set forth in the complete Dakota Micro “Warranty & Repair Policy” listed on page 11 ‐ section XVI , and provide proof of purchase to Dakota Micro. Neither the sales personnel of Dakota Micro nor any dealer or any other person is authorized to make any warranties other than those described herein, or to extend the duration of any warranties beyond the time periods described herein. The warranties described herein shall be the sole and exclusive warranties and remedies provided by Dakota Micro. Correction of defects, in the manner and for the period of time described herein, shall constitute complete fulfillment of all liabilities and responsibilities of Dakota Micro to the purchaser with respect to the Product, and shall constitute full satisfaction of all claims. In no event shall Dakota Micro be liable or in any way responsible for any damages or defects in the Product which were caused by repairs or attempted repairs performed by anyone other than Dakota Micro. Some states do not allow the limitation or exclusion of incidental or consequential damages, so said limitation may not apply to you. Any action at law, suit in equity, or other judicial proceeding for the enforcement of any right provided for herein or otherwise, or with respect to any claim that a purchaser may have against Dakota Micro shall be instituted only in the Courts of the State of North Dakota, either in the state district court located in Wahpeton, North Dakota or in Federal District Court location in Fargo, North ... -
Page 12: Disclaimer
AG‐H9QDTM User Manual XVII. DISCLAIMER Dakota Micro Inc. products, specifications, pricing and programs are subject to change without prior notice. Dakota Micro Inc. reserves the right to make design changes at any time without obligation to retroactively install them on previously sold units. XVIII. CONTACT US 8659 148 ½ Ave. SE. Cayuga, ND 58013 Management System Registered to ISO 9001 www.dakotamicro.com Rev: 10/21/20 Page 12 of 12 Author: CNR ...
Need help?
Do you have a question about the AG-H9QDTM and is the answer not in the manual?
Questions and answers