Table of Contents
Advertisement
Quick Links
Dakota Micro Part Numbers(s): AGCO
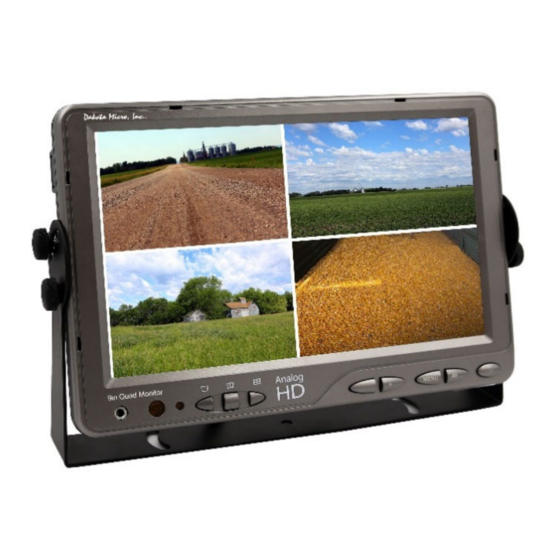
9" AHD Quad Monitor - DM-H9Q
9" AHD DVR Quad Monitor - DM-H9QD
Always read the manual prior to operating this equipment. Also, please follow all safety signs and precautions.
Rev: 10/21/20
User's Manual
AgCam® OR EnduraCam® 9" AHD Quad or Quad DVR Monitor Kit
Thank you for purchasing equipment from Dakota Micro, Inc.
See the Dakota Micro, Inc. website for installation training videos at www.dakotamicro.com.
Page 1 of 12
9" AHD Quad Monitor - AG-H9Q
9" AHD DVR Quad Monitor - AG-H9QD
I.
II.
III.
IV.
V.
VI.
VII.
VIII.
A.
IX.
X.
XI.
XII.
XIII.
XIV.
XV.
H9Q/H9QD User Manual
Part Number(s):
Table of Contents
Monitor Operations
Author: CNR
2
3
3
3
4
4
4
5-6
7-9
10
10
11
12
12
12
Advertisement
Table of Contents

Related Manuals for Dakota Micro H9Q


Summary of Contents for Dakota Micro H9Q
-
Page 1: Table Of Contents
H9Q/H9QD User Manual User’s Manual AgCam® OR EnduraCam® 9” AHD Quad or Quad DVR Monitor Kit Dakota Micro Part Numbers(s): AGCO Part Number(s): 9” AHD Quad Monitor – DM‐H9Q 9“ AHD Quad Monitor – AG‐H9Q 9” AHD DVR Quad Monitor – DM‐H9QD 9” AHD DVR Quad Monitor – AG‐H9QD Table of Contents Included Monitor 2 Standard Features 3 III. Important Information About AHD & Analog 3 Monitor Installation & Mounting 3 Installation 4 Power 4 ... -
Page 2: Included Monitor
H9Q/H9QD User Manual I. INCLUDED MONITOR KIT COMPONENTS (PER PN: DM‐H9Q/AG‐H9Q, DM‐H9QD/AG‐H9QD) Description Picture Dakota Micro, Inc. 9” AHD Quad Monitor Monitor Wire Harness PN: DM‐H9QMWH Monitor Remote PN: DM‐H9QRMT (styles vary by kit & battery is included) A/C Power Wall Plug PN: DMAC‐PA3 (styles vary by kit) Monitor U‐bracket with 4 Wing Bolts PN: DMAC‐9M Bracket Monitor Sun Shield 12v Cigarette Lighter Power Adaptor PN: DMAC‐12v (styles vary by kit) ... -
Page 3: Standard Features
H9Q/H9QD User Manual The AgCam® and EnduraCam® camera lines are a durable, reliable surveillance system with the innovative ability to be quickly moved from one application to the next. STANDARD FEATURES Feature the latest in Analog HD technology View 1, 2, 3 or 4 cameras at the same time LED backlit Compatible with NTSC or PAL cameras, not simultaneously Advanced LCD technology allows you to clearly see your image from any angle Mirror the view of any of your cameras for use as a backup camera 2 Year Warranty 16:9 aspect ratio 4 Camera Inputs Records up to 4 cameras simultaneously or independently onto SD card for easy transfer of files Available in 7in or 9in size Event triggers for each camera allow for triggered events to bring your camera to full view (IE: putting the vehicle in reverse) Color, brightness, contrast and volume controls that allow compensation for use in different environments Remote control, sun shield, and metal U‐bracket monitor stand included III. IMPORTANT INFORMATION REGARDING ANALOG AND AHD EQUIPMENT ... -
Page 4: Installation
H9Q/H9QD User Manual NOTE: Turn the monitor on only after it has been securely mounted, supplied with power, and the cameras are connected INSTALLATION A. Monitor Wire Harness Details 1. Input to Monitor 2. AV1‐4 Event Trigger Wires 3. Power Input 4. RCA‐Video Output 5. AV1 – Audio/Video Input 6. AV2 – Audio/Video Input 7. AV3 – Audio/Video Input 8. AV4 – Video Input POWER A. Supplying Power with 12v Power Adaptor 1. Attach the power input connector (3 above) to your included 12v cigarette lighter power adaptor. 2. Plug cigarette lighter adaptor into 12v power source. ... -
Page 5: Remote & Monitor Operations
H9Q/H9QD User Manual VIII. MONITOR & REMOTE OPERATION B. Monitor Operations 1 Headphone Jack Output for audio (disabled) 2 Full Screen Will show cameras 1/2/3/4 each time pressed. Will show cameras 1/2 and cameras 3/4 each time 3 Duplex Screen pressed. First press will display all four (4) cameras connected. ... -
Page 6: Remote Operations
H9Q/H9QD User Manual C. Remote Operations DVR Remote POWER ON (few POWER ON (few seconds delay)/OFF seconds delay)/OFF Switches between Switches between video channels video channels Navigation Arrows Navigation Arrows Navigation Arrows Navigation Arrows Navigation Arrows Navigation Arrows... -
Page 7: Menu Settings
H9Q/H9QD User Manual MENU SETTINGS A. Monitor Menu Settings 1. Press the MENU key on the face of monitor or remote. 2. Use the AV key on the monitor (up and down arrows on remote) to select an item under each section. Selected menu items turn green. 3. Use – or + on the monitor (left and right arrows on remote) to change the value of the highlighted item. 4. To exit: Press the MENU button monitor (left or right arrow on remote) multiple times until the menu goes away. Allow monitor to time out (approximately 10 seconds). VIDEO BRIGHTNESS: Adjusts the brightness of the image CONTRAST: Adjusts the contrast of the image COLOR: Adjusts the color of the image SHARPNESS: Adjusts the sharpness of the image ADVANCED CONTROL: Accesses additional display controls VIDEO (ADVANCED CONTROL) NOISE REDUCTION: When utilizing microphone, allows for noise ... - Page 8 H9Q/H9QD User Manual SETTING MENU LANGUAGE: Adjusts menu language AHD1 TRIGGER DELAY: Turns ON/OFF Trigger Delay for Camera 1 AHD2 TRIGGER DELAY: Turns ON/OFF Trigger Delay for Camera 2 AHD3 TRIGGER DELAY: Turns ON/OFF Trigger Delay for Camera 3 AHD4 TRIGGER DELAY: Turns ON/OFF Trigger Delay for Camera 4 BLUE: A llows for selection of BLUE or BLACK screen when no camera present on video input RESET DEFAULTS: Restores all default settings PICTURE SETUP AHD1‐4 MIRROR: Turns ON/OFF individual camera mirror functions AHD1‐4 GUIDE LINE: Turns ON/OFF individual camera guide line B. DVR Menu Settings 1. Press the ENT key on the remote. Use the U/D/L/R button to Select the correct User and Enter the Password ...
- Page 9 H9Q/H9QD User Manual REC SET (RECORD MENU) REC MODE: N/A FILESIZE: Adjust the length of the recording in the file. (5Min, 10Min,15Min, 20Min, 30Min, 45Min) Audio: Record Audio On/Off (Separate audio recording device required) REC CHN CFG: Access Record Channel Configuration Menu Enable: Channel Recording On/Off (Is ON by Default) Resoluti: Select the record resolution (D1, CIF, 720) FrmRate: Frame Rate (FPS) ‐ Default BitRate: ...
-
Page 10: Specifications
H9Q/H9QD User Manual X. SPECIFICATIONS B. LCD Monitor Screen Size 16:9 digital panel Overall Size 9.25in(L)x 6.1in(H)x1.44in(D) 235mm(L)X155mm(H)X36.5mm(D) Weight 30.4oz (862g) Power Input DC 12v max Color System NTSC/PAL auto switch Operating Temp. ‐30°F~130°F (‐34°C~+54°C) 2 Brightness 350cd/m Resolution (HxV) 1024(H)x600(V) Contrast 500:1 Viewing Angle L/R: 70° Up: 50° Down: 70° Operating Voltage Min. 12v (Check monitor label for specific voltage range) Lighting Source LED Backlit Environmental Rating IP50 Video Output Format Full/Quad/split/ Auto Switch Video Output Port RCAx1 Video Out ‐ Analog (CVBS) ONLY Video Input Port X4 AHD video input channels DVR Monitor ONLY ... -
Page 11: Product Warranty/Repair Process
H9Q/H9QD User Manual XII. PRODUCT WARRANTY/REPAIR PROCESS 1. For Technical Support call 1 701‐538‐4403 OR email techsupport@dakotamicro.com 2. Technician will assist in troubleshooting product malfunction. 3. If product malfunction cannot be remedied and a repair is deemed necessary, Technician will issue a Repair Authorization (RA) number. IMPORTANT NOTE: The Technician will note on the RA form if the repair APPEARS to be a warranty or non‐warranty issue based on customer description of the issues at hand. No final determination can be made until inspection and testing of the equipment is completed at the factory. 4. To ensure fast and effective repairs, customer is required to send: Dakota Micro Product that Technician has requested/deemed necessary in the proper diagnosis and repair of malfunction. This may include some or all components of the kit. Original/Copy of purchase receipt. For serialized items ONLY, If a copy of the original purchase receipt cannot be provided, then DAKOTA MICRO will use the product manufacture date. Customer information, including return address & phone number. If the phone number is not included, the customer will be sent a letter requesting the needed information. RA Number provided by Dakota Micro Technical Support Shipping and associated costs to ship product to DM factory to be borne by the customer unless otherwise specified. 5. Customer should mail product to: Dakota Micro, Inc. RA # XXXXX 8659 148 ½ Ave. SE Cayuga, ND 58013 6. Upon receipt and evaluation of product at Dakota Micro Factory, it will be established if the repair is warranty or non‐warranty. ... -
Page 12: Consumer Limited Warranty
H9Q/H9QD User Manual XIII. CONSUMER LIMITED WARRANTY LIMITED WARRANTY Subject to the disclaimer, limitations and other directions stated hereafter, Dakota Micro, Inc. warrants that the Product will be free from defects in material and workmanship for periods as stated hereafter from the date of original purchase. THIS WARRANTY IS EXPRESSLY MADE IN LIEU OF ANY AND ALL OTHER WARRANTIES, EXPRESS OR IMPLIED, INCLUDING THE IMPLIED WARRANTIES OF MERCHANTABILITY OR FITNESS. THE EXCLUSIVE REMEDY OF THE BUYER IS LIMITED TO REPAIR OR REPLACEMENT OF THE PRODUCT. EXCEPT AS STATED IN THIS WARRANTY, DAKOTA MICRO SHALL NOT BE LIABLE FOR ANY LOSS, INCONVENIENCE, OR DAMAGE, INCLUDING DIRECT, SPECIAL, INCIDENTAL, OR CONSEQUENTIAL DAMAGES, RESULTING FROM THE USE OR INABILITY TO USE THE PRODUCT, WHETHER RESULTING FROM BREACH OF WARRANTY, NEGLIGENCE, STRICT LIABILITY OF ANY OTHER LEGAL THEORY. Any oral statements or representations made by anyone which are contrary to or at variance with the terms stated in this LIMITED WARRANTY are void. Dakota Micro will, at its option, either repair the defect or replace the defective Product or part thereof with a new or remanufactured equivalent at no charge to the purchaser for parts or labor for the period of three (3) years for AgCam® /EnduraCam® and InnoPro® cameras; two (2) years for AgCam®/ EnduraCam® monitors, and Wireless components; Twelve Months (12) for all Overview Cameras & Monitors, cables and all other accessories. The Dakota Micro limited warranty periods outlined above apply throughout the United States and Canada only. A one (1) year maximum limited warranty for all Products applies to all other geographic locations unless otherwise stated in writing by Dakota Micro. This limited warranty does not apply to any issues connected with appearance that have no relation to the performance of the Product nor to any Product the exterior of which has been damaged or defaced, which has been subjected to improper voltage or other misuse, abnormal service or handling, or which has been altered or modified in design or construction. In order to enforce the rights under this limited warranty, the purchaser should follow the steps set forth in the complete Dakota Micro “Warranty & Repair Policy” listed on page 11 ‐ section XVI , and provide proof of purchase to Dakota Micro. Neither the sales personnel of Dakota Micro nor any dealer or any other person is authorized to make any warranties other than those described herein, or to extend the duration of any warranties beyond the time periods described herein. The warranties described herein shall be the sole and exclusive warranties and remedies provided by Dakota Micro. Correction of defects, in the manner and for the period of time described herein, shall constitute complete fulfillment of all liabilities and responsibilities of Dakota Micro to the purchaser with respect to the Product, and shall constitute full satisfaction of all claims. In no event shall Dakota Micro be liable or in any way responsible for any damages or defects in the Product which were caused by repairs or attempted repairs performed by anyone other than Dakota Micro. Some states do not allow the limitation or exclusion of incidental or consequential damages, so said limitation may not apply to you. Any action at law, suit in equity, or other judicial proceeding for the enforcement of any right provided for herein or otherwise, or with respect to any claim that a purchaser may have against Dakota Micro shall be instituted only in the Courts of the State of North Dakota, either in the state district court located in Wahpeton, North Dakota or in Federal District Court location in Fargo, North Dakota. Without regard to conflicts of law principles, the laws of the state of North Dakota shall govern the interpretation and enforcement of the terms of this Limited Warranty and all aspects of the relationship between Dakota Micro and the purchaser. ...
Need help?
Do you have a question about the H9Q and is the answer not in the manual?
Questions and answers