Table of Contents
Advertisement
Quick Links
Advertisement
Table of Contents

Related Manuals for ComMarker OMNI 1


Summary of Contents for ComMarker OMNI 1
-
Page 2: Table Of Contents
Contents 01 Safety Warning......................2 02 Product Structure......................3 03 List of Items........................4 04 Parameters........................5 05 Assembly of Machine....................6 06 Turn On the laser......................7 07 Operation Instructions..................8 -13 08 Lightburn Operation Tutorial................14-16 09 FAQ........................17-18 10 Maintenance.......................19... -
Page 3: Safety Warning
Safety Warning Before using the laser engraving machine, please read this safety guide carefully. ■ Do not leave the device unattended while in operation. Ensure it is functioning properly at all times. ■ Check the machine for damage every time before you use it. Do not operate it in any way when any damage or defect is found. -
Page 4: Product Structure
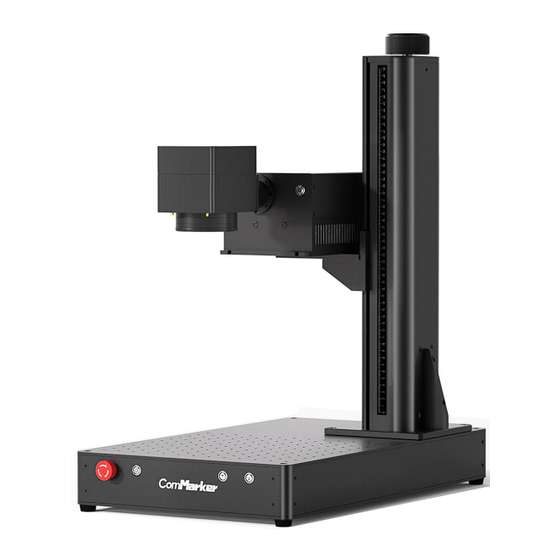
Product Structure... -
Page 5: List Of Items
List of items... -
Page 6: Parameters
Parameters Omni 1 Product Name 110-120V 60Hz Voltage 70*70mm /150*150mm Field Lens Specification 0.001mm Marking Accuracy 0-10000 mm/s Max. Marking Speed Rated Power 355nm Wavelength Laser 10,000 hr. Expected Service Life Laser Type Air Cooling Cooling Type 35 x 65 x 72cm... -
Page 7: Assembly Of Machine
Assembly of Machine 2. Fasten the supporting pole with four screws. 1. Place the parts on the table. 4. Connect the external signal and 3. Fix the laser head on the shelf 5. Connect the cable of galvanometer 6. Connect the wire cable on the case 8. -
Page 8: Turn On The Laser
Turn on the laser Connect the Power cable and switch on the power, the laser's switch indicator light will alternately flash blue and green. After waiting for about 1-2 minutes, the indicator will turn solid green, indicating that the laser is ready and can start working Note :... -
Page 9: Operation Instructions
Operation Instructions 1. Install the driver Notes : *It is recommended to copy and paste the files of the U disk to the computer desktop or other computer disks. 1.Right-click "this PC", click "Manage" 2.Click "Device Manager", find “USBLMCV2” in Other devices 3.Right-click“USBLMCV4”... - Page 10 5. Find the corresponding file in the USB drive, click 6.Click "Install" “ OK ” 7. Click “finish” if it is successful 8.it will display "BJJCZ Device" in Device Manager Noted: If the driver installation is unsuccessful, please refer to FAQ 1.
- Page 11 2. Open the software Open the USB folder omni 1; open the "software15” folder. Open the software “EZCAD2”. You can enter "text", "picture" or "vector diagram" as shown in the figure below. It is recommended to select the text to test first.
- Page 12 4. Adjust the focus Press up or down button to lift or lower the laser head until the 2 red light point overlap, which is the best focal point. The measuring focal length of this machine is ___________ mm (70x70) and _________ mm (150x150), and the measuring distance is the length from the middle line of the Galvo to the surface of the engraving material.
- Page 13 3.Turn on the machine, connect the computer with 4.Import the “TEXT” for testing , select the default the machine parameters, and tick the “continuous part” button. 5.Press “red light” to ensure it’ll mark on the test 6. Meanwhile, lift or lower the laser head and material.
- Page 14 5. Marking test Place the test engraving material on the machine. Click "Red Light (F1)", the area shown by the red light is the marking area. Choose the parameters according to the following picture. Click "Mark (F2)" to start marking. Note: “Speed”, “Frequency”...
-
Page 15: Lightburn Operation Tutorial
2.Find downloaded file Lightburn V1.7.01, and https://lightburnsoftware.com/pages/download-trial drag Lightburn icon to the Applications folder 3.Copy the folder “Omni 1” from the USB to the 4. A device window will pop out if the software is desktop open the first time, click “Create Manually”, Select “JCZFiber”... - Page 16 5.Import EZCAD Config and select the folder 6.Select folder “EZCAD for Omni 1”---->“ Plug”, and choose “markcfg7” and click “next” 7.You can see the following window, UV/YAG 8. Change the name if necessary, and input the click “next” right X and Y Axis Length according to the lens.
- Page 17 11. Go to “Basic Settings” from “Device setting” 12. Change the setting of Freq “Min 1”, “Max 40”. button, click “Load COR file”, Select “omni 1”, Choose Switch on “Galvo 2”. Set the Laser Type UV, and it file “JCZ15.cor”, Click “OK”...
-
Page 18: Faq
*It may be a computer port problem or a computer board connection problem, please try with another computer Q2: The USB flash drive is damaged and cannot be opened *Please visit Commarker's official website to download the omni driver and software. *Contact after-sales staff or email us Q3: The red light preview functions, but there is no mark or the marks are very light *Please adjust the focal length;... - Page 19 Q7: The preview and the shape of the mark is deformed *Import the calibration file, please refer to step 3 of the operating instructions *If it still doesn't work, please contact after-sales staff or email us Q8: Nothing displays on canvas board when importing text or picture *Please click the practical center button, the picture and text are in the center of the canvas Note: This manual will be continuously updated.
-
Page 20: Maintenance
Maintenance 1. Maintenance Overview Unless otherwise specified, perform adjustment and maintenance of this device only when the power is turned off and the power supply has been disconnected. Only trained and skilled professionals should modify or disassemble this device. 2. Regular Maintenance Procedures ... -
Page 21: Customer Service
Customer Service: For more video and supportive materials,please visit our official website at: www.commarker.com For Laser Engraver technical support and service please email: support@commarker.com Manufacturer: ComMarker Industrial Co., Limited...
Need help?
Do you have a question about the OMNI 1 and is the answer not in the manual?
Questions and answers