Stihl BG 50 Service Procedure
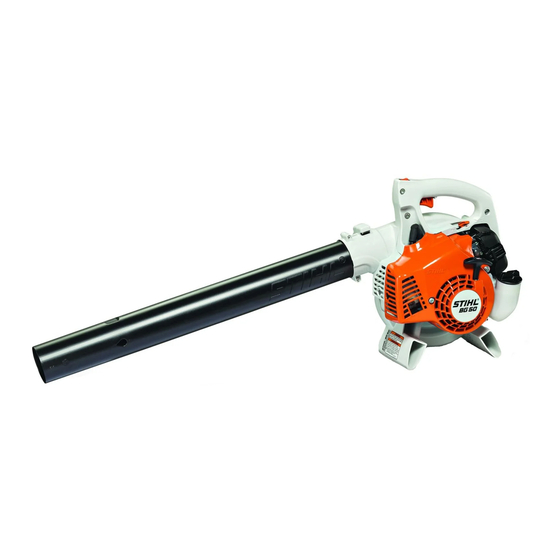
Handheld blower
Hide thumbs
Also See for BG 50:
- User manual ,
- Instruction manual (64 pages) ,
- Instruction manual (24 pages)

Subscribe to Our Youtube Channel
Related Manuals for Stihl BG 50


Summary of Contents for Stihl BG 50
- Page 1 Basic Service Procedures and Principles of Operation for the BG 50 Handheld Blower © STIHL Inc., Virginia Beach, VA 2016...
- Page 2 Introduction The BG 50 is powered by a proven STIHL 2-cycle engine The unit is lightweight and easy to operate © STIHL Inc., Virginia Beach, VA 2016...
-
Page 3: Specifications
Air Volume, Round Tip 700 m 412 cfm Sound Pressure Rating* 70 dB(A) Engine Idle Speed 2500 RPM Maximum Permissible Engine Speed with Nozzle 6800 RPM * As measured per ANSI B175.2 © STIHL Inc., Virginia Beach, VA 2016... - Page 4 Piston comes up and compresses the air-fuel mix Spark plug ignites the air-fuel mix and expanding gases push the piston down on the power stroke © STIHL Inc., Virginia Beach, VA 2016...
- Page 5 Two-Stroke Piston Port © STIHL Inc., Virginia Beach, VA 2016...
- Page 6 Reading and becoming familiar with the instruction manual is the first step to learning about the blower, its features and how to operate it safely Starting, general operation and maintenance is explained © STIHL Inc., Virginia Beach, VA 2016...
- Page 7 Remove the unit from the box and verify that all the items are present for set up of the unit Two-piece tube Instruction Manual The Instruction Manual has details on assembly and initial start-up procedures © STIHL Inc., Virginia Beach, VA 2016...
- Page 8 New Unit Pre-Delivery Inspection (PDI) To assemble, push the blower tube (1) with lug (2) into the fan housing stub (3) and rotate clockwise to lock into position © STIHL Inc., Virginia Beach, VA 2016...
- Page 9 The stop switch has two positions I, or run position and O, or off position to stop the engine WARNING! When service work is performed, always disconnect the spark plug terminal! Remove the spark plug terminal with a twisting motion © STIHL Inc., Virginia Beach, VA 2016...
- Page 10 Starting the BG 50 Fill the tank with 89 octane brand name fuel with STIHL two-stroke oil mixed at a 50:1 ratio Pump the purge primer bulb until it fills with fuel, at least five times Move the stop switch to the I, or run position ...
- Page 11 Warm Starting the BG 50 If the engine has been running and then is stopped for a short time, always set the choke control to the Half-choke position middle (half-choke) position Pull the trigger and hold it there ...
- Page 12 © STIHL Inc., Virginia Beach, VA 2016...
- Page 13 DG Screws STIHL uses these type of fasteners in manufacturing because they cut their own threads the first time they are used Notice that the ones holding into plastic have a different pitch and profile than the ones that hold into metal...
- Page 14 Visually look the unit over for damage, missing items, loose fasteners, or anything else that is obvious Damaged shroud may be a safety hazard for the operator Operated without an air filter or cover © STIHL Inc., Virginia Beach, VA 2016...
-
Page 15: Warning Labels
Verify that labels are present and readable, replace as needed If this label is damaged or worn away, a universal replacement label is available from STIHL Yellow Power Tool Label: 0000 967 3541 © STIHL Inc., Virginia Beach, VA 2016... -
Page 16: Cutting Attachment
3. Cutting Attachment 4. Belt Tension For a handheld blower these do not apply so just draw a line through them and continue to the next item © STIHL Inc., Virginia Beach, VA 2016... -
Page 17: Operator Controls
Verify the stop switch can be moved to the O position and to the I position Move the choke lever to the full closed position and then move back to the full open position © STIHL Inc., Virginia Beach, VA 2016... - Page 18 The BG 50 does not, but the BG 86 does have an anti-vibe handle on it so if that were the unit being evaluated the spring mounts should be inspected ©...
- Page 19 7. Inspect Starter System Inspect rope, handle, and eyelet for wear or damage Pull the rope to its full extended length and be sure it is not about to break at the very end © STIHL Inc., Virginia Beach, VA 2016...
-
Page 20: Inspect Air Filter
8. Inspect Air Filter Squeeze the tabs to release the cover Swing the filter cover open and remove Gently pry out the filter for inspection © STIHL Inc., Virginia Beach, VA 2016... - Page 21 Dirty operating conditions require filter maintenance Verify that the cover, filter or filter housing are not damaged allowing dirt to leak in around the filter © STIHL Inc., Virginia Beach, VA 2016...
- Page 22 Some models may have a limiter cap on the L mixture screw also, such as pictured here with the BG 50 At this point just verify that the H & L mixture screw caps are in place and seated ...
- Page 23 Removal of this style of limiter cap is done with the 5910 890 4501 tool Anytime a cap is removed, always fit a new one © STIHL Inc., Virginia Beach, VA 2016...
-
Page 24: Hose Removal
The 5910 890 4501 tool also works well to remove fuel, impulse, or vent hoses Use a side to side rocking motion while pushing against the hose to walk it off of the fitting © STIHL Inc., Virginia Beach, VA 2016... - Page 25 Use a twisting motion to remove the spark plug connection and be careful not to pull the clip out of the high tension lead Inspect it for damage, hardness or cracks © STIHL Inc., Virginia Beach, VA 2016...
-
Page 26: Spark Test
If no spark is present try again with a new plug A fouled or defective spark plug may not show spark on the tester even if the ignition system is OK © STIHL Inc., Virginia Beach, VA 2016... - Page 27 the stop switch in the off position and pull the rope through and verify that no spark is present This verifies that the stop switch and connecting wiring is in order © STIHL Inc., Virginia Beach, VA 2016...
-
Page 28: Spark Plug
13. Spark Plug Remove the plug and verify that is the correct plug For a BG 50 there are two approved spark plugs, NGK BPMR7A or Bosch WSR6F Normal tan color, normal electrode wear due to high run time. - Page 29 Replace if damaged Remove the muffler and inspect it and the exhaust gasket for damage and verify that the engine has not been running with the muffler bolts loose © STIHL Inc., Virginia Beach, VA 2016...
- Page 30 Try to observe if the rings are moving slightly when the piston is moved up and down, indicating that they are free in the lands Inspect the intake side of the cylinder wall for wear or damage © STIHL Inc., Virginia Beach, VA 2016...
-
Page 31: Cooling System
It is not absolutely necessary to measure this with a gauge, just be sure the flywheel is not rubbing on the module and that the gap does not look excessively wide © STIHL Inc., Virginia Beach, VA 2016... - Page 32 Pour the fuel out in a pan and see if there is trash or debris, or any evidence of other contaminants such as water in the fuel © STIHL Inc., Virginia Beach, VA 2016...
-
Page 33: Fuel Filter
The filter body screen should be clear and in good condition, and the element may have oil staining but should not be dark or fouled or have any kind of coating on it © STIHL Inc., Virginia Beach, VA 2016... - Page 34 Pressure Vacuum Tester 0000 850 1300 Pump With the knurled ring to the right, the gauge indicates pressure With the knurled ring to the left, the gauge indicates vacuum © STIHL Inc., Virginia Beach, VA 2016...
- Page 35 OK until the fuel level dropped to the point where the air in the tank would enter the hose, leading to lean running even though the tank still had fuel in it © STIHL Inc., Virginia Beach, VA 2016...
- Page 36 Apply 3 to 4 pounds of pressure and it must hold steady If it leaks down at all use soapy water in a spray bottle to locate where the leak is © STIHL Inc., Virginia Beach, VA 2016...
- Page 37 23. Vacuum Test Tank Vent The tank vent on the BG 50 is a one- way check valve that will not let fuel leak out under pressure, but will allow air into the tank as the fuel level goes...
- Page 38 Remove the carburetor, which will require removal of the trigger cover to undo the throttle link from the trigger Pay attention to how the linkage hooks up and how the stop circuit wires are routed © STIHL Inc., Virginia Beach, VA 2016...
- Page 39 Rotate the engine by turning the flywheel to get a good look at the intake side of the piston; use a light if necessary © STIHL Inc., Virginia Beach, VA 2016...
- Page 40 For the BG 50 the impulse signal comes out through the flange here: © STIHL Inc., Virginia Beach, VA 2016...
- Page 41 25. Impulse Signal Present Place a small amount of grease over the impulse port on the flange, just enough to cover it © STIHL Inc., Virginia Beach, VA 2016...
- Page 42 Now watch the port carefully and spin the flywheel back and forth by hand and the grease should be either drawn in or pushed out, verifying that there is an impulse signal from the crankcase to the carb © STIHL Inc., Virginia Beach, VA 2016...
- Page 43 Block off the exhaust port by starting the muffler screws in place and slipping a rubber block off plate in between the muffler and the cylinder, then snug up the screws making sure the rubber plate is covering the ex port © STIHL Inc., Virginia Beach, VA 2016...
- Page 44 The Service Manual for each model describes how to do this test and gives the part number for the adapter For the BG 50 the part number is 5910 850 4200 Be sure the gasket is in good condition and in place ...
- Page 45 Switch the tester to the pressure mode and pump 0.5 bar of pressure into the engine and it should hold steady for at least 20 seconds © STIHL Inc., Virginia Beach, VA 2016...
- Page 46 If an engine leaks under vacuum but holds under pressure it is most likely a crankshaft seal © STIHL Inc., Virginia Beach, VA 2016...
- Page 47 27. Crankshaft and Bearing Condition See if the flywheel moves in and out or up and down There should not be any loose play in the crankshaft bearings on a BG 50 © STIHL Inc., Virginia Beach, VA 2016...
- Page 48 Verify that the throttle shaft does not have any excessive side to side play Open and close the butterfly and it should open smoothly Pressure test the carb no higher than 10 PSI and it should hold steady © STIHL Inc., Virginia Beach, VA 2016...
- Page 49 29. Other Observations; Final Running This is where any other observations about the unit not specifically covered by one of the numbered items on the STIHL Engine Check can be recorded Once repairs have been made, the last part of the STIHL Engine Check...
Need help?
Do you have a question about the BG 50 and is the answer not in the manual?
Questions and answers