Advertisement
Quick Links
Thank You
Thanks for purchasing Nomad from us! We appreciate your business and your
trust. Please take a moment to familiarize yourself with the product and this
manual before installation. If you have any questions, at any time, don't hesitate
to call us at 888-525-7300. You can also find a full list of our product manuals at:
https://www.apgsensors.com/resources/product-resources/user-manuals.
Table of Contents
1.
Description
4.
Dimensions
2.
How to Read Your
5.
Installation
Label
6.
Wiring Information
3.
Warranty
Description
1
The Nomad Remote Monitor is capable of monitoring RS485 ModbusRTU
sensors almost anywhere on earth via satellite. It has Wifi configurability and a
very accurate GPS. It has been tested and found to comply with the limits for a
Class B digital device, pursuant to part 15 of the FCC Rules.
2
How To Read Your Label
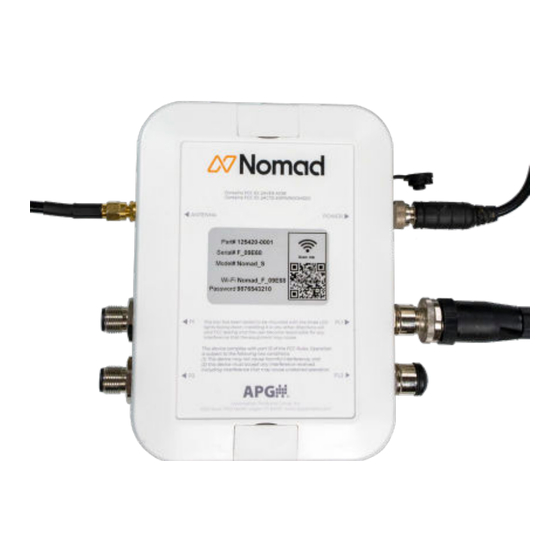
Every APG instrument comes with a label that includes the instrument's model
number, part number, and serial number. Please ensure that the part number on
your label match your order.
The Nomad label also contains the Wifi name and password, and a QR code to
easily connect to the Wifi for initial setup.
3
Warranty
This product is covered by APG's warranty to be free from defects in material
and workmanship under normal use and service of the product for 24 months.
For a full explanation of our Warranty, please visit:
www.apgsensors.com/resources/warranty-certifications/warranty-returns/.
Contact Technical Support to receive a Return Material Authorization before
shipping your product back.
If your Nomad needs repair, contact us via email, phone, or on-line chat on our
website. We will issue you an RMA number with instructions. You can also find the
form on our website by clicking "RMA" in the web footer, or go to
https://share.hsforms.com/1rPTIAWbsTMiD0XD_SkBs6g2rio0.
Phone: 888-525-7300
•
Email: sales@apgsensors.com
•
Online chat at www.apgsensors.com
•
Please have your part number and serial number available.
4
Dimensions
13.5" x 14.5"
Solar Panel:
6" x 4.5" x 1.7"
Nomad Box:
7.
Wifi Configuration
8.
General Care
9.
Connect to Explorer
13.5"
14.5"
6"
1.7"
4.5"
Nomad
NOMAD
Installation Guide
R
Automation Products Group, Inc.
1025 W 1700 N Logan, UT 84321
www.apgsensors.com | phone: 888-525-7300 | email: sales@apgsensors.com
5
Installation
Mount your solar panel in an area with an unobstructed view of the sky,
Step 1.
at least 3 ft off the ground. Orient the solar panel to capture as much
light as possible (ie. facing south in the northern hemisphere).
Step 2.
Secure the Nomad box using the hose clamps or other mounting
hardware beneath the solar panel to optimize shading when the sun
is high. The LEDs on the box must be facing down to comply with FCC
testing and certification.
Step 3.
Connect the ¼ wave antenna to the top of the solar panel.
Connect Antenna extension from the solar panel to the Nomad box.
Step 4.
Twist the head to fasten it securely.
Connect the power cable from the solar panel to Nomad. Push the
Step 5.
cable in firmly and twist the head clockwise to fasten it securely.
Repeat pushing and twisting until it is firmly installed.
The yellow LED will turn on and remain solidly on, the red LED will blink
•
once per second to indicate the system is operational.
Step 6.
Connect your first sensor to Power Line 1 (PL1).
If your sensor doesn't have an M12 5-pin connector, ask us about our
•
adapter accessories.
Antenna
extension
6
Wiring Information
M12 5-Pin Sensor Connector
Connector Callout
Cable ID
1
B
2
A
3
12V
4
Ground
5
Earth
M12 2-Pin Relay Connector
Relay wire orientation does not matter.
Part #201129
Doc #9006845 Rev A
Power cable
Sensor
Advertisement

Subscribe to Our Youtube Channel
Related Manuals for APG Nomad


Summary of Contents for APG Nomad
- Page 1 Step 6. Connect your first sensor to Power Line 1 (PL1). The Nomad label also contains the Wifi name and password, and a QR code to If your sensor doesn’t have an M12 5-pin connector, ask us about our easily connect to the Wifi for initial setup.
- Page 2 (default: 10 seconds). Step 5. Rinse again with clean water. iii. Set the Fast Timer for how frequently Nomad wakes up and reads the Dry the panel with a squeegee or clean, dry cloth. Avoid letting the Step 6.
Need help?
Do you have a question about the Nomad and is the answer not in the manual?
Questions and answers