Advertisement
Available languages
Available languages
Quick Links
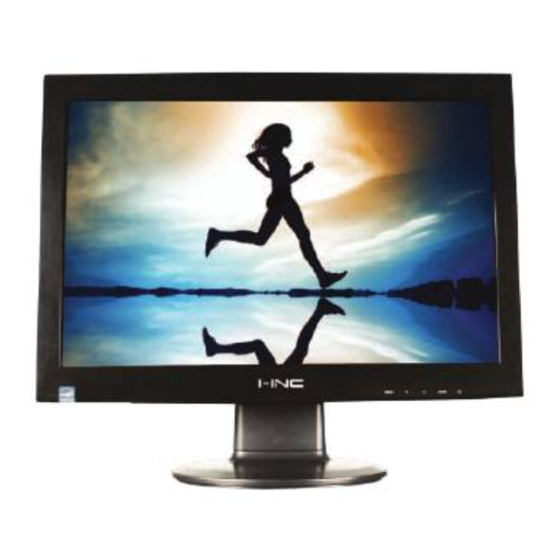
iK171 LCD MONITOR
USER'S GUIDE
Important Safety Instruction
1. Read these instructions thoroughly and keep this user
manual for future use.
2. Do not use the product near water. Never spill liquid of
any kind of the products. Clean LCD monitor when
power off.Never clean it with liquid cleanness or liquefier.
Better use clean wet cloth carefully.
. Do not place the product on an unstable cart, stand or
3
table. Doing so may cause the product to fall, which can
seriously damage it.
4. To ensure reliable operation,never block these ventilation
slots by placing the product on a bed, rug or similar
surface; this product should never be placed near or over
a radiator or heat register; or installed in any enclosure
that prevents proper ventilation.
5. Do not place any object on the
power cord
. Do not place
this product where persons could walk on the
power cord.
6. Never push objects of any kind through the ventilation
slots at the back of the product. To do so could risk fire or
electronic shock.
7.
7.Do not attempt to service this product by yourself. Opening
or removing covers may expose you to dangerous voltage
that could cause fire or electronic shock. Refer all
servicing needs to authorized service personnel.
8.
Unplug this product from the wall outlet and contact
authorized service personnel under the following
conditions:
a. When the power cord or plug is damaged or frayed.
b. If a liquid has been spilled into or on the product.
c. If the product has been rained or spilled by water.
d. If the product has been dropped or the cabinet has
been damaged.
e.
If the product does not operate normally when
operating instructions are followed, and product shows
to be maintained.
Special Notice
Only under normal condition can the quality of LCD products
be assured during operation. Normal condition as following:
Temperature: 20±15;
Humidity: 65±20;
Display image: continuously changing image. (Not freezing
image)
For the LCD products, the phenomenon of image stagnation
may appear when display the freezing image for a certain
long time. All the display products including LCD may have
this kind of image stagnation, and this is not a kind of defect.
In order to avoid the phenomenon of image stagnation, we
suggest that the screen protection program be set when
your PC or system is spare.
The device complies with Parts 15 of the FCC Rule.
Operation is subject to the following two conditions:
(1) this device may not cause harmful interference;and
(2) this device must accept any interference received,
including interference that may cause undesired operations.
Connection
1.Turn off computer and unplug power cord.
2.To connect signal cable with 15pin into VGA out hole on
the back of monitor, and to be sure to tighten switches
on both ends of signal cable.
3.To plug PC and monitor power cord to the nearest socket.
4.Turn on PC and monitor, image possibility shows successful
installation. If not , please double check all the connections.
NOTES: 1. To connect signal cable and plug power cord to be
assure monitor safety on process of installation.
2. To avoid monitor damaged, please handle the
centre part of front cover while it installation.
POWER
DVI
D-SUB(VGA)
MONITOR INPUT CONNECTIONS:
Audio input(optional)
2. DVI signal input(optional)
1.
3.
VGA signal input
4. AC power input
Stand Assembly Instruction
Front Panel Controls
Press it to open the OSD MENU, to select MENU options
1
MENU
when the OSD MENU is displayed.
Hot key to adjust contrast,
2
Down selection button
Hot key to adjust brightness
3
Up selection button
For similar screen display resolutions, the screen
resolution can be changed by pressing the "AUTO" key
4
AUTO
for 3 seconds to achieve the optimal display quality.
Hot key to automatically optimize positions, phase and
clock when OSD is not shown.To exit OSD MENU when
OSD is shown.
Power on or off;
LED-On Normal;
5
LED flicker:Power Saving;
LED-Off:Power Off.
Power Switch
Press this button to turn on or off the monitor. Note: It will
not cut off power supply. But to unplug pin from the socket.
Power Indicator
LED power indicator
LED-On Normal;
LED flicker:Power Saving;
LED-Off:Power Off.
Operate Explanation
Your LCD has been adjusted to its optimal status before
shipment. You can also adjust the image in accordance
with the following allustrations and steps.
Press the "MENU" button to start the OSD feature.
Click the "
" or "
" to select the function to be
adjusted.
Click the "MENU" button to access into the function to
be adjusted.
Click "
" or "
" button to change the current setting
of the function
To exit OSD MENU or go back to the previous action
by "AUTO".
To repeat above steps for changing the setting of the
other function.
OSD Control
Contrast Press "
" adjust the Contrast.
Brightness Press "
" adjust the Brightness.
For similar screen display resolutions, the screen
resolution can be changed by pressing the "
AUTO
key for 3 seconds to achieve the optimal display
quality.
OSD Menu
Source Resolution and Frequency
Primary
Secondary
Description
Directory
Directory
Contrast
Adjust the contrast of the image
Brightness
Adjust the brightness of the screen
Color
Set up the color Temp. to be 9300K 6500K 5500K
Color Temp
USER red, green, blue to adjust red/green/blue
Auto Adjust
Set up to adjust clock, phase and position automatically
Primary
Secondary
Description
Directory
Directory
H. Position
Move the image left and right on the screen
Picture
V. Position
Move the image up and down on the screen
Clock
Adjust the clock pulse of the image
Phase
Adjust the focus of image
Language
OSD Menu
Select the language you want
OSD H. Pos.
Move the OSD left and right on the screen
OSD V. Pos.
Move the OSD up and down on the screen
OSD Timer
Adjust OSD display time setting
Transparency
Adjust OSD Transparency
MODE
Select PC GAME MOVIE display mode
Others
Audio Volume
Adjust the volume of the audio (optional)
Signal Selection Select D-SUB signal or DVI signal (optional)
Aspect Ratio
Select 16:9 AUTO 4:3 display image
Reset
Restore to factory settings
Max resolution
1440x900/WXGA+
D
s i
p
a l
y
C
l o
r o
16.2M(6-bit+FRC)
Pixel Pitch
0.255mm x 0.255mm
r B
g i
h
n t
e
s s
2
5
0
c
/ d
m (typical)
2
Contrast Ratio
600:1 (typical)
Response time
5ms (typical)
160°(H) / 150°(V)
(typical)
Viewing Angle
"
Display Area
367.2mm(H) X 229.5mm (V)
,
Signal Mode
Video Signal:0.7Vpp 75
DVI (optional)
Sync. Frequency
Horizontal 30kHz-80kHz/Vertical 56Hz-75Hz
AC100-240Volt @ 60/50Hz
Power Supply
Speaker
2WX2(optional)
Power Consumption
25
W
Dimension
410
mm (L) X
163
mm (W) X
Net Weight
2.9
Kg
Display Mode
VGA 640x480
SVGA 800x600
XGA 1024x768
47.712
60.015
85.5
WXGA 1360x768
WXGA + 1440x900
55.469
59.901
88.750
360
mm (H)
Advertisement

Related Manuals for I-Inc iK171ABB


Summary of Contents for I-Inc iK171ABB
- Page 1 Primary Secondary Description Power Switch Directory Directory Connection H. Position Move the image left and right on the screen iK171 LCD MONITOR 1.Turn off computer and unplug power cord. Press this button to turn on or off the monitor. Note: It will Picture V.
- Page 2 Interruptor de energía Directorio Directorio Descripción Pulse este botón para encender o apagar el monitor. Nota: primario segundario Conexión No se cortará el suministro de energía. Si quiere cortar el 1.Apague el ordenador y desconecte el cable de alimentación. iK171 MONITOR LCD suministro de energía, desenchúfelo de la toma.
- Page 3 Interruptor de Poder Conexão Primário Segundo Descrição Director Director Pressione este botão para ligar ou desligar o monitor. Nota: 1. Desligue o computador e desconecte o cabo de alimentação. H.Posição Mover a imagem à esquerda e à direita na tela Não vai cortar o fornecimento de energia.
Need help?
Do you have a question about the iK171ABB and is the answer not in the manual?
Questions and answers