
Related Manuals for THOMSON TMFC70IX2


Summary of Contents for THOMSON TMFC70IX2
- Page 1 MANUEL THOMSON TMFC70IX2 NOTICE D’UTILISATION Tous nos magasins Tous nos Tutos vidéo Communauté SAV Darty...
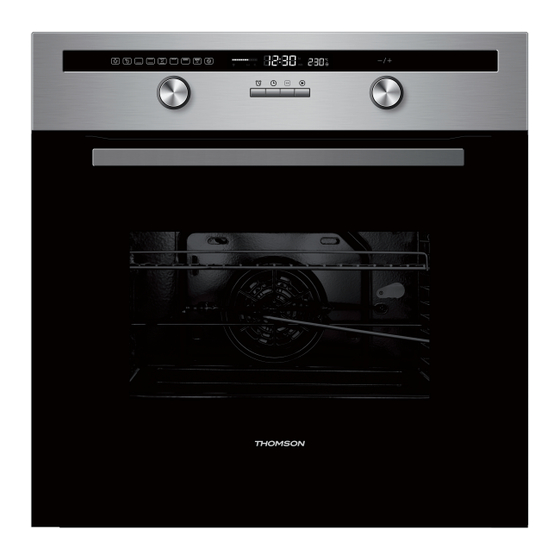
- Page 2 TMFC70IX2 FOUR ENCASTRABLE INBOUWOVEN BUILT-IN OVEN MANUEL D'UTILISATION HANDLEIDING...
-
Page 3: Table Of Contents
Table des matières MISES EN GARDE ................2 CONSIGNES DE SÉCURITÉ IMPORTANTES ........6 INSTALLATION ................6 RACCORDEMENT ÉLECTRIQUE ............7 DESCRIPTION DU FOUR ..............8 UTILISATION ................11 Régler l’horloge ..............11 Cuire ..................12 Régler la fonction Rappel ............13 Verrou enfant ................ -
Page 4: Mises En Garde
MISES EN GARDE Cet appareil est destiné à être utilize dans des applications domestiques et analogues telles que : -les coins cuisines réservés au personnel des magasins, bureaux et autres environnements professionnels ;... - Page 5 Si le câble d'alimentation est endommagé, il doit être remplacé par le fabricant, son service après-vente ou des personnes de qualification similaire afin d'éviter un danger. Lors de son utilisation, l'appareil devient chaud. Il convient de veiller à ne pas toucher les éléments chauffants à...
-
Page 6: Nettoyage Et Entretien
L’appareil ne doit pas être installé derrière une porte décorative pour éviter sa surchauffe. Un moyen de déconnexion du réseau d’alimentation ayant une distance d’ouverture des contacts de tous les pôles doit être prévu dans la canalisation fixe conformément aux règles d’installation. - Page 7 Après un cycle de cuisson, le ventilateur de refroidissement continue de fonctionner pendant un certain temps, afin de garantir un refroidissement plus rapide et une meilleure fiabilité du four. Toutes les cuissons se font porte fermée de préférence. ...
-
Page 8: Consignes De Sécurité Importantes
Cet appareil n’est pas destiné à être mis en fonctionnement au moyen d'une minuterie extérieure ou par un système de commande à distance séparé. Ces surfaces peuvent devenir chaudes. CONSIGNES DE SÉCURITÉ IMPORTANTES Le four doit être correctement installé et mis à la terre par un technicien qualifié. Nous ne serons pas responsables en cas de dommage pouvant être dû... -
Page 9: Raccordement Électrique
Les dimensions ci-jointes sont en mm. min. Étapes d’installation Veuillez monter les armoires en vous basant sur les données du « Schéma de montage d’armoire ». Avant l'installation, veuillez vérifier si la prise de courant est reliée à la terre et si la taille de l’armoire répond aux exigences d'installation. -
Page 10: Description Du Four
Le fil marron doit être raccordé à la borne portant la lettre L. Le fil bleu doit être raccordé à la borne portant la lettre N. Le fil vert et jaune doit être raccordé à la borne portant la lettre E ou le symbole de terre DESCRIPTION DU FOUR... - Page 11 3. Bouton du thermostat 4. Écran 5. Indicateurs lumineux des fonctions Indicateurs lumineux des Description fonctions Éclairage du four Cette fonction permet d’allumer la lampe du four sans aucune (sauf fonction ECO) fonction de cuisson. Décongélation Cette fonction fait circuler de l’air à la température ambiante autour des aliments.
- Page 12 Turbo Grill avec ventilation Cette fonction allie le grill avec un ventilateur pour griller tout en faisant circuler la chaleur autour des aliments. Idéal pour faire griller de gros morceaux de viande. La température est réglable entre 180 et 240 °C, la température par défaut est de 210 °C. Chaleur tournante pulsée Quand cette fonction est sélectionnée, le ventilateur s’allume automatiquement pour améliorer la circulation de l’air afin de...
-
Page 13: Utilisation
Placez la grille/lèchefrite entre les barres de guidage des rails support dans le four et enfoncez-la au maximum. Si la grille et la lèchefrite sont toutes les deux insérées dans le four, positionnez la grille plus haut que la lèchefrite. UTILISATION Avant d’utiliser le four, essuyez soigneusement les parois de sa cavité... - Page 14 Cuisson 1. Tournez le bouton de la fonction pour sélectionner la fonction désirée. L’indicateur de la fonction correspondant s’allume. 2. Tournez le bouton du thermostat pour régler la température désirée. REMARQUE : Vous ne pouvez pas régler la température dans les fonctions Éclairage du four et Décongélation.
-
Page 15: Régler La Fonction Rappel
5. Une fois la cuisson terminée, le four sonne cinq fois. Pour interrompre la cuisson, appuyez sur . Appuyez sur pour la reprendre. Vous pouvez stopper la cuisson à tout moment en appuyant deux fois sur Régler la fonction Rappel Cette fonction vous permet de régler un rappel sonore vous indiquant de démarrer la cuisson après un délai réglable entre 1 minute (0:01) et 9 h 59 (9:59). -
Page 16: Verrou Enfant
Verrou enfant Pour verrouiller les boutons et les mole�es : appuyez simultanément sur les boutons pendant environ 3 secondes ; un long « bip » reten�ra et le témoin lumineux de verrouillage « » s'allumera. À l'excep�on du bouton , tous les autres boutons et mole�es seront verrouillés. -
Page 17: Fonction D'économie D'énergie
Fonction d’économie d’énergie Les informations suivantes vous aideront à utiliser votre four de manière plus écologique et à économiser l’énergie. Pour activer cette fonction, appuyez sur pendant 3 s environ dans le mode veille. Quand vous n’effectuez aucune action pendant 10 minutes, l’écran s’éteint. ... - Page 18 Nettoyer les accessoires amovibles Lavez tous les accessoires amovibles à l'eau chaude savonneuse. Rincez-les et séchez-les entièrement avant de les réutiliser. Changer l’ampoule du four AVERTISSEMENT : MISE EN GARDE: S'assurer que l'appareil est déconnecté de la lampe pour éviter tout l'alimentation avant de remplacer risque de choc électrique.
-
Page 19: Spécifications Techniques
SPÉCIFICATIONS TECHNIQUES Cette fiche concernant le four domestique est conforme au règlement UE N° 66/2014. Identification du modèle Type de four Four électrique encastré Poids de l’appareil (M) 31.2 kg Nombre de cavités Source de chaleur par cavité (électrique ou au gaz) Électrique Volume par cavité... -
Page 20: Mise Au Rebut
Ce produit a été fabriqué et vendu sous la responsabilité des Etablissements Darty et Fils (S.A.S). THOMSON, et le logo THOMSON sont des marques utilisées sous licence par les Etablissements Darty et Fils (S.A.S) – pour plus d’informations : www.thomson- brand.com. - Page 21 Pour plus de renseignements sur les procédures de mise au rebut et de recyclage, contactez les autorités de votre commune. Apportez l’appareil à point de collecte local pour qu’il soit recyclé. Certains centres acceptent les produits gratuitement. Hotline Darty France Quels que soient votre panne et le lieu d'achat de votre produit en France, avant de vous déplacer en magasin Darty, appelez le 0 978 970 970 (prix d'un...
- Page 22 Inhoudsopgave WAARSCHUWINGEN ......................2 BELANGRIJKE VEILIGHEIDSINSTRUCTIES ................. INSTALLATIE ........................... ELEKTRISCHE AANSLUITING ....................BESCHRIJVING VAN DE OVEN ....................BEDIENING ..........................De klok instellen ......................Koken..........................10 De herinnering instellen ....................11 Kinderslotfunctie ......................13 Energiebesparingsfunctie ..................... REINIGING EN ONDERHOUD ....................14 TECHNISCH GEGEVENSBLAD ....................
-
Page 23: Waarschuwingen
WAARSCHUWINGEN Dit apparaat is geschikt voor huishoudelijk gebruik en gelijksoortige toepassingen zoals: - kantines in winkels, kantoren en andere werkomgevingen; - boerderijen; - door gasten in hotels, motels en andere woonomgevingen - bed & breakfasts. Dit apparaat mag worden gebruikt door kinderen vanaf 8 jaar oud en personen met beperkte fysische, visuele of mentale mogelijkheden, of die gebrek aan ervaring en kennis hebben, indien ze... - Page 24 vervangen door de fabrikant, een erkend hersteller of een ander gekwalificeerd persoon om elk gevaar te vermijden. Het apparaat wordt heet tijdens de werking. Raak de verwarmingselementen in de oven niet aan. WAARSCHUWING: Het apparaat en de toegankelijke delen worden heet tijdens de werking.
- Page 25 bedrading en in overeenstemming met de nationale bedradingsvoorschriften worden geï ntegreerd. Installeer het apparaat in overeenstemming met de nationale bedradingsvoorschriften NF C 15-100. Voor instructies over alle nodige afstanden met afmetingen, de bevestigingsmethode en hoe het apparaat aan de steun vast te maken, raadpleeg de rubriek INSTALLATIE “...
-
Page 26: Belangrijke Veiligheidsinstructies
Bedek de ovenruimte niet met aluminiumfolie voor een eenvoudige reiniging: De oven kan oververhitten en de emaillaag van de ovenruimte kan worden beschadigd. WAARSCHUWING: Zorg dat het apparaat is uitgeschakeld voordat u de lamp vervangt om risico op elektrische schokken te voorkomen. ... -
Page 27: Installatie
Het is gevaarlijk om de specificaties te wijzigen of om het apparaat op enige wijze aan te passen. Verplaats of til het apparaat niet op door aan het deurhandvat te trekken. Als de ovendeur open is, zorg dat kinderen niet op de deur klimmen of erop gaan zitten. -
Page 28: Elektrische Aansluiting
ELEKTRISCHE AANSLUITING Elektrische aansluitingen mogen alleen door een vakbekwame en erkende elektricien uitgevoerd worden. Sluit de bruine draad aan op de aansluitklem gemarkeerd met de letter L. Sluit de blauwe draad aan op de aansluitklem gemarkeerd de letter N. Sluit de groen en gele draad aan op de aansluitklem aardingssymbool gemarkeerd met de letter E of het BESCHRIJVING VAN DE OVEN... - Page 29 3. Thermostaatregelknop 4. Display 5. Functiecontrolelampjes Functie Beschrijving controlelampjes Ovenlamp Deze functie schakelt de ovenlamp in zonder enige bakfunctie. (behalve ECO-functie) Ontdooien Deze functie laat lucht op kamertemperatuur rond de levensmiddelen circuleren. Verwarming aan de onderkant Deze functie is ideaal voor ovenschotels, kerrieschotels en slow cooking.
- Page 30 Convectie In deze functie wordt de ventilator automatisch ingeschakeld voor een betere luchtcirculatie en zorgt voor een gelijkmatigere warmte tijdens het bakproces. De temperatuur kan worden ingesteld tussen 50°C en 240°C. De standaard temperatuur is 180°C. Deze functie zorgt voor energiebesparing tijdens het koken. Oventoebehoren Rooster: voor schotels en items om te roosteren en te...
-
Page 31: Bediening
Duw het rooster / ovenplaat tussen de geleidestangen van de draagrails in de boven en duw volledig in. In geval het rooster en de ovenplaat samen worden ingebracht, installeer het rooster boven de ovenplaat. BEDIENING Voordat u de oven gebruikt, veeg de ovenwand schoon met een licht bevochtigde doek. Reinig het rooster en de bakplaat in warm zeepwater voor gebruik. -
Page 32: De Herinnering Instellen
2. Draai de thermostaatregelknop om de gewenste temperatuur te selecteren. OPMERKING: Het is niet mogelijk om de temperatuur in de ovenlamp- of ontdooifunctie te regelen. 3. Druk op om het kookproces te starten. Het display geeft de voortgangsbalk en de geselecteerde temperatuur weer. - Page 33 2. Draai de thermostaatknop om de cijfers voor de uurweergave in te stellen (Het cijfer moet tussen 0 en 9 zijn). 3. Druk op om te bevestigen. De minutenweergave knippert. 4. Draai de thermostaatknop om de cijfers voor de minutenweergave in te stellen (Het cijfer moet tussen 0 en 59 zijn).
-
Page 34: Kinderslotfunctie
Kinderslotfunctie Om de knoppen en toetsen te vergrendelen: druk tegelijker�jd ongeveer 3 seconden op . U hoort vervolgens een lange pieptoon en het vergrendelingscontrolelampje " " brandt. Alle knoppen en toetsen, uitgezonderd de knop zijn vergrendeld. OPMERKING: De oven is �jdens de werking vergrendeld. Als u het kookproces wilt stoppen, druk rechtstreeks op de knop (het is niet nodig om het kinderslot te annuleren). -
Page 35: Energiebesparingsfunctie
Energiebesparingsfunctie De volgende informatie zal u helpen om de oven op een ecologische en energiebesparende manier te gebruiken: Om deze functie te activeren, in stand-by, druk en houd circa 3 seconden ingedrukt. Het display wordt automatisch uitgeschakeld na een inactiviteit van 10 minuten. -
Page 36: Technisch Gegevensblad
Dit product bevat een lichtbron van energie-efficiën�eklasse G. TECHNISCH GEGEVENSBLAD Hieronder vindt u de technische fiche van de huishoudelijke oven overeenkomstig het EU-verordeningsnr. 66/2014 Identificatie van model TMFC70IX2 Type oven Elektrische inbouwoven Gewicht van het apparaat (M) 31.2 kg Aantal ruimtes... - Page 37 De test is uitgevoerd in overeenstemming met de voorschriften van EN60350-1:2016. Dit product is vervaardigd en verkocht onder de verantwoordelijkheid van Etablissements Darty et Fils (S.A.S). THOMSON en het THOMSON logo zijn handelsmerken die onder licentie worden gebruikt door Etablissements Darty et Fils (S.A.S) – meer informatie op www.thomson-brand.com.
-
Page 38: Verwijdering
VERWIJDERING Als verantwoordelijke handelaar dragen we zorg voor het milieu. We moedigen u aan om de juiste verwijderingsprocedure voor uw apparaat en verpakkingsmateriaal te volgen. Dit draagt bij tot het behoud van de natuurlijke rijkdommen door deze te recyclen zodat zowel de menselijke gezondheid als het milieu worden beschermd. - Page 39 Table of Contents WARNINGS ..................2 IMPORTANT SAFETY INSTRUCTIONS ............ 5 INSTALLATION ..................5 ELECTRICAL CONNECTION ..............6 DESCRIPTION OF THE OVEN ..............7 OPERATION ..................9 Setting the Clock ................10 Cooking ..................10 Setting the Reminder ..............1 Child Safety Lock Function ............
-
Page 40: Warnings
WARNINGS This appliance is intended to be used in household and similar applications such as: - staff kitchen areas in shops, offices and other working environments; - farm houses; - by clients in hotels, motels and other residential type environments; - bed and breakfast type environments. - Page 41 WARNING: The appliance and its accessible parts become hot during use. Care should be taken to avoid touching heating elements. Children less than 8 years of age shall be kept away unless continuously supervised. Do not use harsh abrasive cleaners or sharp metal scrapers to clean the oven door glass since they can scratch the surface which may result in shattering of the glass.
- Page 42 Regarding the detailed instructions for the safe use of the appliance, the precautions during user maintenance and bulb replacement, refer to the sections “Operation” and “CLEANING and Maintenance”. Regarding the method of fixing and cables connection, refer to the section “ELECTRICAL CONNECTION”.
-
Page 43: Important Safety Instructions
WARNING: Accessible parts may become hot during use. Young children should be kept away. The lamp inside the product is used for lighting of the product. This lamp is not suitable for household room illumination. The appliance is not intended to be operated by means ... -
Page 44: Installation
INSTALLATION The diagram below determines the correct dimensions to install the oven in a cabinet. This oven can also be installed as an under counter oven. The walls surrounding the oven must be made of heat-resistant material. Both the veneered plastic and the adhesive used must be resistant to temperatures of 120°C in order to prevent unsticking and deformation. -
Page 45: Description Of The Oven
The brown wire must be connected to the terminal marked L. The blue wire must be connected to the terminal marked N. The green and yellow wire must be connected to the terminal marked E or the earth symbol DESCRIPTION OF THE OVEN Control panel The oven is designed with two push-pull control knobs. - Page 46 5. Function indicator lights Function Description indicator lights Oven lamp This function allows the oven lamp to be on without any cooking (except ECO function) function. Defrosting This function circulates room temperature air around the food. Bottom heat This function is ideal for casseroles, curries and any slow cooking. The temperature can be set in the range of 60-120°C and the default temperature is 60°C.
-
Page 47: Operation
Oven accessories Wire shelf: for dishes and items for roasting and grilling Pan: for cooking large quantities of food such as moist cakes, pastries, frozen food etc. or for collecting fat/spillage and meat juices Shelf support rail (2): The shelf support rails on the left and right sides inside the oven can be removed for cleaning. -
Page 48: Setting The Clock
Setting the Clock The clock is set on a 24-hour cycle. 1. Press . The hour digit will flash. 2. Turn the thermostat control knob to set the correct hour. 3. Press to confirm and then the minute digits will flash. 4. -
Page 49: Setting The Reminder
5. When the cooking is finished, the oven buzzer will sound five times. To interrupt cooking, press . Press to resume. You can stop cooking at any time by pressing twice. Setting the Reminder This function will help to remind you to start cooking in a certain time from 0:01 to 9:59. -
Page 50: Child Safety Lock Function
Child Safety Lock Function To lock the bu�ons and knobs : press simultaneously for about 3 seconds, there will be a long "beeping" sound and the lock indicator light " " will be illuminated. Except the bu�on, all other bu�ons and knobs are locked. NOTE: During working mode, the oven is locked. -
Page 51: Energy Saving Function
Energy Saving Function The following information will help you to use the oven in an ecological way, and to save energy To activate this function, in standby state press and hold for approximately 3 seconds. If there is no operation within 10 minutes, the display will turn off. ... -
Page 52: Replacing The Oven Light Bulb
This product contains a light source of energy efficiency class G. TECHNICAL DATA SHEET Below is the sheet of domestic oven according to EU regulation No. 66/2014. Model identification TMFC70IX2 Type of oven Built-in electric oven Mass of the appliance (M) 31.2 kg... -
Page 53: Disposal
The test is performed in compliance with the requirements of EN60350-1:2016. This product has been manufactured and sold under the responsibility of Etablissements Darty et Fils (S.A.S). THOMSON, and the THOMSON logo are trademarks used under license by Etablissements Darty et Fils (S.A.S) – further information at www.thomson-brand.com. - Page 54 You must dispose of this appliance and its packaging according to local laws and regulations. Because this appliance contains electronic components, the appliance and its accessories must be disposed of separately from household waste when the appliance reaches its end of life. Contact your local authority to learn about disposal and recycling.
-
Page 55: Déclaration Ue De Conformité
Descriçào do produto: Marque – THOMSON Brand /Merk /Marca: Référence commerciale – TMFC70IX2 Model number: /Modelnummer / Numero de modelo / Numero do modelo: L’objet de la déclaration décrit ci-dessus est conforme à la législation d’harmonisation de l’Union applicable :... - Page 56 Reference number Title 2014/30/EU EMC Directive (EMC) 2014/35/EU Low Voltage Directive (LVD) 2009/125/EC Eco design requirements for energy-related products (ErP) 2011/65/EU & (EU) 2015/863 RoHS EMC: EN IEC 55014-1: 2021 EN IEC 55014-2: 2021 EN 61000-3-3: 2013+A1: 2019 EN IEC 61000-3-2: 2019+A1:2021 LVD : EN 60335-2-6: 2015 + A1:2020+ A11:2020 EN 60335-1: 2012 + A11: 2014 + A13: 2017+ A1: 2019 + A14: 2019 + A2: 2019 + A15: 2021...
Need help?
Do you have a question about the TMFC70IX2 and is the answer not in the manual?
Questions and answers